Settings
smartRender offers lots of settings to customize it to your needs.
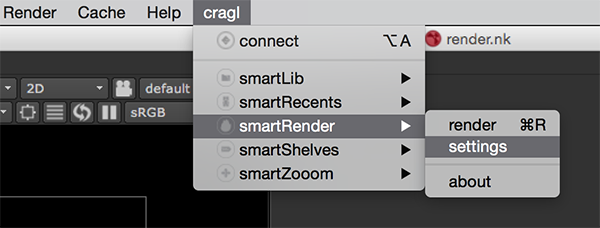
To open smartRender’s settings navigate to your menu bar and choose cragl -> smartRender -> settings:
smartRender’s settings are divided into 5 tabs:
general
render info
cache
executables
general
The general section lets you configure various general details. Let’s have a closer look.
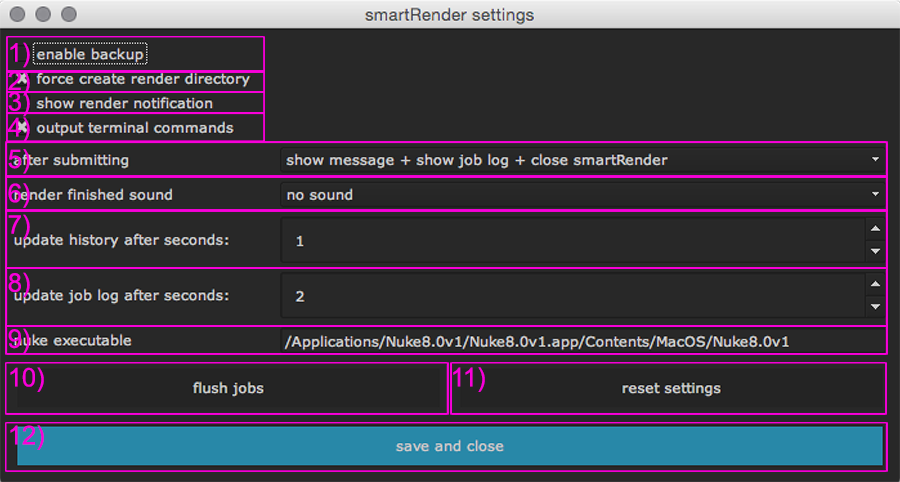
1) enable backup: If this checkbox is checked, save a backup of the current
script into the backup directory before starting the render process. The script
will be saved to: ~/cragl/smartRender/backups. The script will be saved
as: jobID_name-of-script.nk. Please note: If this checkbox is enabled then
all worker threads will process the backup file. This means changing your NUKE
script while it is being processed doesn’t have an effect on the overall
rendered images. However, if you disable the checkbox then the worker threads
process your current NUKE script which means that if you change anything in it
while it is being processed this will actually affect the rendering. This can
become useful to make changes to your nuke script on the fly while it is being
rendered. Both workflows (i.e. rendering from a backup copy vs. rendering from
the current working file directly) have pros and cons, which is why you can
adjust this here to your needs.
Please note: When your working file uses relative paths make sure to have the ‘enable backup’ checkbox disabled because the backup file path lives in a location different from your current working file which is why relative paths will be different!
2) force create render directory: If this checkbox is checked, the render directory will be created automatically if it doesn’t exist. This is to prevent renderings from not starting because of a missing render directory because by default if a render directory doesn’t exist, NUKE won’t process the rendering. By checking this checkbox it will always be guaranteed that the render directory exists.
3) show render notification: If this checkbox is checked, a notification window will pop up that contains some action to choose from. For more information about the render notification window please refer to the Render notifications window.
4) output terminal commands: If this checkbox is checked, all generated
commands (one command per line) that will be executed in NUKE’s terminal mode
are written to:~/cragl/smartRender/logs/terminal_input.log
All nuke terminal outputs are written to:
~/cragl/smartRender/logs/terminal_output.log You can either browse directly
to these files or show the terminal inputs and outputs in the job log window by
navigating to the render history, right clicking a job, selecting
job->show log and choosing terminal input or terminal output from
the log filter drop down menu.
This option is for error checking and script debugging purposes. If your renderings won’t start then copy one of the lines of the terminal_input and paste them into your terminal to see what is causing the rendering from raising errors. The terminal_output can also give valuable information about rendering errors. Please also have an additional look at the general job log.
5) after submitting: Choose what action to process after hitting the render button in the smartRender main window. These options are available:
show message + show job history
show message + show log + close smartRender
show message + close smartRender
show message
6) render finished sound: Play a sound when the rendering is finished. If set to ‘no sound’ then there will be no notification sound. Please note: You can also put your own .WAV sound files into the ‘sounds’ directory of the smartRender module and choose your own custom sounds to play when a rendering has finished.
7) update history after seconds: Automatically update the render history that shows all jobs after x seconds. This setting should rarely need to be changed.
8) update job log after seconds: Automatically update the job log that shows the log information for the current job in the job log window. This setting should rarely need to be changed.
9) nuke executable: Use this NUKE executable for the rendering. The default executable targets to your currently used NUKE version. However, if you need to change the executable to another version then you can set it right here. Please note: This input will be set to its default value after re-launching NUKE.
10) flush jobs: Use this button to flush all jobs from the jobs list. Already rendered frames are NOT being removed from your hard drive. If you do that while a job is being processed it will be stopped.
11) reset settings: Use this button to reset the smartRender settings. Please note: This will also remove all presets. This action can’t be undone.
12) save and close: Click to save the current settings state and close the settings window. Please note that settings get only updated when you click the save and close button.
render info
In the render info section you can decide which widgets to show in the render info widget that shows up when rendering a job. The render info widget gives you the ability to quickly access certain elements in the render process. For more information about this widget, please refer to the render info widget section.
In the render info settings section we can configure the render info widget:
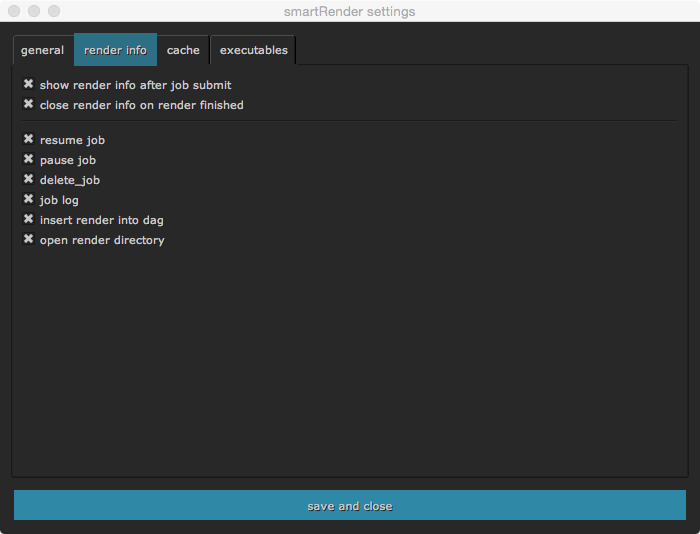
This section contains the following settings:
1) show render info after job submit: If this checkbox is set, show the render info quick panel at the bottom left of your screen after submitting the render job.
2) close render info on render finished: If this checkbox is set, close the render info panel once the job is finished.
You can use the checkboxes to toggle on and off the visibility of each element in the render info widget.
cache
When selecting a non Write or non DeepWrite node and launching smartRender, you will be presented with a window that enables you to quickly set up a pre rendering for the currently selected node. For more information about this please have a look at the caching section. In the cache tab you can configure some crucial details when setting up a caching workflow.
In here you can configure the settings for the caching:
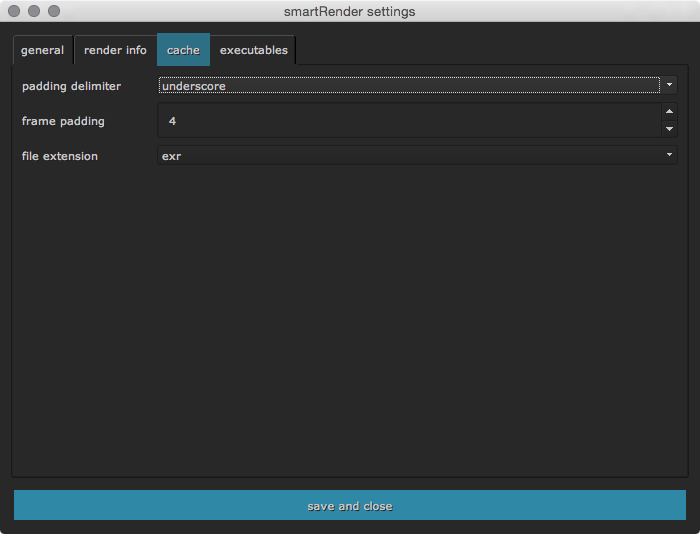
The section contains the following elements to configure:
1) padding delimiter: Determines the delimiter that will be used inside the render file path name. The delimiter can always be changed inside the cache write node once it is created.
cache_####.exrcache.####.exr2) frame padding: Determines the count of hashes to use inside the render path. The count of hashes can always be changed inside the cache write node once it is created.
cache_####.exrcache_#######.exr3) file extension: Default file extension to use inside the render path. The extension can always be changed inside the cache write node once it is created.
cache_####.exrcache_#######.tifexecutables
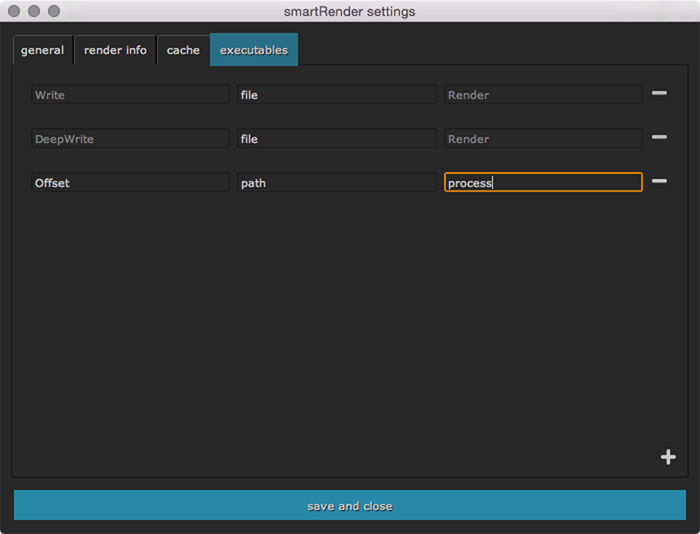
The executables tab lets you configure executable nodes to show up in the smartRender window ready for rendering using smartRender’s multi threaded fashion.
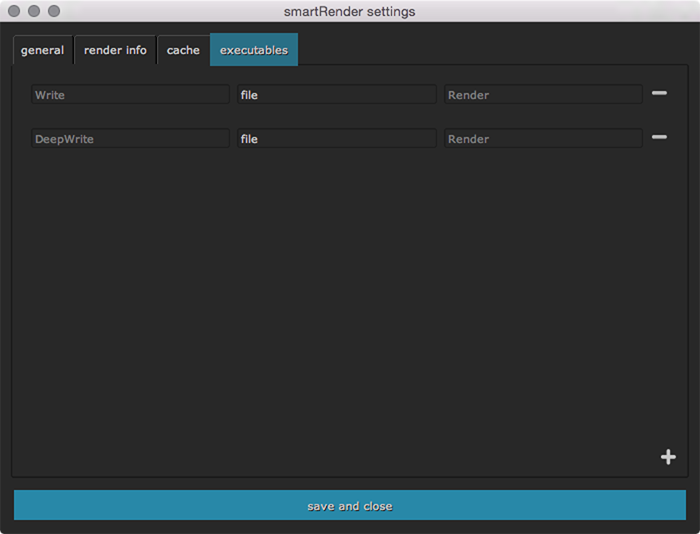
By default, the list contains Write nodes and DeepWrite nodes, meaning these nodes will show up right away in the smartRender main window. If your working file contains custom executable Gizmos and nodes, you can add them here as well. To add a new node, click the plus button. In order to be able to execute these nodes, smartRender will need three details about your nodes that you need to enter in the new row:
Node class name: The name of the node class.
File knob name: The internal knob name that contains the file path.
Execute knob name: The internal knob name of the button that executes the node.

To get the internal knob names, please hover over the knob. The internal knob name is the bold name in the tooltip that shows up.
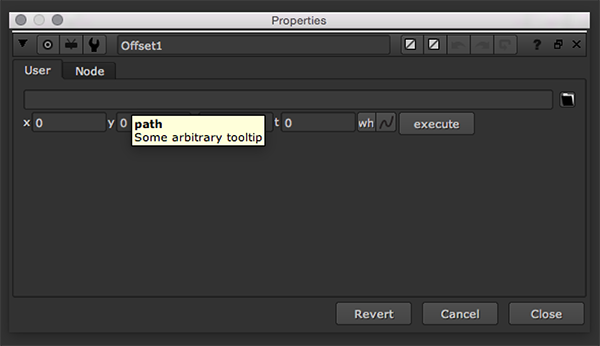
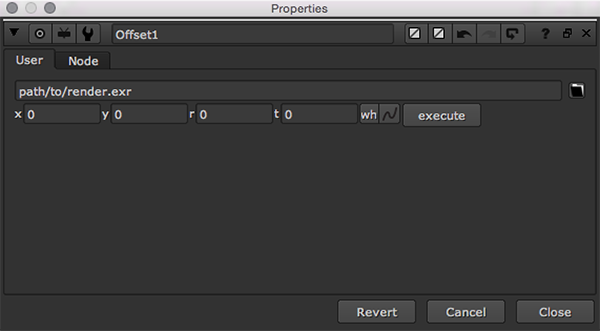
Example
Let’s say we want our custom Gizmo called Offset to render multi threaded using smartRender. If we hover over the knob that stores the file path, we see that the internal knob name is called path:
The execute button is internally called process:
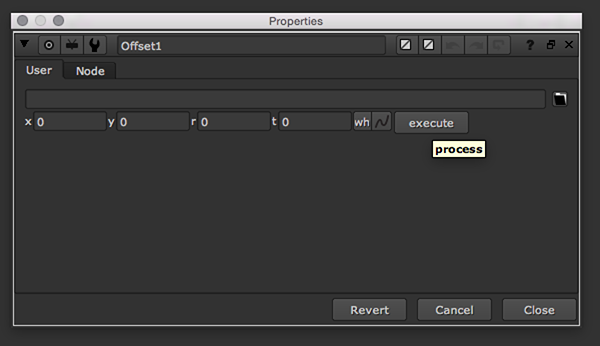
We can now configure the Offset Gizmo to show up in smartRender using the following details as shown below:
Let’s say our Offset gizmo is set up using the following path:
When launching smartRender, our Offset node will now show up in the smartRender main window.
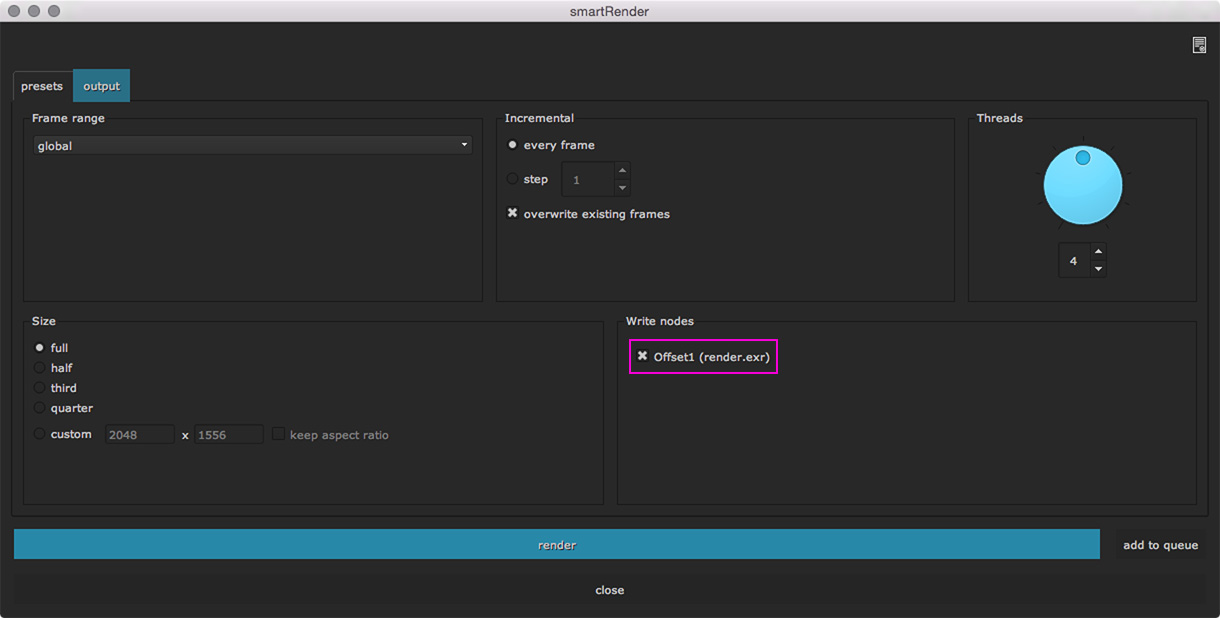
This set up will of course be applied on a per node class base, meaning other Offset nodes are processable via smartRender as well.
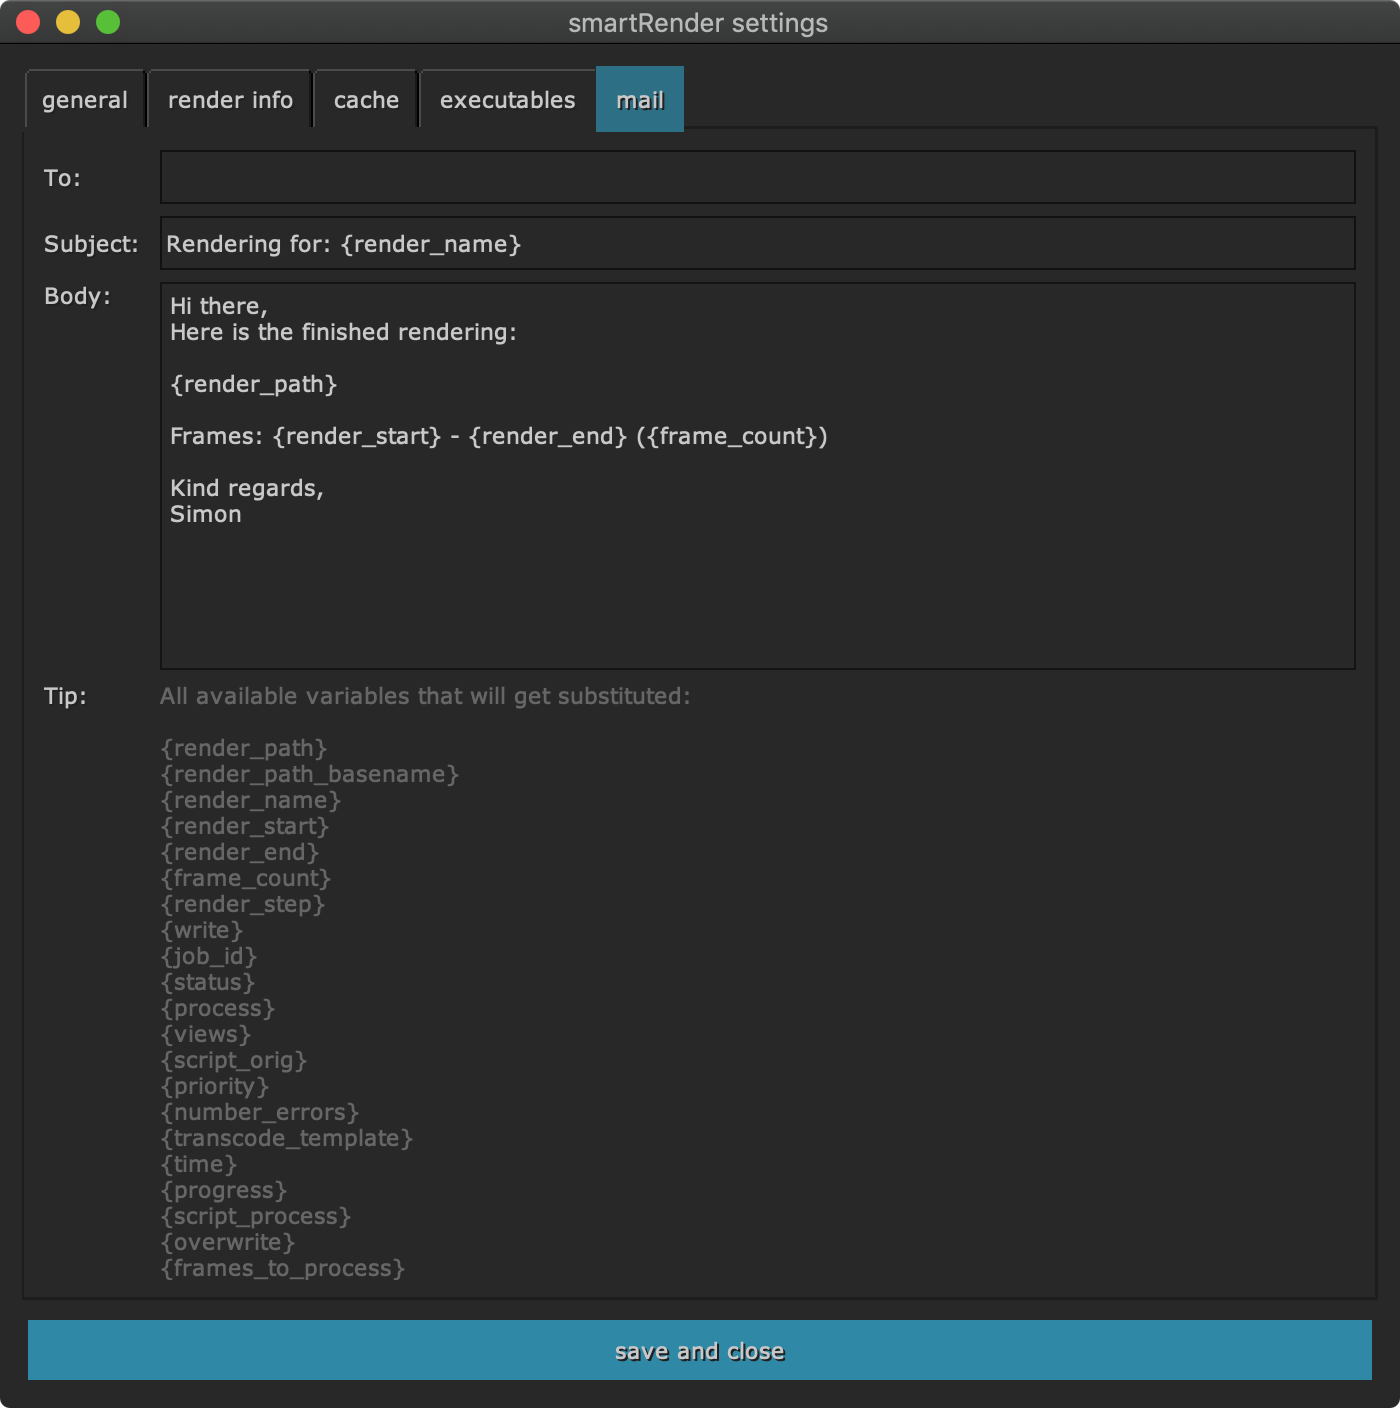
mail
The mail tab lets you define default values to use when launching you default mail client when clicking the ‘send email’ button in the render notifications window. For more information please refer to the render notifications window page.