The job history section

The job history section shows you all jobs; weather they are finished, waiting or processing. All jobs are sorted descending by date. The latest job will be listed on top while older jobs are listed below. You can toggle the job history to show/ hide it by clicking the Alt-key.

The job table shows you the most important job details:

_images/07.png

1) time: The date and time when the job was added to the job history.

2) script: The processed nuke script for the job.

3) write: The processed write node for the job.

4) range: The set frame range for the job. This will be in the known format startframe - endframe. If the job uses some incremental rendering then the incremental step will be listed in brackets. For instance, rendering from frame 1 to frame 50 with rendering only every 10th frame will be displayed as following: 1 - 50 (10)

5) status: The current status of the job. If it is rendering, then a progress bar will be shown displaying the current render progress in percentage.

The job history right click menu

Right click the job table. This will reveal a menu containing the following commands:

_images/08.png

1) refresh list: The jobs table will be refreshed all n seconds automatically where n is the number set in the smartRender settings under update job history after seconds (Please refer to The smartRender settings.However, by clicking this item the job history will be refreshed manually.

2) job: Hover over job to reveal the job specific commands for the selected job. Detailed information can be found here: job_menu.

3) display: Hover over display to reveal the display menu. Detailed information can be found here: display_menu.

4) remove all finished jobs: Well, as the name would suggest. It removes all finished jobs from the jobs table. Please note: This does NOT physically remove the rendered frames. It will simply remove the jobs from the history so it does not get cluttered.

The job menu

Right click a job from the job history table and choose job. This will reveal the job menu to execute some specific commands for the selected job:

_images/09.png

1) resume job: Click to continue the job if it was paused. If the job was submitted with the *add to queue button, clicking the resume job command will start the job.

2) pause job: Click to pause the job. All threads that are rendering at that moment will finish rendering their frame and will then pause so that no new frame will be processed.

3) show log: Click to show the log for this job. For detailed information about job logs please refer to The job log window

4) open render directory: Click to open the render directory that was set for the write nodes file path for the selected job.

5) remove job: Click to remove the job from the job list. If the job is rendering at the moment the threads will be stopped so that they won’t start processing new frames. Already rendered frame are NOT physically removed from your hard drive.

Changing a job’s thread count

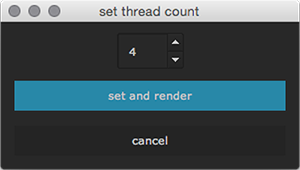
You can change the number of threads processing a job on the fly, also when the job is already rendering, waiting and paused. Simply click the job menu’s resume item and in the upcoming window set a new thread count. The job will be processed with the entered amount of threads.
_images/09b.png

The display menu

Right click a job from the job history or right click the table in an empty area and choose display. This will reveal the display menu to view only j obs with a specific status:

_images/10.png

1) all: Click to view all jobs.

2) waiting: Click to view only jobs with the status waiting. That are jobs that have been added to the job queue but haven’t been started rendering, yet.

3) paused: Click to show only jobs that have been paused from processing.

4) error: Click to show jobs that produced one or more errors while processing.

5) finished: Click to show only finished jobs.