Auto transcoding after render
Transcoding has been implemented with smartRender-3.13. This feature lets you automatically create another render of your finished renderings. This can be used for example to create an h264 preview, a fullres or halfres jpeg proxy, a DNxHD or Prores to send to the client, etc.
Note that this is a light transcode implementation that can however be fully customized to your needs. In case you search for a more advanced transcode tool please have a look at our tool smartMedia.
By default, smartRender ships with a handful of presets, but you can create as many additional ones as needed. This mechanism uses .nk files that are populated with the necessary data to create your transcodings. Due to that you are fully free in adding any node logic you like. So for example, you can also add slates and burnins to your transcoded media if needed.
Here is an overview video showing that functionality in action:
Choosing a transcoding template from the main window
To set up an auto transcode, choose a template from the transcoding dropdown menu in smartRender’s main window and click the render button when you are finished with your adjustments:
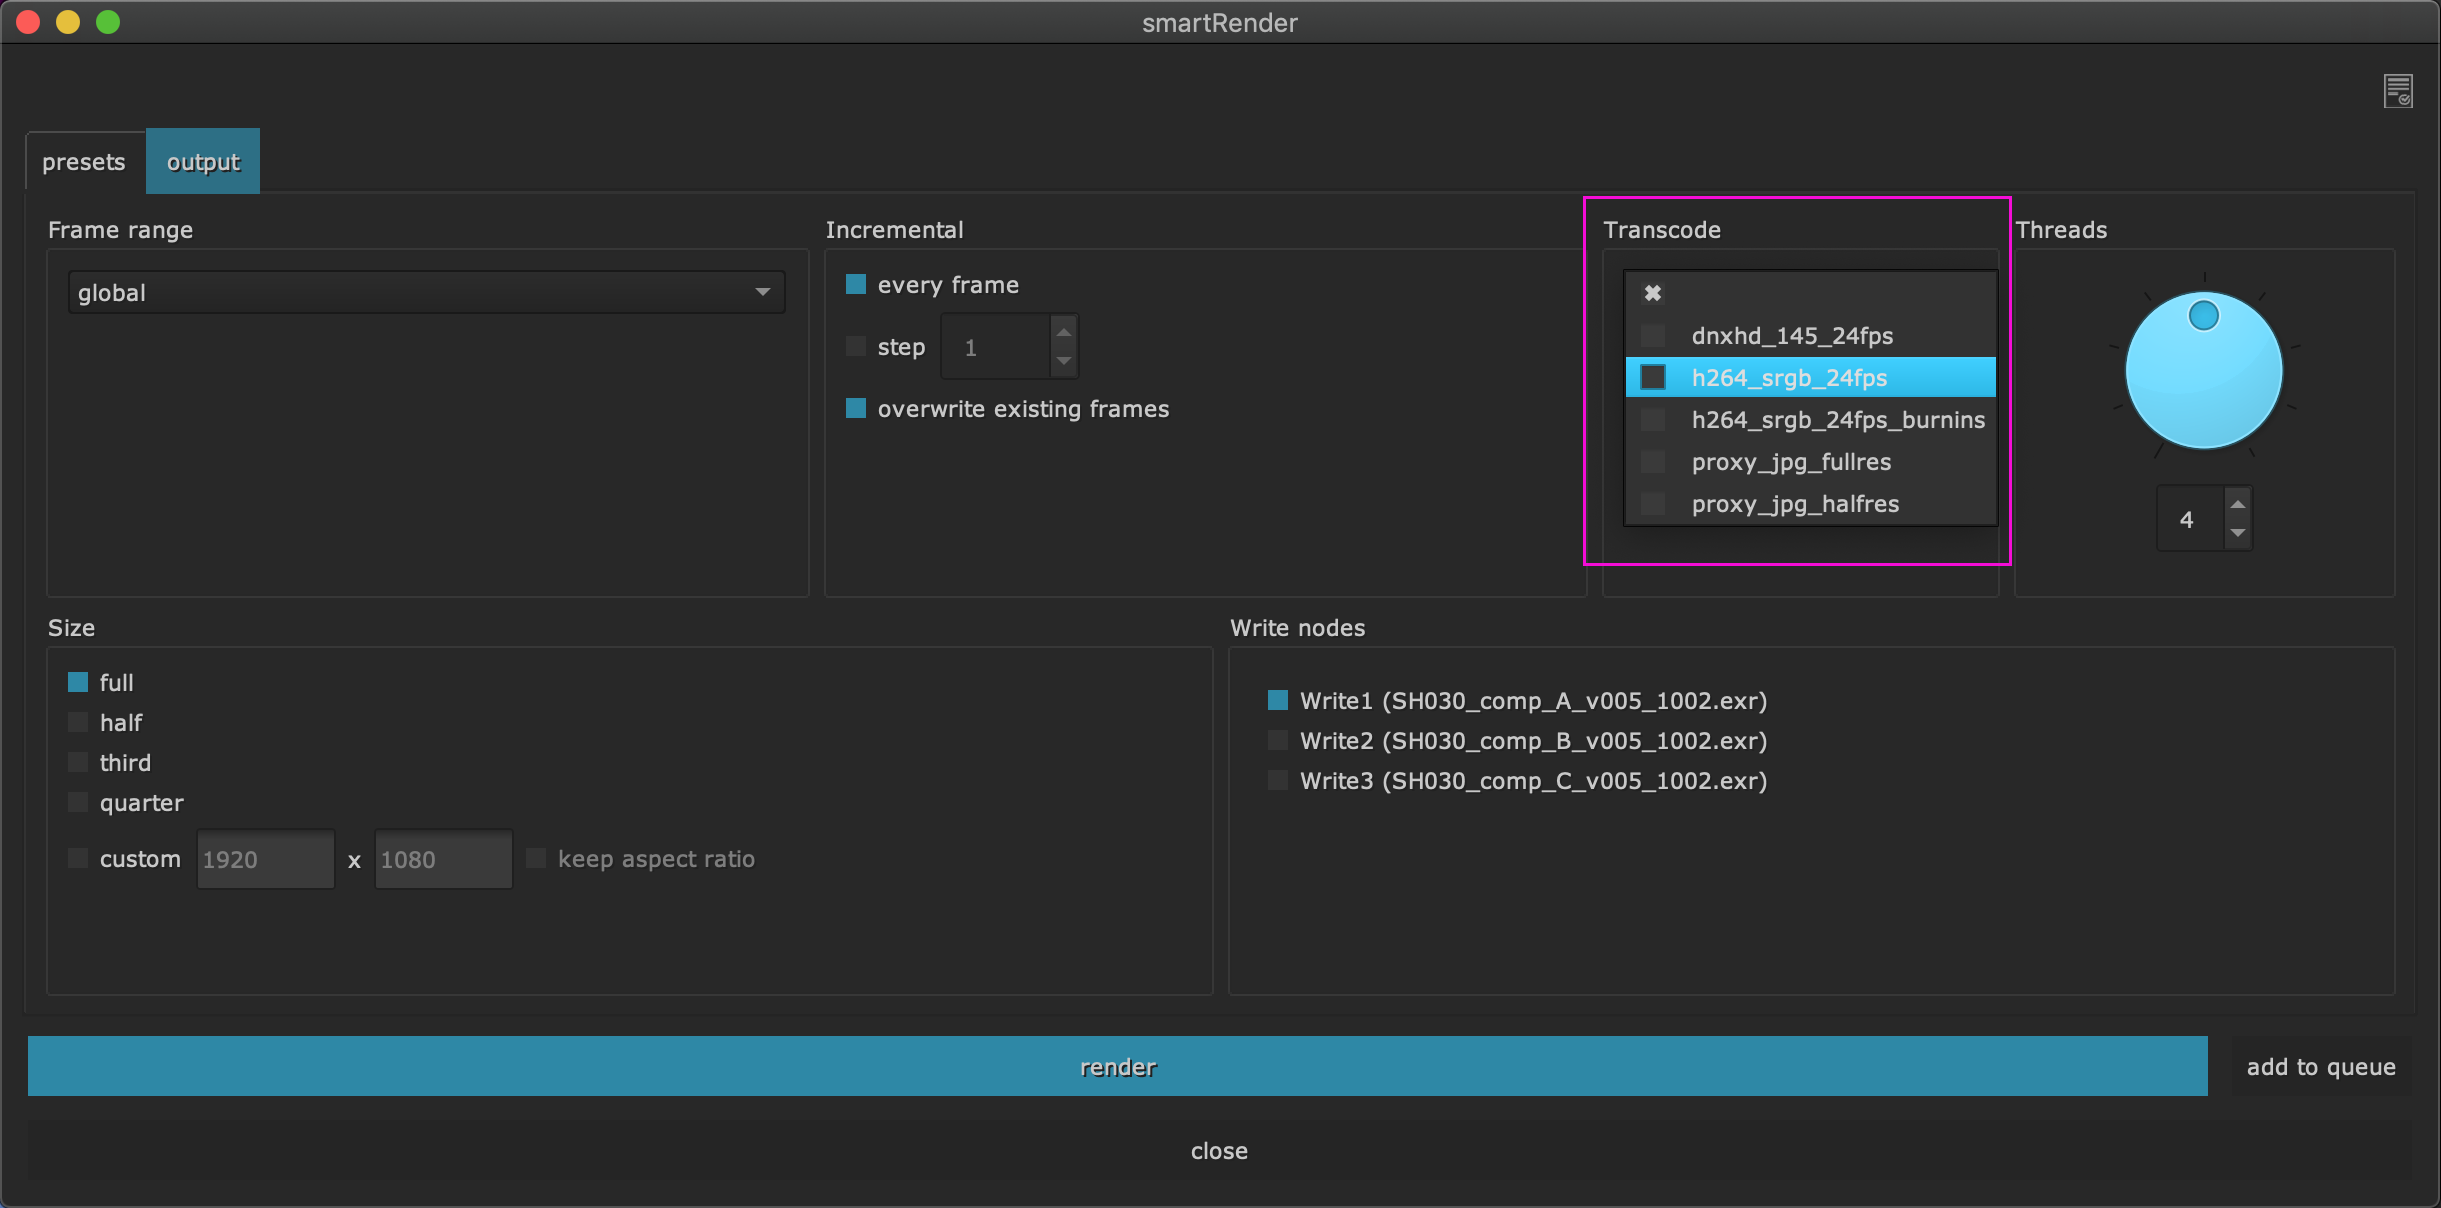
Once your regular rendering has finished, the rendered sequence will be piped into the transcoding job and will automatically transcode your render.
Transcode via right click menu
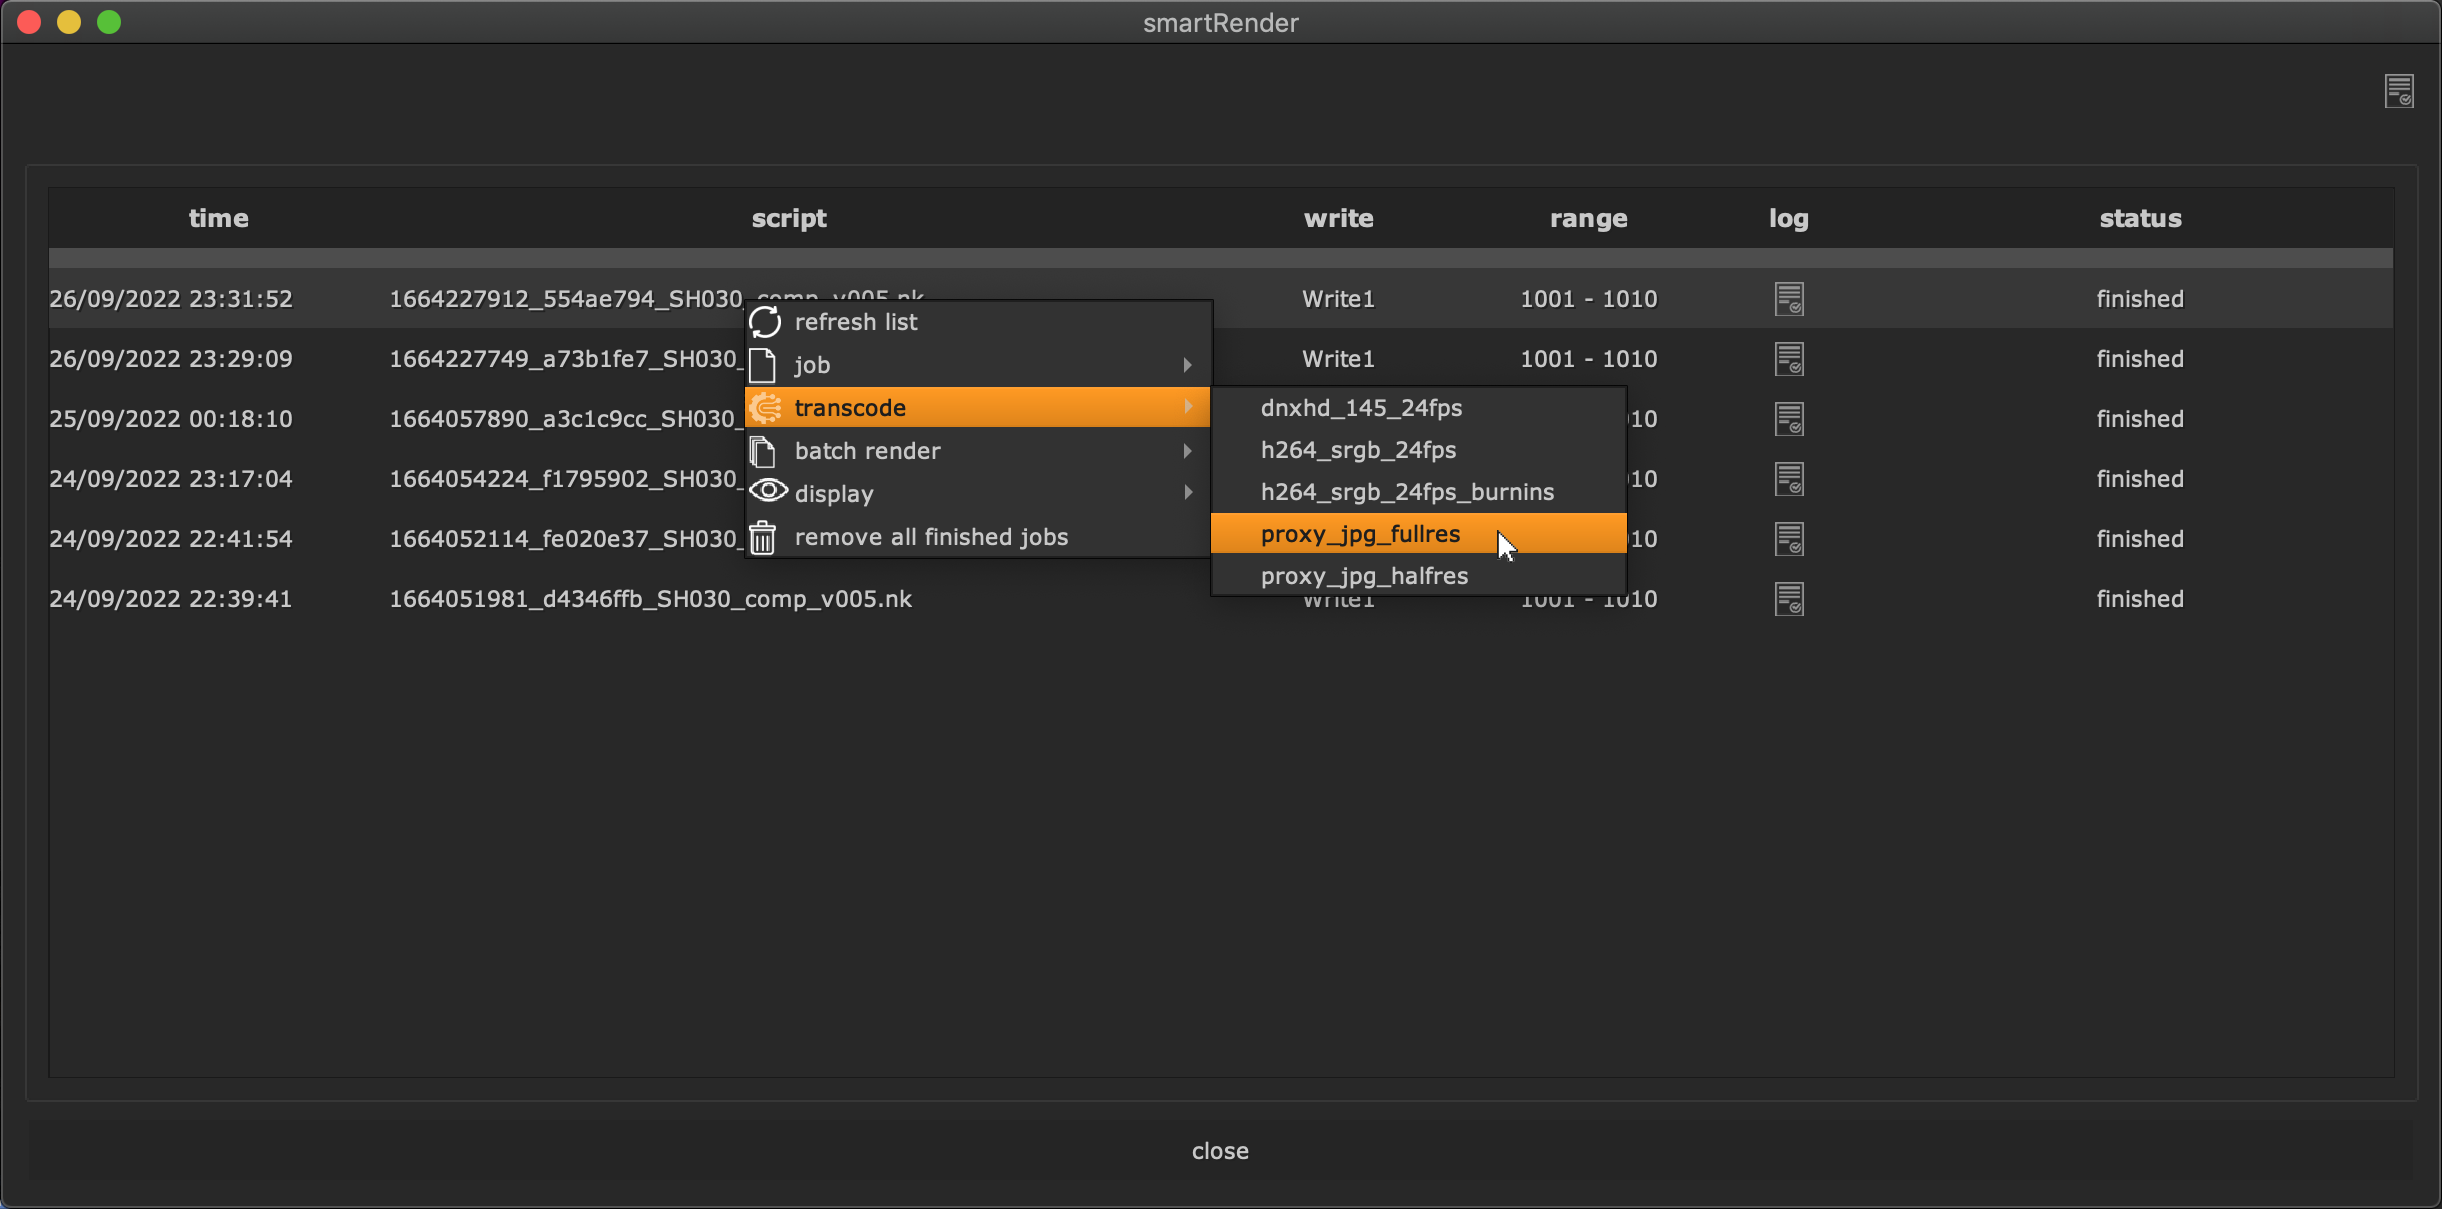
You can transcode your finished renderings at any time and trigger several encodings if needed. Simply right click a rendering from the render history and choose a template from the transcode sub menu:
Adding your own transcode templates
As mentioned above, transcoding happens through .nk files. All transcoding templates that smartRender ships with live in the following location and get automatically detected when launching smartRender:
smartRender_vX.XX/cpXX/smartRender/custom/transcode_templates
Where smartRender_vX.XX is the current smartRender version you are using
and cpXX is the python version using. In Nuke-13 this is cp37
(python-3.7) and in previous Nuke versions this is cp27 (Python-2.7).
Please have a look at the templates we ship by default. We might extend the list of templates in the future.
It is recommended to store your custom .nk transcoding templates outside this
directory so they don’t get lost once you update smartRender. Simply move them
to any folder of your choice outside of your smartRender installation and
point to that folder using the environment variable
CRAGL_SMARTRENDER_ADDITIONAL_TRANSCODING_ROOTS. Inside your init.py add
the following:
import os
os.environ["CRAGL_SMARTRENDER_ADDITIONAL_TRANSCODING_ROOTS"] = "C:/path/to/my/custom/templates"
Note
When adding a new template, make sure the template contains at least one Read node called READ and one Write node called WRITE (see our example transcode templates). smartRender’s logic will detect these nodes and set them up to transcode your rendering.
Besides the READ and WRITE nodes that must exist, feel free to do anything you need. You can for example set up whole node setups for slates, burnins, color changes, reformats, time offsets, switch nodes driving various node sections, tcl expressions, etc. There is basically no limit here. A basic example of using burnins can be found with the template h264_srgb_24fps_burnins. Here is an example rendering of a file sequence with the name ‘dnh_a100_0060_bg.%04d.exr’:
after_render_transcode customization
The transcoding gets triggered in the following module:
smartRender_vX.XX/cpXX/smartRender/custom/after_render_transcode.py
Where smartRender_vX.XX is the current smartRender version you are using
and cpXX is the python version using. In Nuke-13 this is cp37
(python-3.7) and in previous Nuke versions this is cp27 (Python-2.7).
Please have a look at that module. If needed, there might be some things you would like to change to your needs, e.g. the assembled destination path for your transcodings, whether to delete the sources after the transcode or not (the default is to keep the source), something additionally to set up when calling the render process, etc.
If you have any question on the transcode mechanism or additional feedback and suggestions please let us know, we are always interested in improving any of our tools.