Main window
This page serves as a reference and describes all sections of the main window.

Menu bar
The menu bar contains several menus as described below.
Note
In the future we might add some menus and commands. These changes will get reflected in the What’s new page.
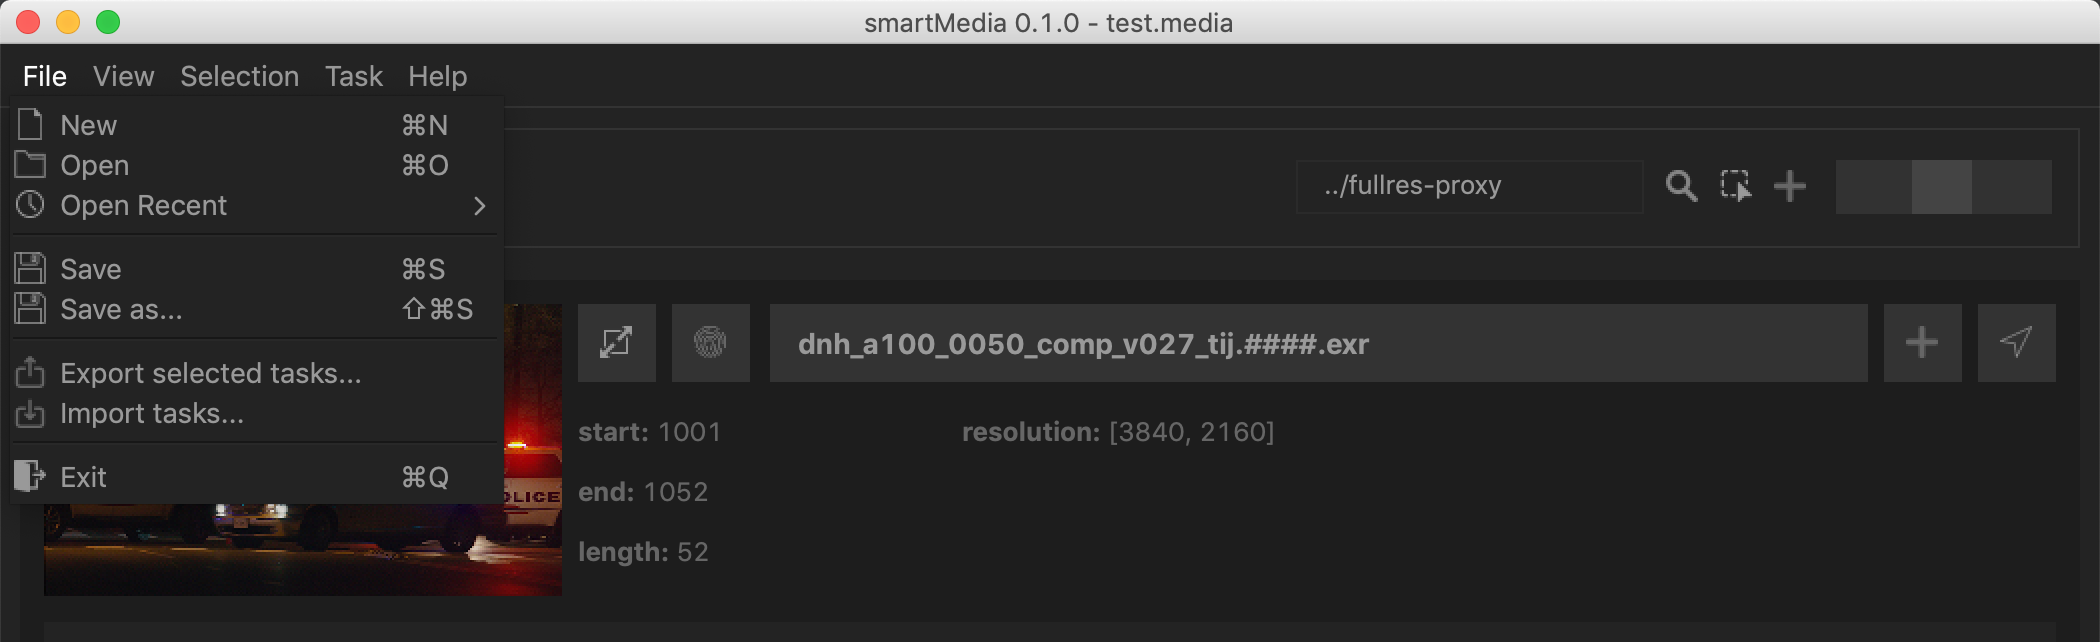
Menu bar - File
The File menu contains basic commands that you are familiar with from any other application. So for example to create a new file, load an existing file, load from a recents files menu and save and save as. You can select multiple tasks and export them to disk and import them back into smartMedia. And finally you can exit the application.
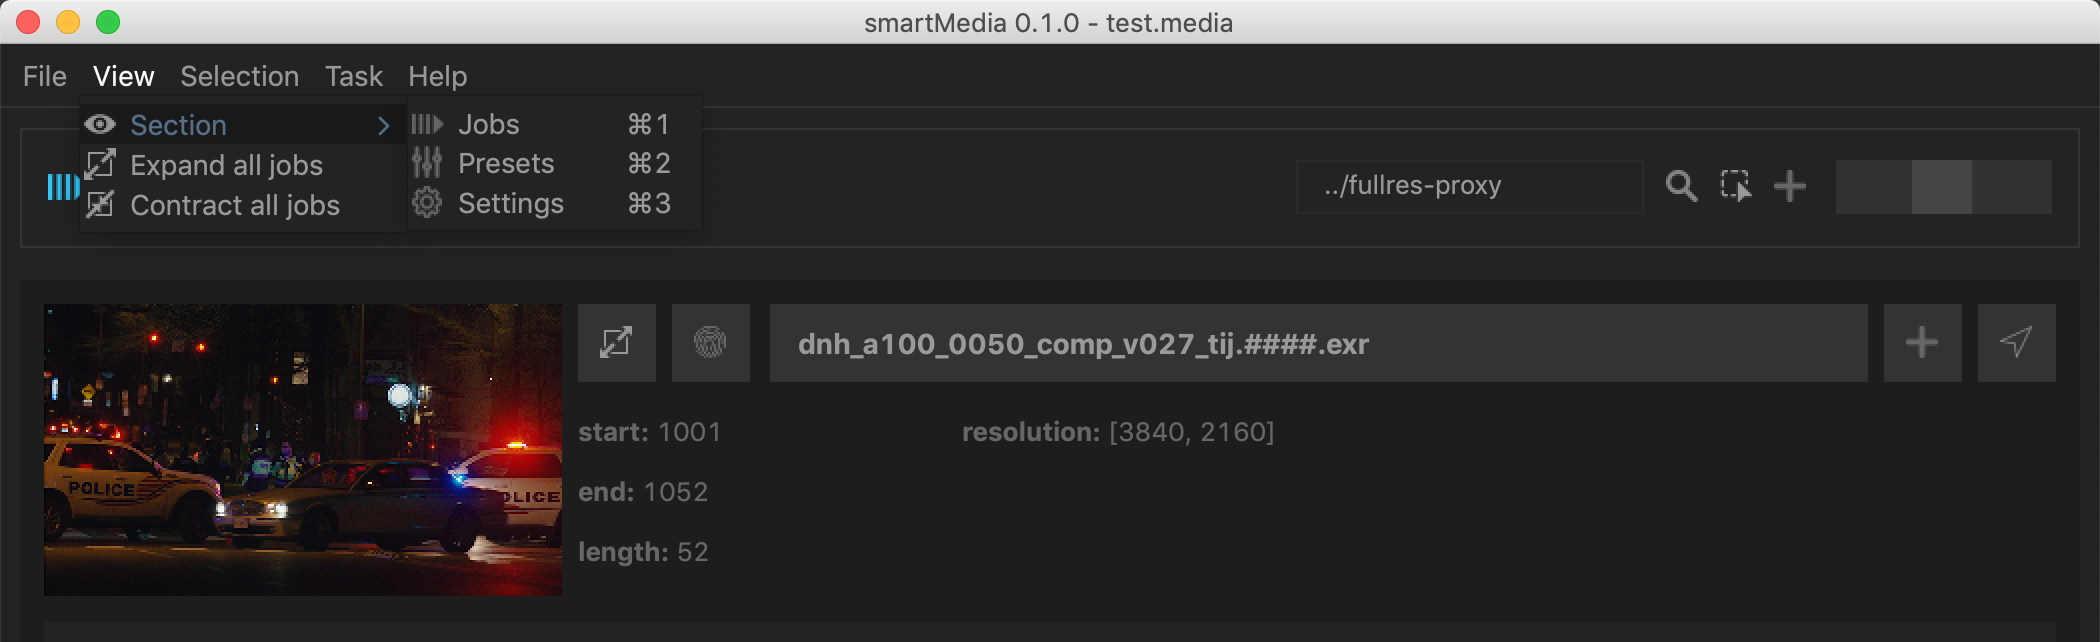
Menu bar - View
The View menu contains view specific commands. Here you can switch between the different sections (hotkeys: Ctrl+1, Ctrl+2, Ctrl+3) and expand and contract all sources.
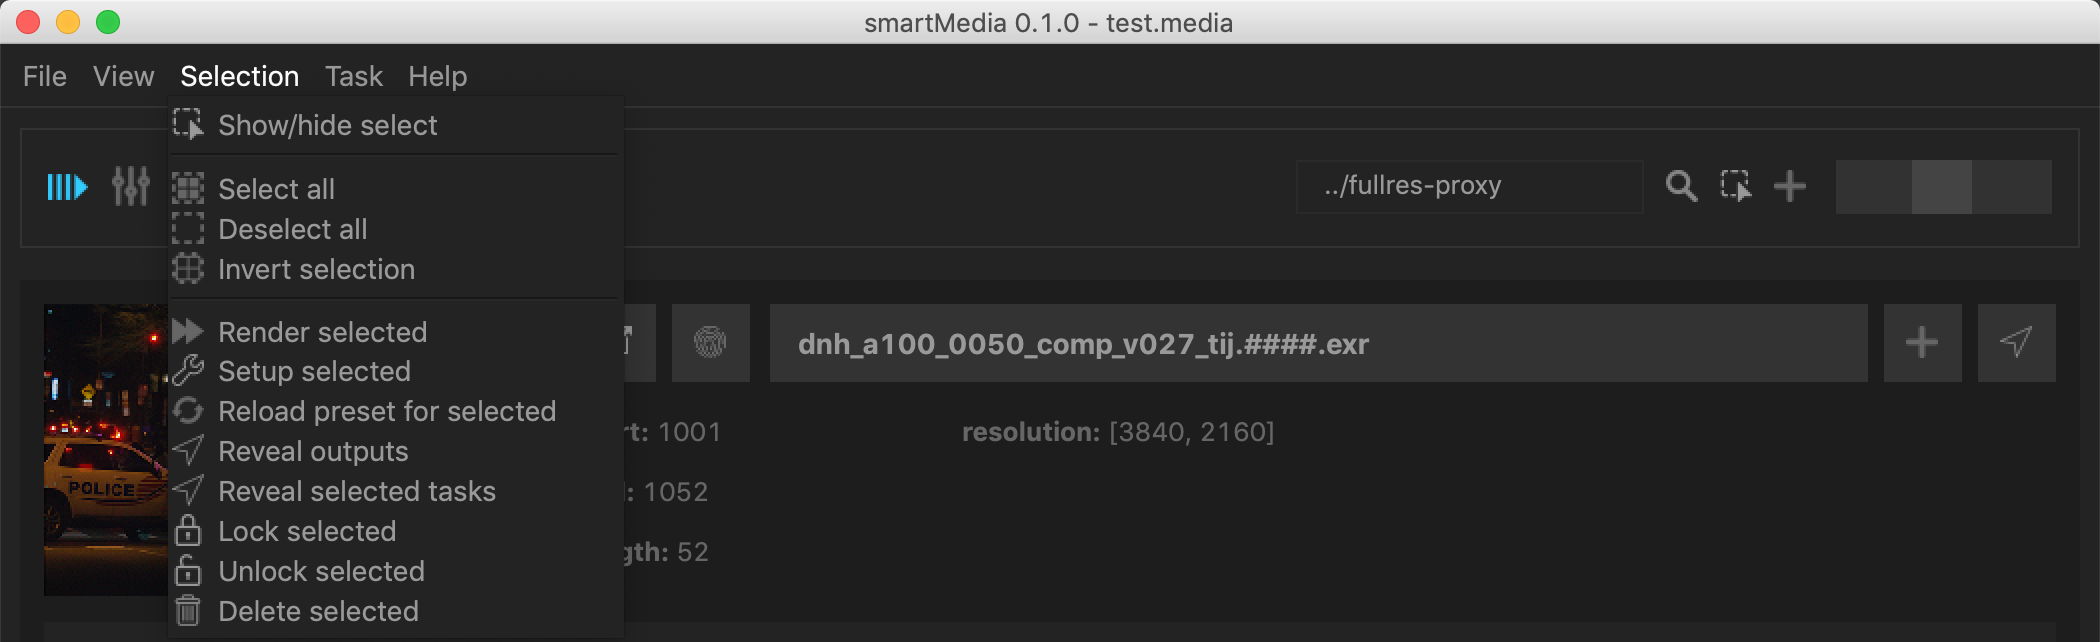
Menu bar - Selection
The Selection menu deals with selecting tasks and offers commands to execute a variety on a selection of tasks. Click the ‘Show/hide select’ to show a selection checkbox for all tasks in order to select and unselect these. Next, you find commands to select all tasks, deselect all and invert your selection. Below you wil find common commands that you can execute on a task selection. These are all tasks that you can execute on single tasks using the context menu but here you can execute these tasks on a selection of tasks.
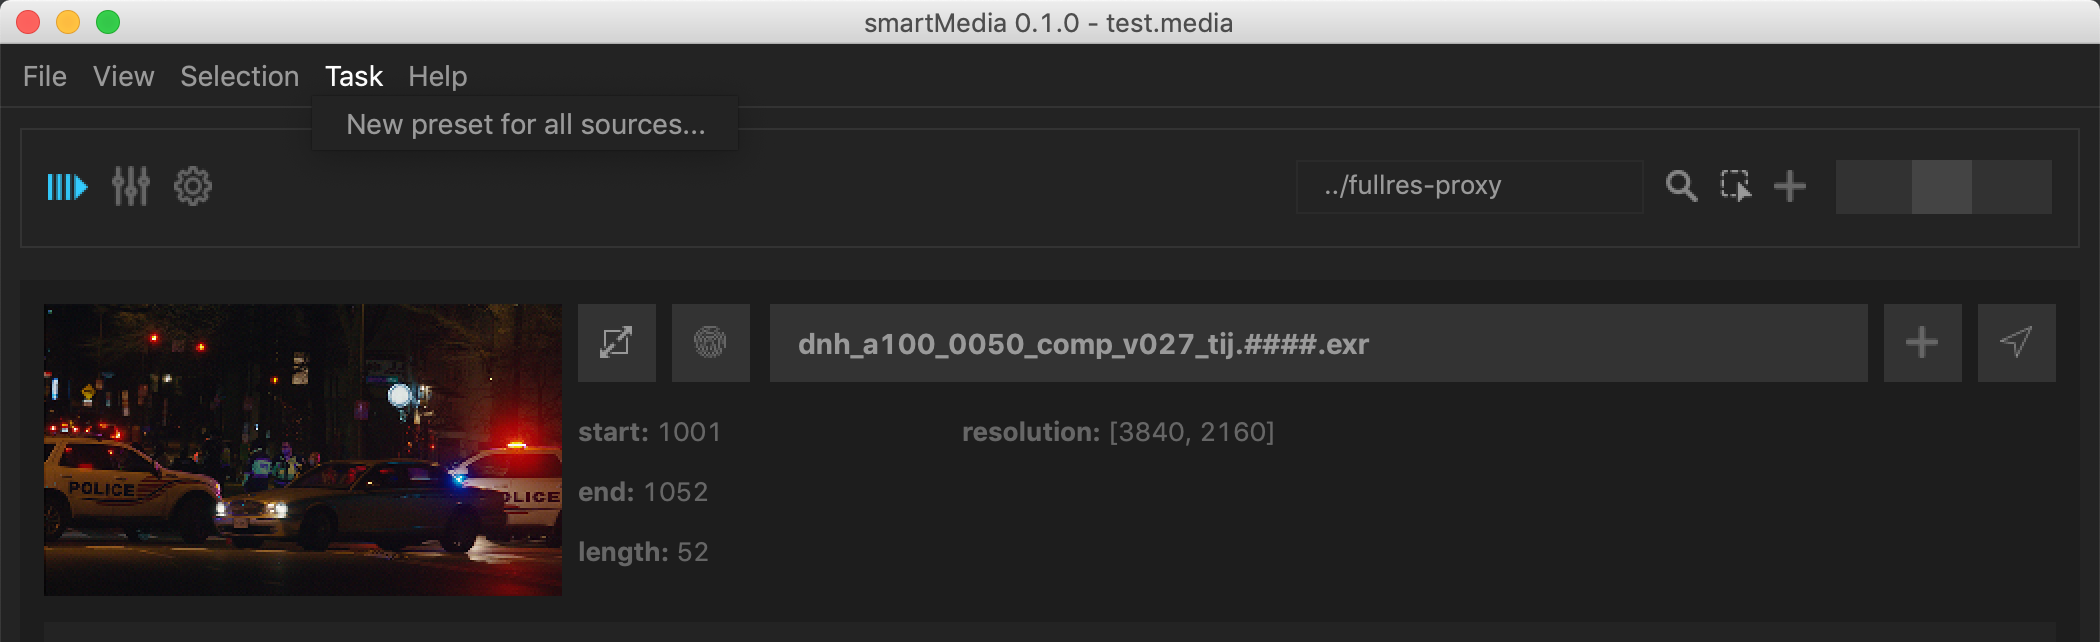
Menu bar - Task
The Task menu contains task related commands. E.g. assigning a new preset to all sources so that you can process additional tasks easily.
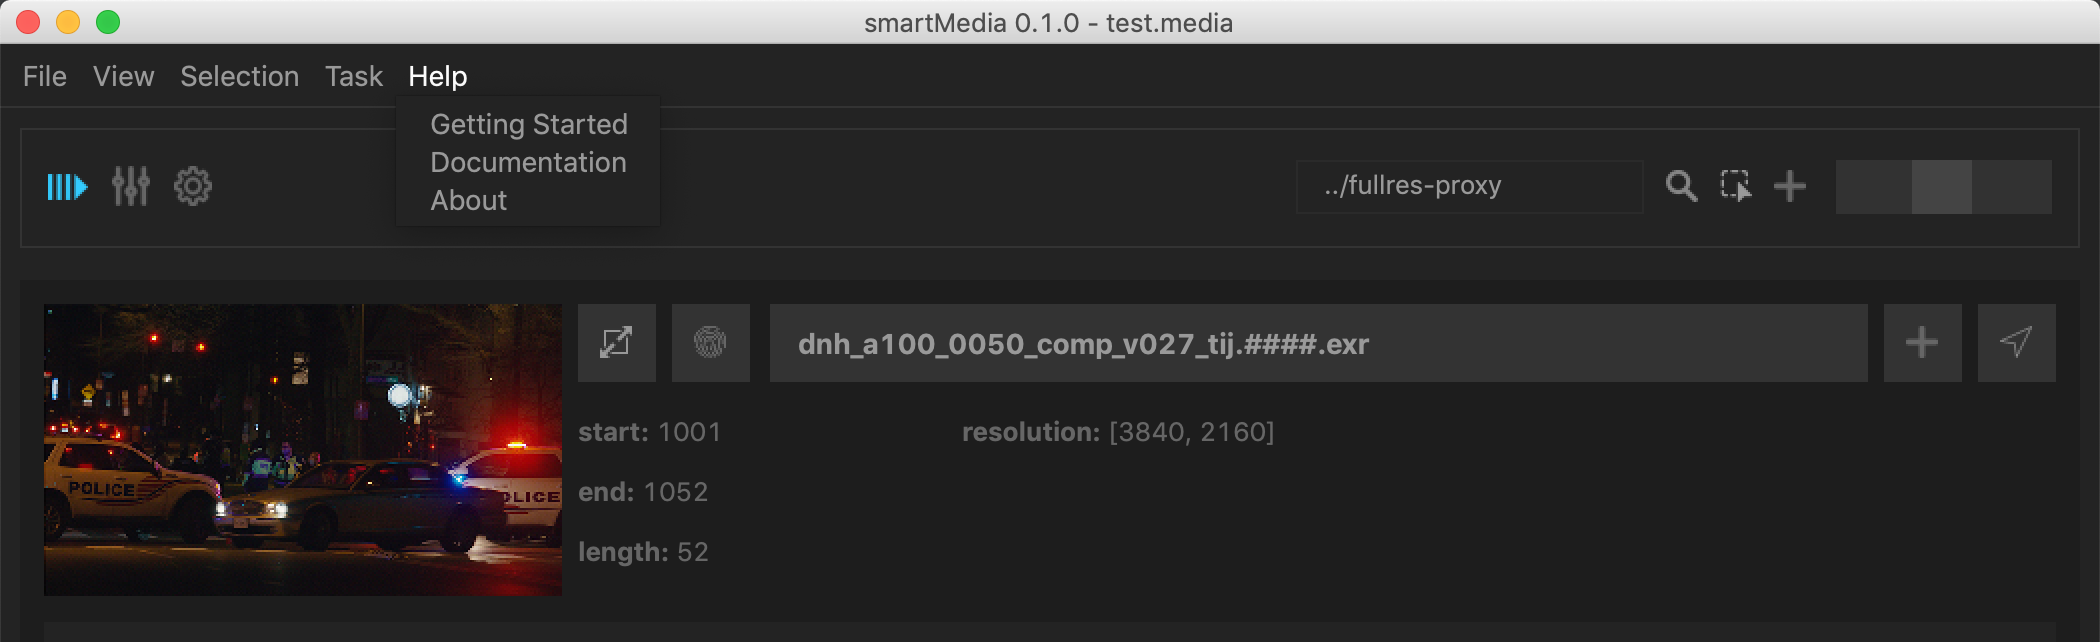
Menu bar - Help
The Help menu contains help related commands like browsing the getting started tutorial, the documentation and show information about your smartMedia installation.
Top bar
The top bar contains functionality to switch between the three sections and to perform source and task specific functionality. It the following widgets:

- Jobs section: Click to jump to the jobs section. Hotkey: Ctrl+1
- Presets section: Click to jump to the presets section. Hotkey: Ctrl+2
- Settings section: Click to jump to the settings section. Hotkey: Ctrl+3
- Output roots: Here you can set Absolute and relative output root directories for all non locked tasks. Please have a look at the Using output roots section to see how to set up and use output roots.
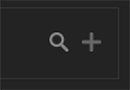
- Search: Click to show the search input. This input lets you filter sources by name. This is helpful in case your jobs list starts to get long.
- Shot/hide select: Clicking this button toggles the visibility of the checkbox for each task which lets you select and unselect certain tasks so that you can execute any task from the Selection menu.
- New Source: Click to brose to a new source to bring into smartMedia. The simpler way is to simply dragging and dropping any media into smartMedia.
- Thumbnail size slider: Click and drag the slider to enlarge or shrink the thumbnails for all sources.
Main section - Jobs
The main section is where you spend most of the time when working with smartMedia. It contains the following sections:
- Job section
- Preset section
- Settings section
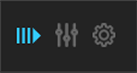
You can switch between these using the three buttons on the left as seen in the Top bar section:
Tip
Use the shortcuts Ctrl + 1, Ctrl + 2, Ctrl + 3 to toggle between the job, preset and settings sections.
The most important section is the first section which is the job section. This is where all your sources and all their tasks are located.
The jobs section can be accessed by clicking the jobs button or using the shortcut Ctrl + 1.
Source
Let’s have a closer look at one source:

A source contains the following widgets:
1) Thumbnail: A thumbnail for the source. This helps you visually to better navigate between all the source and to find a specific source quicker. Use the slider as documented in the Top bar section to increase/decrease the size of all thumbnails.
2) Expand/Contract: Click to expand or contract the source alongside of all its tasks.
3) Naming: Click to show/hide the naming for this source. smartMedia contains information to extract naming values from your source path which you can then use down the line, e.g. in burnins and slates. This gets further documented in the naming section.
4) Title: This is the base name of your source. Hover over it to see the absolute path as a tooltip. Double click it to toggle expand/contract the source alongside of all its tasks.
5) New Task: Click to create a new task for this source. Shortcut: Simply press + while hovering over your source.
6) Reveal: Click to reveal the source in your explorer.
7) Information: This section shows some information about your source like frame range, number of frames and resolution.
Source context menu
Right click anywhere in the source section to reveal the source’s context menu:
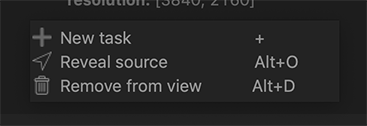
The context menu contains the following commands:
1) New Task: Click to create a new task for this source. Shortcut: +
2) Reveal source: Click to reveal the source in your explorer. Shortcut: Alt+O
3) Remove from view: Click to remove the source and all its tasks from the smartMedia main window. Shortcut: Alt + D Note that this will not delete the source or any task or any task output. It will simply no longer show it in the main window. You can get it back by adding the source folder from your Jobs root directory back into smartMedia.
Note
All shortcuts are context sensitive, i.e. they trigger the command only when hovering over a source.
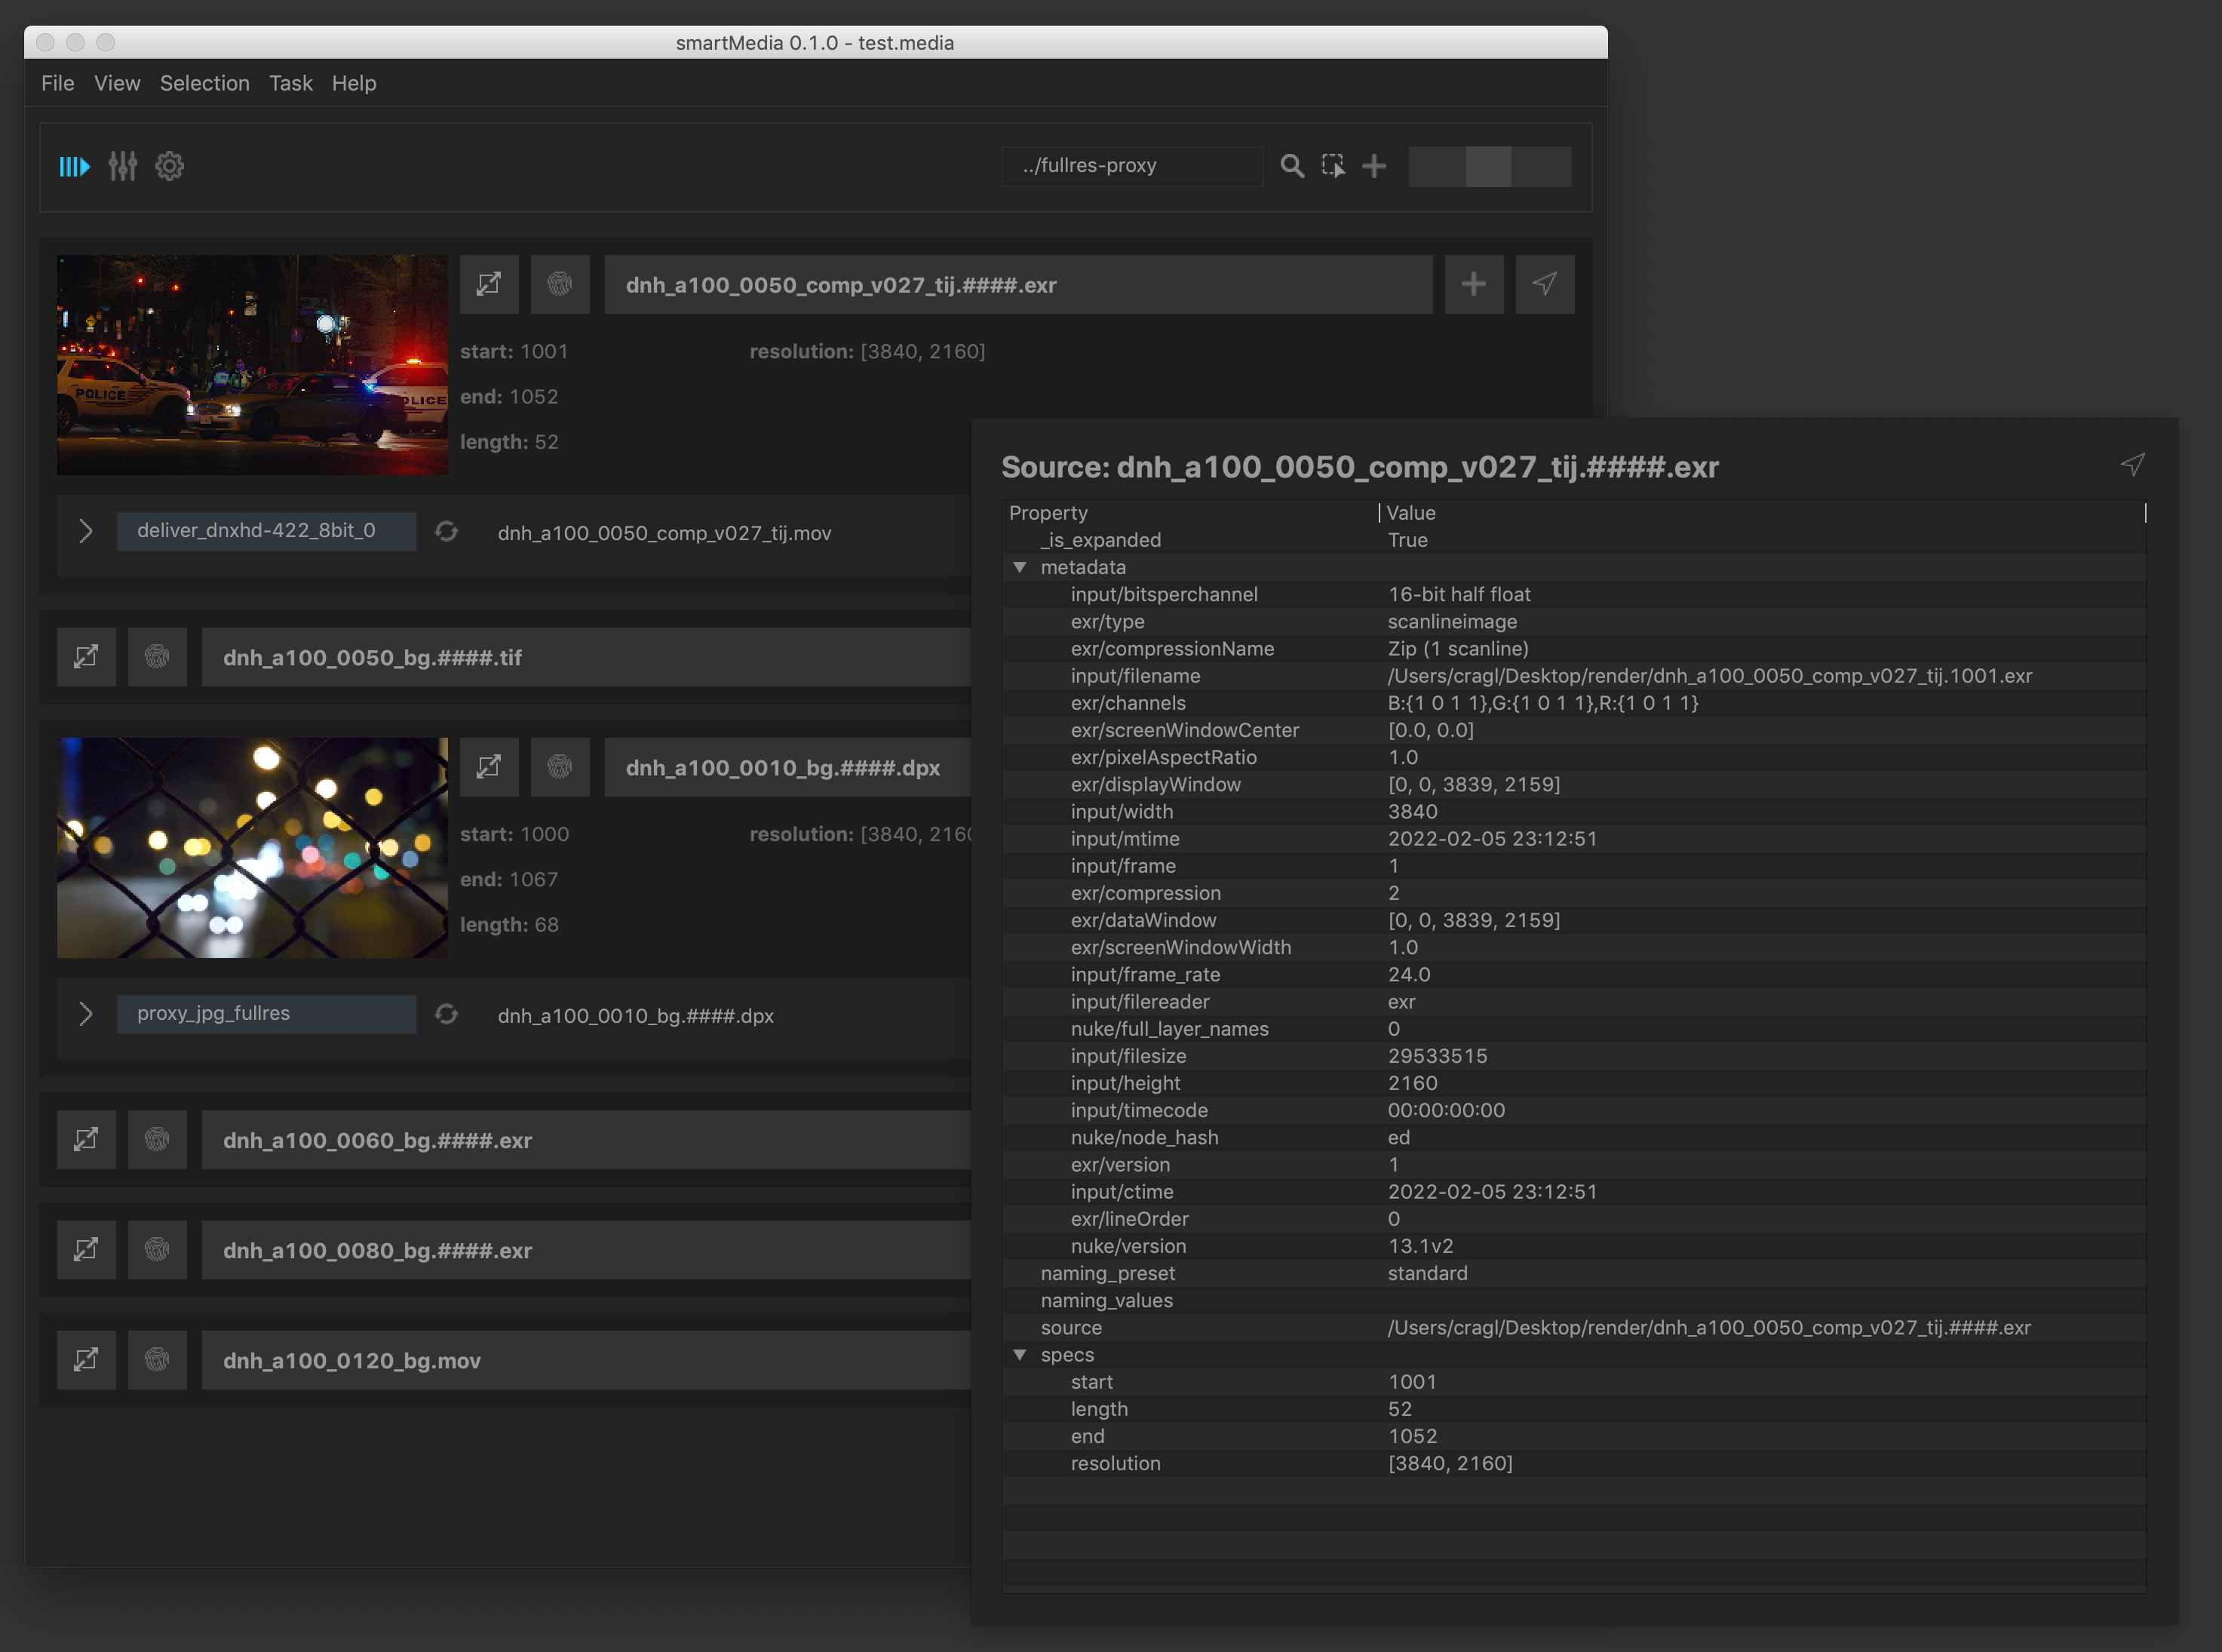
Source info view
Hover over a source and press Alt + I to reveal additional information about the source:
Tasks
Each source contains tasks. Each task renders the given source with a selected preset to get the needed result. Each task contains several options and these can be edited in smartMedia directly via the graphical user interface. A task contains the following widgets:

1) Show/hide details: Click to toggle show/hide the task’s details.
2) presets: Choose a preset from the drop down menu to use for the task.
3) Reload preset: Click to reload, i.e. re-apply the preset.
4) Output path: Click to browse the path to output to. Hover over to reveal the task render path as a tooltip.
5) Status: The status informs you about render succeeds / failures and render progress when processing.
6) Reveal: Click to reveal the output in your explorer.
7) Render log: Click to view the render log.
8) Render: Click to render the task.
The task gets driven by its output options. These can be adjusted directly in the main window as follows:
9) Source path: (Read only) The absolute path of the source.
10) Target path: (Read only) The absolute path to render the task to. This is just for visual feedback. If you want to update the render path then adjust the Output path as seen above (4).
11) Preset info: (Read only) Information about what the selected preset aims to output.
12) Source range: Set the source frame range to use. You can either use the original range (source), start at a specific frame (start at) or use a custom range (custom).
13) Target range: Set the frame range to render. You can either use the same frame range as set up for the source (same as source) or use a custom frame range (custom).
14) Source/target colorspace: Set the source colorspace to convert to and the render colorspace to render to.
15) Comment: Add a comment that will be shown in the slate.
16) Reformat: Reformat to render to a specific format. You can choose between not applying any reformat at all, meaning rendering the same resolution as the source (same as source), scale to a specific factor (scale), apply a specific format or create a new format to apply on the fly (reformat) or use a specific width and auto calculate the height or force a specific width and height (box).
17) Use slate: Keep checked to use a slate for your rendering. This is useful for delivery presets.
18) Use burnins: Keep checked to use burnin information for your rendering. This is useful for delivery presets.
19) Custom: Apply any custom data that can be used by any logic inside the render.nk file. For more information about that please check out the advanced section.
Task context menu
Right click the task to show the context menu for this task. The context menu contains the following commands:
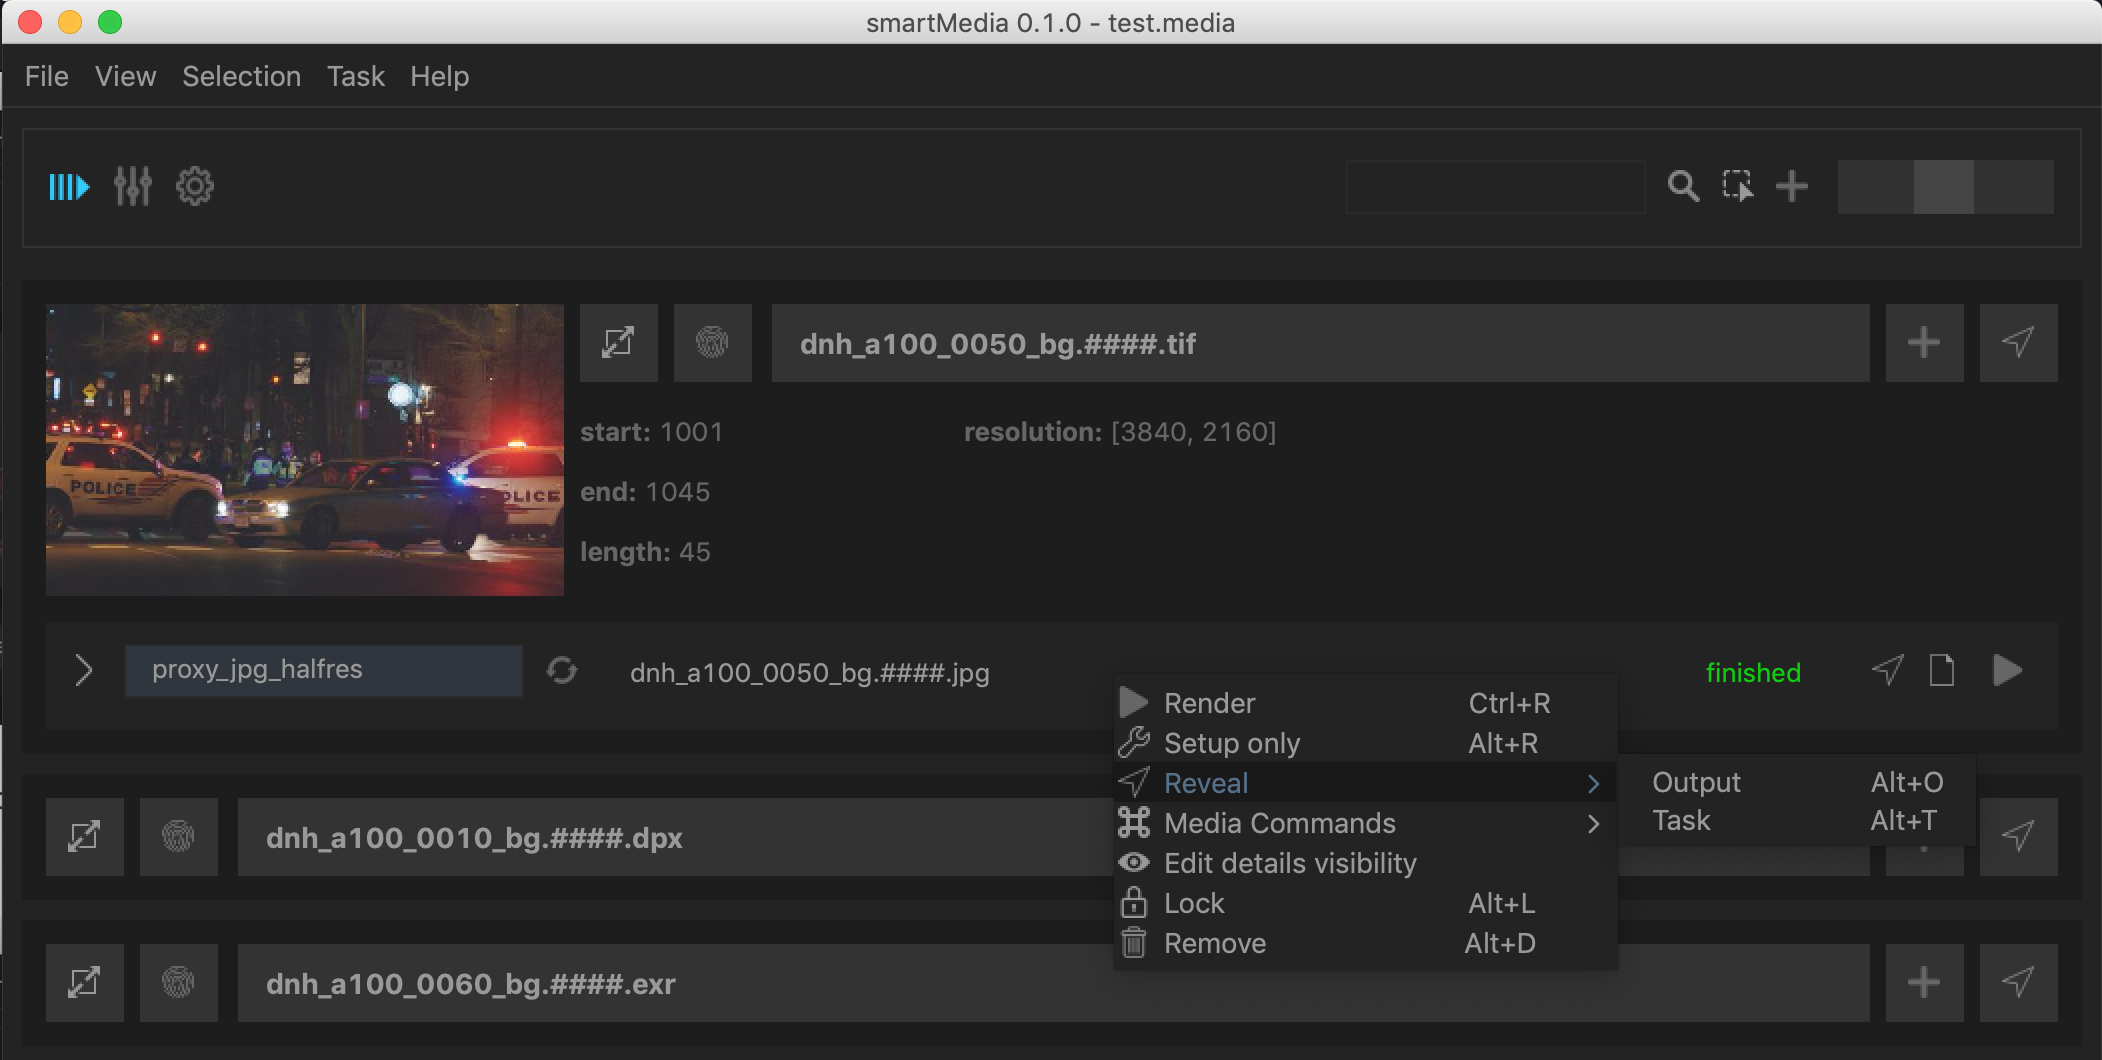
1) Render (Ctrl+R): Click to render the task.
2) Setup only (Alt+R): Click to set up the task and generate the render.nk file in the task root only without rendering any image. This is useful for debugging purposes or if you want to create some final tweaks before rendering. For more information on that please refer to our advanced - setup only section.
3) Reveal: This menu holds commands to reveal the render output (Alt+O) and the task output root directory (Alt+T). For more information about the task output root directory please refer to the advanced - Task root directory section.
4) Media commands: This menu hold custom commands to execute on the task and its render outputs. By default we offer three custom commands:
- Send to RV: Play the rendering in RV player.
- Send to DJV: Play the rendering in DJV player.
- Copy media paths to clipboard: Copy the render path to your clipboard.
You can create as many additional custom commands as you like and register them so that they get available in the custom commands menu. How to do that gets documented in the custom commands <custom_commands.html> page.
5) Edit details visibility: Click to show a window in which you can show/hide certain details widgets and change the order in which they appear in the graphical user interface. For more information please refer below to the Edit detail widgets visibility page.
6) Lock (Alt+L): Click to lock the task to prevent any editing or render output path changes.
7) Remove (Alt+D): Click to remove the task. Note that this will only remove the task root directory but will not remove the actual rendering that this task produced.
Note
All shortcuts are context sensitive, i.e. they trigger the command only when hovering over a task.
Change details layout
Depending on your needs you might or might not need to see all details widgets that were described above. Having all available in the view give you more flexibility in changing these, however there might potentially be some that you are not always or even never interested in changing. Also, when you are a TD setting up presets and testing these, you might explicitly want to see all details of a task while your producer or coordinator might not want that and would otherwise feel overwhelmed by all the widgets. Luckily, smartMedia serves these needs. You can show and hide any details widget and even change the order they appear in. To change the layout of the details choose Change details layout from the task’s context menu. A window pops up in which you can enable/disable the visibility of each details widget and use the up and down arrows to change the order:
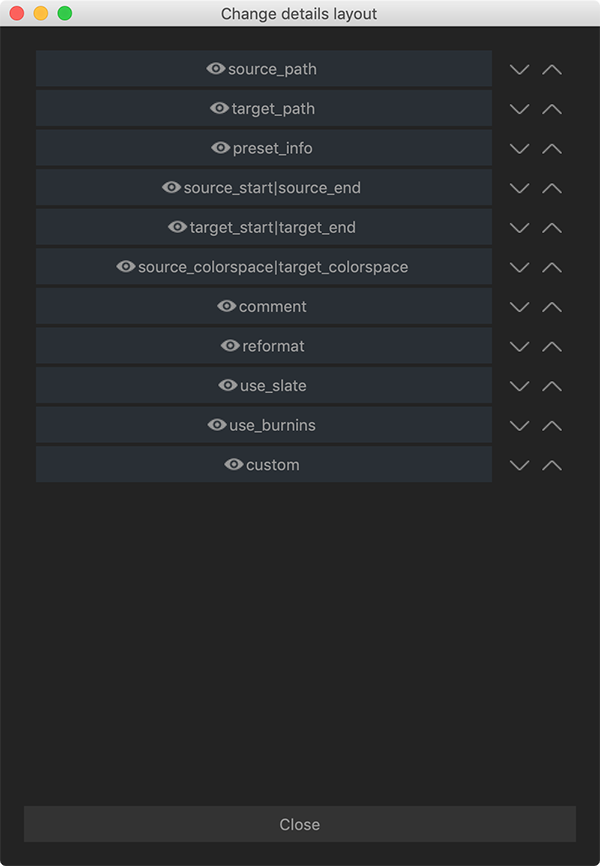
The layout changes apply in real time while you are editing these. They get applied to all task’s details widgets.
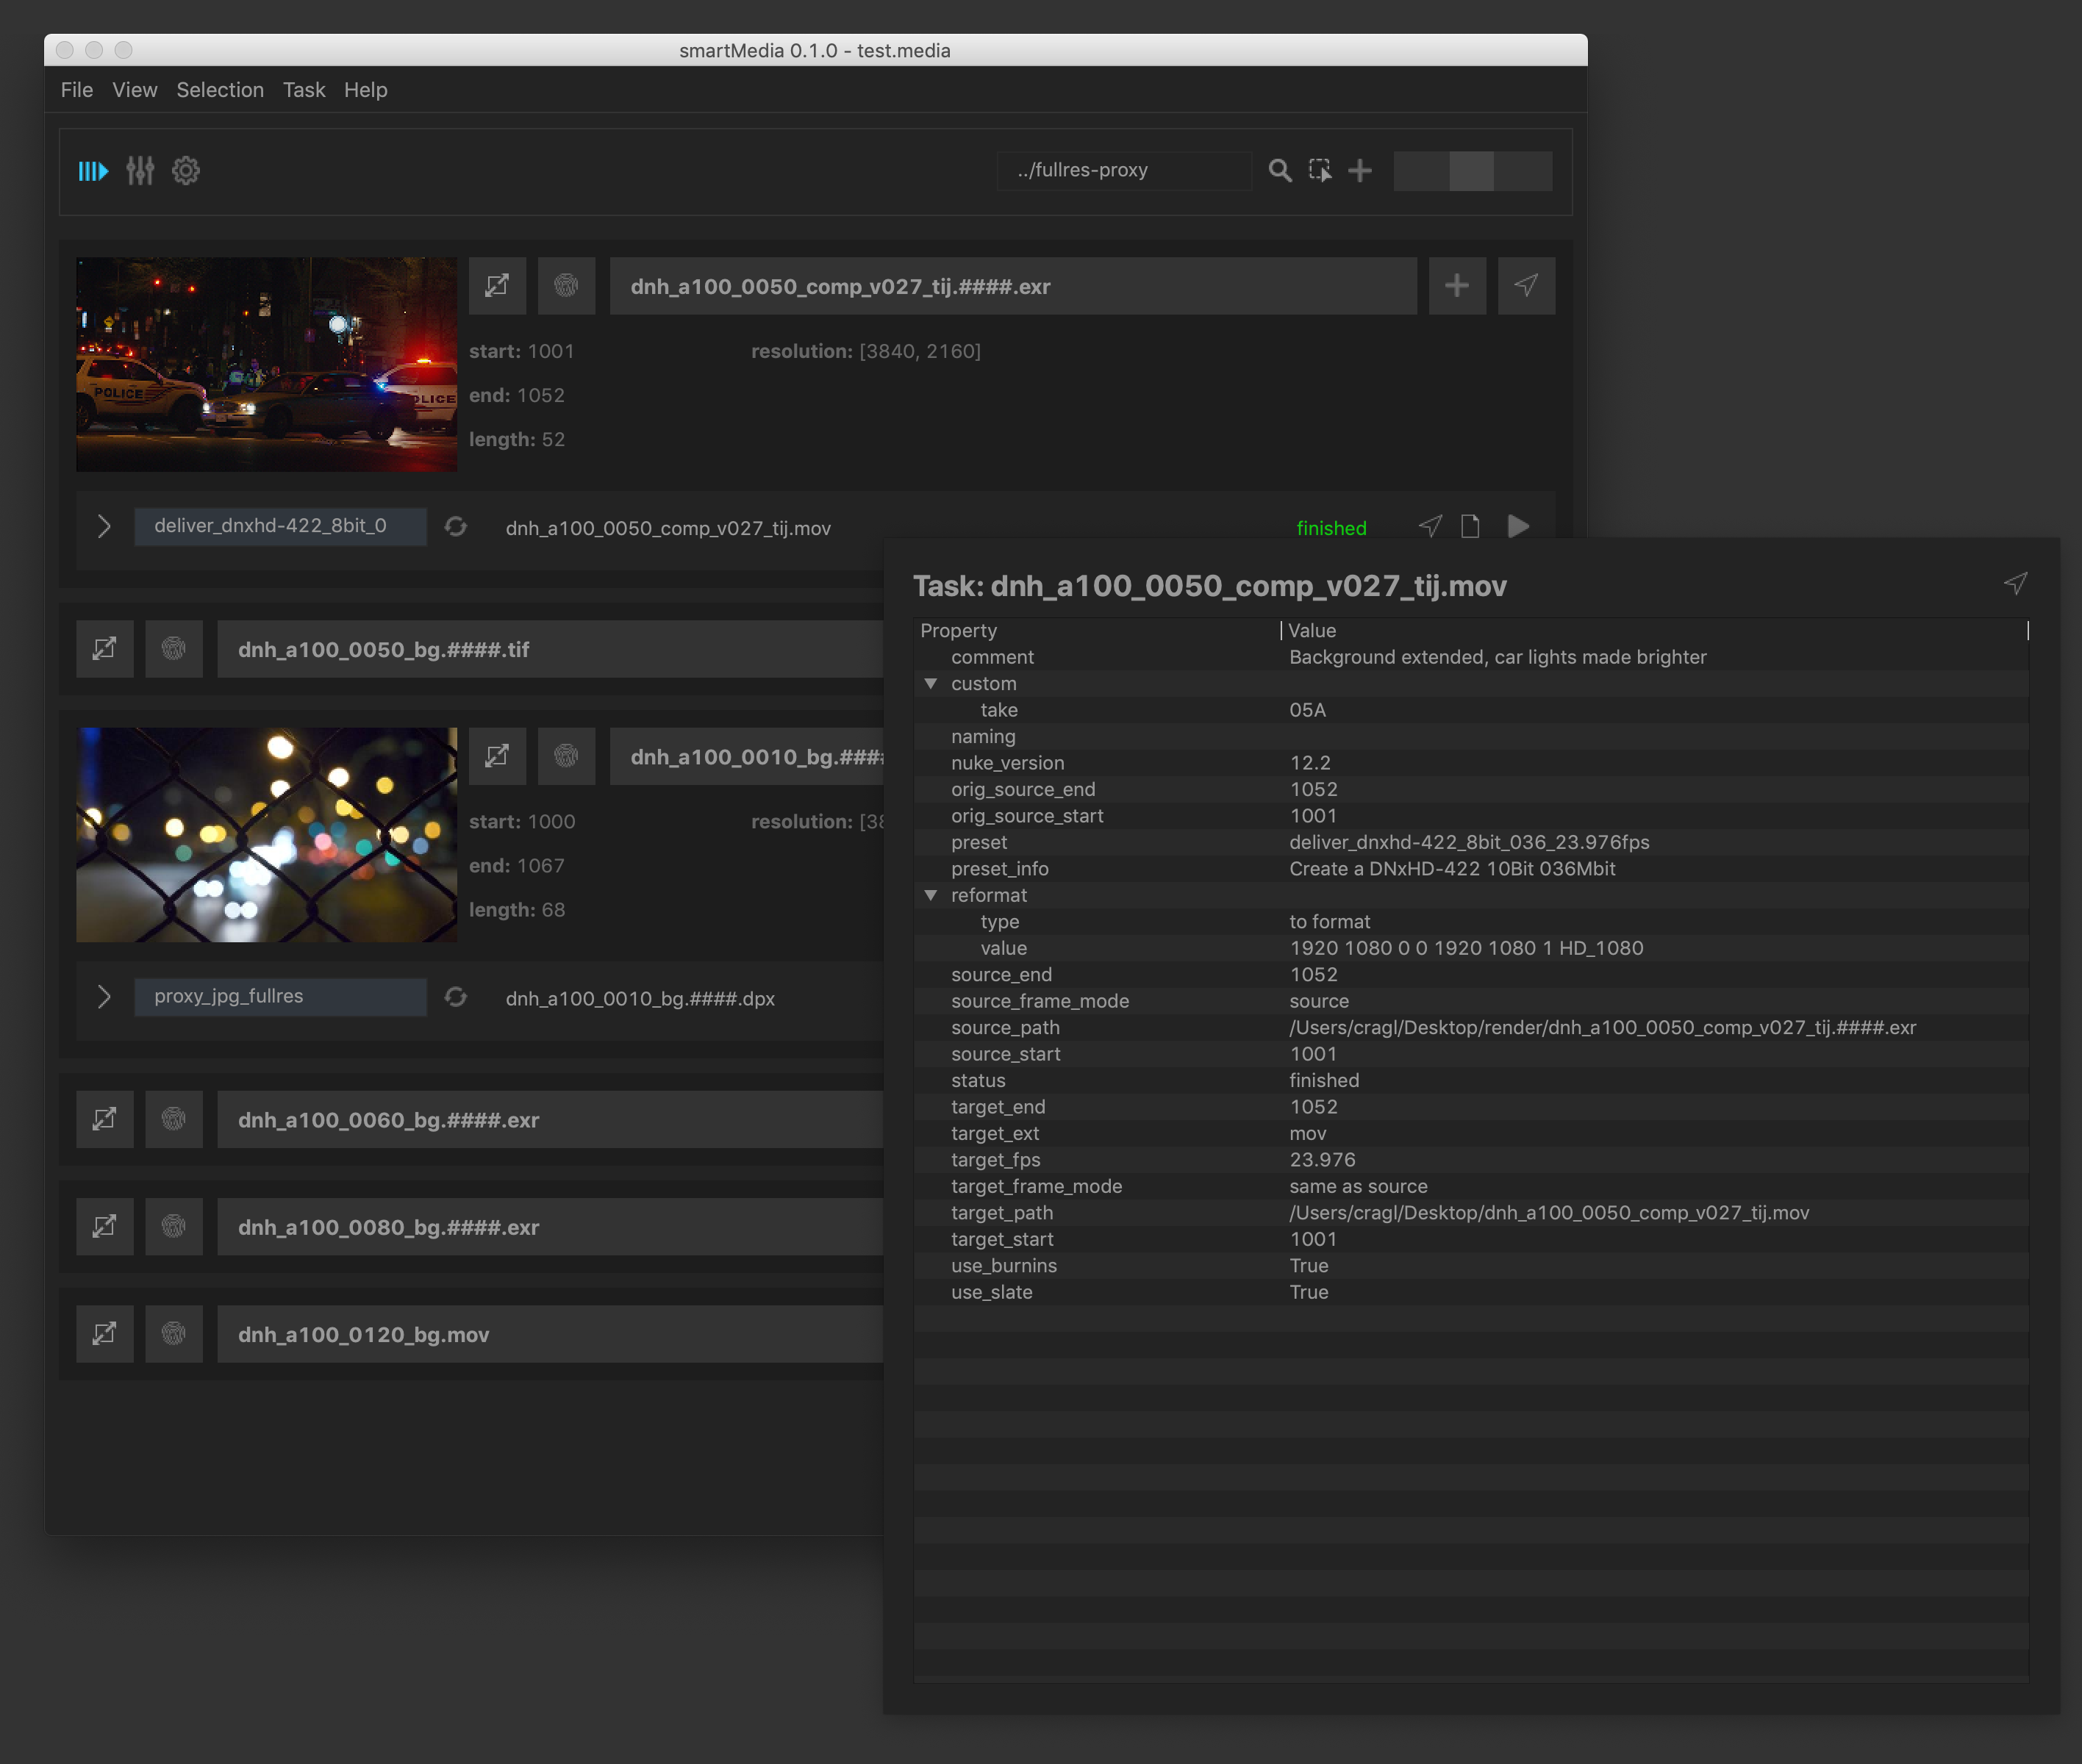
Task info view
Hover over a task and press Alt + I to reveal additional information about the task:
Main section - Presets
The presets section can be accessed by clicking the presets button in the top bar or using the shortcut Ctrl + 2.
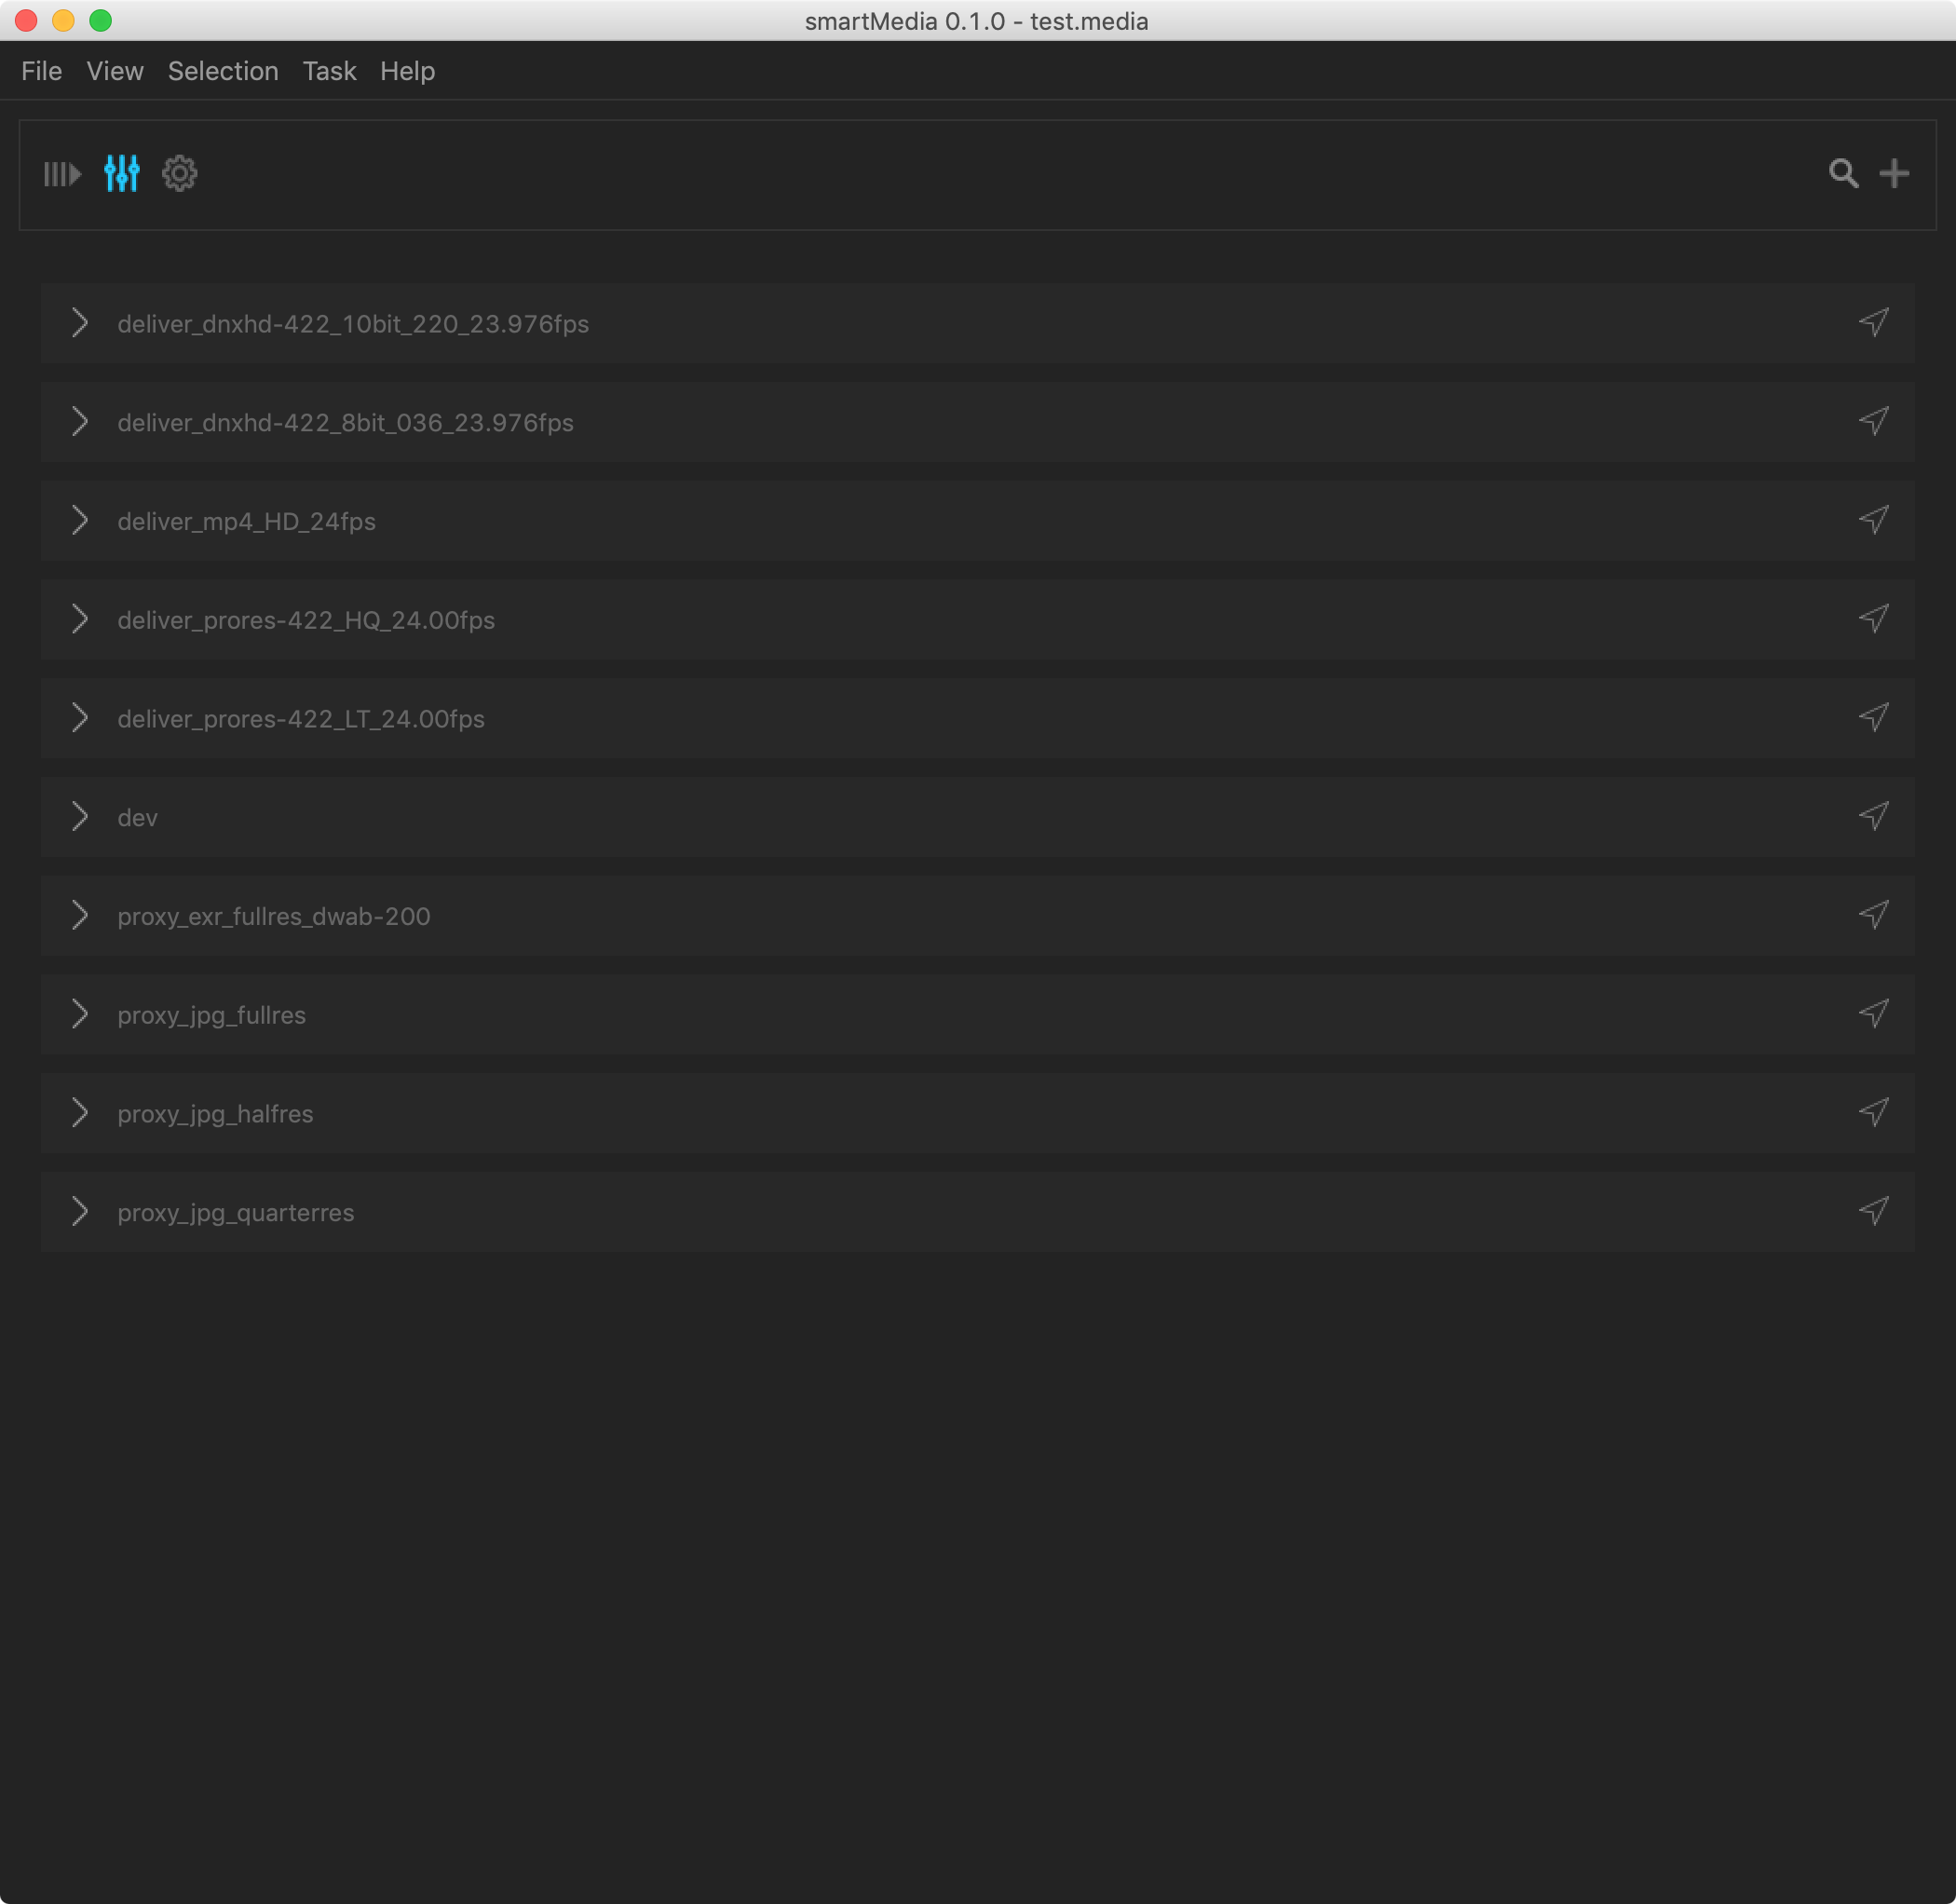
Here you can access and edit all presets. In order to edit a preset click the arrow button on the left of each preset.
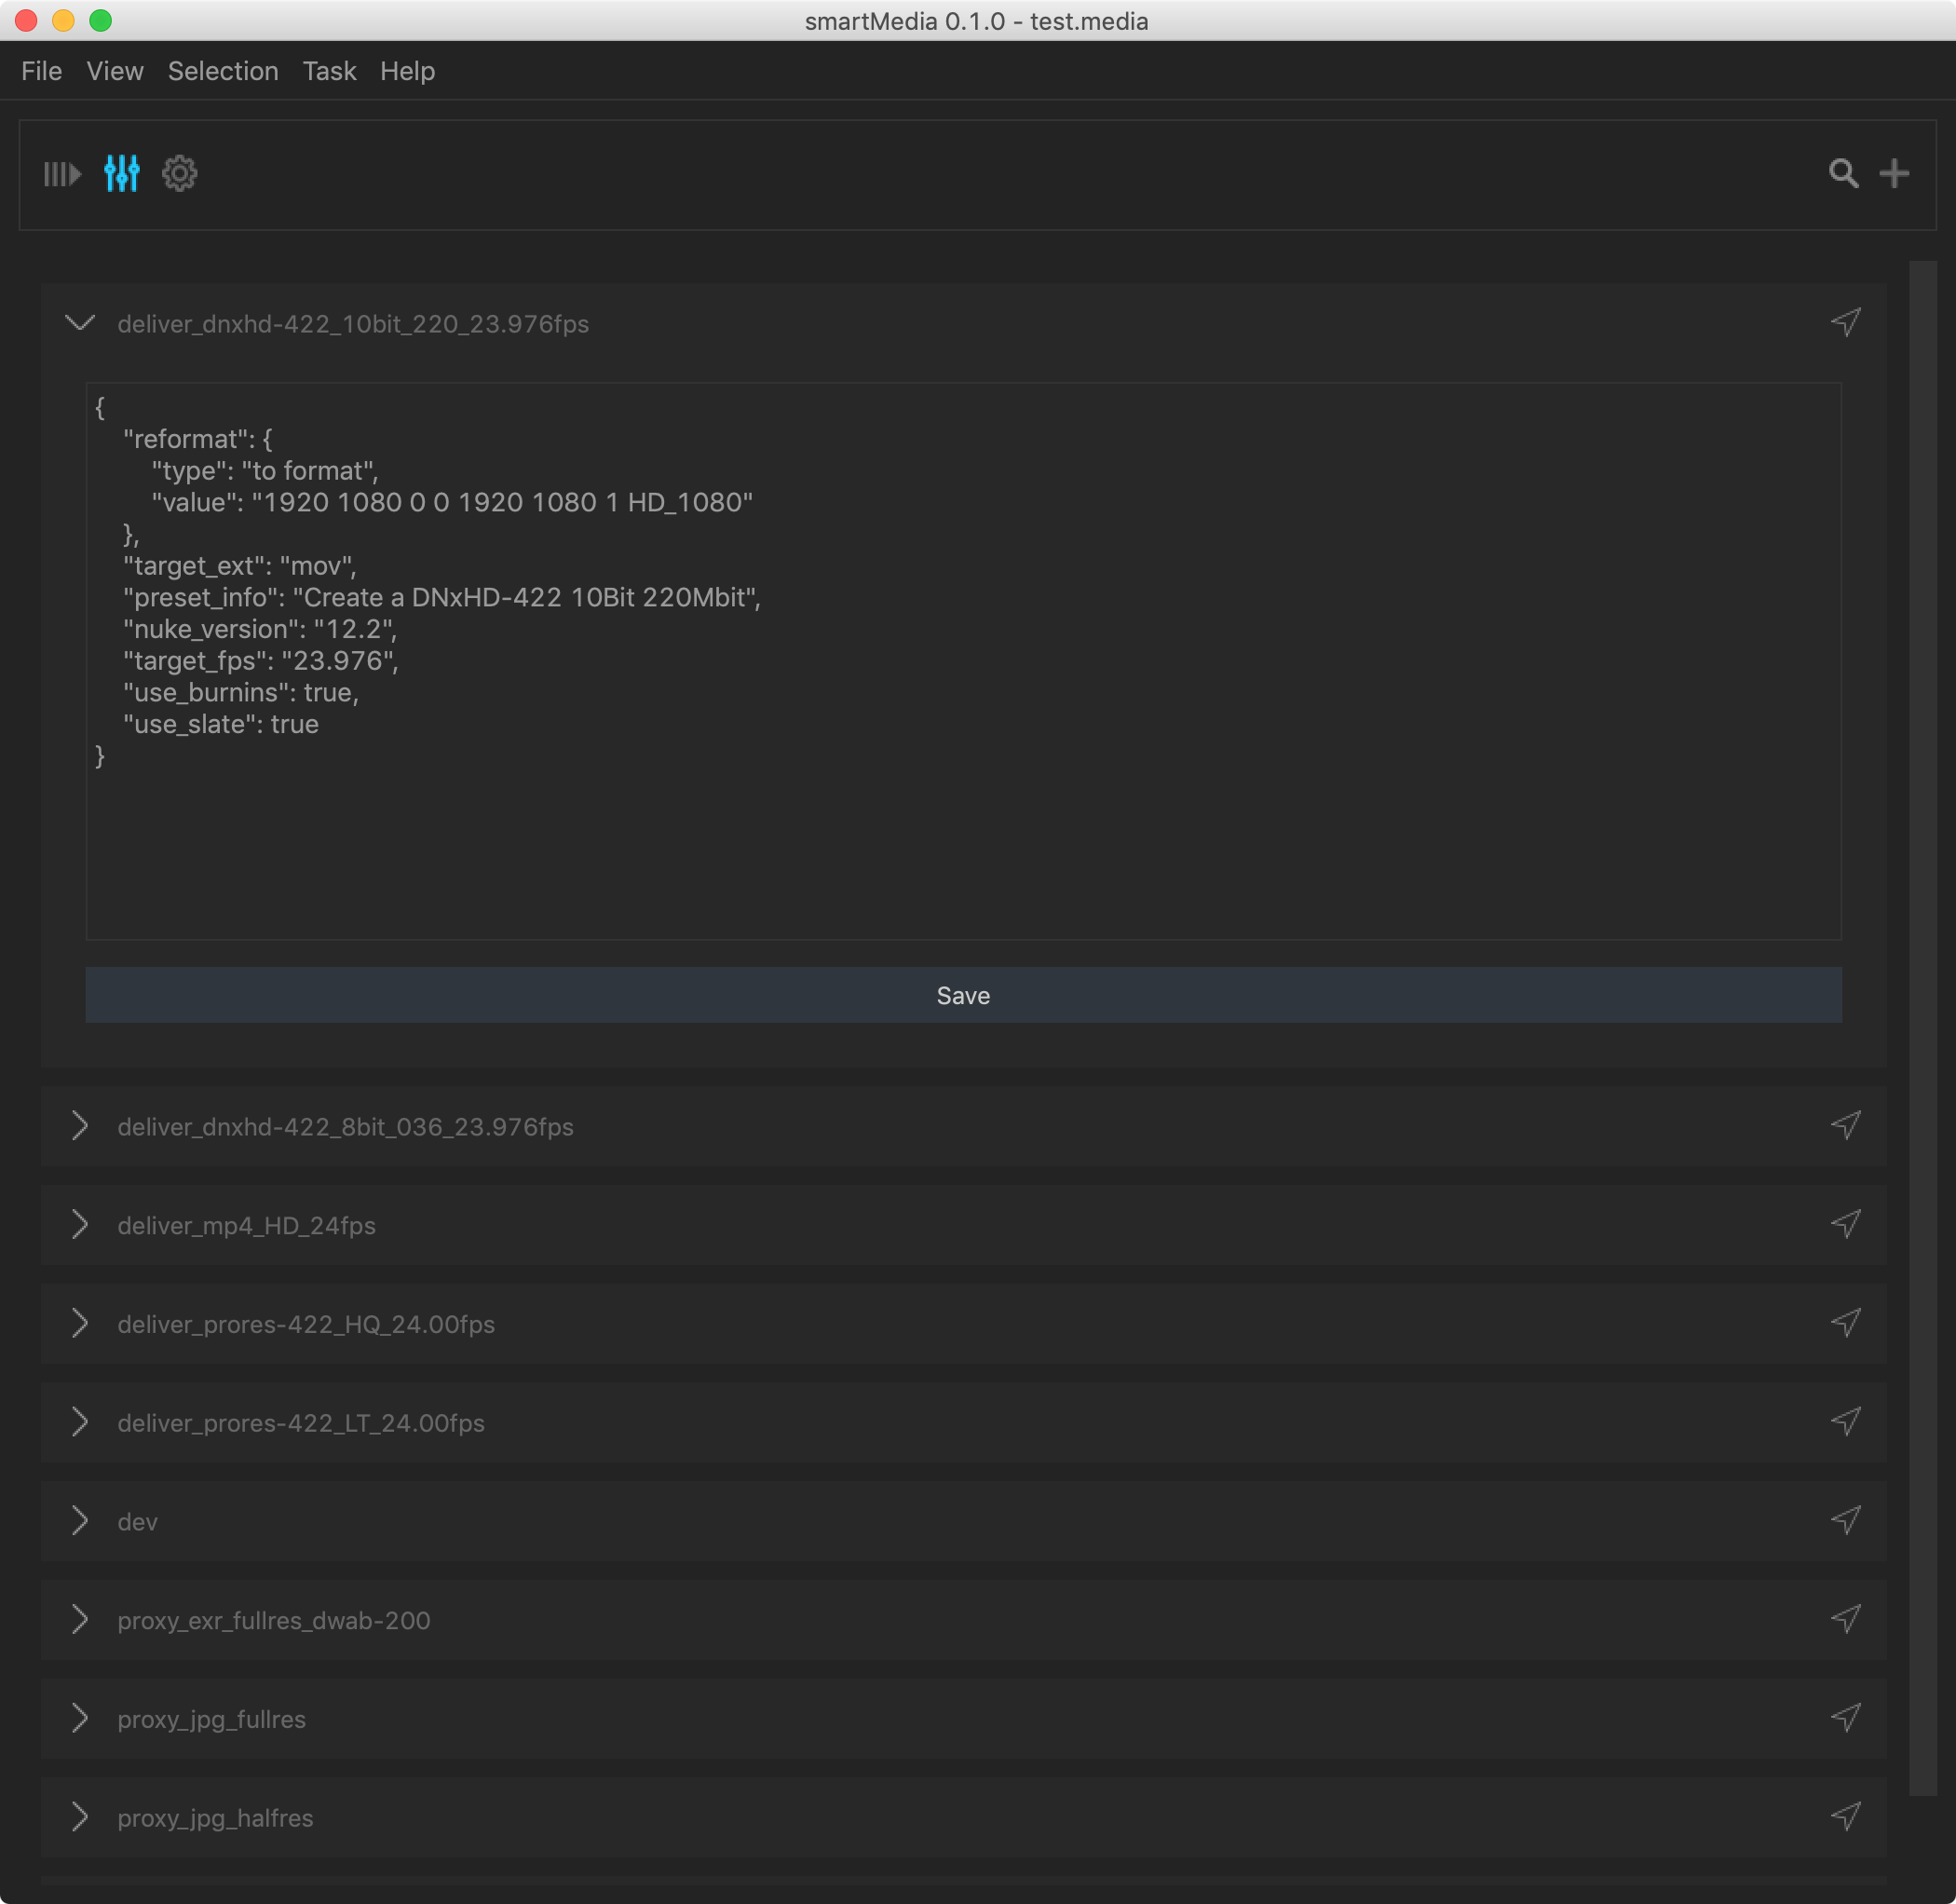
Click the magnifying glass to filter presets. Click the + button to create a new preset using the preset wizard.
For additional information about the preset wizard please refer to the preset wizard page.
Main section - Settings
The settings section can be accessed by clicking the presets button in the top bar or using the shortcut Ctrl + 3.
smartMedia contains many settings to adjust it to your needs. These get documented on the next page.