Creating new presets
smartRender ships with a handful of presets. You can easily create new presets via our preset creation wizard. These presets can then be applied to one or many tasks.
Note
Depending on your needs the wizard might totally nail what you require or you need further adjustments, that really depends on what you expect achieve with your presets. A preset can be as simple as converting a source to some other file format but it can do many more things like inject custom code, call your database, send emails and many more. Keep in mind that you can always use the preset wizard as a starting point and adjust afterwards if that is needed.
Let’s see how the preset creation wizard works by creating a new preset for delivering final comp outputs back to dpx files using a delivery resolution of 2048x1152 px in log format.
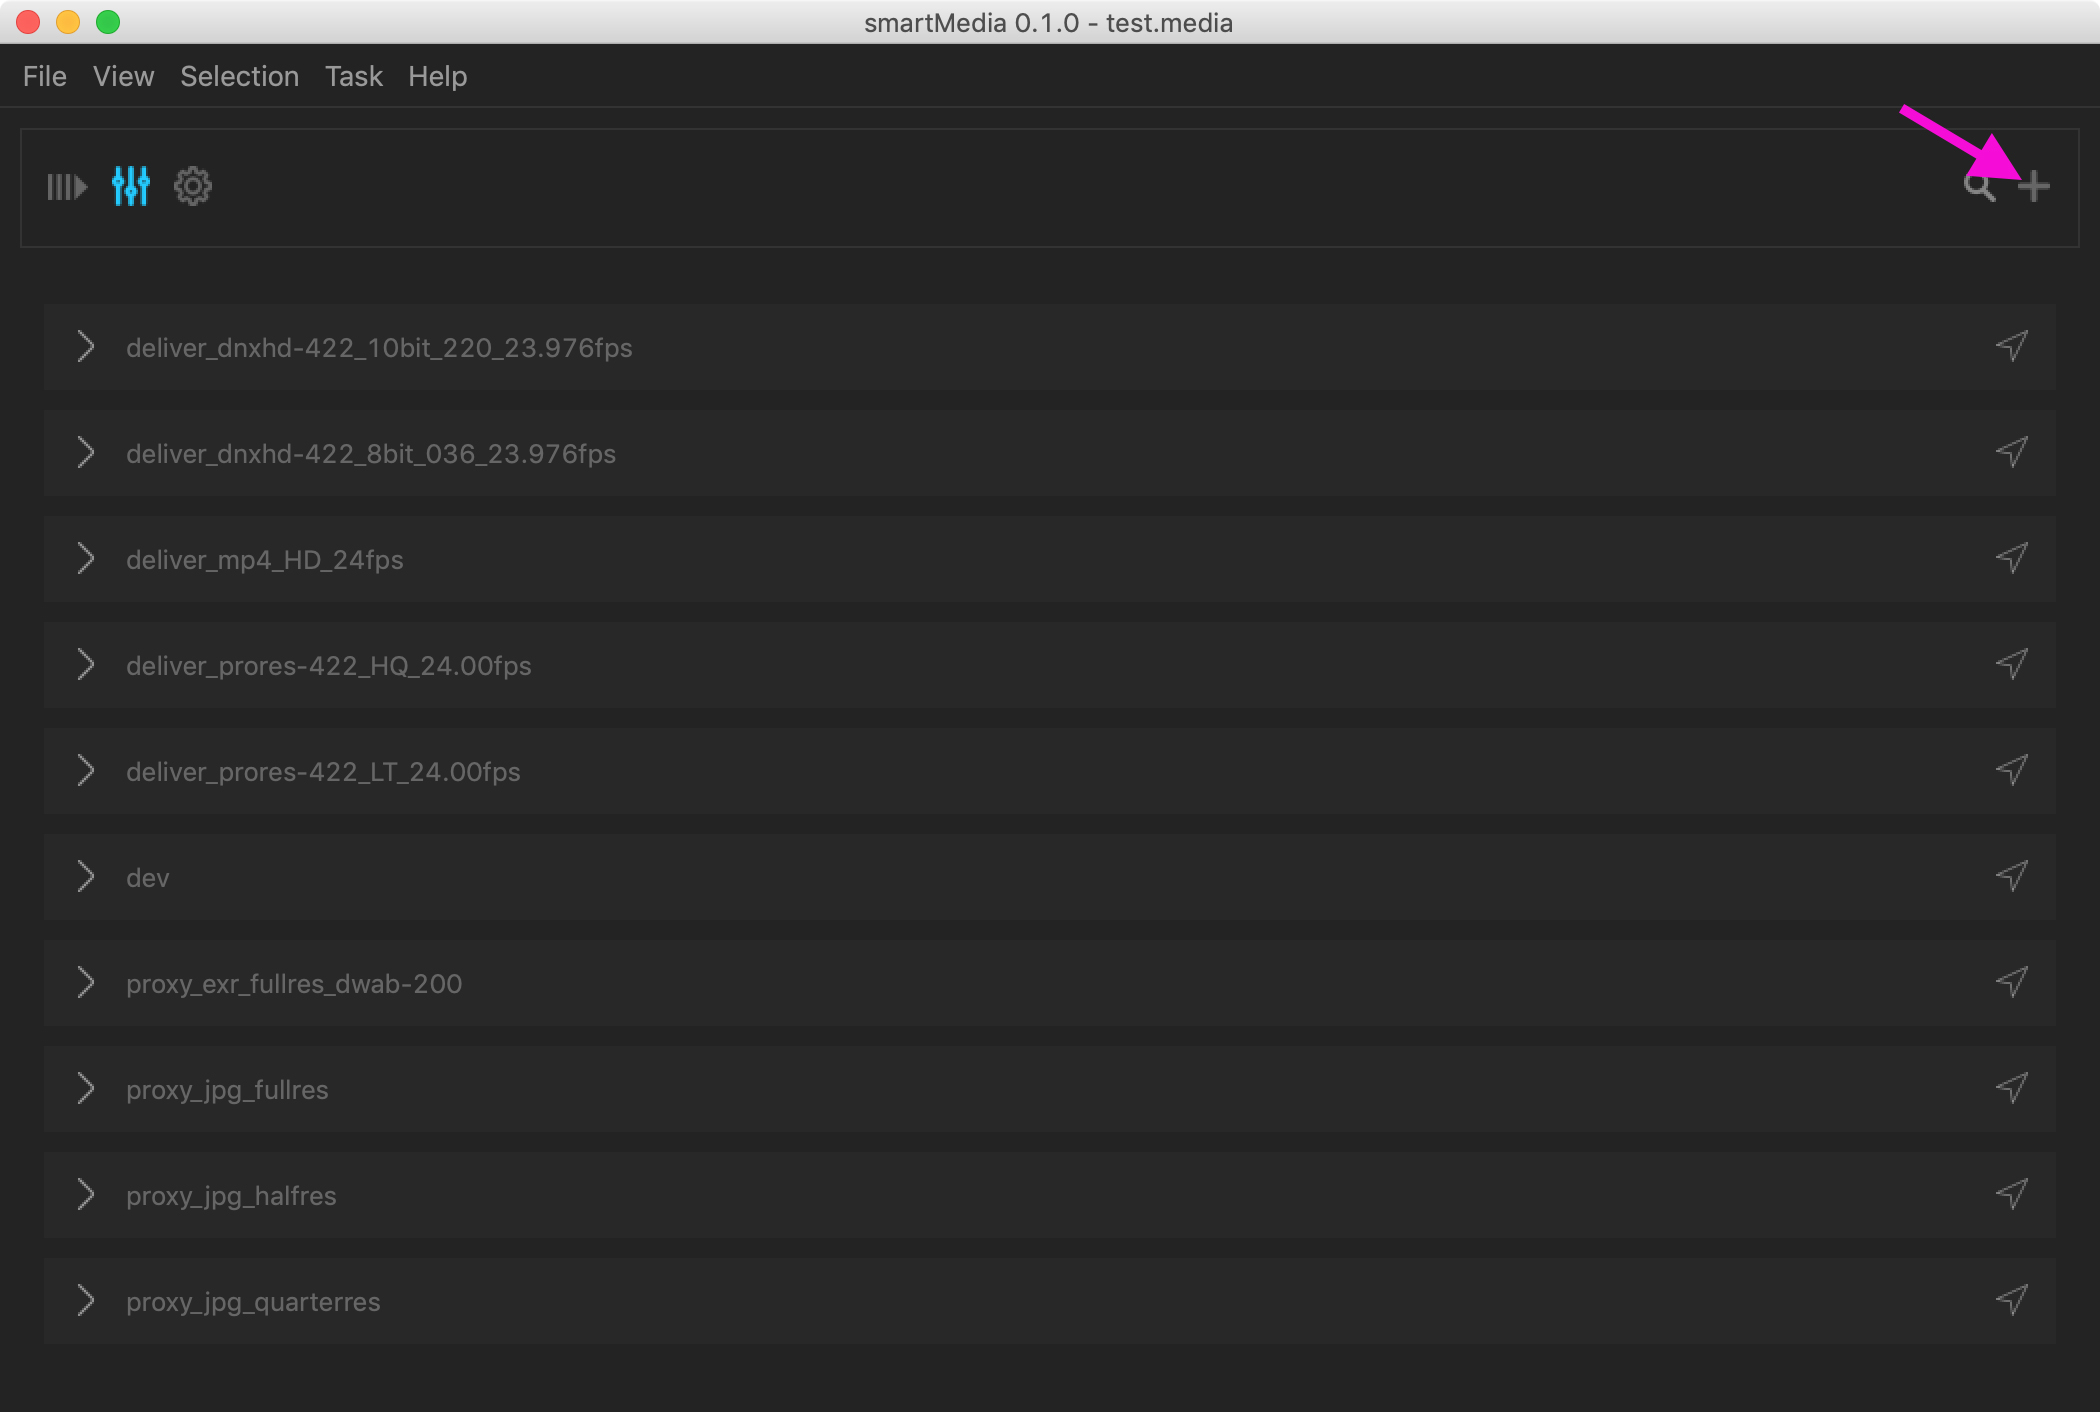
To launch the wizard start smartMedia and navigate to the presets section (hotkey: Ctrl+2)
The wizard launches. It is grouped by sections and will guide you step by step through the creation of a new preset:
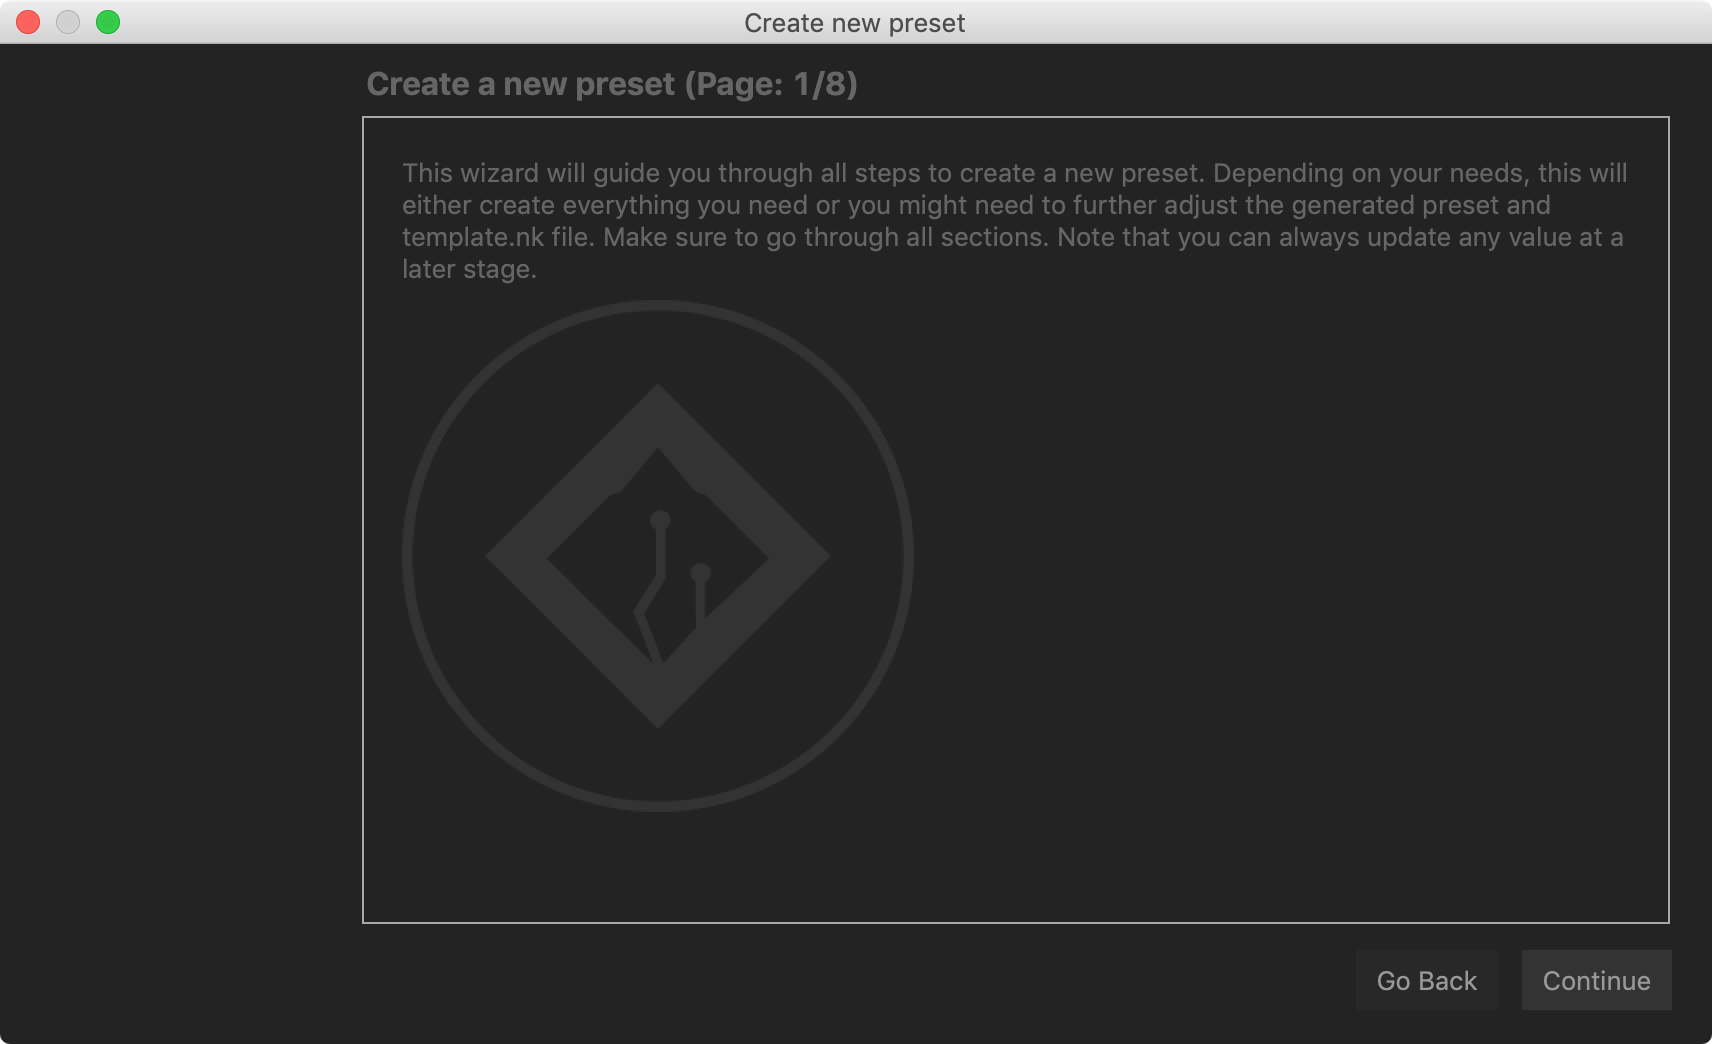
The preset wizard introduction page.
Click the ‘Continue’ button to start the creation:

Preset information: General information about the preset
The Preset information page asks you general information about the preset to create. Enter a name (required) and a description (optional). The description shows up in the task details so that everybody is aware what the preset is about.
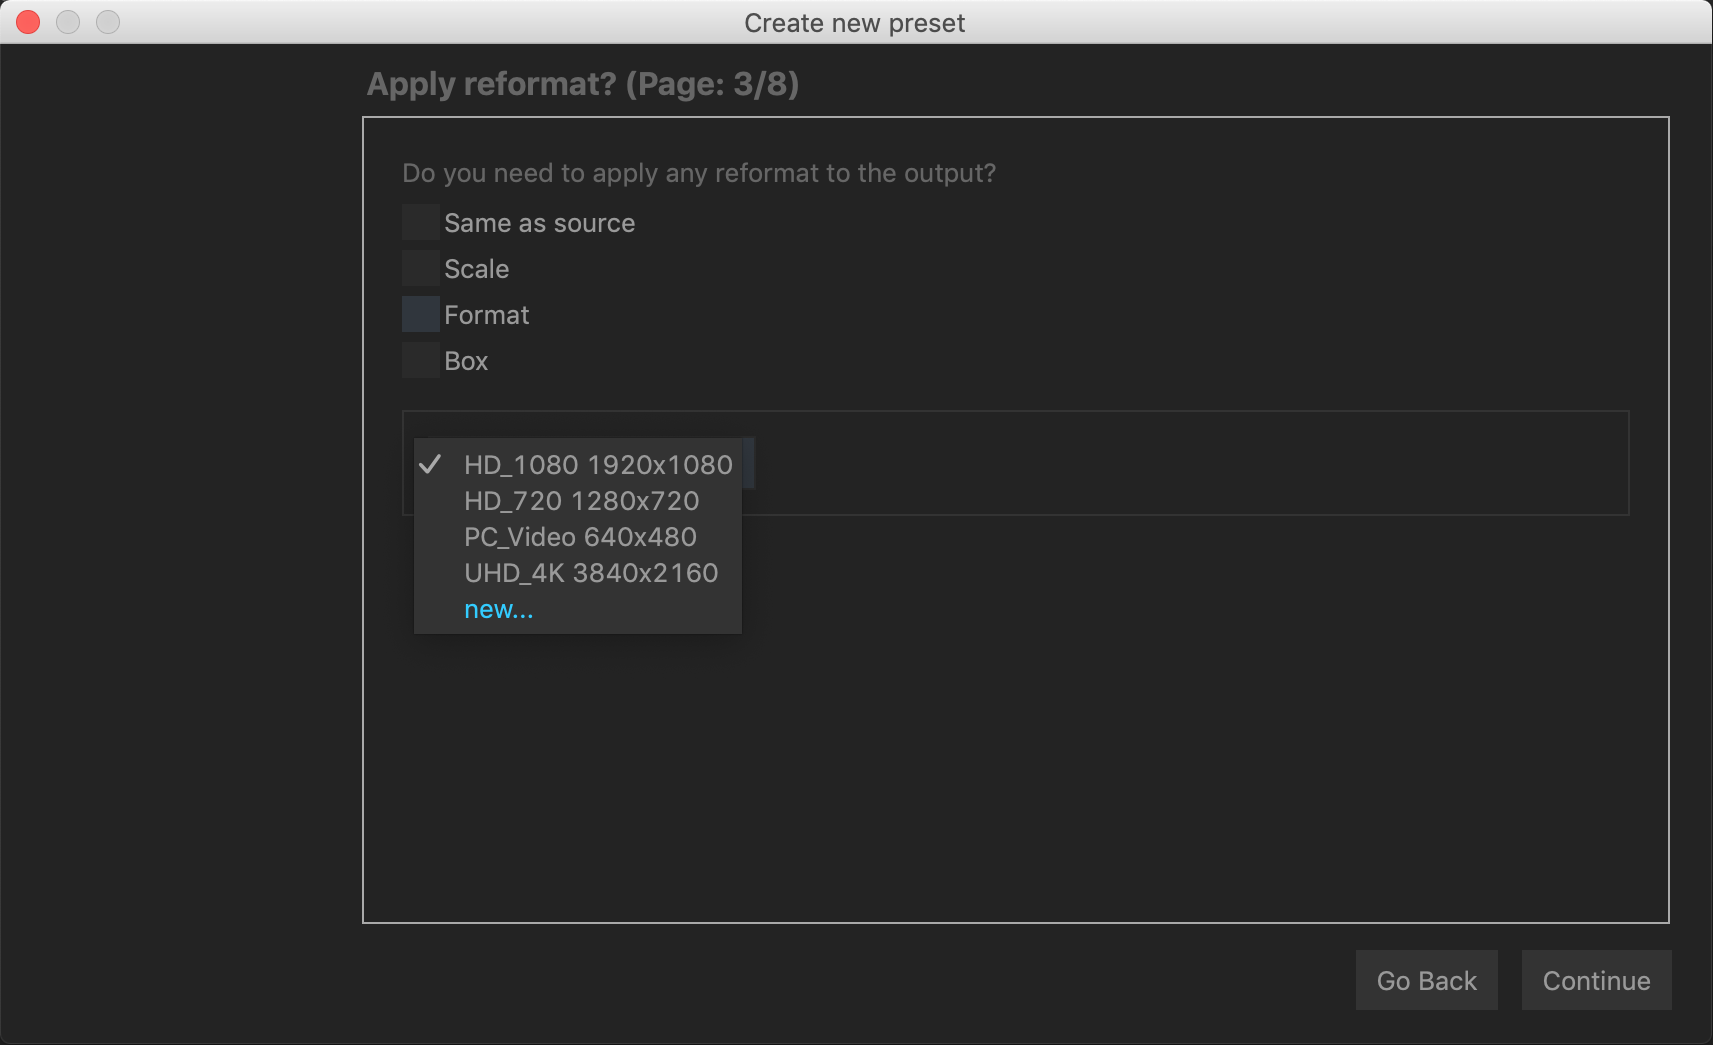
The reformat page: Reformat the source
The reformat page asks you about reformating the source to a specific format.
- Same as source: Use the same resolution as the source, i.e. don’t reply
- any reformat.
- Scale: Scale the source by a specific factor.
- Format: Use a specific format.
- Box: Use a specific width with auto calculation of the respective height or force a specific width and height.
Since we want to render in a specific format choose Format. The format dropdown contains by default a few formats. We can create a new format on the fly. Choose new…. In the upcoming dialog enter as follows:
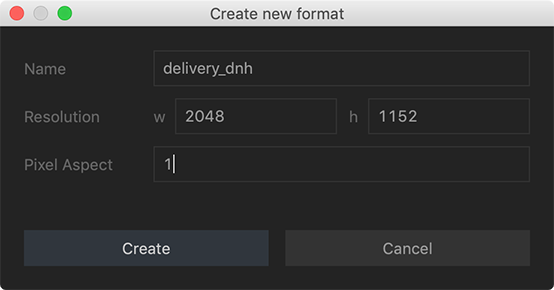
Create a new output format on the fly
Click the ‘Continue’ button.
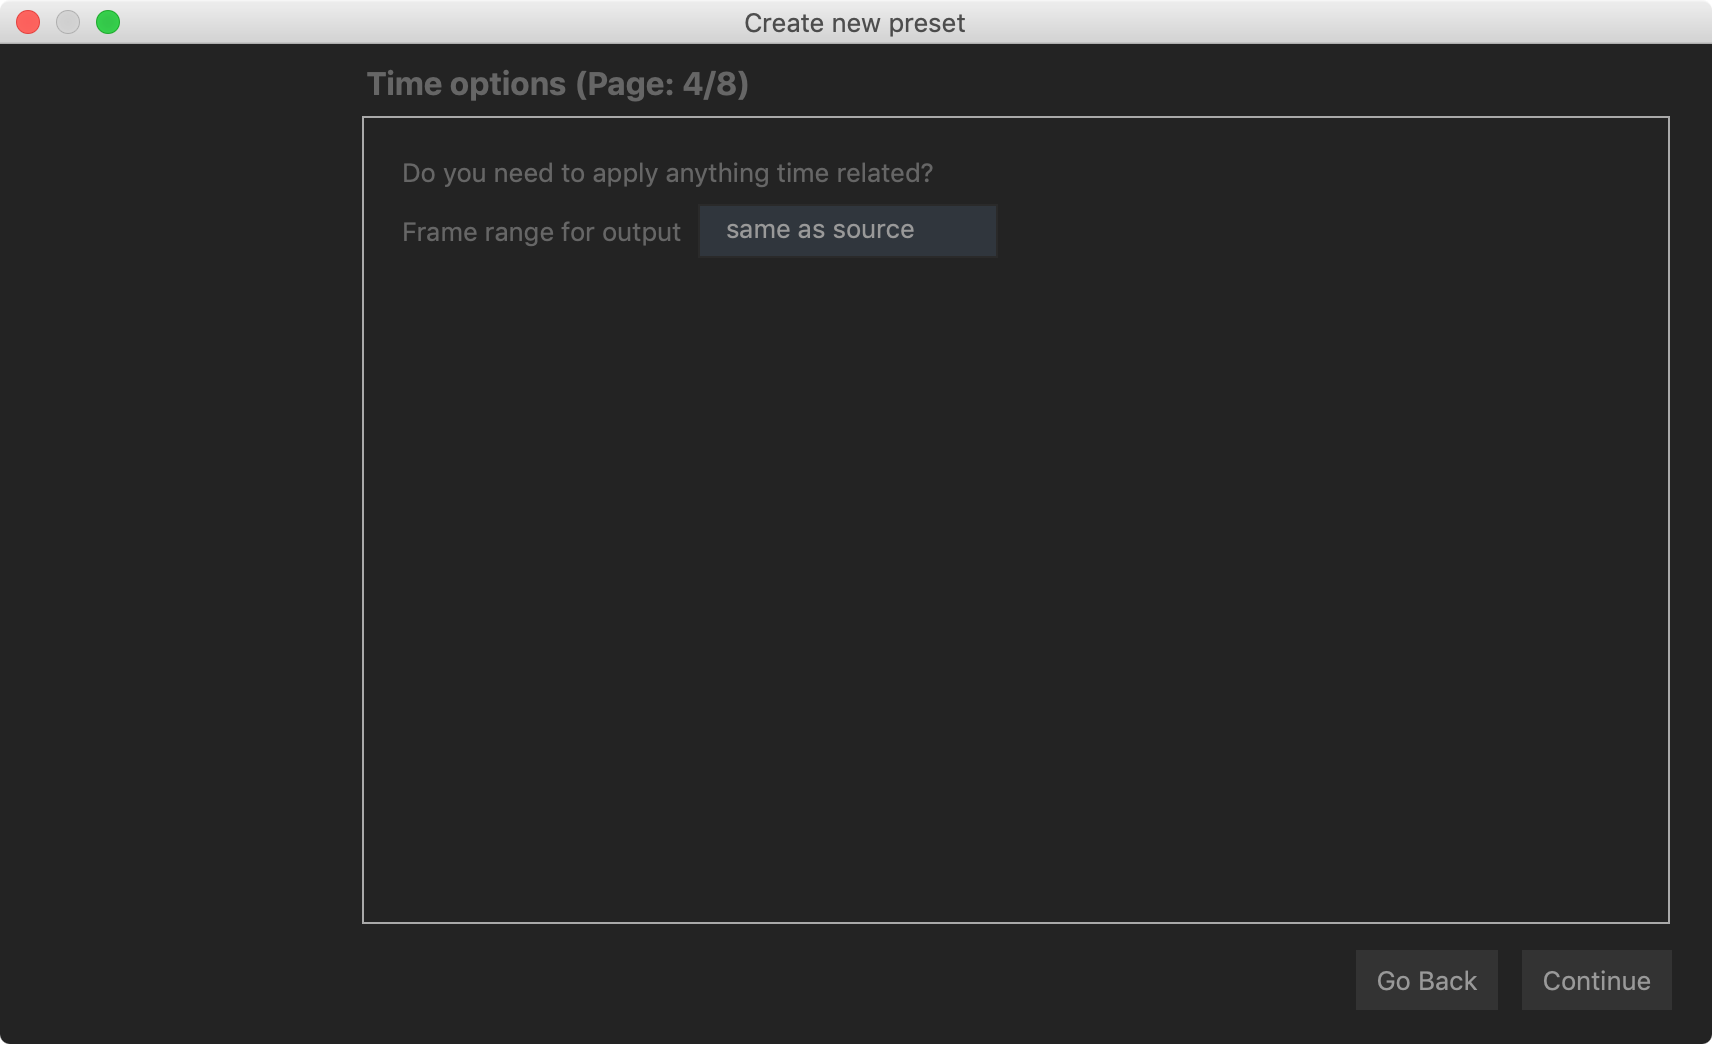
Edit time specific settings
In the time options page you are asked about timing specific things. Render the frame range using the same frame range of the source of force a specific frame as start frame. Let’s keep ‘Same as source’.
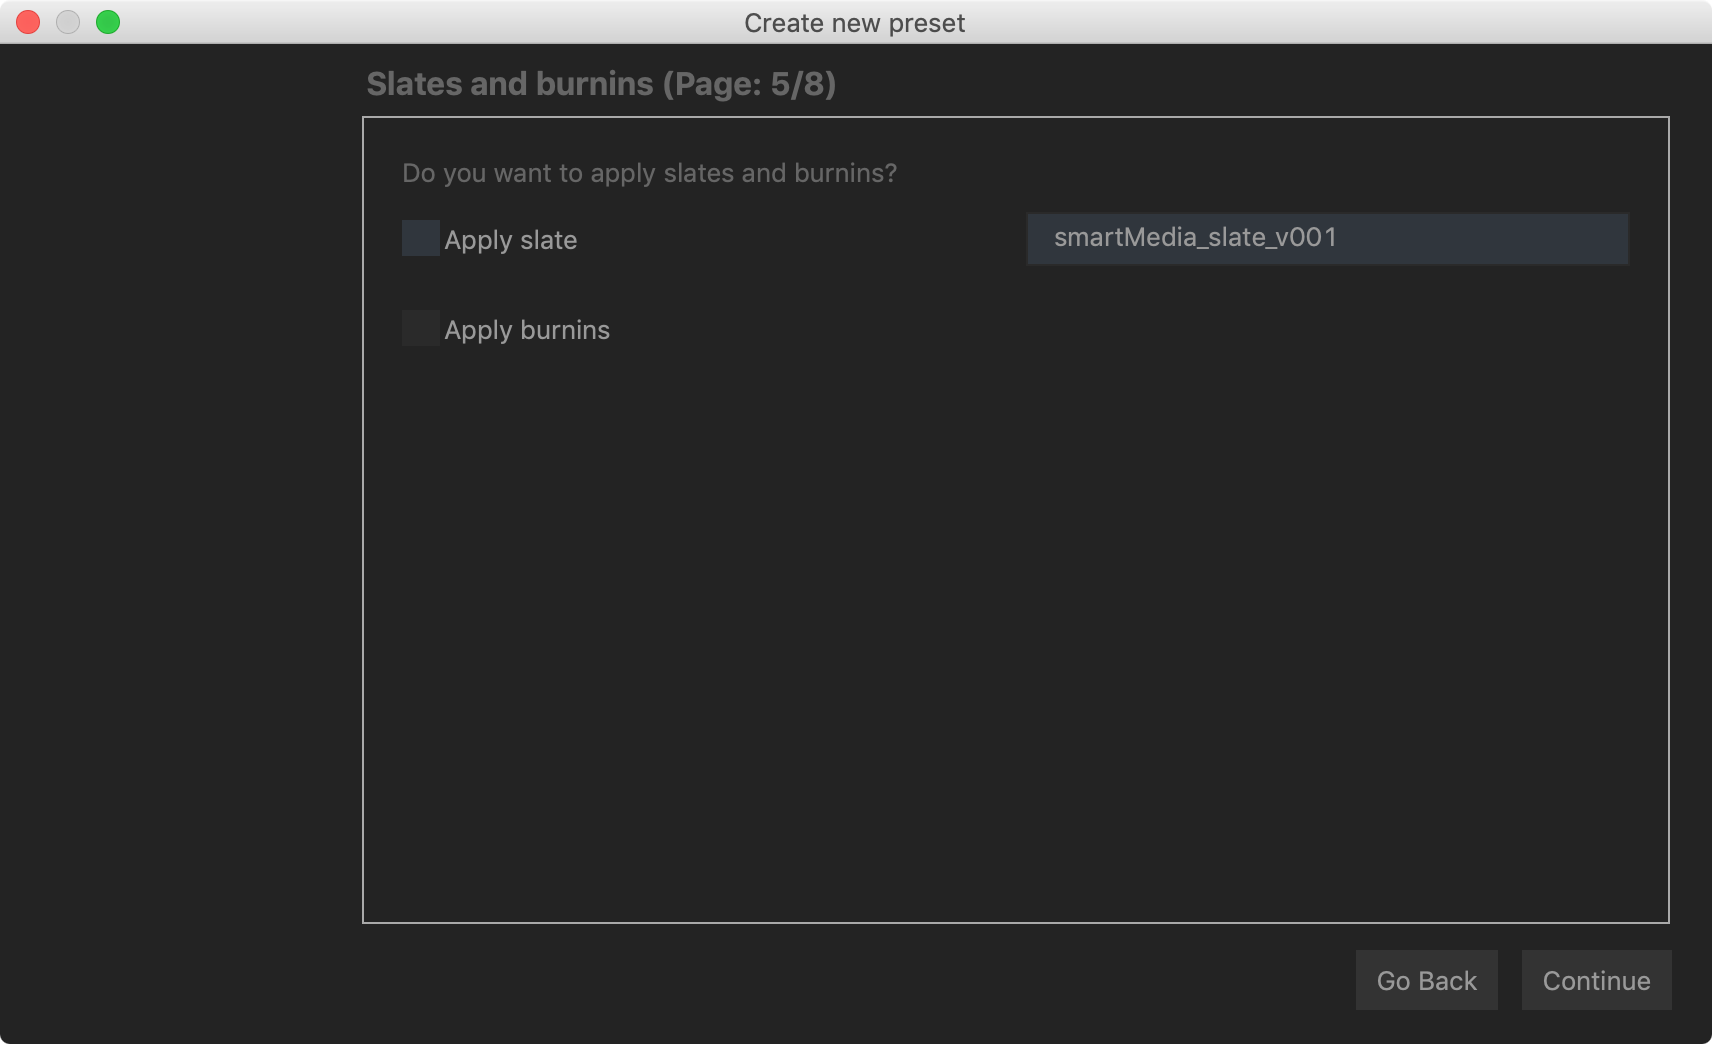
Apply slate and burnins
The next page lets you add slates and burnins to your outputs. smartMedia ships with a slate and burnins node. You can create additional ones and choose them here. How that works is documented in the advanced section - adding your own slates and burnins.
Since we want to use our preset for delivering final comp renderings back to our client, let’s check ‘Slate’ so that we prepend a slate before the rendering but keep ‘Burnins’ unchecked. Again, as mentioned above, you can always adjust this afterwards at any time in case you need to change your preset.
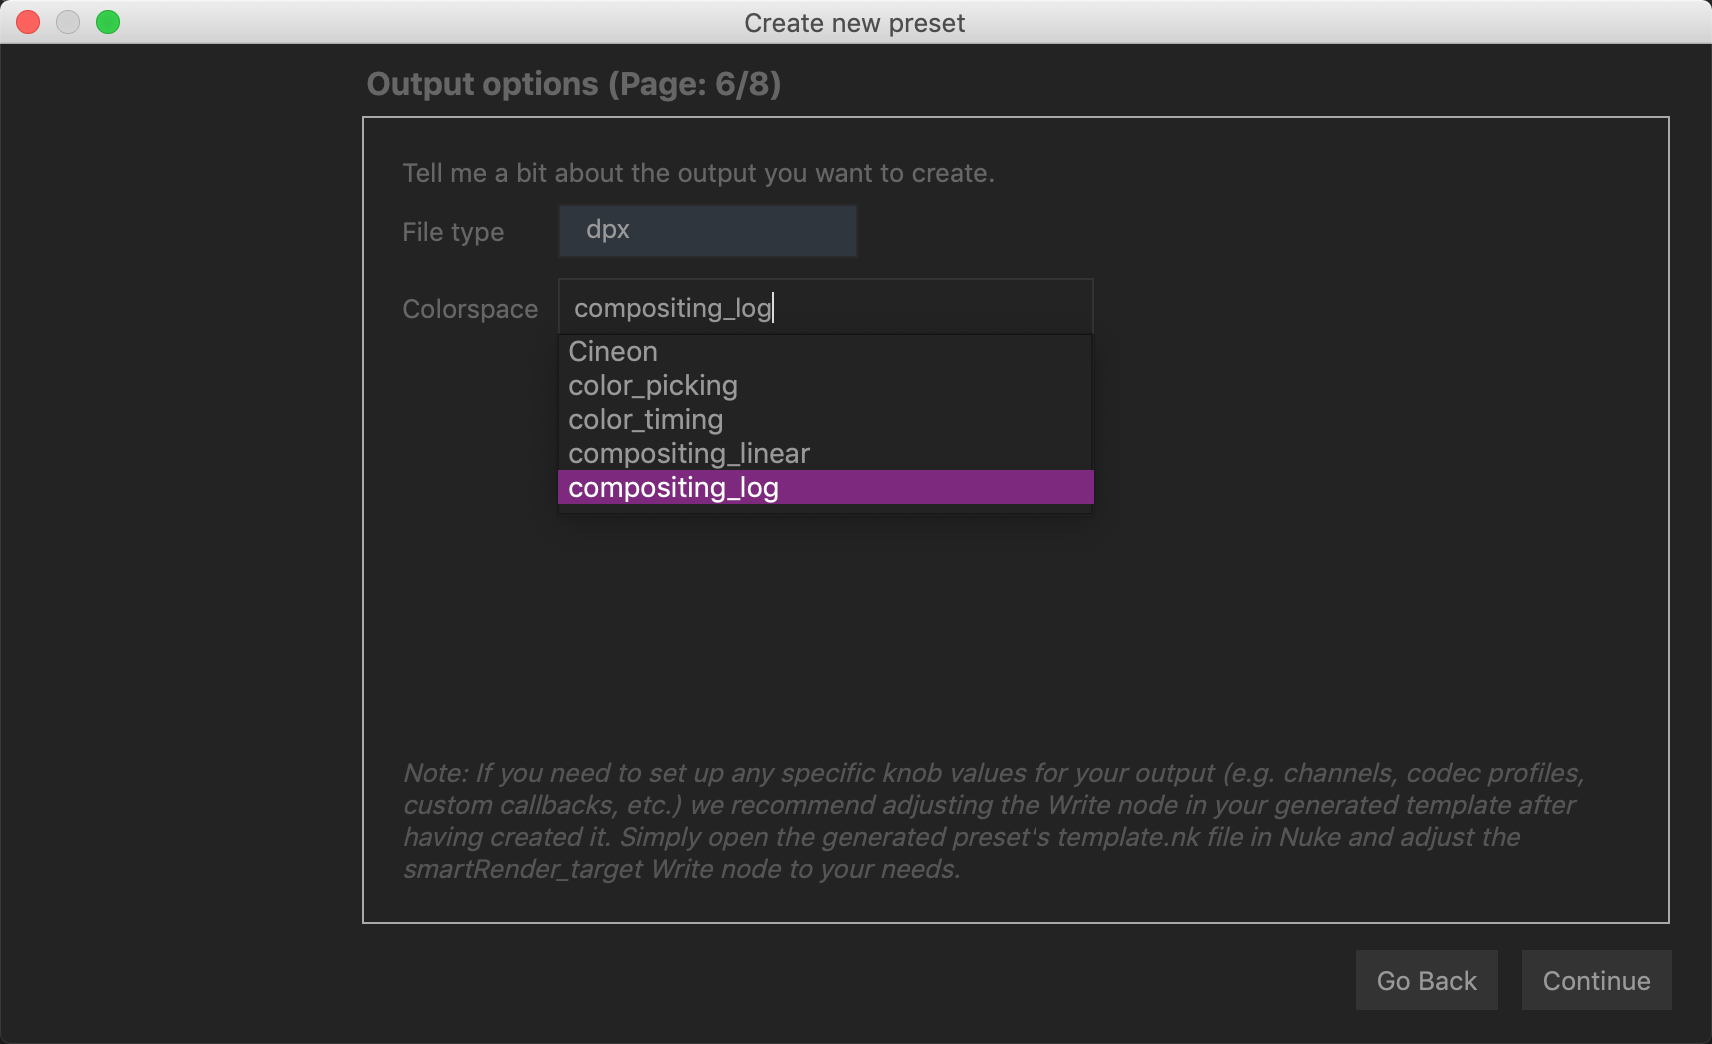
Set up output options like file type and output colorspace
On the next page we get asked about the file type and output colorspace. Choose ‘dpx’. In the ‘Colorspace’ type ‘c’. From the suggestions choose ‘compositing log’. You can also enter anything else and you are not restrictred to the suggestions in here.
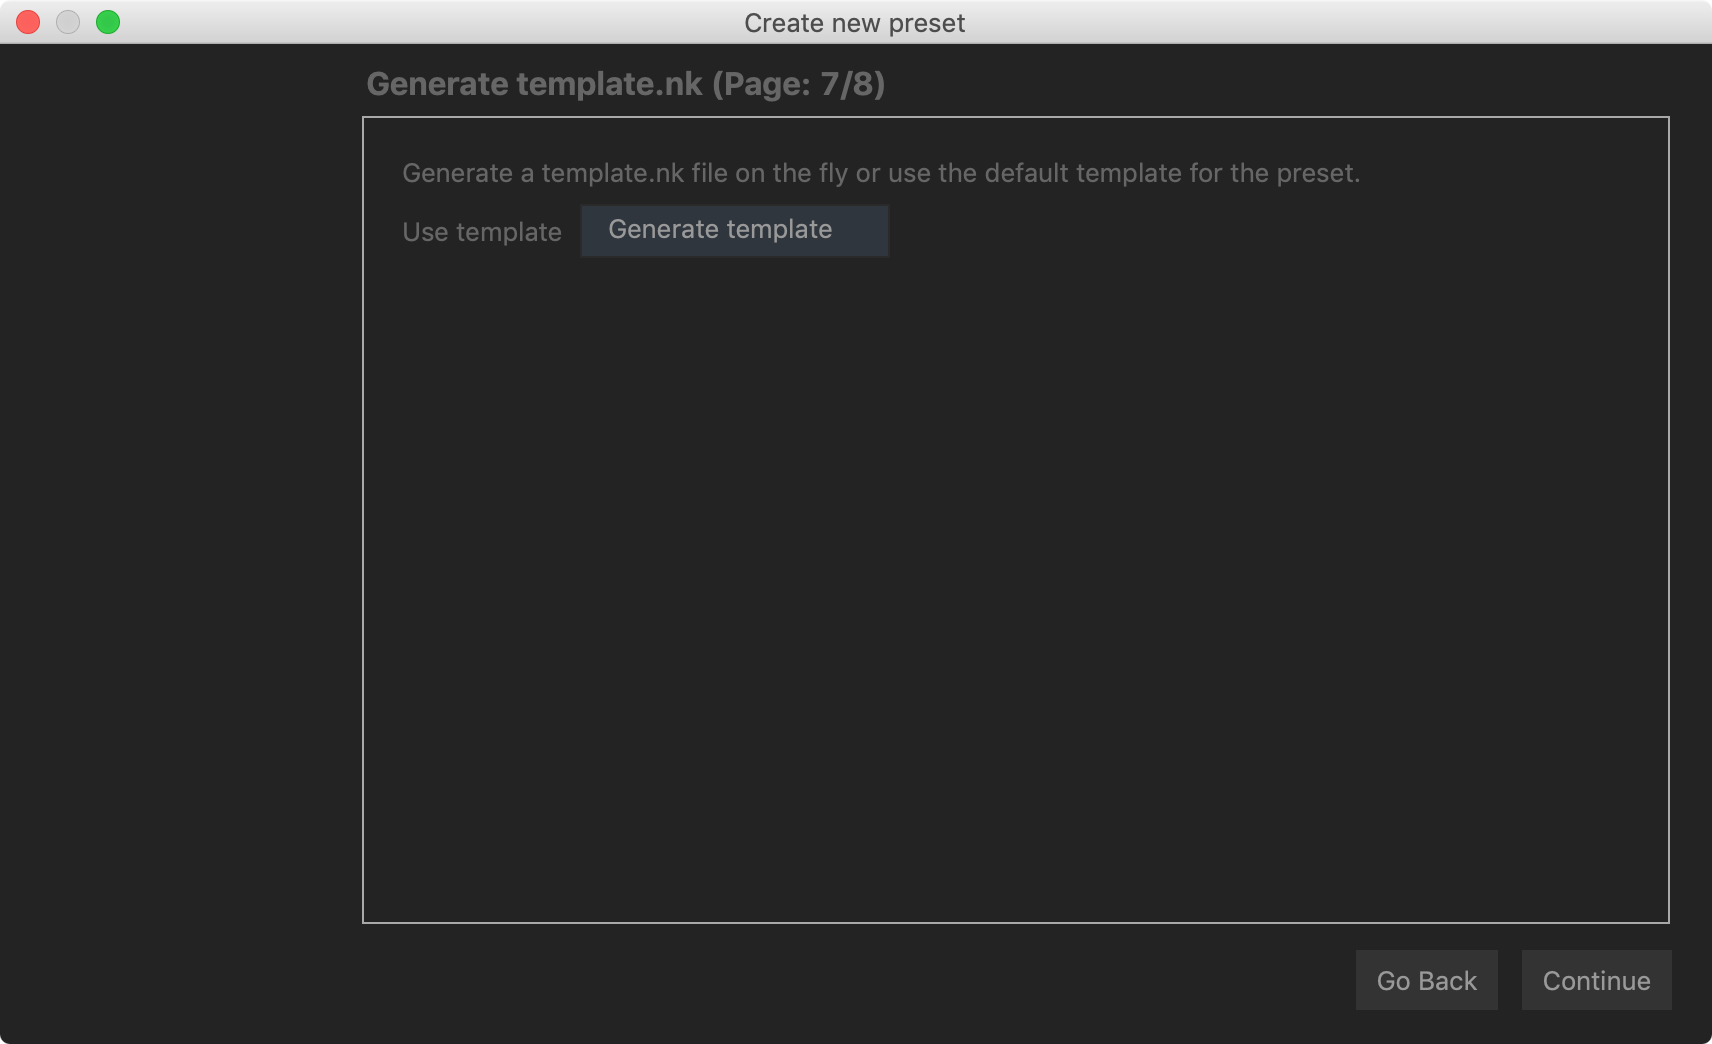
Generate a template.nk from previous code or using the _default preset
On the next page you get asked if smartMedia should generate a template.nk file automatically for you or if you would like to use the template.nk file from the _default preset. The template.nk file is the file that will get populated with your task data. Generating a minimal template.nk from code is fine for now, so let’s leave it at ‘Generate template’.
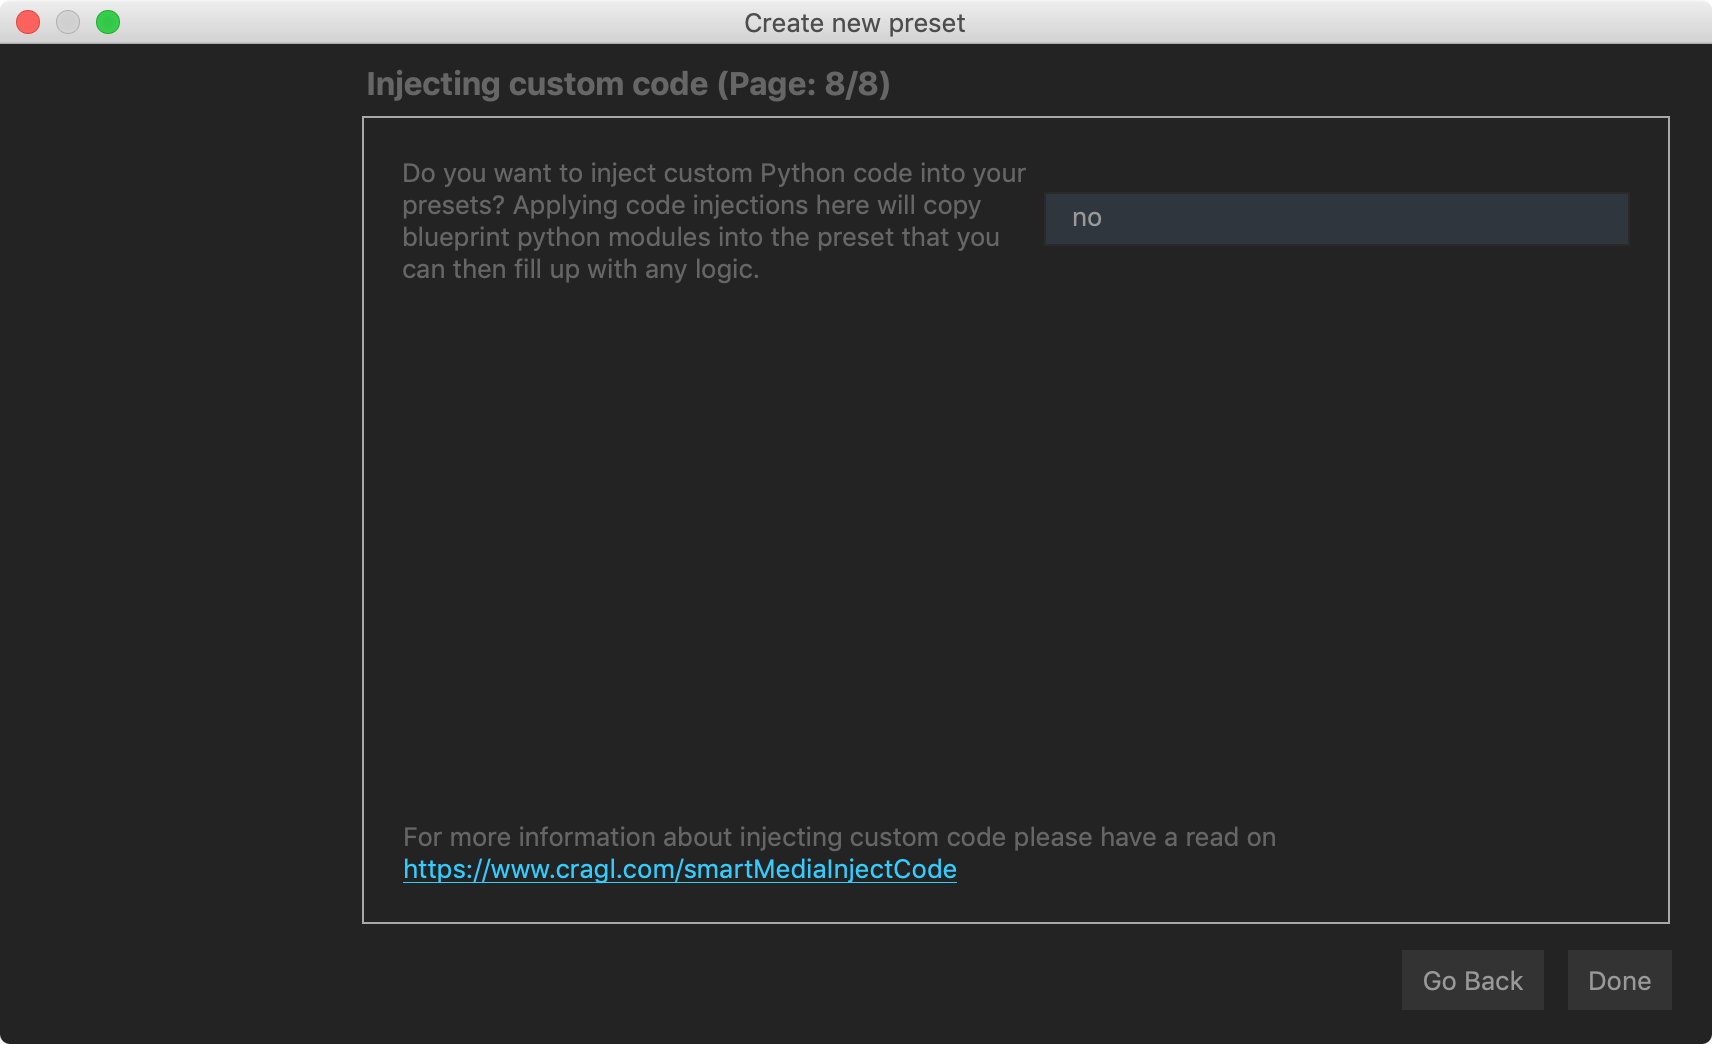
Inject custom Python code in various locations
The final page lets you create automatically create blueprints to use for code injections in various locations, e.g. as soon as you apply a preset and before and after rendering. You can use these injections to basically do whatever you want. As an example you could call your database for additional information to pipe into your task to render, update your database, copy some files, write emails once renderings have finished and so many more things. How this works gets documented here
Let’s leave the choice at ‘no’ for now and not inject any custom code into our preset.
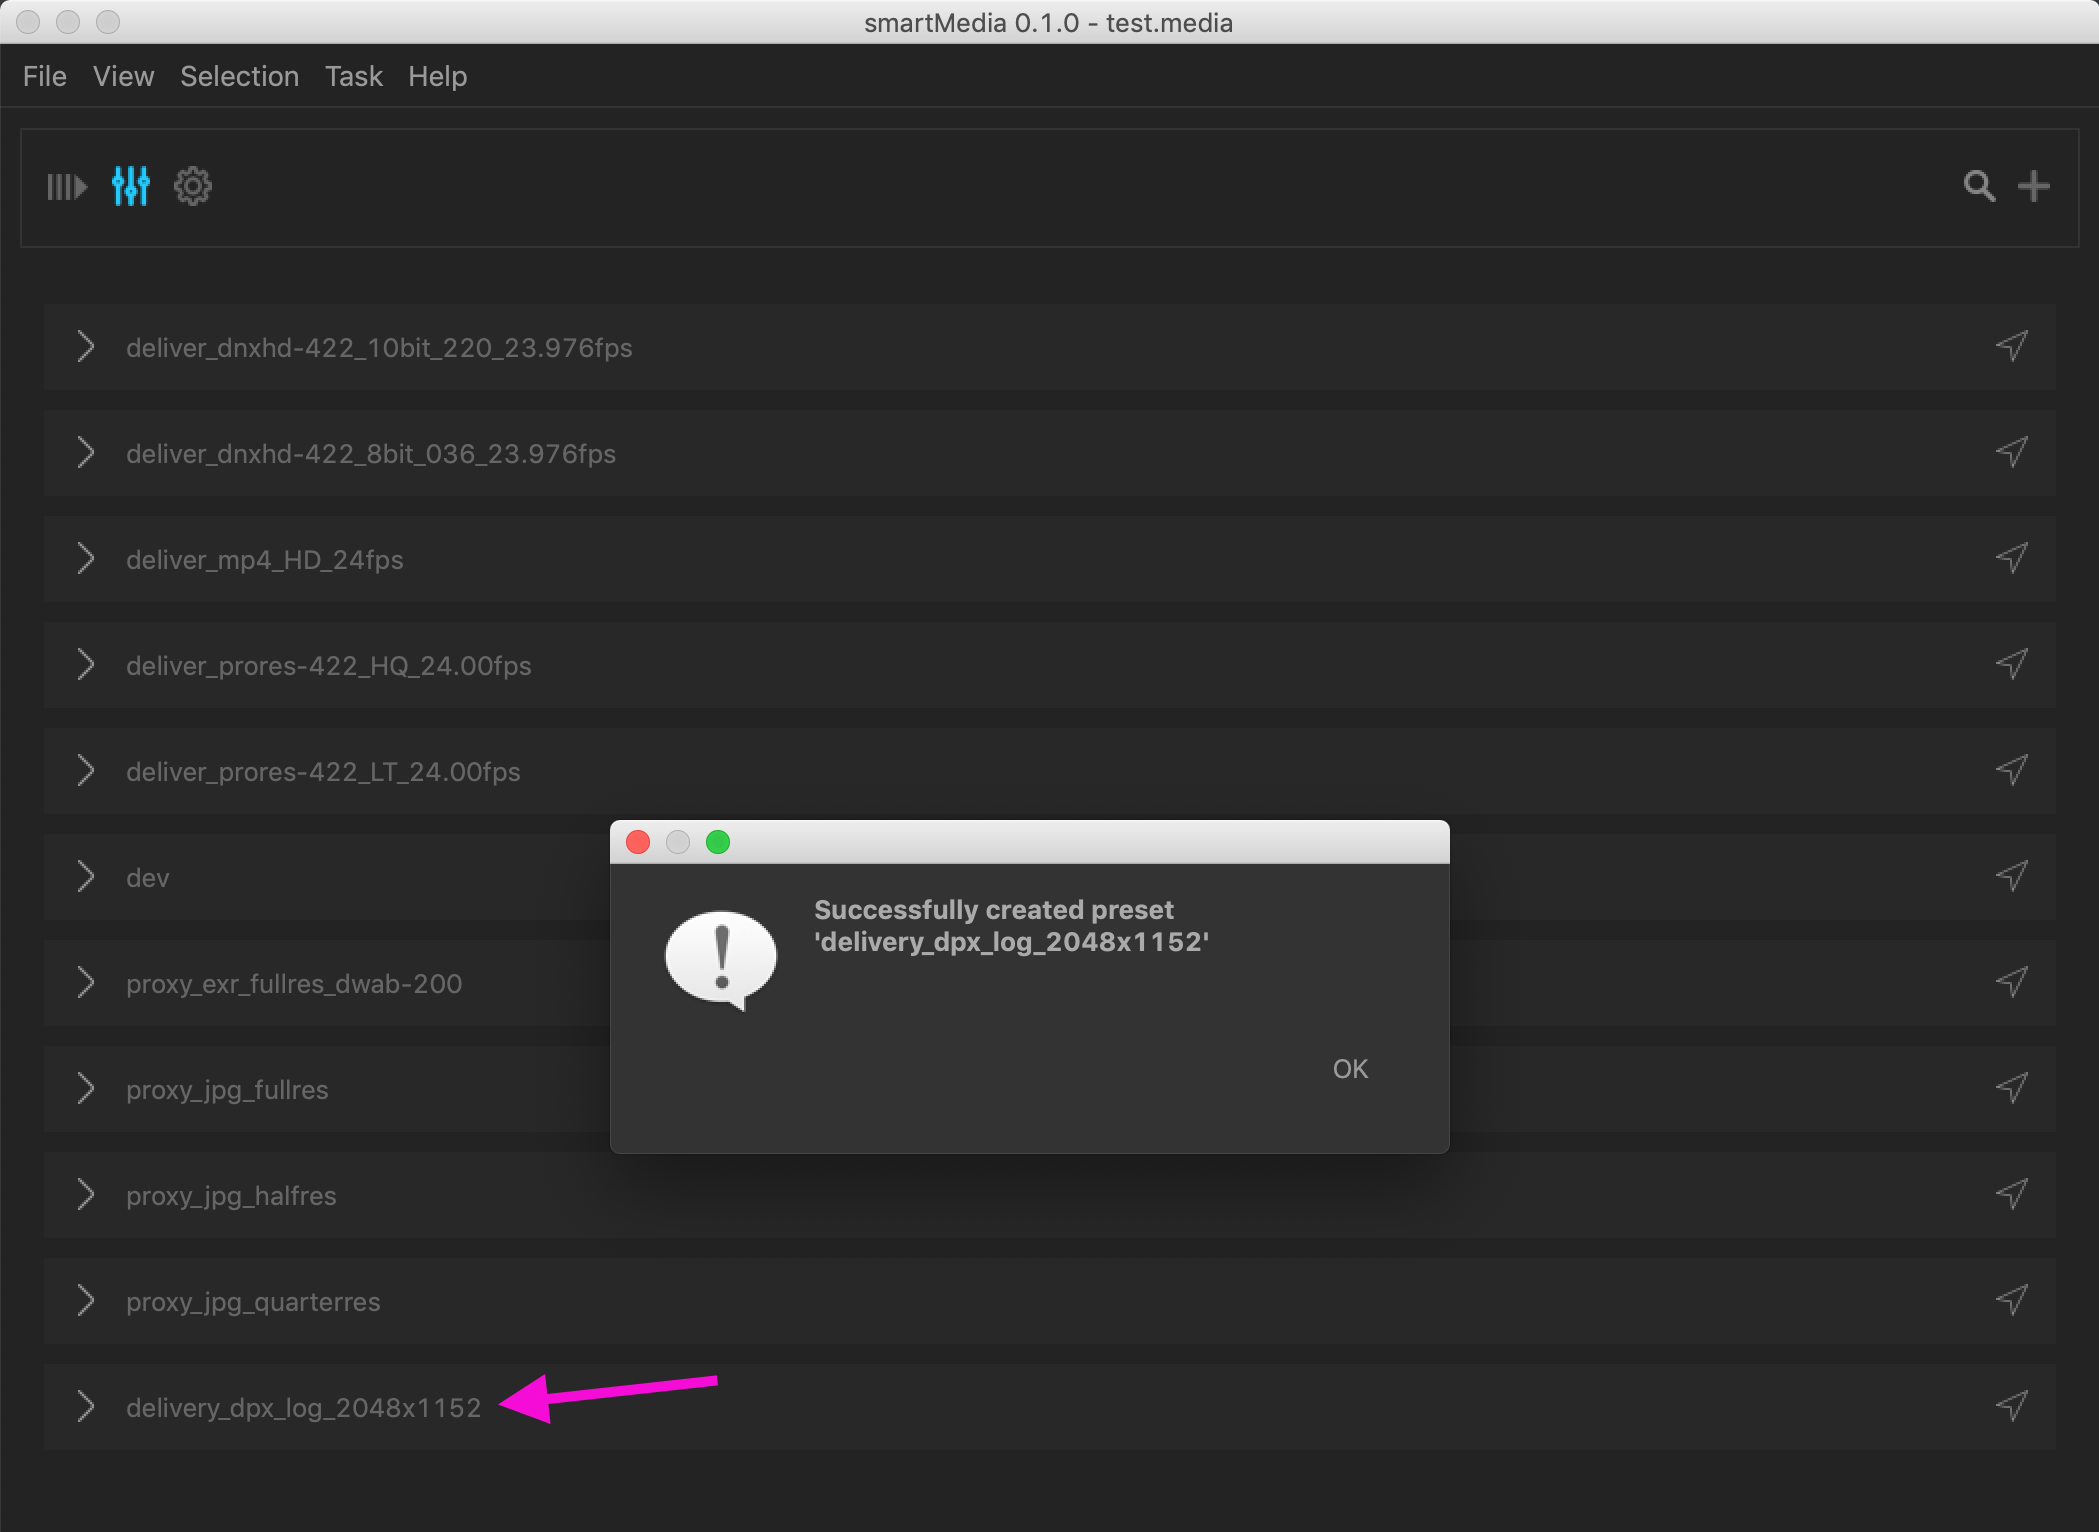
Finally, click ‘Done’. The preset was successfully created:
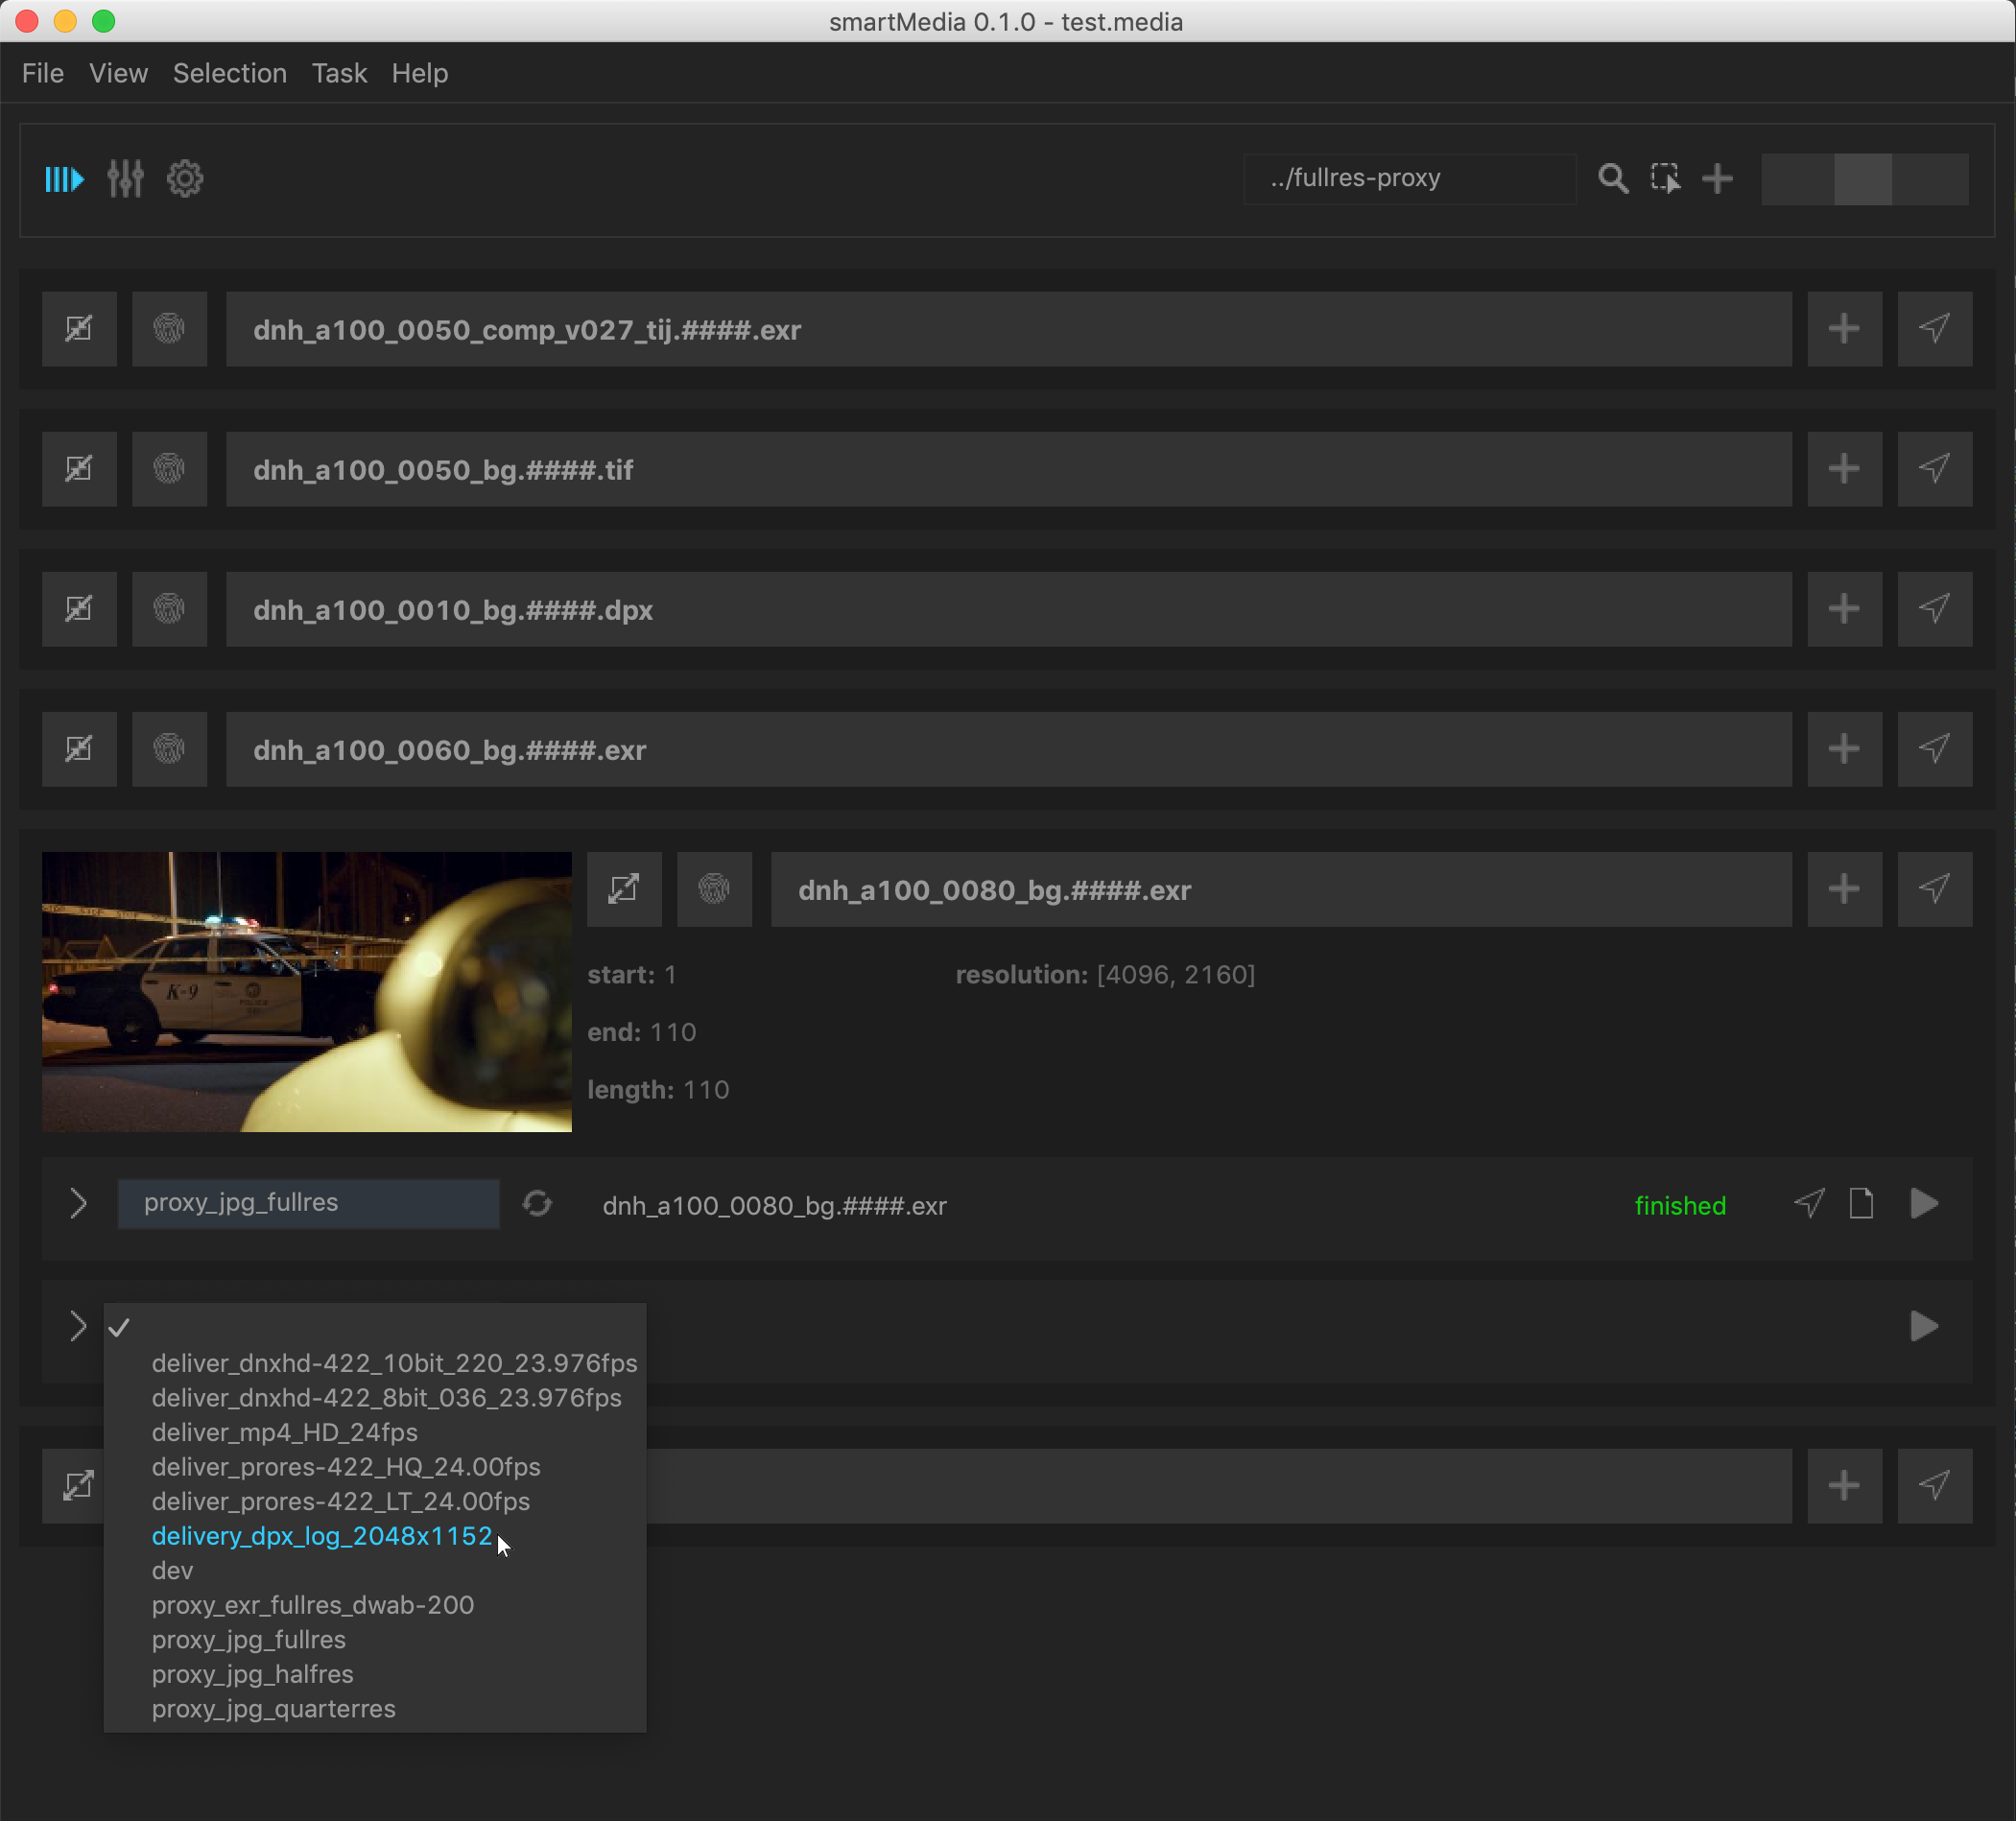
Now we can use it right away. Navigate back to the jobs section (hotkey: Ctrl+1). Create a new task for any source and choose the newly created preset from the presets dropdown menu:
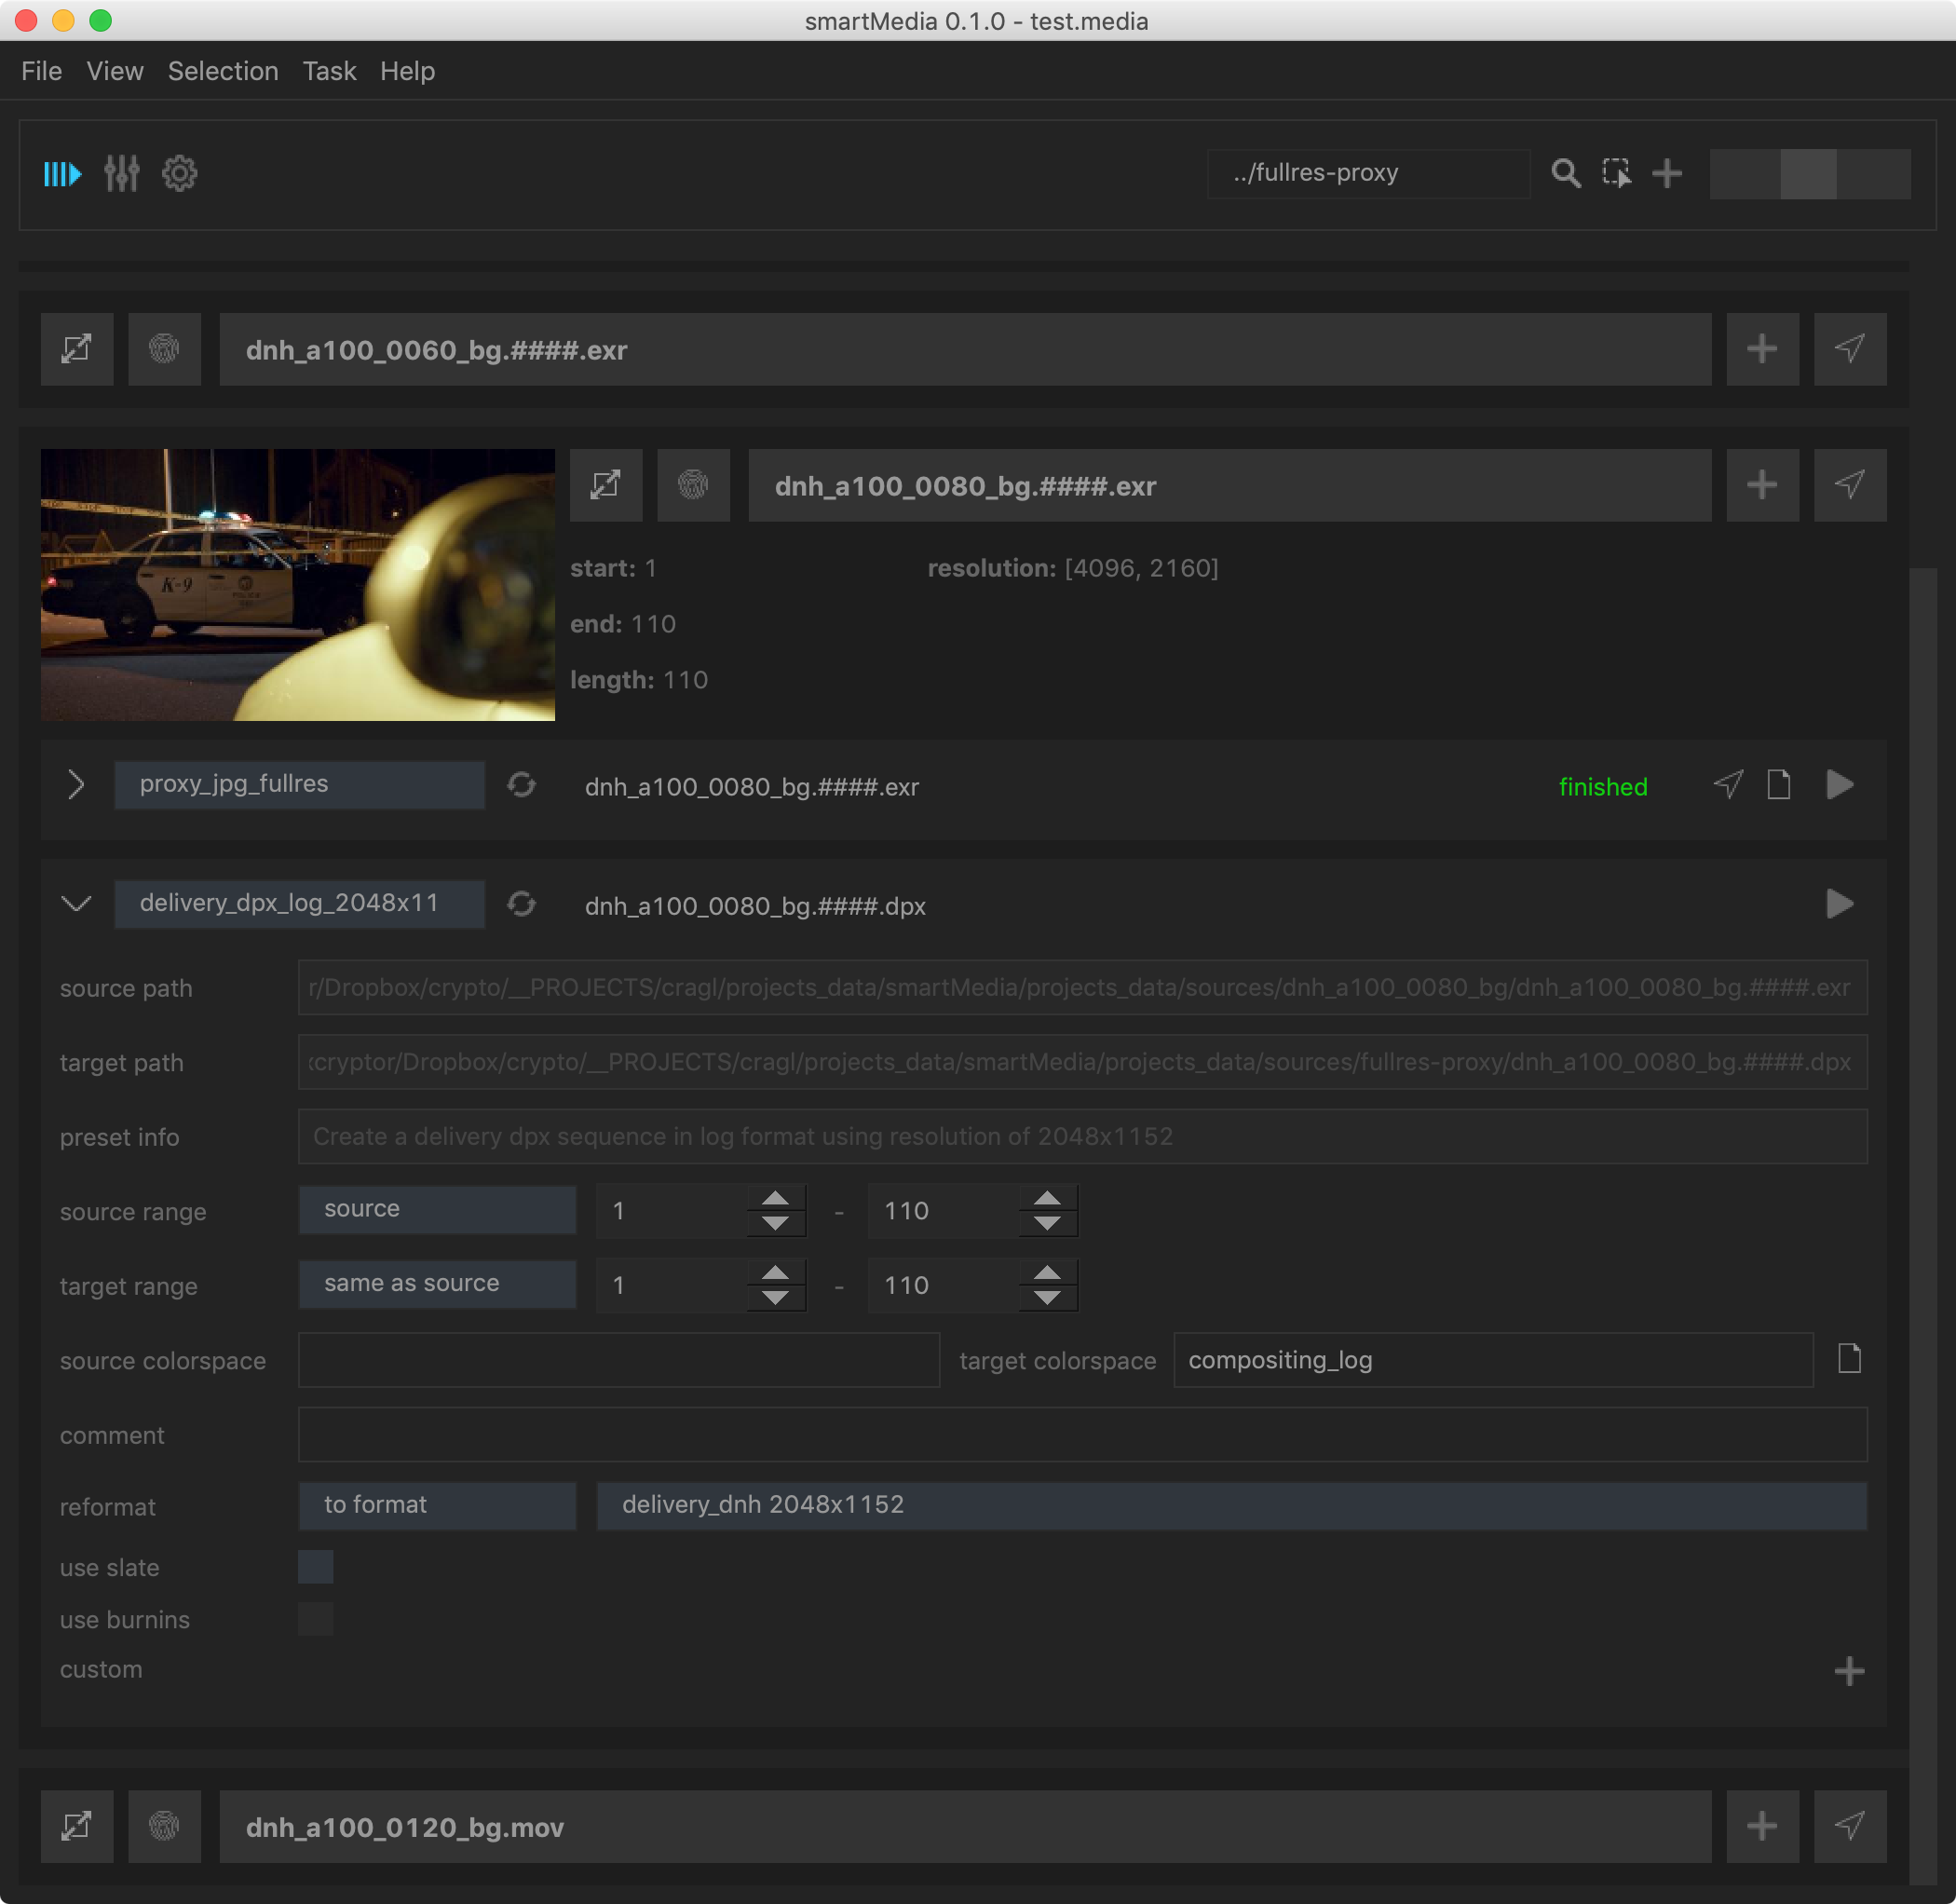
You can now click the arrow on the task’s left to adjust the task to your needs if required:
Further adjusting the generated template
Depending on your needs, there is nothing more to adjust, or you might need to further adjust you template. That depends totally on what you want to achieve with your presets. There are several ways to further adjust you presets.
Click the arrow on the left to toggle showing the preset details:
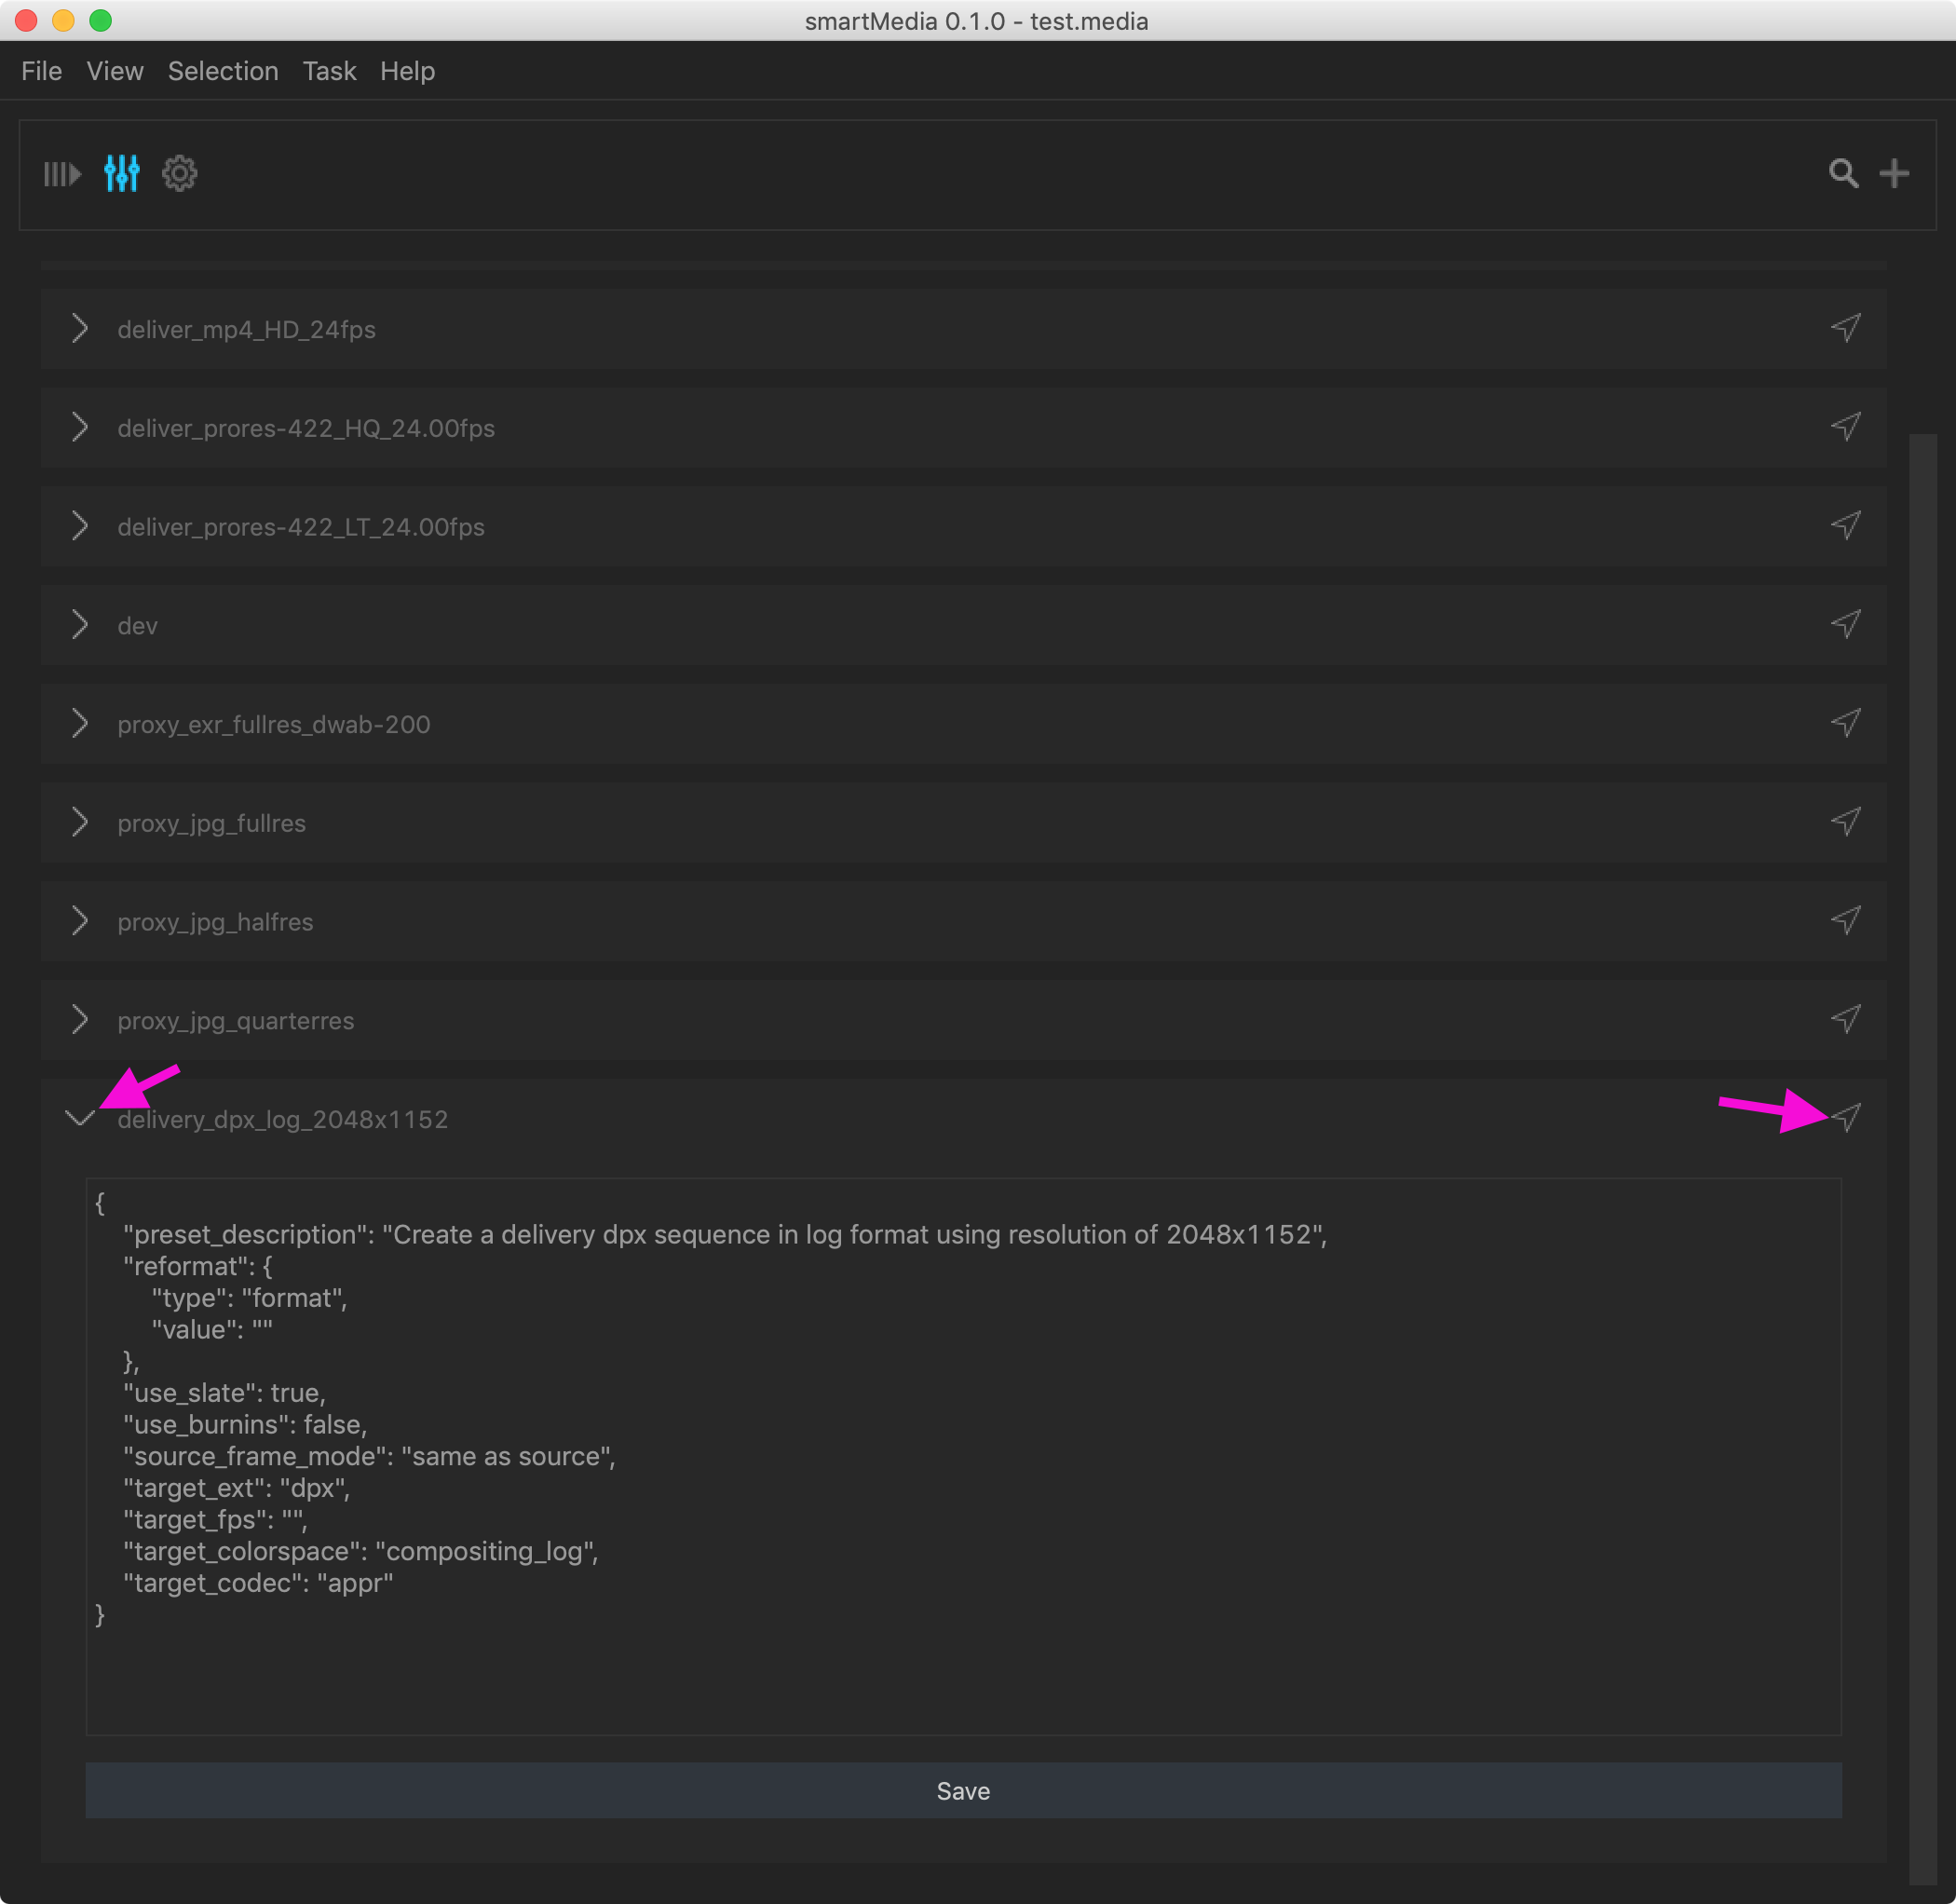
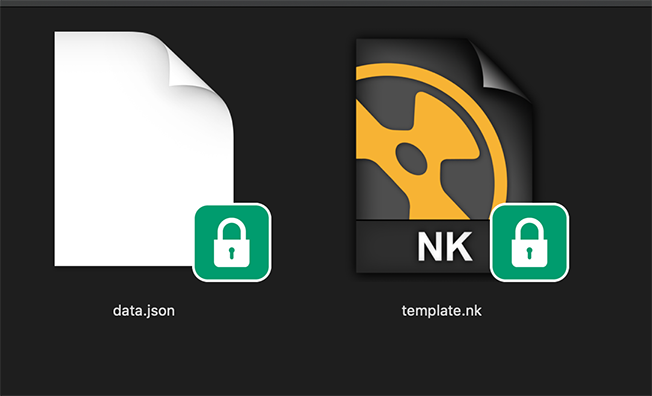
Each preset gets described by a dictionary type using a key-value pair map. You can create own key value pairs that your template.nk file can understand and process. This gets further discussed in the advanced section. Click the reveal button on the right to reveal the actual data.json file that stores the key-value pair map as well as the generated template.nk file.
You can do anything you like in that file and the node connection gets passed to a task when rendering.
We suggest having a look at all our other presets to get a glimpse how they work and what they contain. For TDs: Have a look at our dev preset. In here you find the following Python modules:
- data.py: Execute code when selecting the preset.
- pre_render.py: Execute code before rendering the task.
- post_render.py Execute code after the rendering of the task has finished.
If a file exists in a preset, they will be executed automatically for you. So you can take over full control and execute any custom code while processing a task.
Using Presets root directories to share presets in your team
By default, all presets live in the smartMedia package here:
path/to/smartMedia_vX.X.X/presets
If you work in a team it is however desirable to load presets from outside the smartMedia installation, so for example from a network location that all machines can access. And it is also desirable to load from as many other root locations as you like. Both things are easily achievable. For that you need to tell smartMedia where to look for presets. To do that, navigate to smartMedia’s settings (shortcut: Ctrl+3) and click the Paths tab. Here you can adjust path related settings for smartMedia:
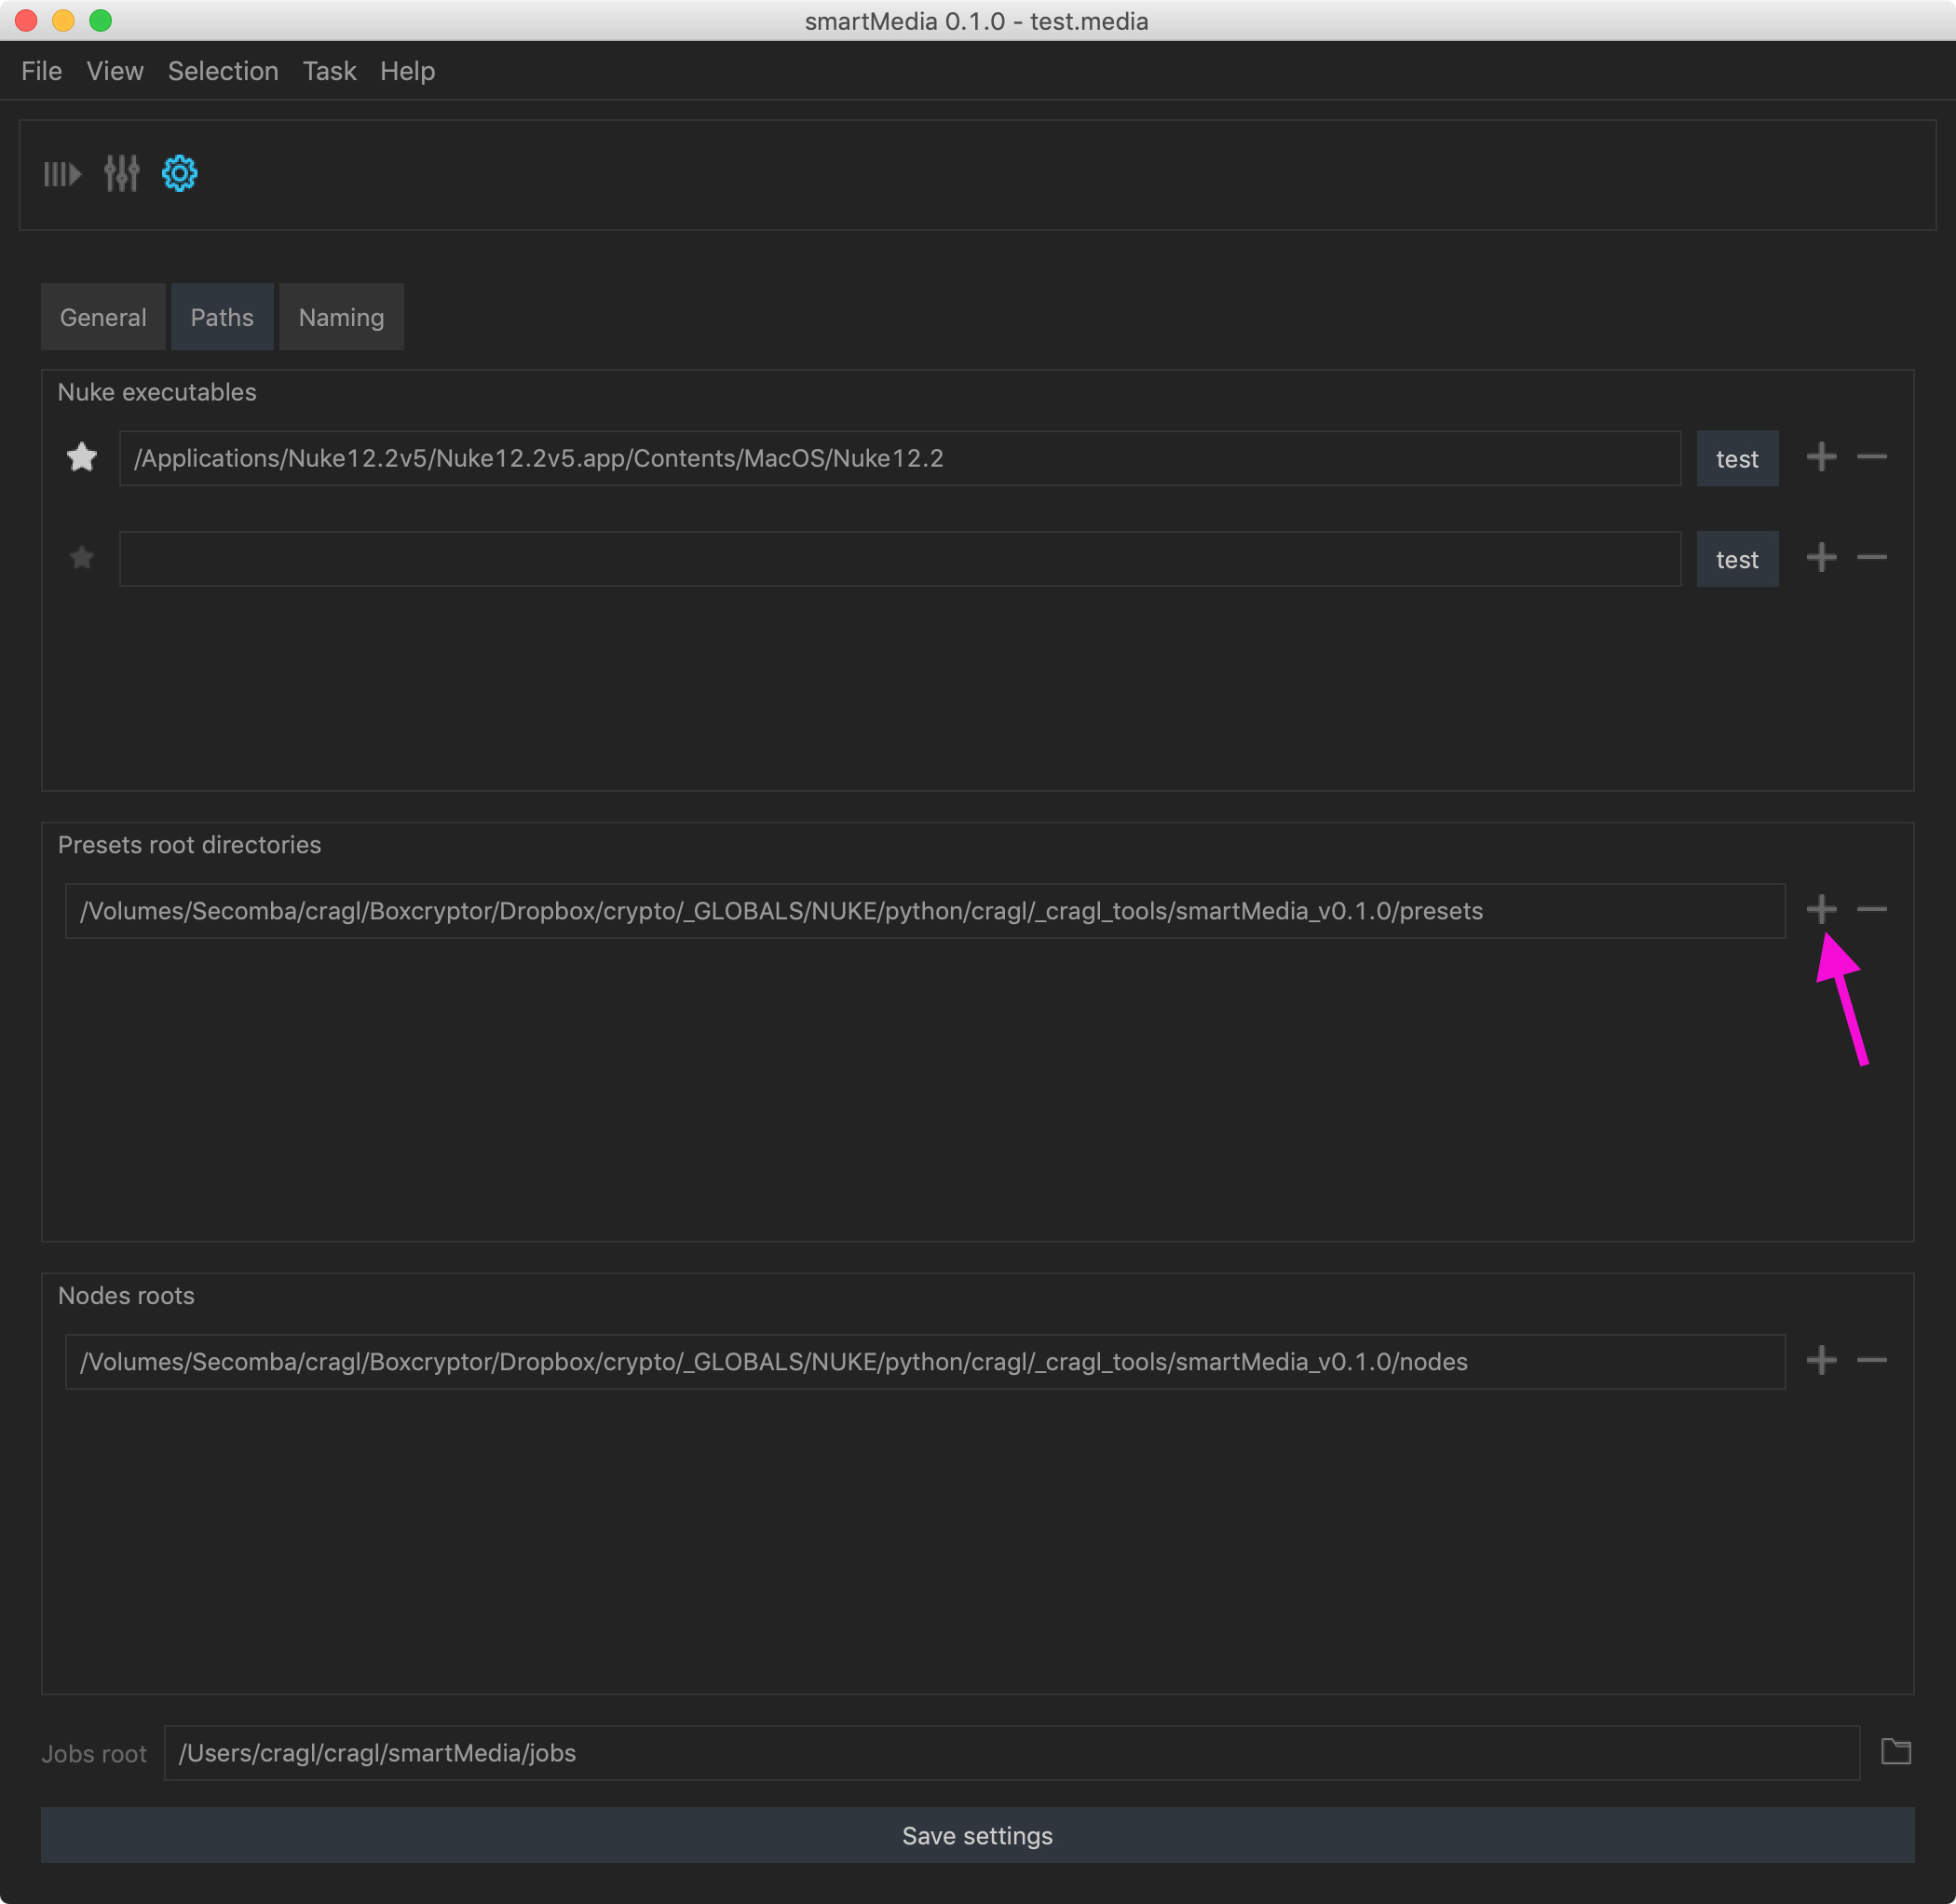
Click the + button and paste another absolute path to a directory that contains presets. Or one that is empty so that you can fill it with presets:
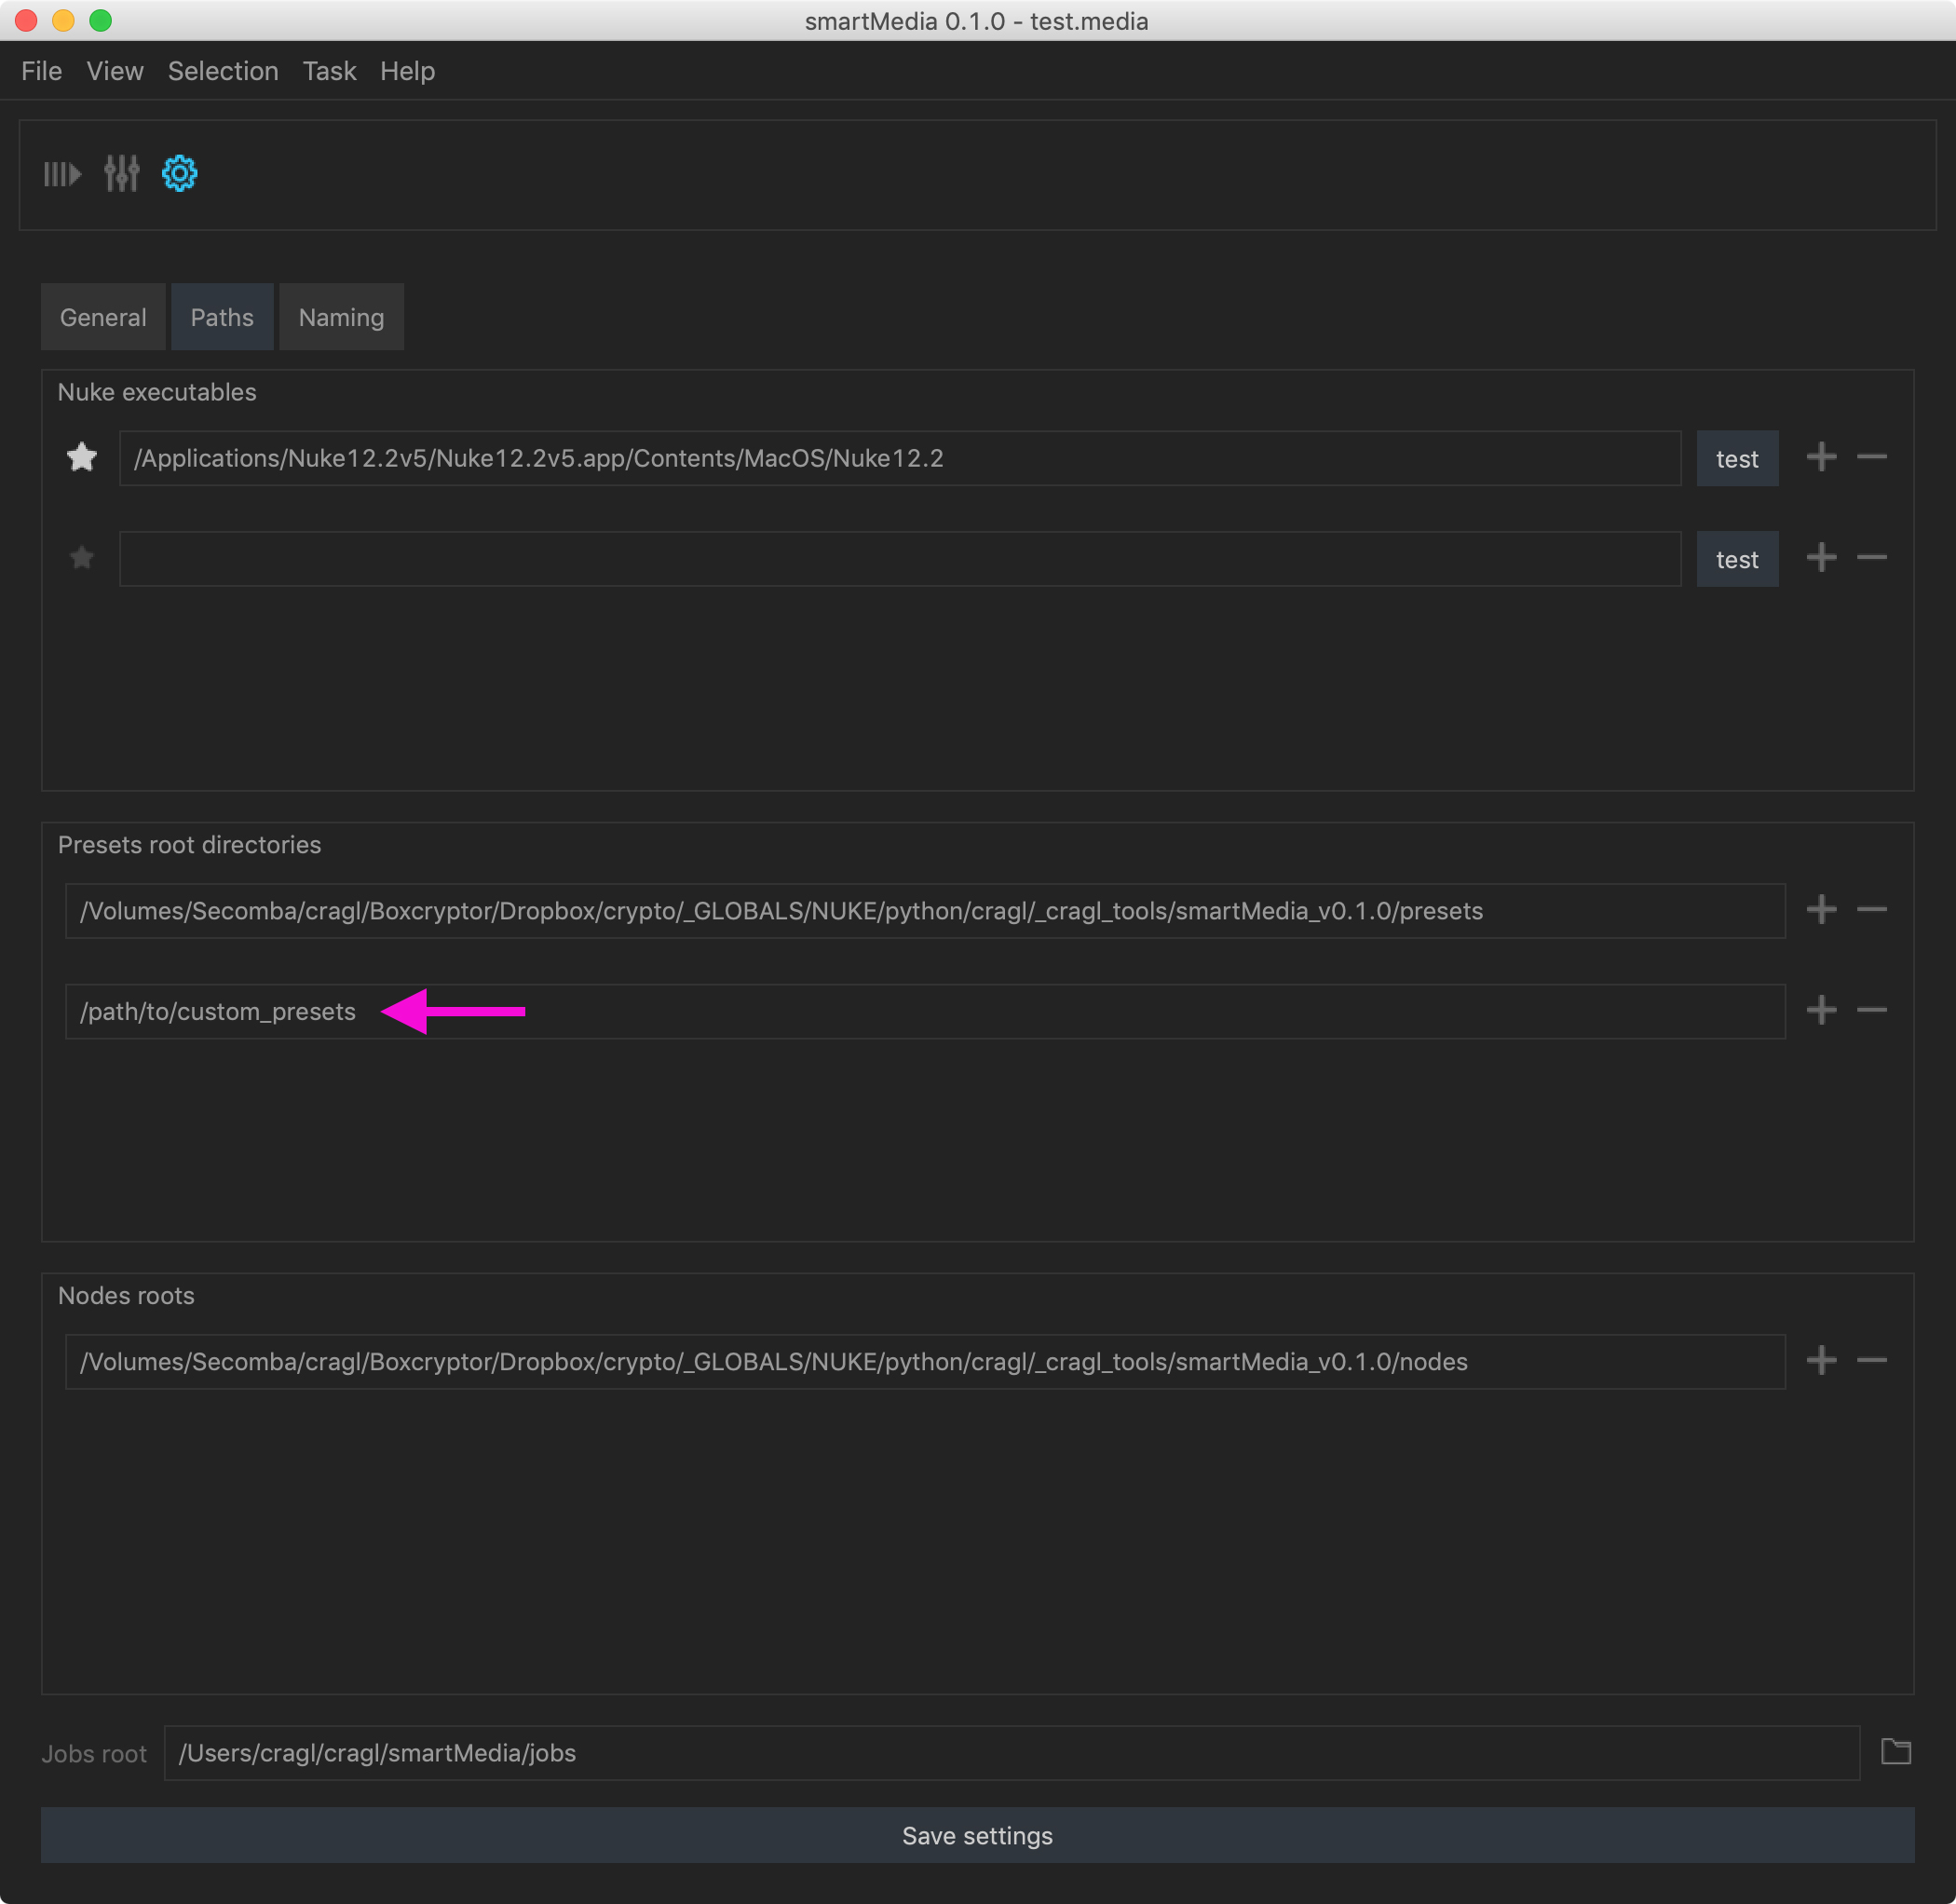
Click the ‘Save settings’ button.
The next time you launch the preset wizard, you can choose where to store the new preset you are creating in:
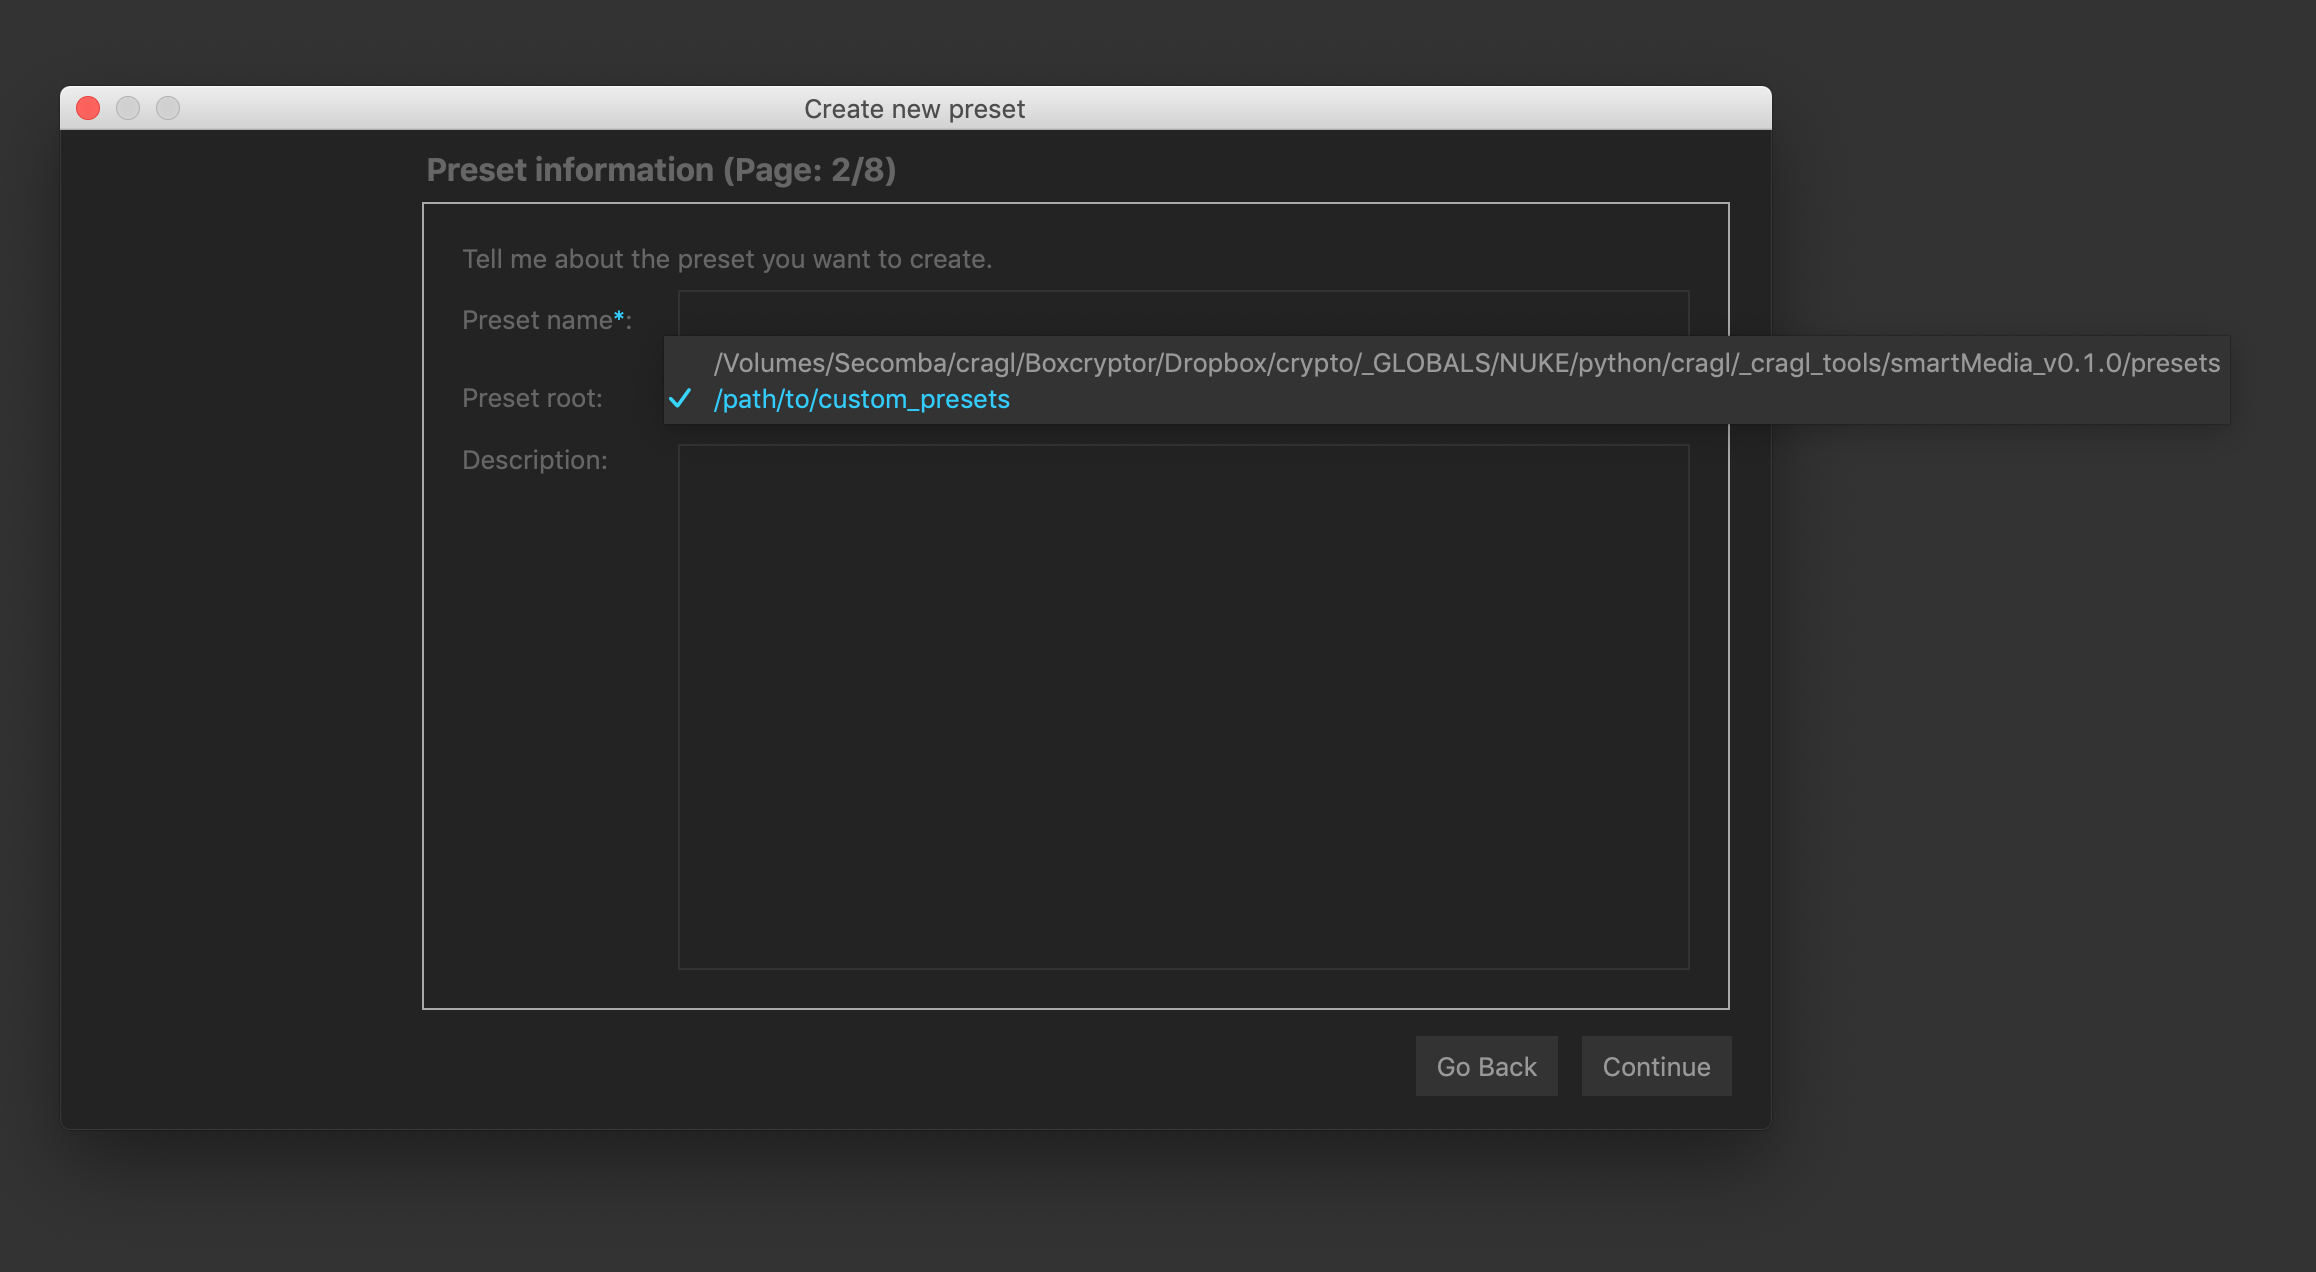
Here are some possible workflows how to use this feature:
- Your pipeline TD sets up a new preset in a local location. If the preset has been tested and works well they can then push the preset to a location that other users can discover as their smartLib points to that location.
- Have a preset folder for specific shows or tasks.
- Archive presets that are no longer used/needed into a location without actually deleting them and always having the ability to access them very quickly and easily by pointing smartMedia to that folder.
Discovering and using custom slates and burnins
smartMedia ships with slates and burnins that you can use in your delivery type presets. These will then contain individual information about each and every rendered version:
An example slate used for a delivery

An example burnin for that same rendered file
The default slates and burnins are located here:
burnins:
<path to smartMedia installation>/nodes/smartMedia_burnins_v001.nk
slate:
<path to smartMedia installation>/nodes/smartMedia_slate_v001.nk
Note
Both the slates and burnins are scalable, meaning they don’t require any specific input resolution. When resolution changes, they adjust themselves and should work out of the box for any image resolution that you feed into them.
You can easily add additional burnins and slates and make the presets wizard discover these so that you can pick these in the when creating a new preset. To make these discoverable do the following:
- Make sure your nodes live inside a nodes root so that smartMedia can discover these. For more information how to add a nodes root please refer to the paths settings section.
- Make sure the .nk filename contains ‘burnins’ so that smartMedia discovers it as burnins or ‘slate’ so that smartMedia discovers it as slate.
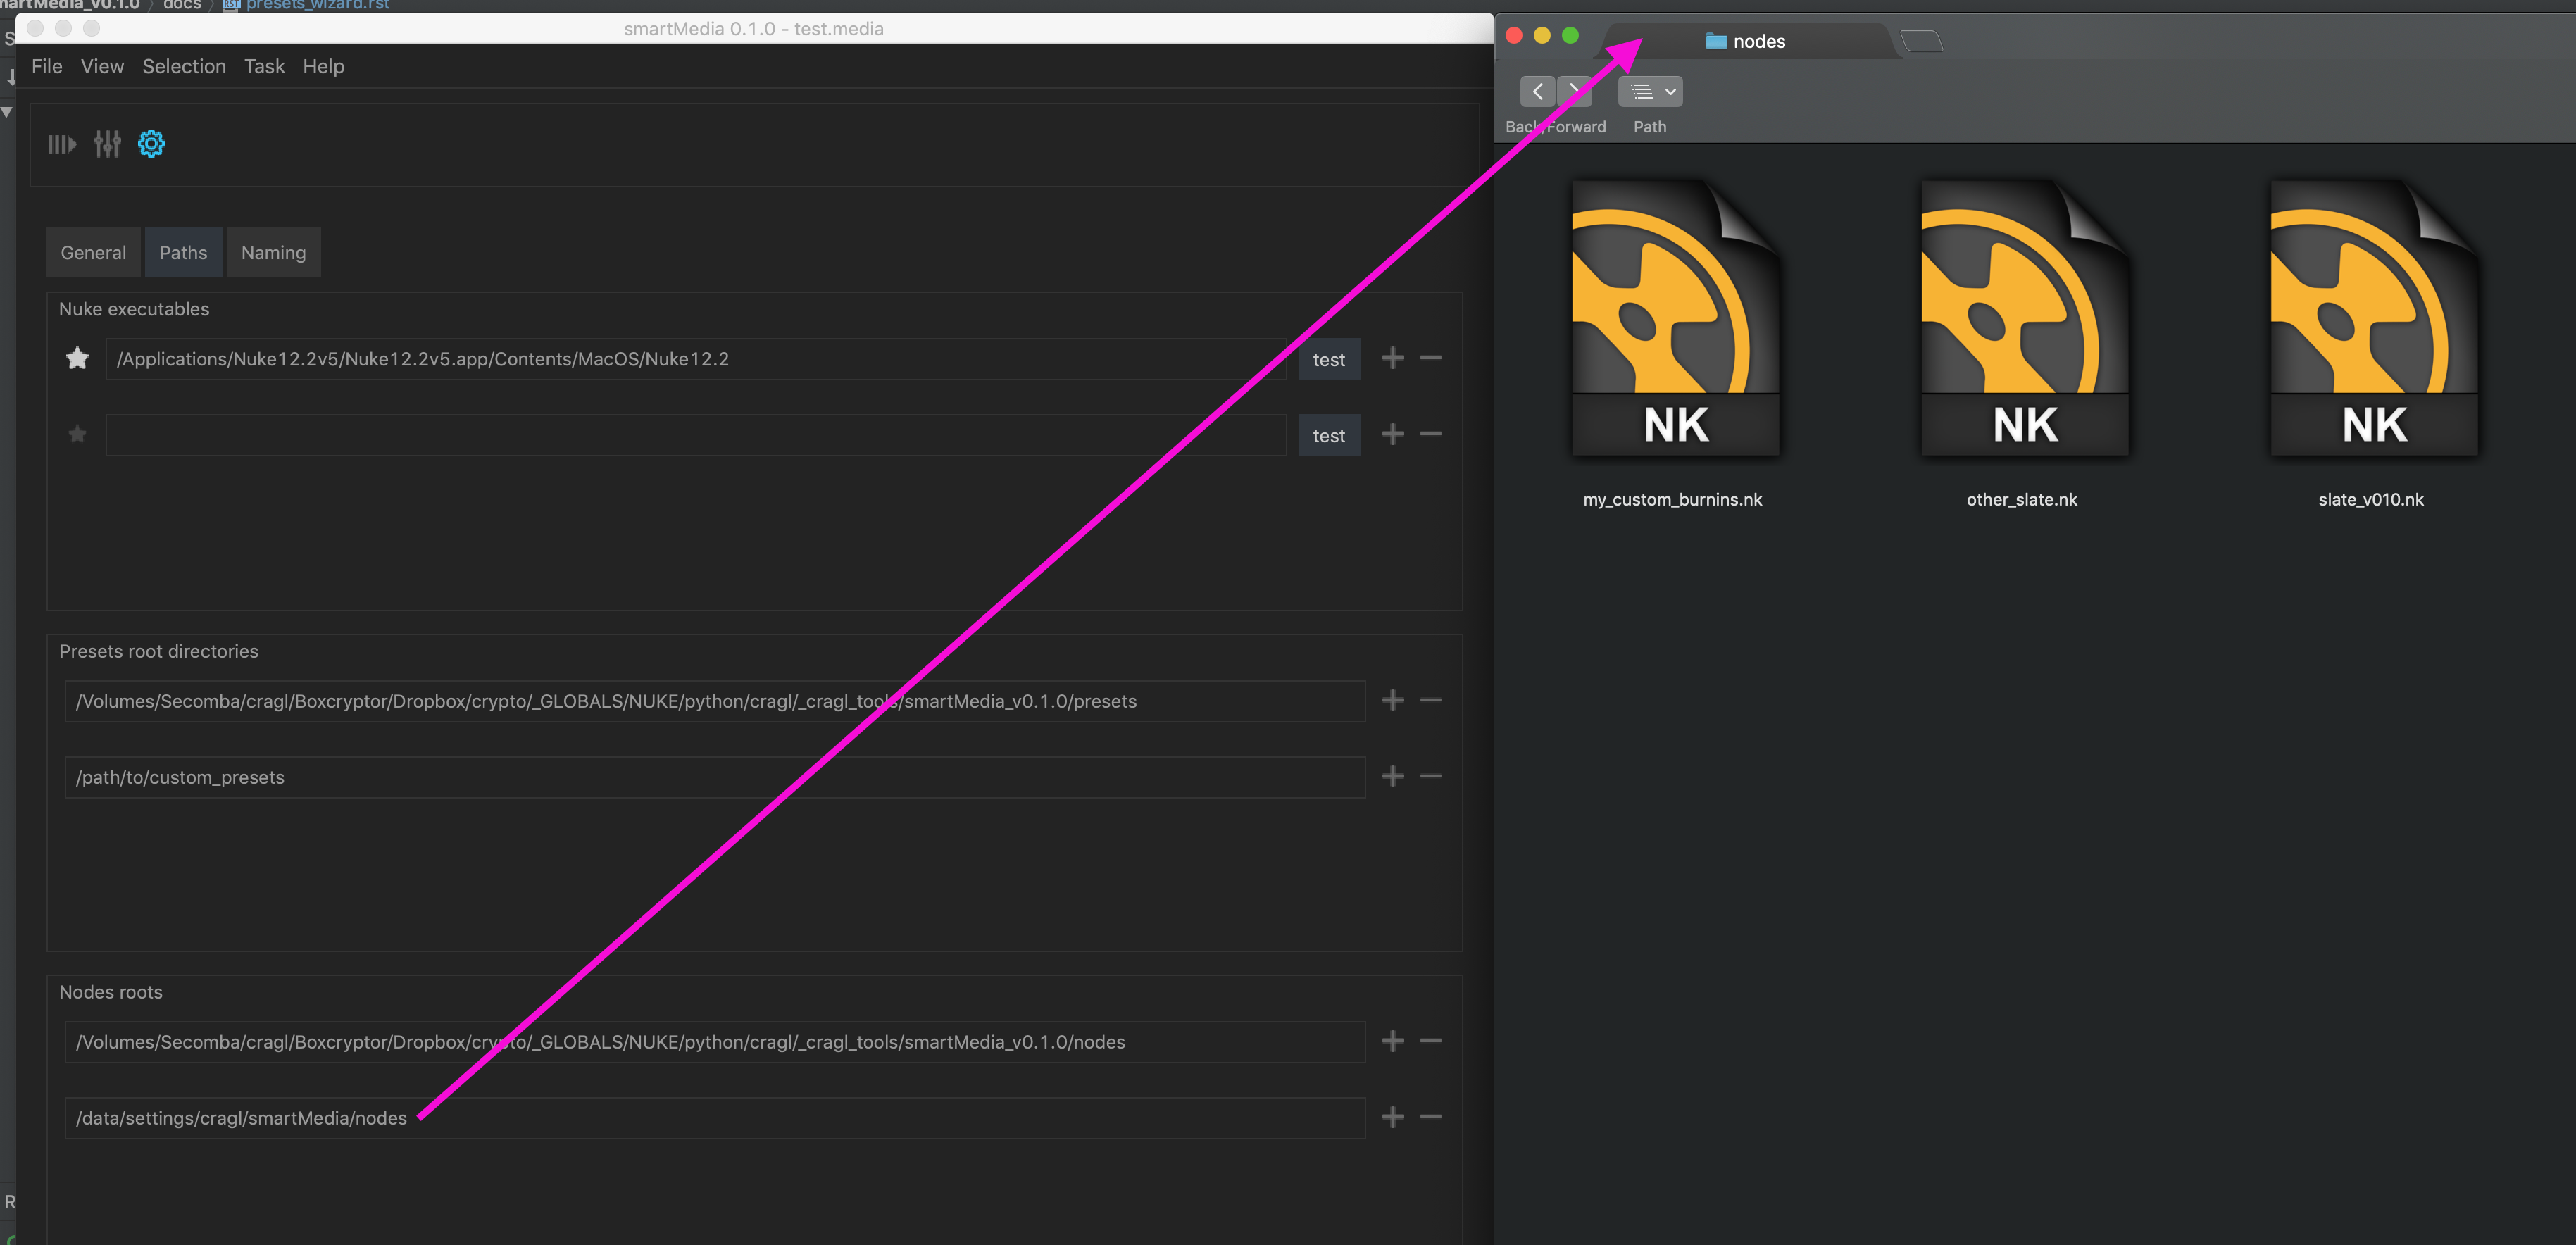
Adding a custom nodes root with burnins and slate nodes.
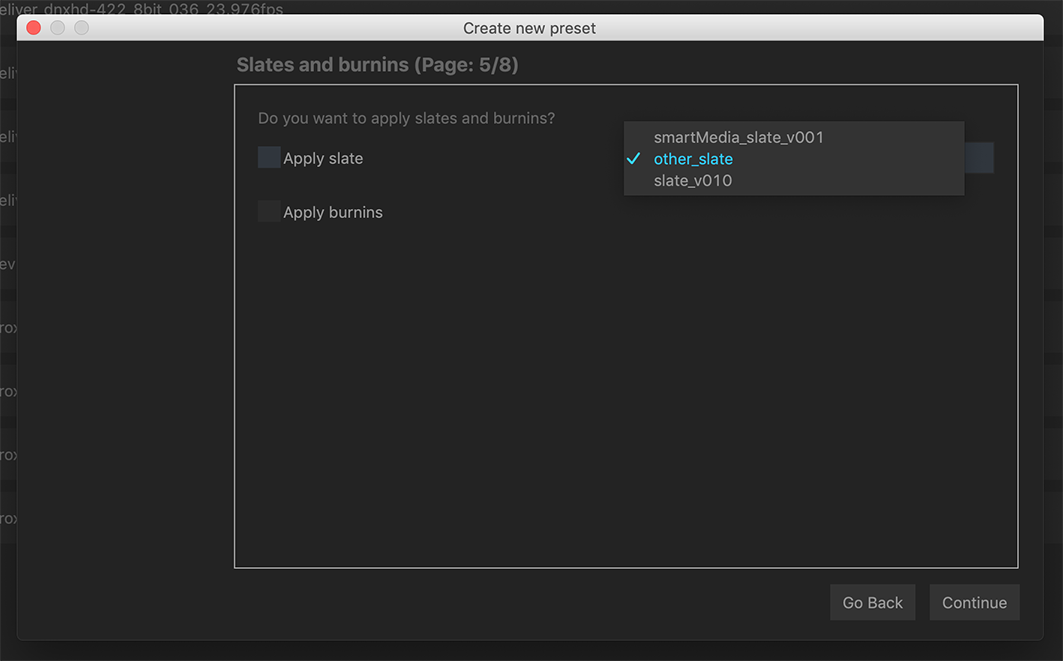
The burnins and slates of the custom nodes root are now selectable.