Advanced workflows
The following page is a collection of advanced features that smartMedia offers for you to take over full control and get the most out of it. Many of these features require some technical knowledge and are best addressed to TDs and artists with programming knowledge.
Task folder
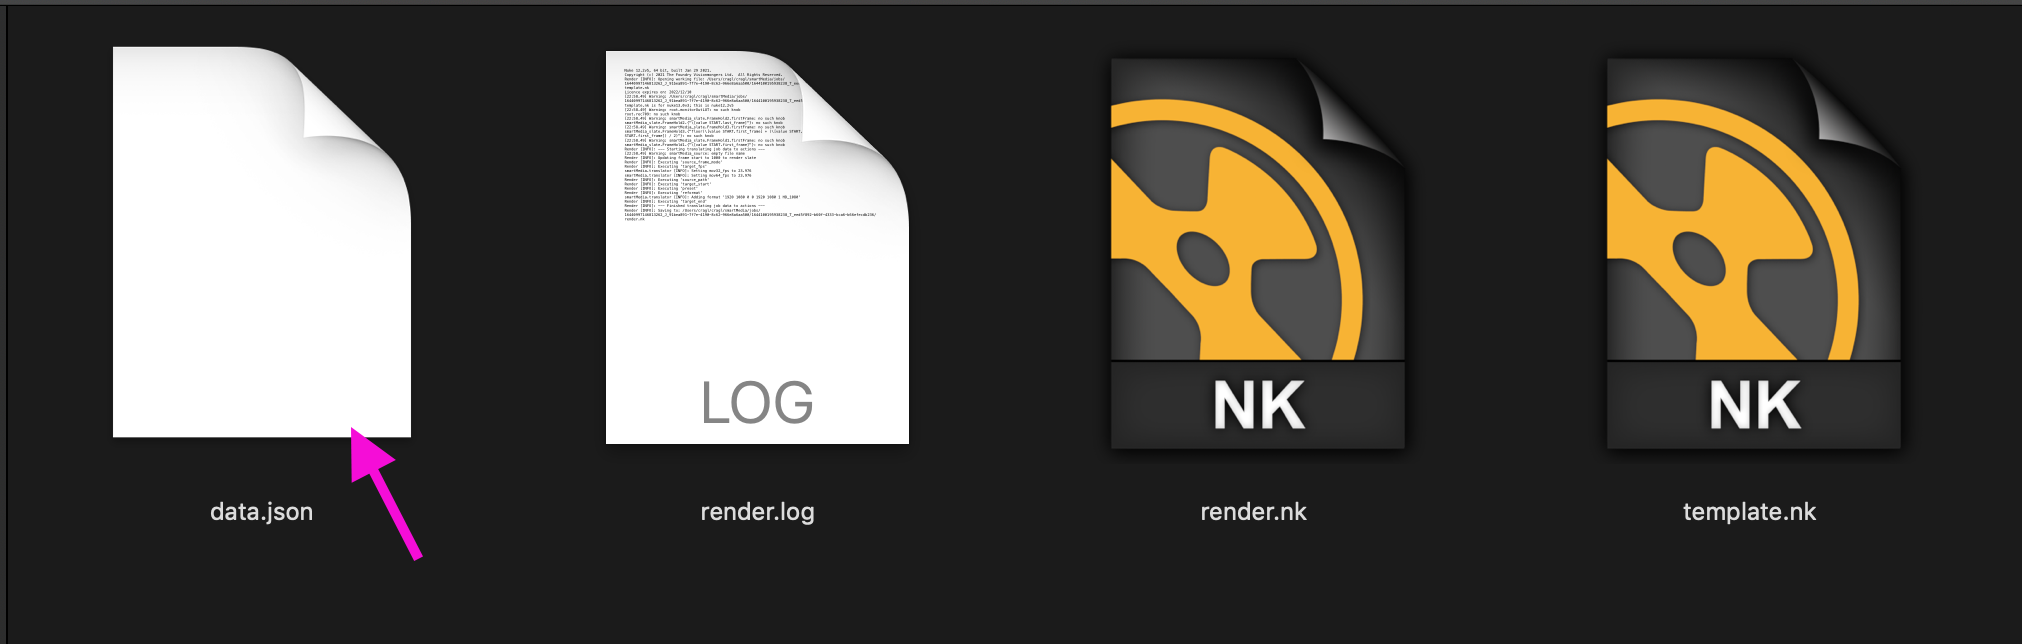
Each task contains several files to render a task. Right click a task and choose ‘Reveal -> Task’ (shortcut: Alt + T). This reveals the task’s data folder which contains the following files:
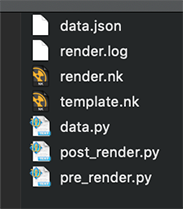
- data.json:
This file contains key-value pairs of how the task is required to be
rendered. It contains many values that get interpreted by the smartMedia’s
translator which translates a key-value pair into an actionable item. The
translator can be found in:
[path to smartMedia_vX.X.X]/cpXX/smartMedia/translator. - render.log: This file contains the render log that was created when rendering the task. It contains valuable information about what was happening when rendering your task.
- render.nk: This is the actual file that produces the final rendered result. It contains the node structure from the template.nk (see below) but with everything translated so that it is ready to be rendered. You can always open this file up inside Nuke and render it yourself when needed.
- template.nk: This is the raw file from your preset. This file will be populated by the smartMedia translator in order to change it to the structure of the render.nk file. I.e. the file that contains your actual source and everything else needed to create the final render result.
- data.py: (optional, only when your preset contained such a file) The data.py file handles injecting any code when applying a preset. For further information about that module please see the data.py section below.
- pre_render.py: (optional, only when your preset contained such a file) The pre_render module gets executed before rendering your task. For more information on that module please see the custom callbacks section.
- post_render.py: (optional, only when your preset contained such a file) The post_render module gets executed after your task finished rendering. For more information on that module please see the custom callbacks section.
Task data
Once you set up your task a data.json file gets stored on the task’s folder. Right click your task and reveal your task folder (shortcut Alt + T):
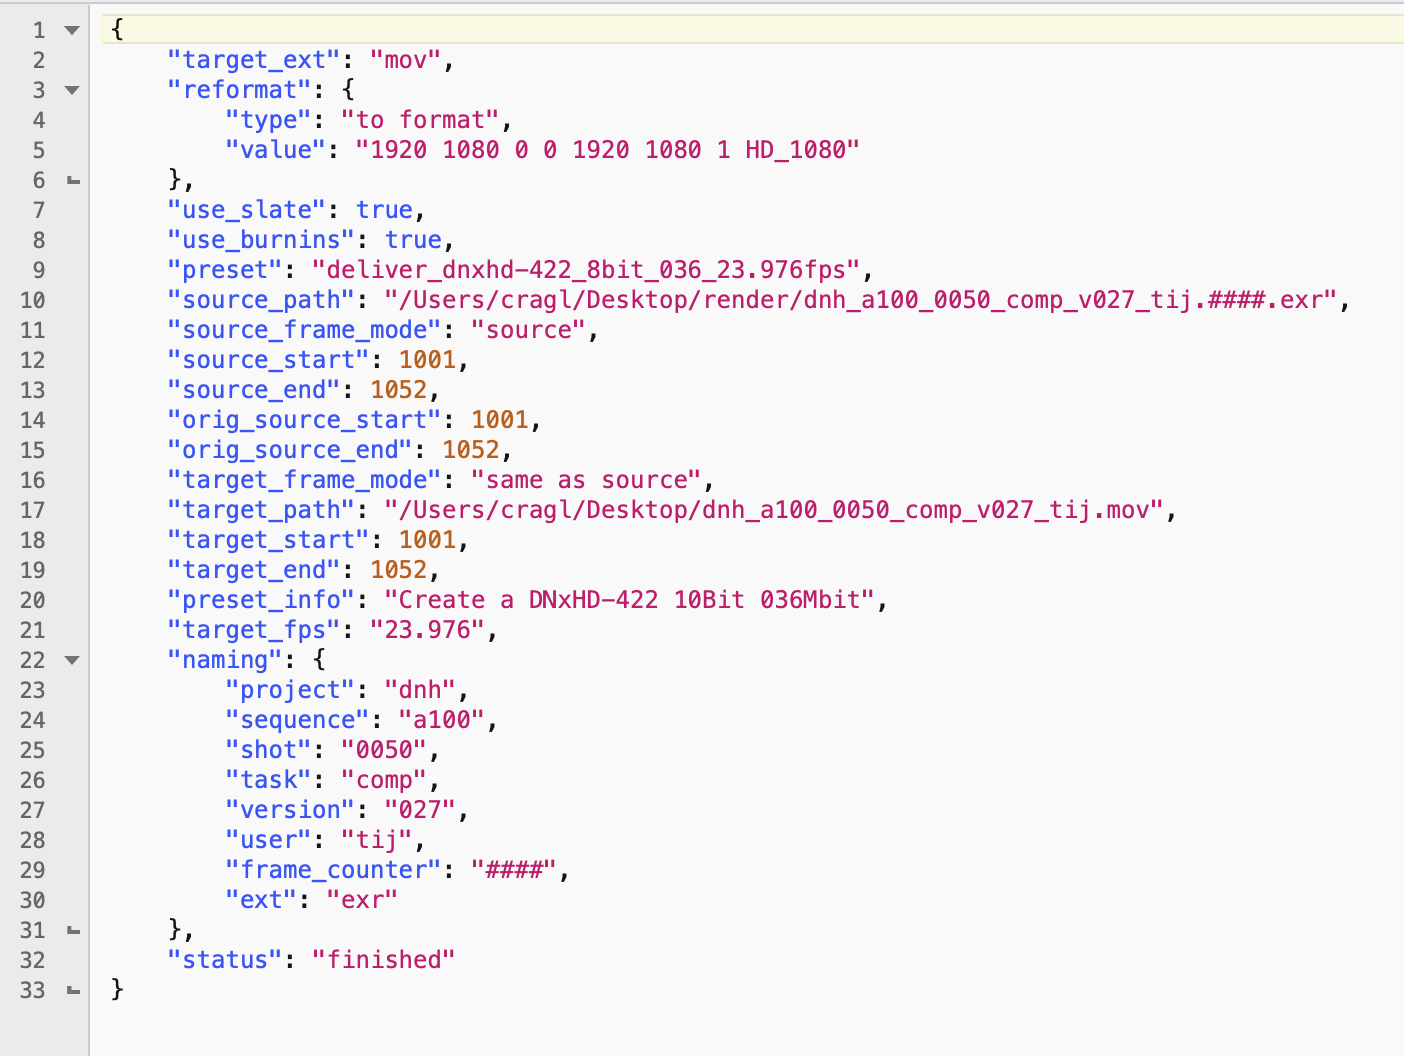
This is an example of a task’s data.json file:
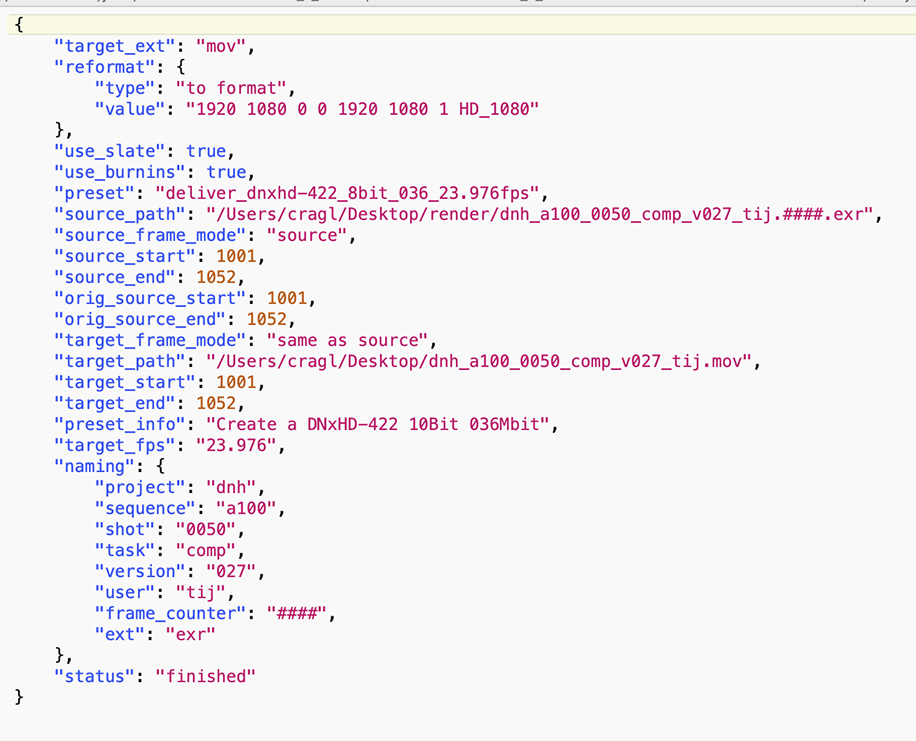
It contains key-value pairs that the smartMedia translator will transform
into actionable items. As an example, take the source_path and the
target_path key-value pairs. The smartMedia translator will make sure that
the task’s source Read node will reference the specified source_path and
the task’s Write node will be set up to render into the target_path.
Another example is the reformat setting. The translator will make sure to
use the specified reformat value in order to reformat the source to achieve the
desired render output format.
The translator lives inside:
[path to cragl installation]/smartMedia_vX.X.X/cpXX/smartMedia/translator.py.
The translator class contains methods that match the names of the data.json’s
keys.
Task data inside Nuke
As seen above, the task data contains key-value pairs that describe several
details of your task to render. This data gets automatically available inside
Nuke once a working file is loaded that has a data.json file sitting right
next to it. You can access the data in form of a global dictionary. This lets
you drive behavior in your render working file. How this can be used gets
documented in the
Using naming values in slates and burnins
section. But before having a look at that section it is useful having read and
understood the following section which deals with naming.
Naming
smartMedia offers functionality to split naming values from paths and base names for all sources when ingesting. Trying to split naming values gets triggered automatically (by default, can be turned off if needed) when dropping media into smartMedia. You can also extract manually at any time using the naming widget that can be found on every source. Once naming values have been split off of a source they are available in any preset that you apply to a source.
These naming values can be used in many places, e.g. in a task’s burnins and/or slate, for dynamic path assembly, etc. See below for some demonstrating examples how to use naming values.
The gist of how that feature works is that you define a regular expression pattern that describes a source’s absolute path or just the base name in the setting’s naming section. Once you drop media into smartMedia it will try out all defined patterns and searches for a match. Once a match is found you can use these naming values down the line as described above and shown below.
Note
When defining regular expression patterns, we recommend using www.regex101.com as it lets you create patterns quite interactively with lots of nice visual feedback. You can then paste the patterns into a naming preset.
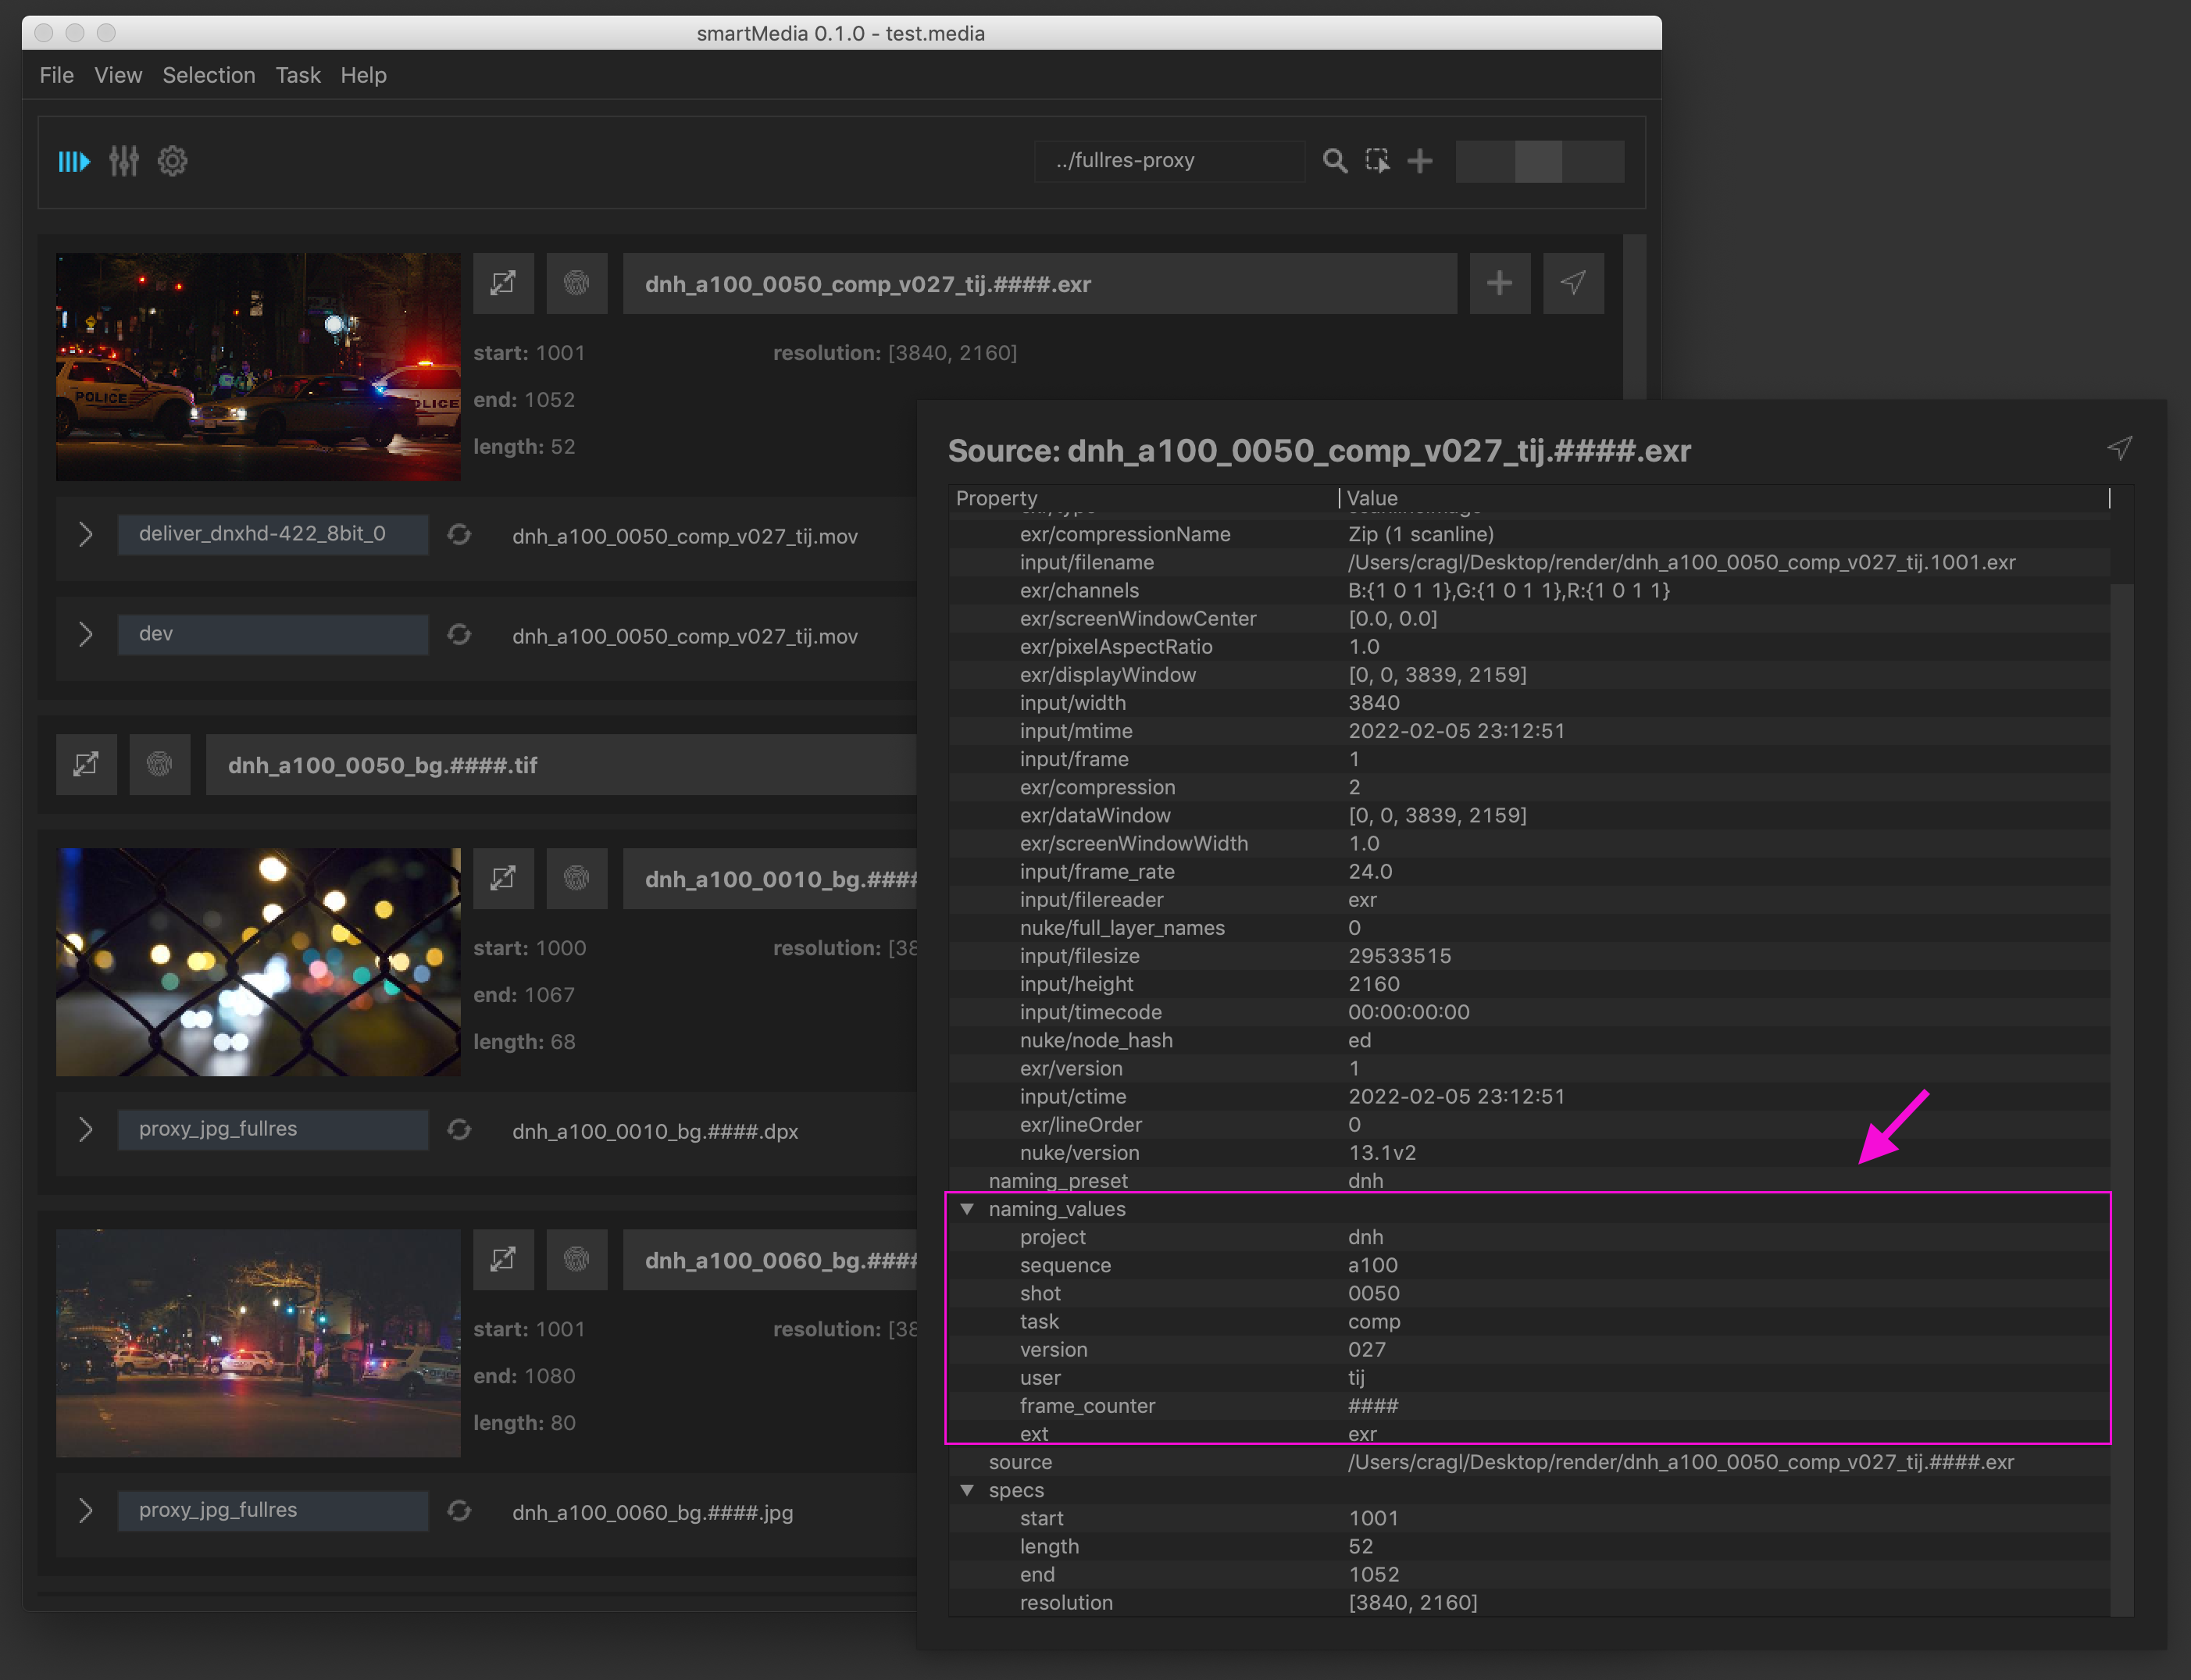
To view the naming info for a source hover over it and hit Alt + I and you will see all available naming values in the naming section. These can also be seen when hovering over a task and viewing the task info using Alt + I
Naming value extraction happens automatically when ingesting. To make that happen make sure a naming preset is selected in the settings as described in the naming section page. As long as having ‘Auto extract naming’ checked, smartMedia will cycle through all configured naming presets to see if any one matches and if that is the case then it will keep these naming values stored for your source.
Using naming values in slates and burnins
As described above, once you render a task the naming values are available
inside the Nuke job in a global data dictionary. To see it in action load
a task’s render.nk file from the task folder and in Nuke’s Script Editor
execute the following:
print(data)
The output will look something like this:
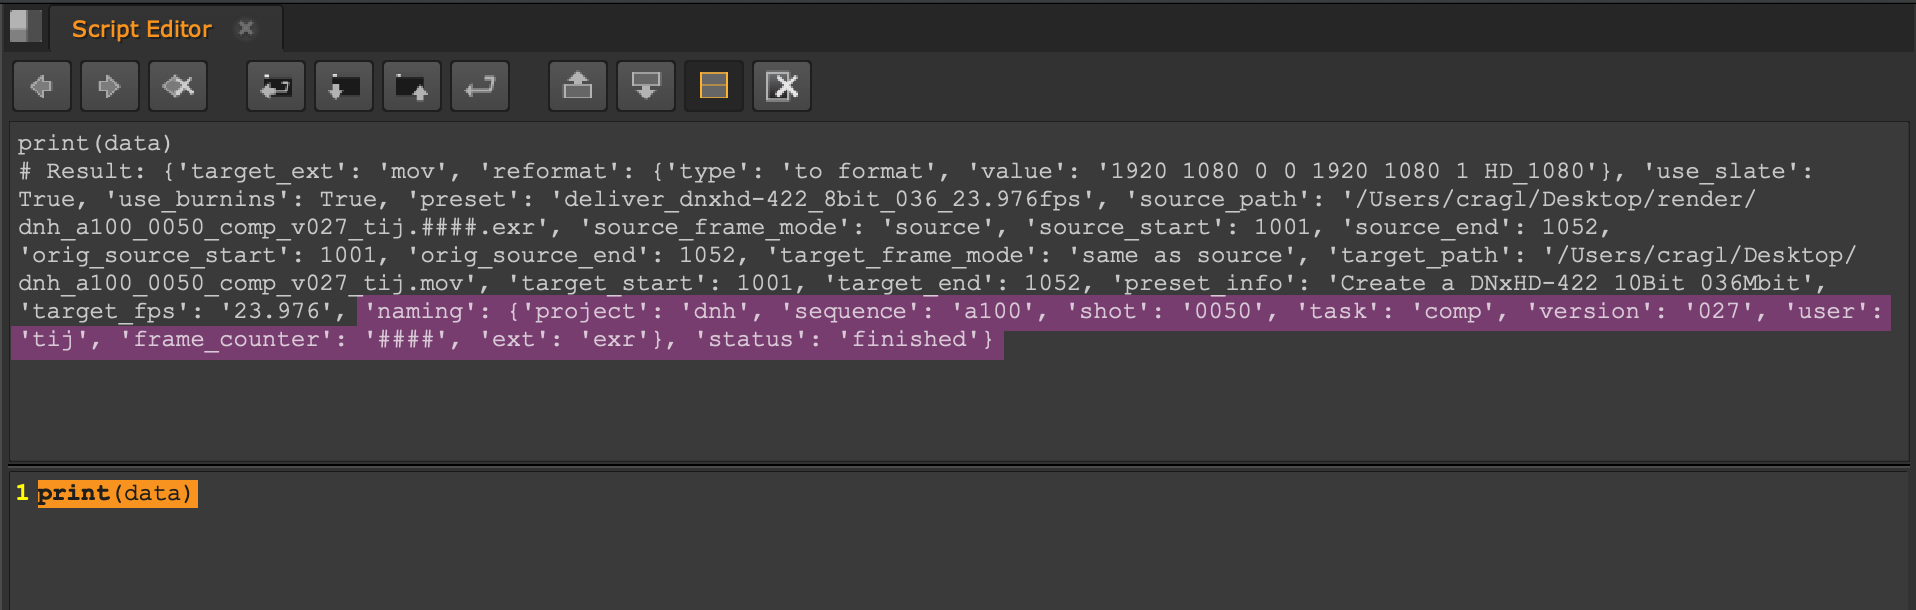
As you see it contains the whole data key-value pairs of your job and in
particular also the naming values which you can access by data["naming"]
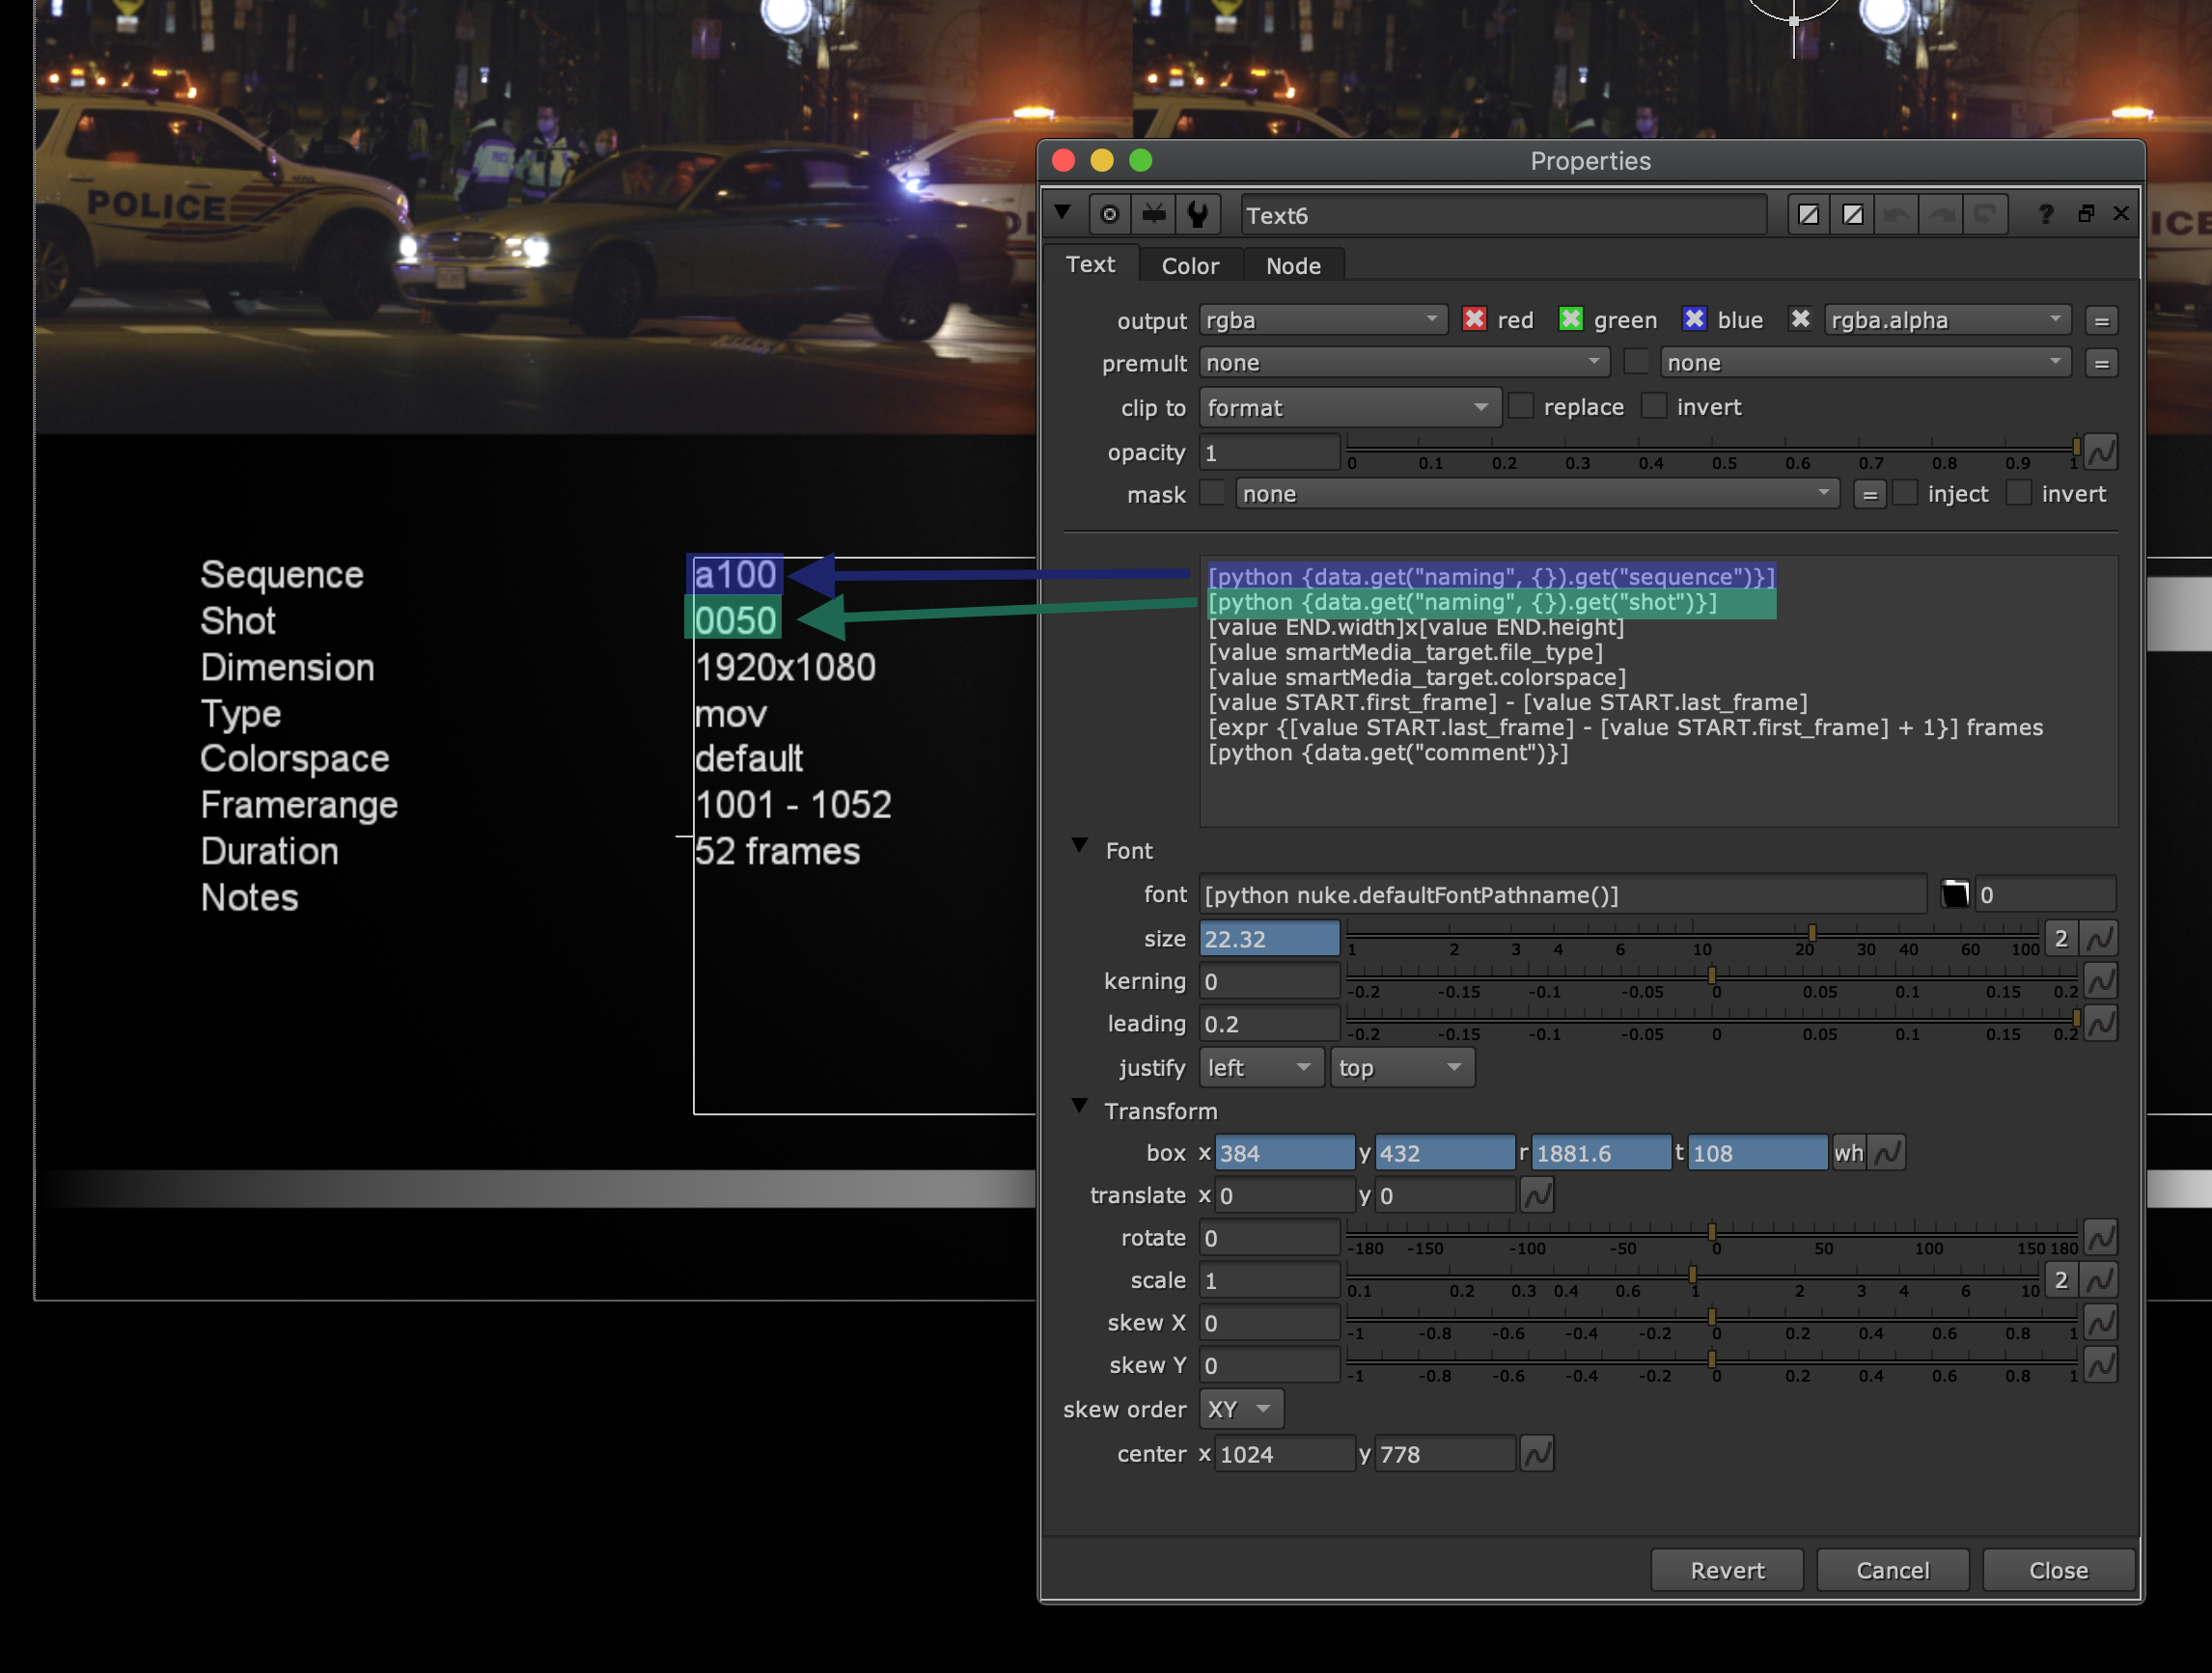
These values can be accessed inside your burnins and slates. Our default template does exactly that. In that case via using TCL:
Using naming values for path assembly
Inside a preset’s data.py you can access the previously extracted naming
values using data["naming"]. This can become handy to dynamically assemble
output paths that contain your previously collected naming values.
For more information about a preset’s data.py file please refer to the
dedicated section for the data.py
file.
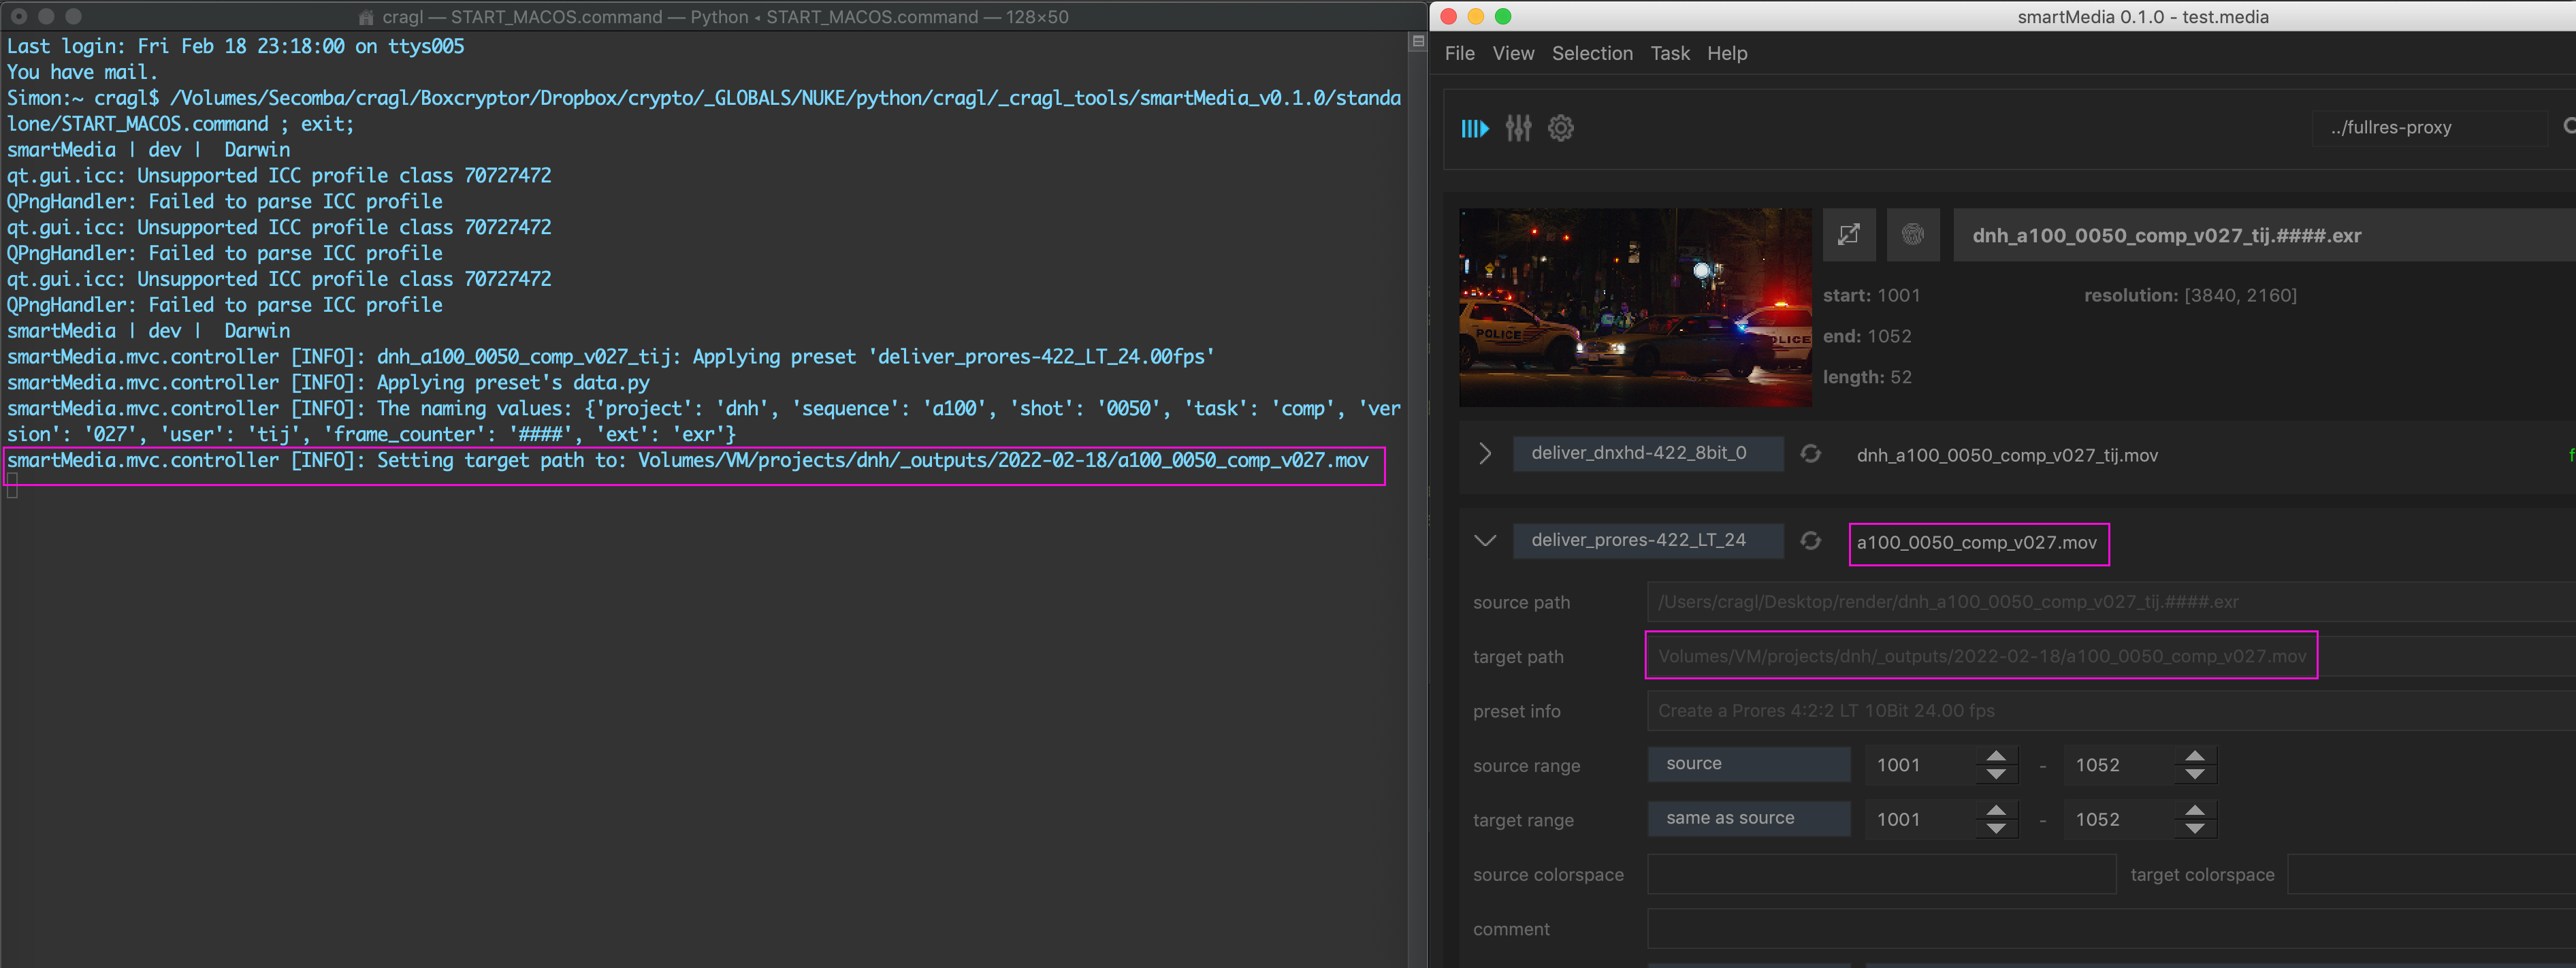
Here is some example code to get an automatically assembled path that contains
naming values. In this example, we drive the render folder containing the
project (data["naming"]["project"]) and the render file base name contains
several naming values like the sequence, shot, task and version information
from the previously collected naming values:
Applying the template that contains this data.py file will then assemble the path dynamically for us:
Using a source naming widget
You can always trigger naming value extraction for any source by using its naming widget. Click the naming button as shown below:
This will show the naming section for this source. Cycle through the naming preset dropdown menu to apply naming extraction to your source. Below, you see extracted naming values in case your regular expression matched. Note that the text field that shows your regular expression is non-editable. In order to edit it please navigate either to smartMedia’s settings and edit it from there or edit the text file that contains your regular expression (it is located in the naming root as configured in the settings) in an external text editor. Click the ‘reload’ button to reload your regular expression in smartMedia without the need to restart it.
Adding details widgets
Details widgets let you edit a task’s data directly inside smartMedia:
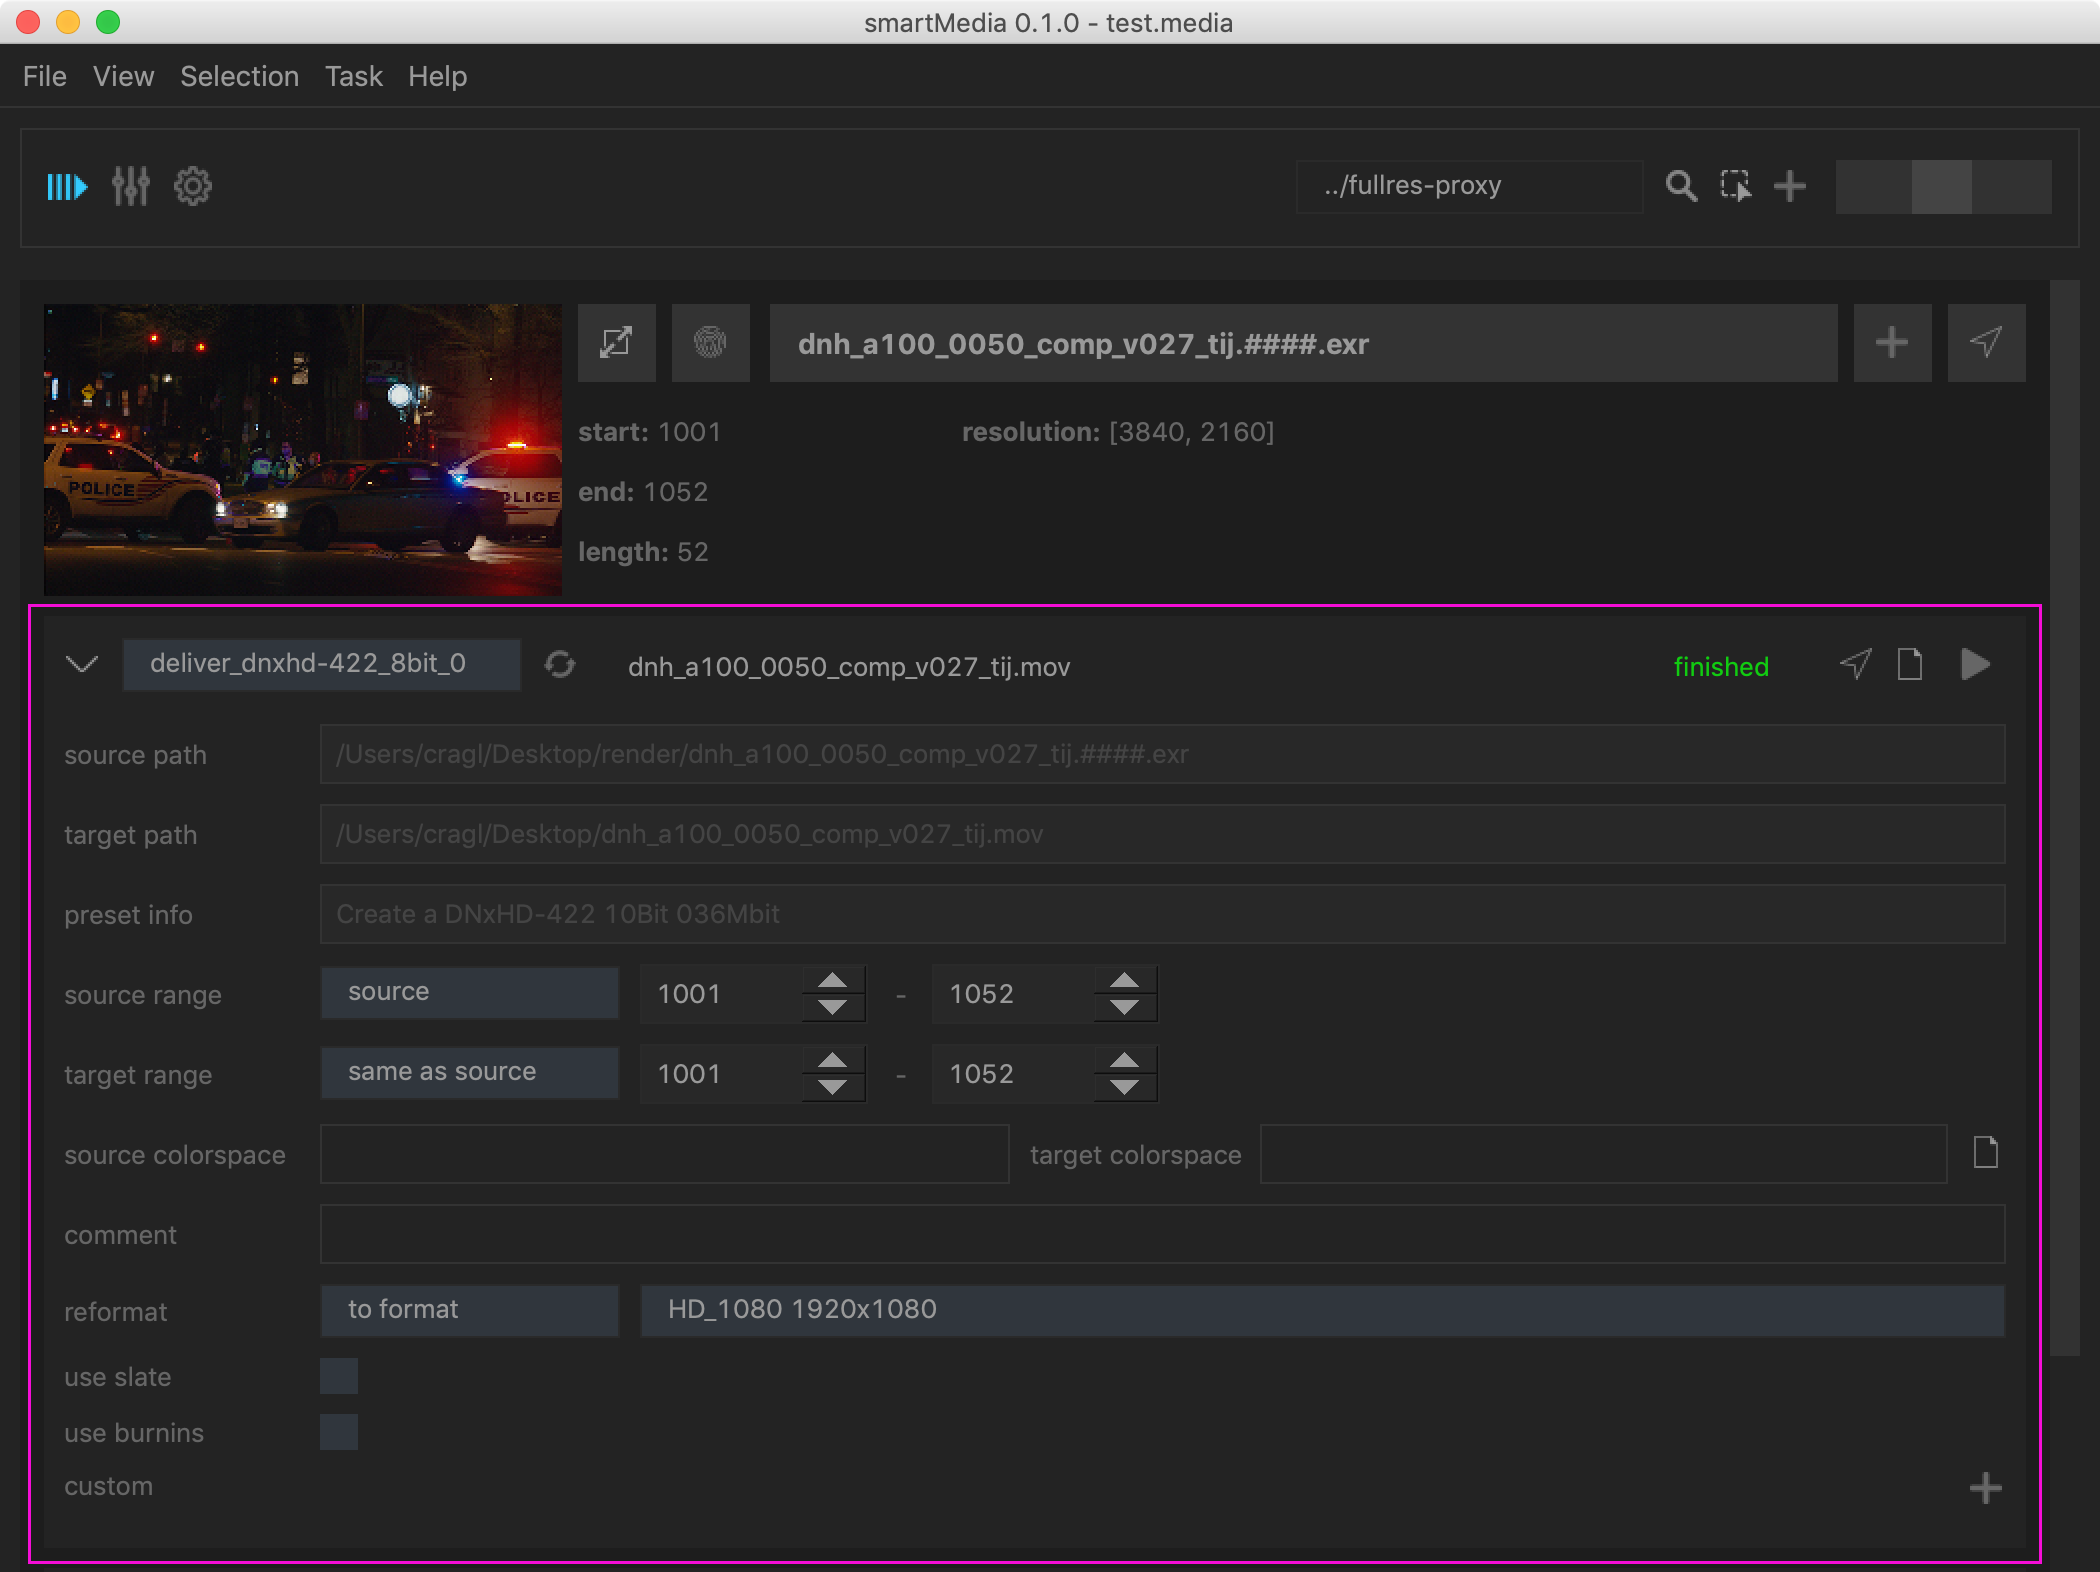
These widgets drive the task’s underlying data.json file that can be accessed by right clicking a task and choosing ‘reveal -> task’ from the context menu:
A key-value pair gets driven by a details widgets. These live in the details_widgets python package that is located in the following location:
[path to smartMedia installation]/cpXX/smartMedia/mvc/details_widgets
Each details widget inherits from base.Base. If you require to add custom
details widgets on your own we suggest having a look at all other details
widgets. There are quite simple ones (e.g. LineInput) and more complex
ones (e.g. CustomAttributes). Pay attention to the update method.
This method drives writing any UI change back to the data.json file. Saving
happens via accessing the preset attribute and calling save. Example
as seen in LineInput:
def update(self):
    """Update the preset and thus the task's data.json"""
    self.preset[self.key] = self.input.text()
    self.preset.save()
The mapping of a details widget to a specific key-value pair happens in the
__init__ module of the details_widgets python package by calling
register_details_widget. Please have a look at that module’s doc string
for further information.
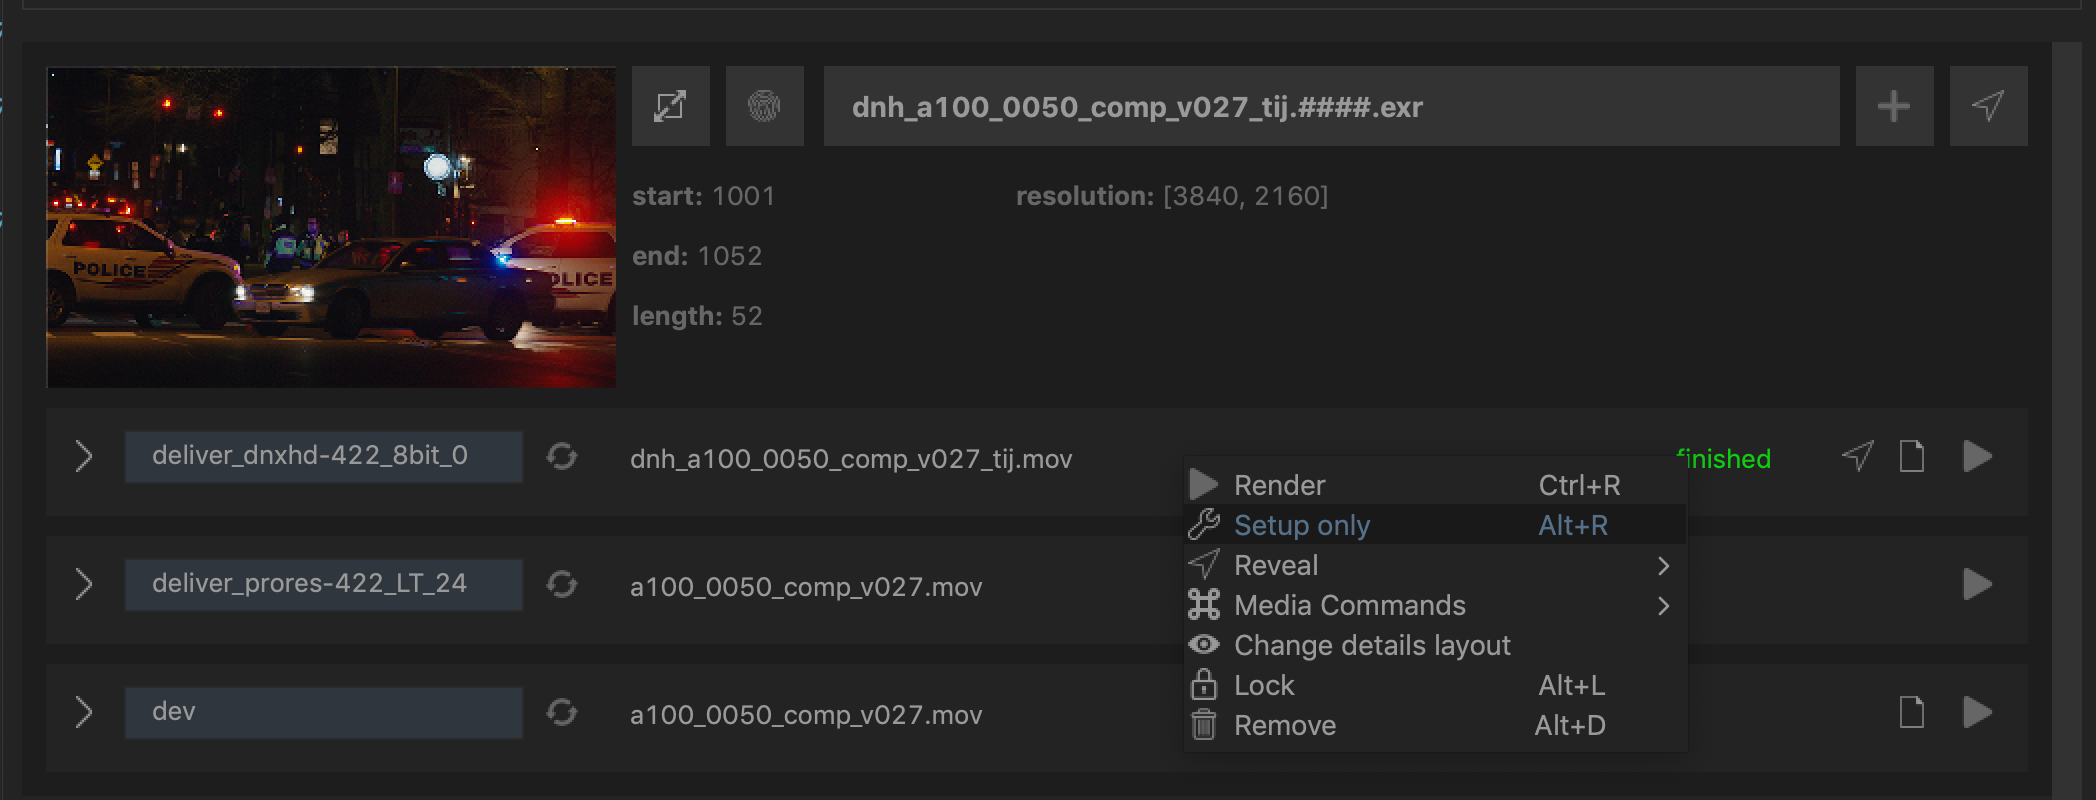
Setup only
Sometimes it is beneficial to get your task into a stage where everything is setup but without rendering. This is for example beneficial in the following situations:
- To debug your working file without being interested in the rendered result.
- When you are still in the middle of setting up your preset and want to quickly check if a certain detail inside your task produces the required result.
- To do some last minute changes directly inside the render.nk file and manually rendering it yourself without the need to adjust the preset itself or create a new template.
- To quickly render out one or two frames without the need to wait for the whole render.
In order to set up your working file, i.e. perform everything needed without actually rendering it right click your task and choose Setup only from the context menu. The shortcut is Alt + R:
data.py - Update data.json file with logic and do other stuff
When a task contains a data.py file in its task folder then smartMedia will automatically execute it as soon as you apply that preset. This functionality lets you take over full control on your presets because it literally means you are now free to do whatever you like to do. Here are just a few examples of what you can do with that power:
- Manipulate the output path assembly
- Add / update / remove any key-value pair of the task’s data.json
- Perform any call to your database
- Create/copy/remove or update any files or folders on your system
- Write an automated email
- Zip files
- And do many more things
Please have a look at the ‘dev’ preset that ships with smartMedia. It contains
a custom data.py file. This file contains a main function with the
following signature:
def main(data, logger):
  """This is the main entry point for code injection for your preset.

  Args:
      data (dict): This is the key-value pairs of the task which is the
          preset's blueprint applied with the data of a source. You can
          access any key-value pair here or add additional ones which
          are handed over to the task to render.
      logger (logging.Logger): The logger to use for logging to std out.

  Returns:
      dict: The data dict that was coming in and might have been updated
          by logic inside this function, depending on the needs.

  """
  # TODO: Inject code here.

  return data
Every task’s data.py file should have a main function. This is the main
entry point to inject any custom code into your task when applying a preset.
The main function will automatically receive two arguments when it is
called which you can use to your advantage:
- data:
dict: This is the key-value pairs of the task which is the preset’s blueprint applied with the data of a source. You can access any key-value pair here or add additional ones which are handed over to the task to render.- logger:
logging.Logger: The logger to use for logging to std out.
Be aware: Please keep in mind that this function should return the (probably manipulated) data dict at the end of its function body!
Please also have a look at the dev preset’s data.py which can be found here:
[path to cragl installation]/smartMedia_vX.X.X/cpXX/presets/dev
Note that you are not limited to just calling this main function. The
data.py module can import anything else in your PYTHONPATH and use it.
As an example, you could import other modules and python packages and thus
create a lot more complex logic when needed. You can also outsource that logic
into dedicated modules and re-use it by importing and calling it again in other
presets. Its your decision.
As a practical example how to use a preset’s data.py file to adjust the path assembly for the task output path please have a look at the Using naming values for path assembly section.
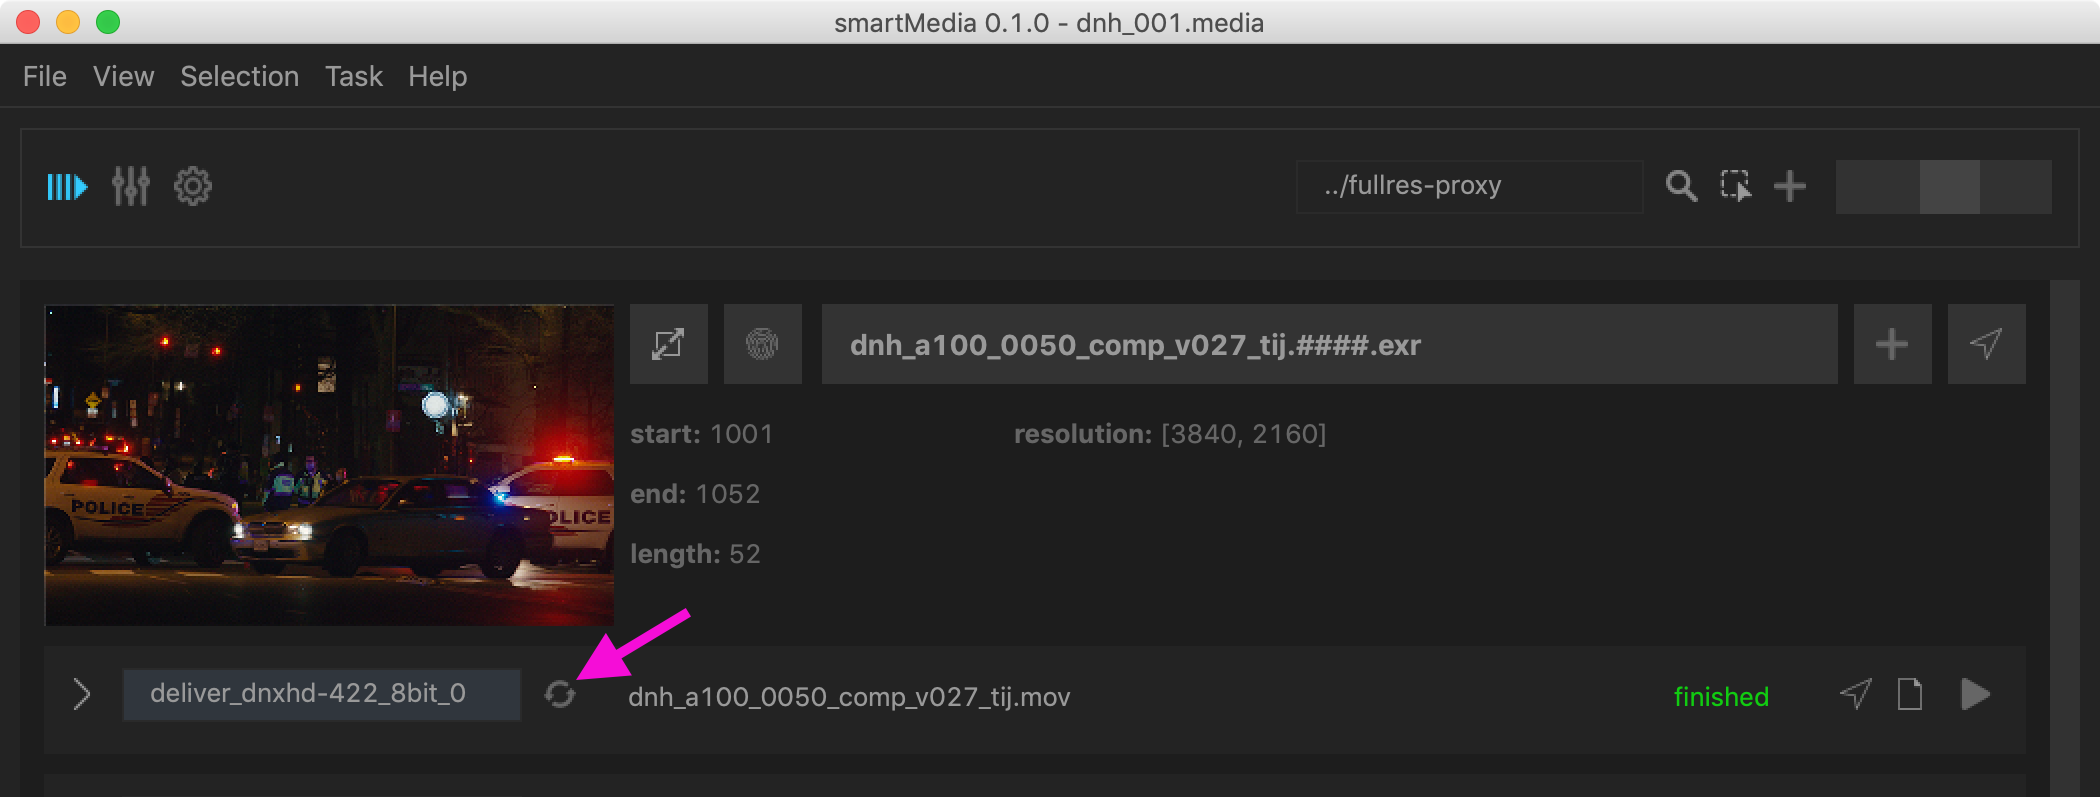
Tip
While working on your data.py file to lay out your custom logic you can
easily test it by re-applying the preset without the need to re-launch
smartMedia. Simply click the reload button next to the preset as seen below.
This will re-run your data.py’s main function with all changes
automatically applied.
Executing custom callbacks before and/or after render
Besides triggering custom Python code on applying a preset (data.py) as
seen in the previous section, smartMedia lets you also automatically trigger
custom code in the following situations:
- pre_render.py: Execute custom code right before rendering your task.
- post_render.py: Execute custom code right after your task finished rendering.
This can become useful in the following situations:
- Perform some last changes before rendering your file
- Remap paths if required
- Move or copy the rendered file to somewhere else
- Perform any call to your database
- Write an automated email
- Zip rendered file sequence or a specific folder
- And do many more things
This mechanism works identical to the previously described
data.py section,
so simply add a pre_render.py and / or a post_render.py file into your task
and smartMedia will automatically execute it before / after rendering. Please
also have a look at the dev preset that ships with smartMedia. Similar to
the data.py file, these modules should also contain a main module. On
function call, you will also have access to the task’s data dict and the logger
for logging purposes. Note that this function should not return anything.
Adjusting a preset’s template.nk
At any time you can adjust a preset’s template.nk. Simply reveal your preset in the presets section and open the preset’s template.nk file. The next time you apply the template to a source, the updates will become available.
colorspaces_autocomplete
A task’s source and target colorspace widget contains an autocomplete feature:
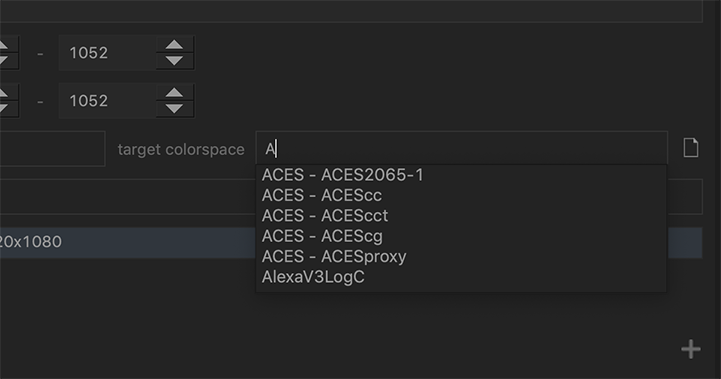
Auto completes ensures to set colorspaces quicker than manually typing them in and prevents from entering incorrect colorspaces that Nuke does not know. The auto complete items get stored inside a text file that is located here:
[User home]/cragl/smartMedia/colorspaces.txt
Use this file to set auto complete values that get available in the source and target colorspace details widgets. Auto completes help you speeding up to set colorspaces and reduce entering typos that would otherwise cause render jobs failures due to invalid colorspaces.
Any empty line or line starting with ‘#’ will be ignored. All others will be added as autocomplete items in the colorspace details widget. By default, we provide a selection of commonly used Nuke default colorspaces as well as a selection of comonly used ACES colorspaces. Feel free to adapt to your needs.
Any change in here requires a restart of smartMedia in order to show up in the auto complete list.
If you ever need to revert to the factory settings simply delete this file. The next time you launch smartMedia, a new default colorspaces.txt file will be created.
custom media commands
smartMedia lets you trigger any custom commands on a selected task’s render output path. These commands are available in the ‘Media Commands’ menu of the context menu that appears when right clicking any task inside smartMedia:
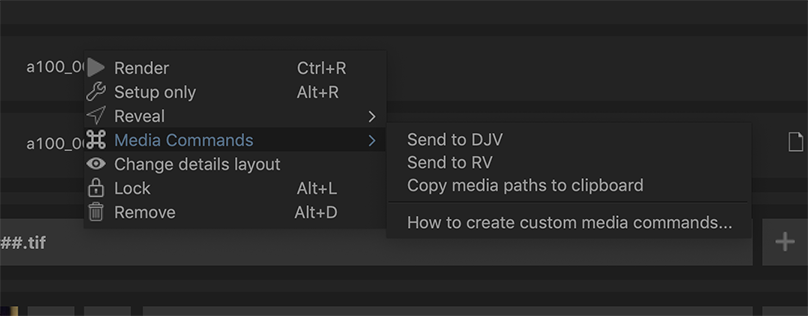
By default we already provide 3 custom media commands:
- Send to DJV:
Sends the task’s render output to the DJV media player. Keep in mind that
the DJV application needs to be installed on your machine and you need to
set the environment variable
CRAGL_SMARTMEDIA_DJV_EXECUTABLEwhich should point to the absolute path of the DJV executable. - Send to RV:
Sends the task’s render output to the RV media player. Keep in mind that the
RV application needs to be installed on your machine and you need to set the
environment variable
CRAGL_SMARTMEDIA_RV_EXECUTABLEwhich should point to the absolute path of the RV executable. - Copy media paths to clipboard: Copy the task’s render output path to your clipboard.
Custom logo in slate
The slate that ships with smartMedia can display a custom logo. This can
be used for example to show the logo of your company or for the current show.
All you need to do is set the environment variable CRAGL_SMARTMEDIA_LOGO
to the absolute path of your logo file. In order to get the best results,
use a 300px x 300px .png file as a logo.
As an example, here is a logo file:
Let’s assume this file lives in the following location:
/mnt/settings/logo.png
Setting the environment variable either in the system settings or anywhere else appropriate in your pipeline:
export CRAGL_SMARTMEDIA_LOGO=/mnt/settings/logo.png
The custom logo will then show up on the slate:
Translator
Each task contains a data.json file. This file contains key-value pairs.
These key-value pairs are translated into actionable items in a task’s
template.nk file in order to generate the render.nk file which will then
produce the rendering. The translation happens in the Translator class
that can be found here:
[path to cragl installation]/smartMedia_vX.X.X/cpXX/smartMedia/translator.py
Here we tell Nuke what to do on the render.nk file for each key. This happens before we render the render.nk file. Each key corresponds to a method (but that is not mandatory, there might not be a method needed for each and every key) of the translator and it will set the given value.
As an example take the following key value pair of a data.json:
{
    ...
    target_colorspace: 'sRGB'
    ...
}
The Translator contains a method with the very same name as the key, so In here we perform the logic for this key in order to set our render.nk file up the way we need it. In that example, we set the colorspace of our Write node to the specified value, which in that case is ‘sRGB’:
def target_colorspace(self, value):
    """Set the given colorspace for the Write node.

    Args:
        value (str): The colorspace to apply.

    """
    if not value:
        self.logger.info("Will not apply any colorspace as none is set.")
        return

    self.logger.debug("Setting target colorspace to: %s", value)
    self.target["colorspace"].setValue(value)
Note however, that there are certain key-value pairs that don’t need any method inside the Translator. As an example take the use_slate or use_burnins details. These get passed directly to the render.nk file where these boolean values drive the slates and burnins nodes to be shown or hidden directly.
Warning
The translator references the source Read node, Reformat node and Write node with the following names:
- smartMedia_source
- smartMedia_reformat
- smartMedia_target
The names of these nodes in any preset and any task Must Not change, otherwise operations cannot be transpated successfull!
Writing custom Media Commands
All media commands classes are are contained in the media_commands python
package that is located in: smartMedia.media_commands. Each media command
is located in a separate module and all media command classes inherit from the
abstract BaseMediaCommand class which is located in:
smartMedia.media_commands.base_media_command.BaseMediaCommand.
This abstract base class provides base functionality for all media command classes. When creating a new media command you can simply inherit from this abstract base class. You will need to implement the following abstract methods:
label (None -> str): Return the label to show in the UI for this command.process (:obj:`list` of :obj:`smartMedia.media.Media` -> None): Process action for the selected task’s render output. This method dictates what to do when clicking the media command or executing it manually. When triggering the command from the smartMedia context menu then the selected task’s render output media will automatically be passed your custom command. If you want to execute your custom command via code please have a look at the example being provided in the module doc string of the base_media_command module.
You need to register the media command to smartMedia so that it shows up in
smartMedia. Navigate to smartMedia.media_commands.__init__.py, import your
class and call osl.register_media_command(<media command class>) at the end of
the module. Have a look at smartMedia.media_commands.__init__.py for more
information as it already contains register examples.