Settings
smartMedia contains many settings to adjust it to your needs. You can access the settings by clicking the presets button in the top bar or using the shortcut Ctrl + 3.
The settings are split into 3 sections:
- General: A variety of general settings to adjust smartMedia to your needs.
- Paths: Everything that is path related in smartMedia.
- Naming: This section lets you set up the naming extractions for your sources.
You can access these sections with the section buttons as seen below:

Note
Changing some settings require a restart of smartMedia. Please refer to the tooltips to find out which settings widgets requires that.
The General section
The General section contains various general settings to adjust smartMedia to our needs:
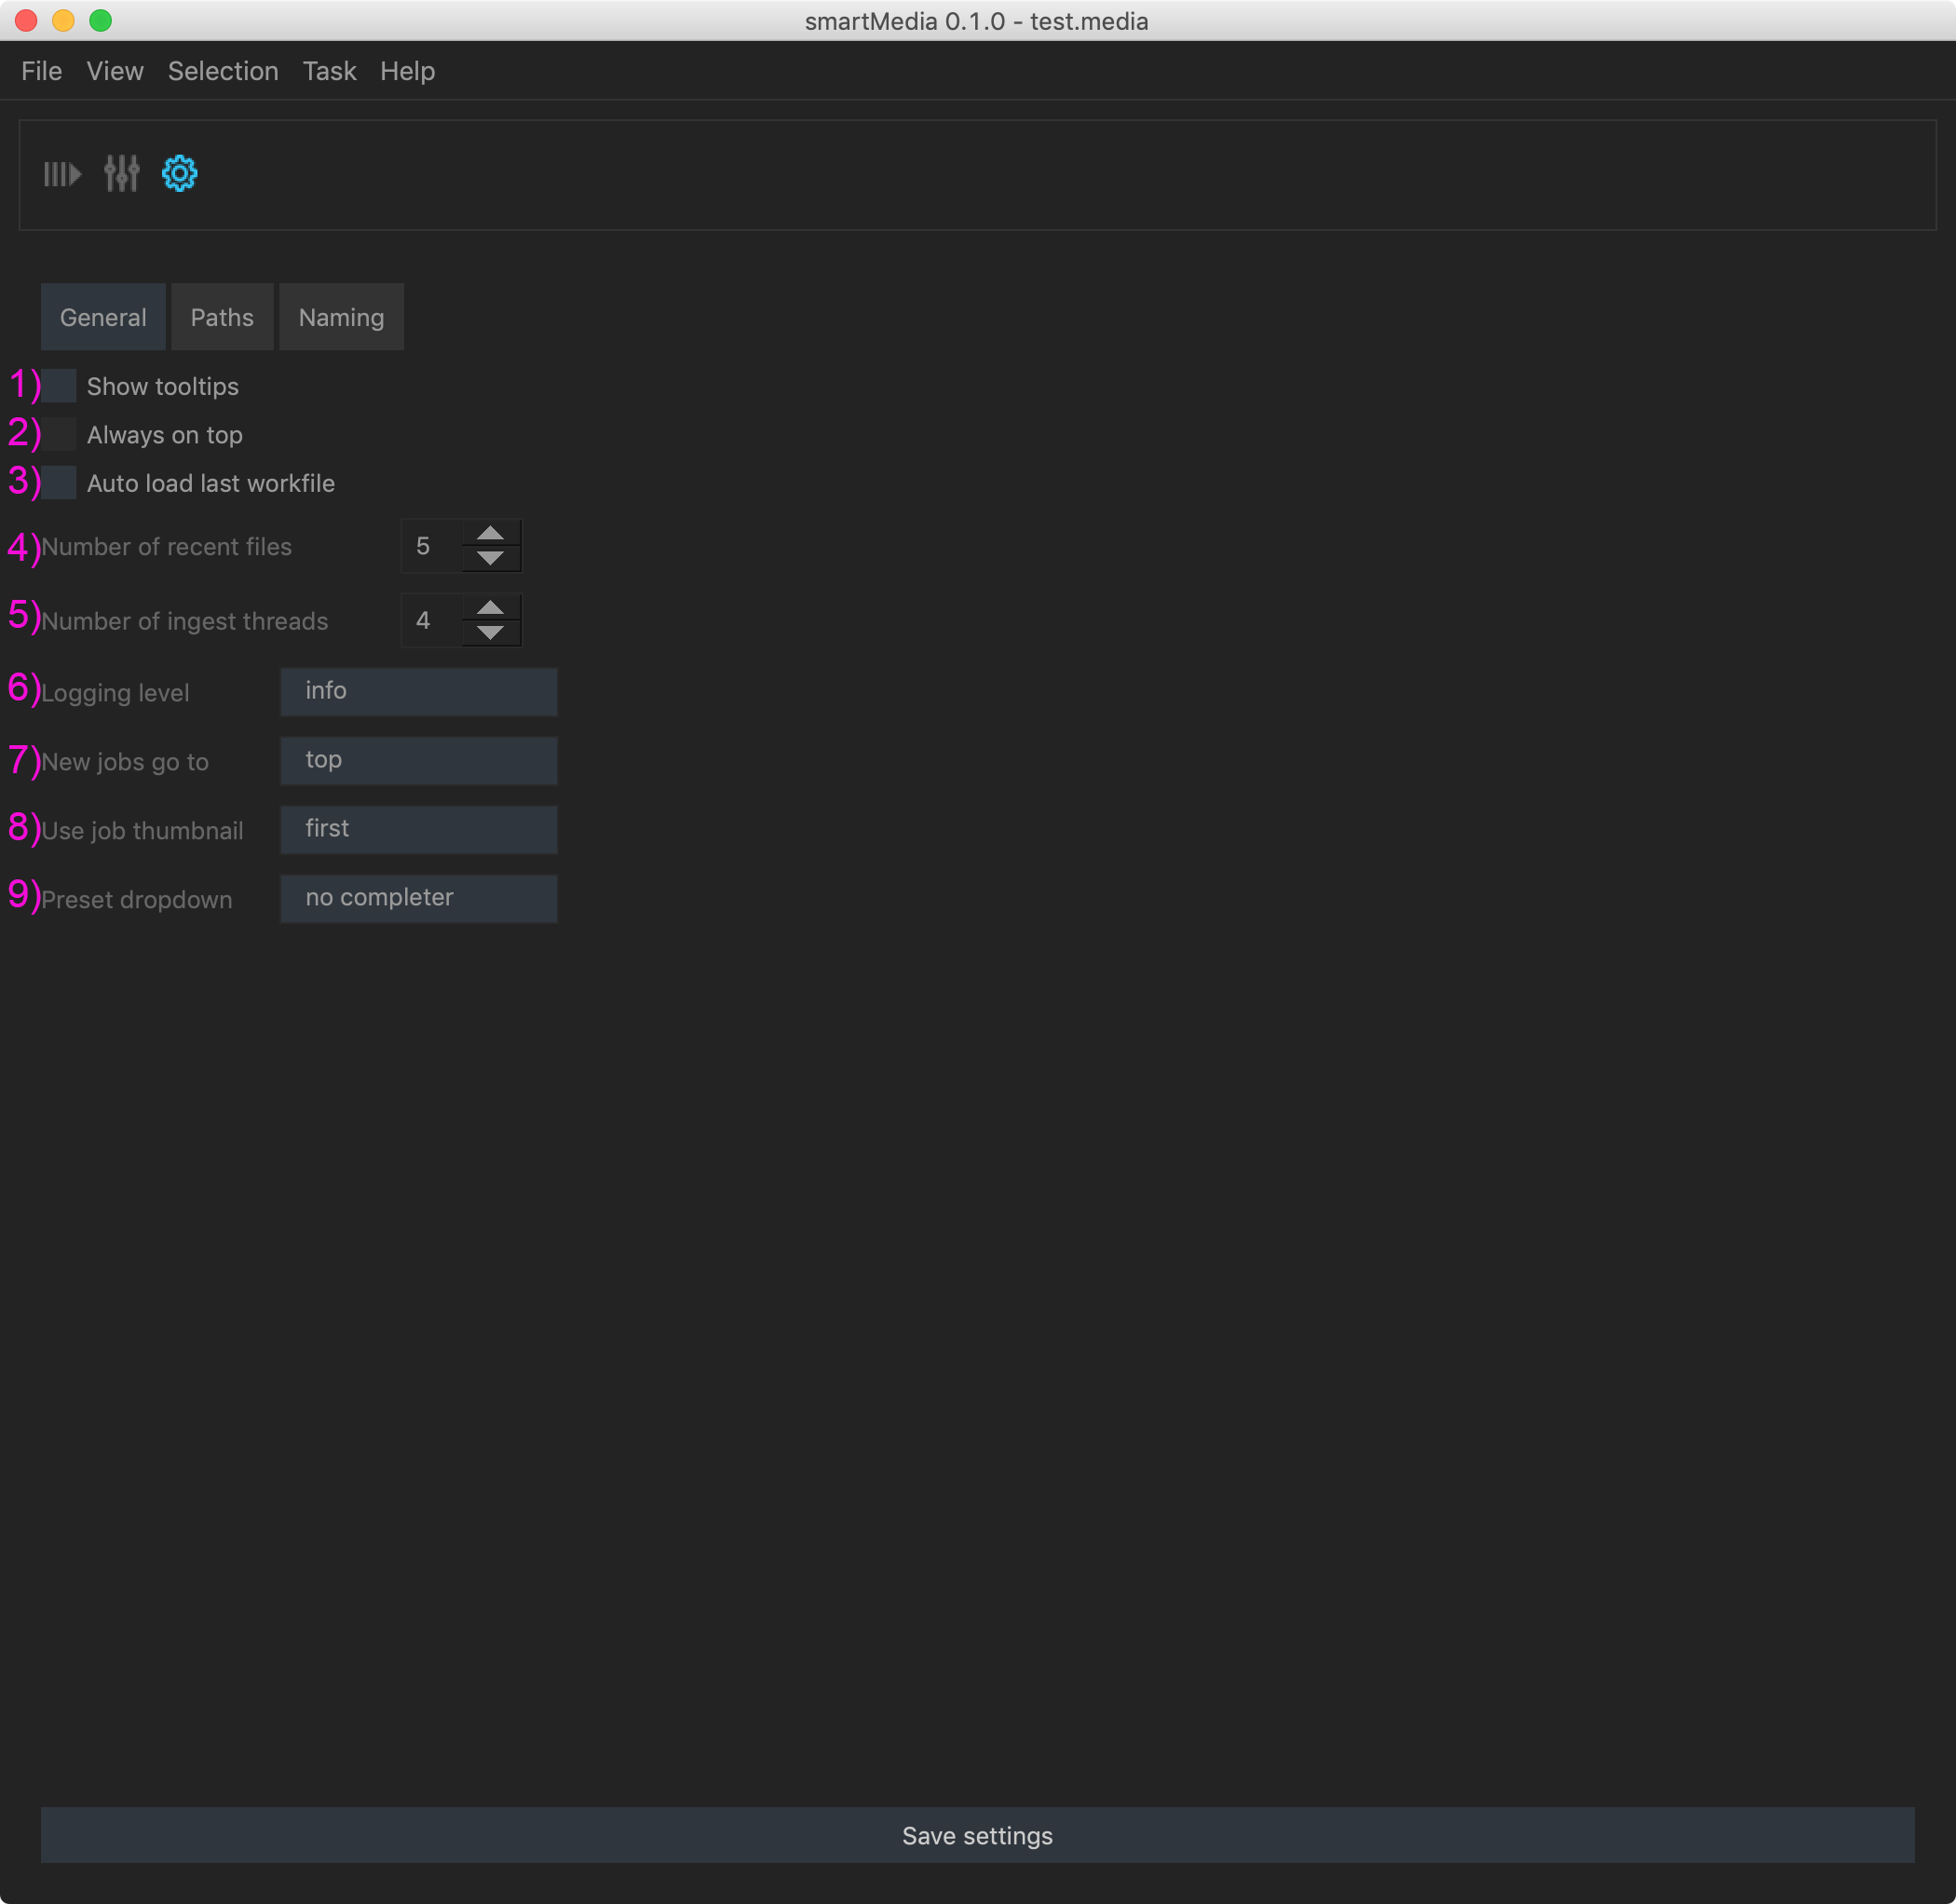
1) Show tooltips: When checked this shows tooltips for all major widgets.
2) Always on top: When checked the main window stays always on top of all other windows. Uncheck if that is not wanted.
3) Auto load last workfile: When checked your latest working file along with all its jobs and tasks gets automatically loaded. Uncheck to start always with an empty window without any jobs.
4) Number of recent files: smartMedia’s ‘File’ menu contains a ‘recent files’ sub menu that lets you quickly load recent job files. Choose the number of recent files to keep in that list. Once the number of recent files exceeds this number then the oldest file gets removed from that list.
5) Number of ingest threads: Determine the number of threads to use for parallel ingestion when bringing media into smartMedia.
6) Logging level: Determine the logging level to use. Debug level shows you the most information, error the least.
7) New jobs go to: Determine if new ingested media should go to the top of the jobs list or if it should be appended to the bottom.
8) Use job thumbnail: When ingesting media into smartMedia use the first, middle or last frame as a thumbnail.
9) Preset dropdown: Choose ‘completer’ and type in a preset name into the preset dropdown menu to get suggestions on presets. Use ‘no completer’ to get a normal dropdown to scroll through. Using a completer might be quicker as soon as you start having a long list of presets as you can quickly type in which template you want to apply.
The Paths section
The ‘Paths’ section covers all settings that are path related in smartMedia. smartMedia writes certain settings data onto disk. By default this locates to your user folder. However, when working in a team it makes sense to shift these paths to a location that several machines can access so that several smartMedia instances can consume the same data. As an example, you can create presets and nodes that several machines can access.
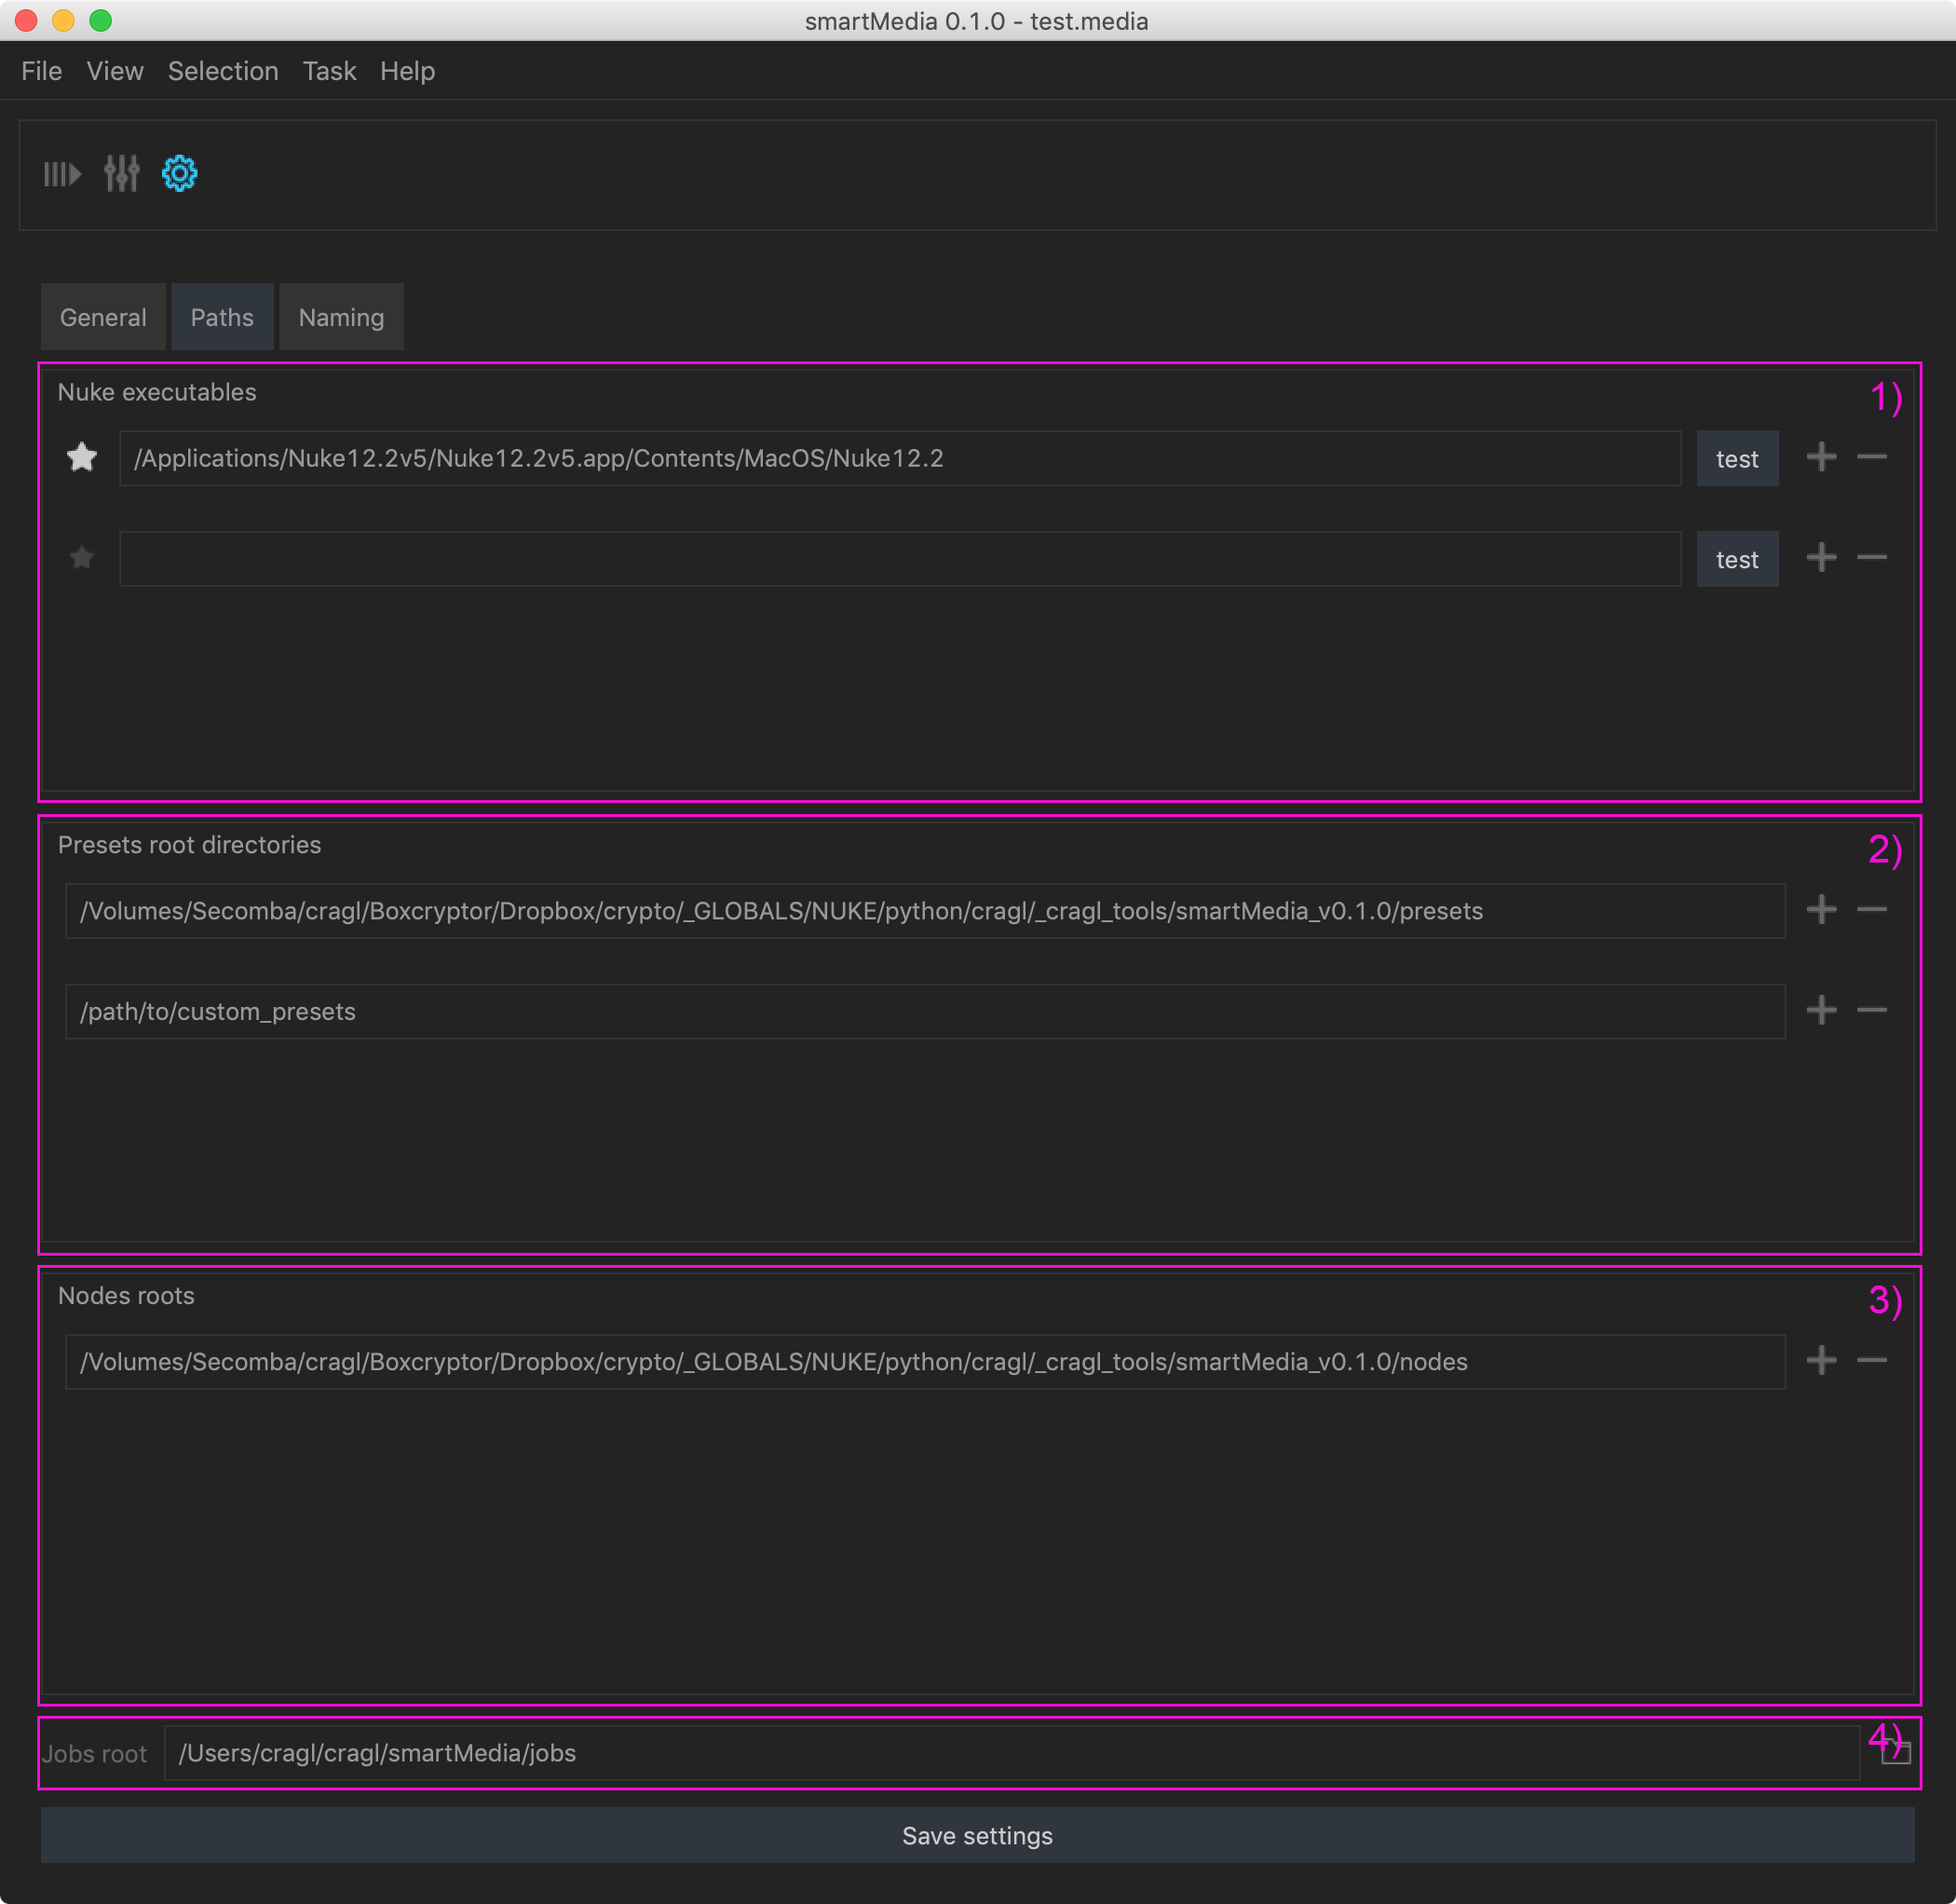
1) Nuke executables:
smartMedia uses Nuke under the hood to ingest and render the tasks. Here you
can set up the absolute path to your Nuke executable. In case you want to
switch between Nuke executables click the + button and enter a new absolute
path to your Nuke version root. Click the test button to let smartMedia
automatically find your Nuke executable. Click the - button to remove the
Nuke executable. Click the star button to make a Nuke executable the
executable to use for all presets by default, unless a preset or task sets an
executable version explicitly by using the preset settings key:
"nuke_version".
Example: "nuke_version": "12.2"
2) Preset root directories: Here we configure the absolute paths of folders that contain presets. All presets in these root directories will then show up in every task’s presets dropdown menu. Click the + button to add a new root. Click the - button to remove a root. This will of course not delete the presets, they will simply not be shown anymore in any task’s presets dropdown menu.
3) Nodes roots: Paste the root directory that contains nodes that can be used when processing a task, e.g. burnins, slates, reformats, etc.
All nodes that contain ‘burnins’ or ‘slate’ will be discovered and selectable in the presets wizard so that you can use them in a preset.
Jobs root: This is the root directory where all metadata for all jobs and tasks are stored.
The naming section
smartMedia offers functionality to split naming values from paths and base names for all sources. Trying to split naming values gets triggered automatically (by default, can be turned off if needed) when dropping media into smartMedia. You can also extract manually at any time using the naming widget that can be found on every source.
splitting naming values from a path or basename gets done via regular expressions. These describe a generic path structure that needs to match and if it matches then smartMedia can and will extract naming values from it.
The naming values can be used in the slates, burnins, when assembling paths and in many other locations.
The naming section lets you configure your naming settings. You can create as many patterns as needed. The naming section contains the following widgets:
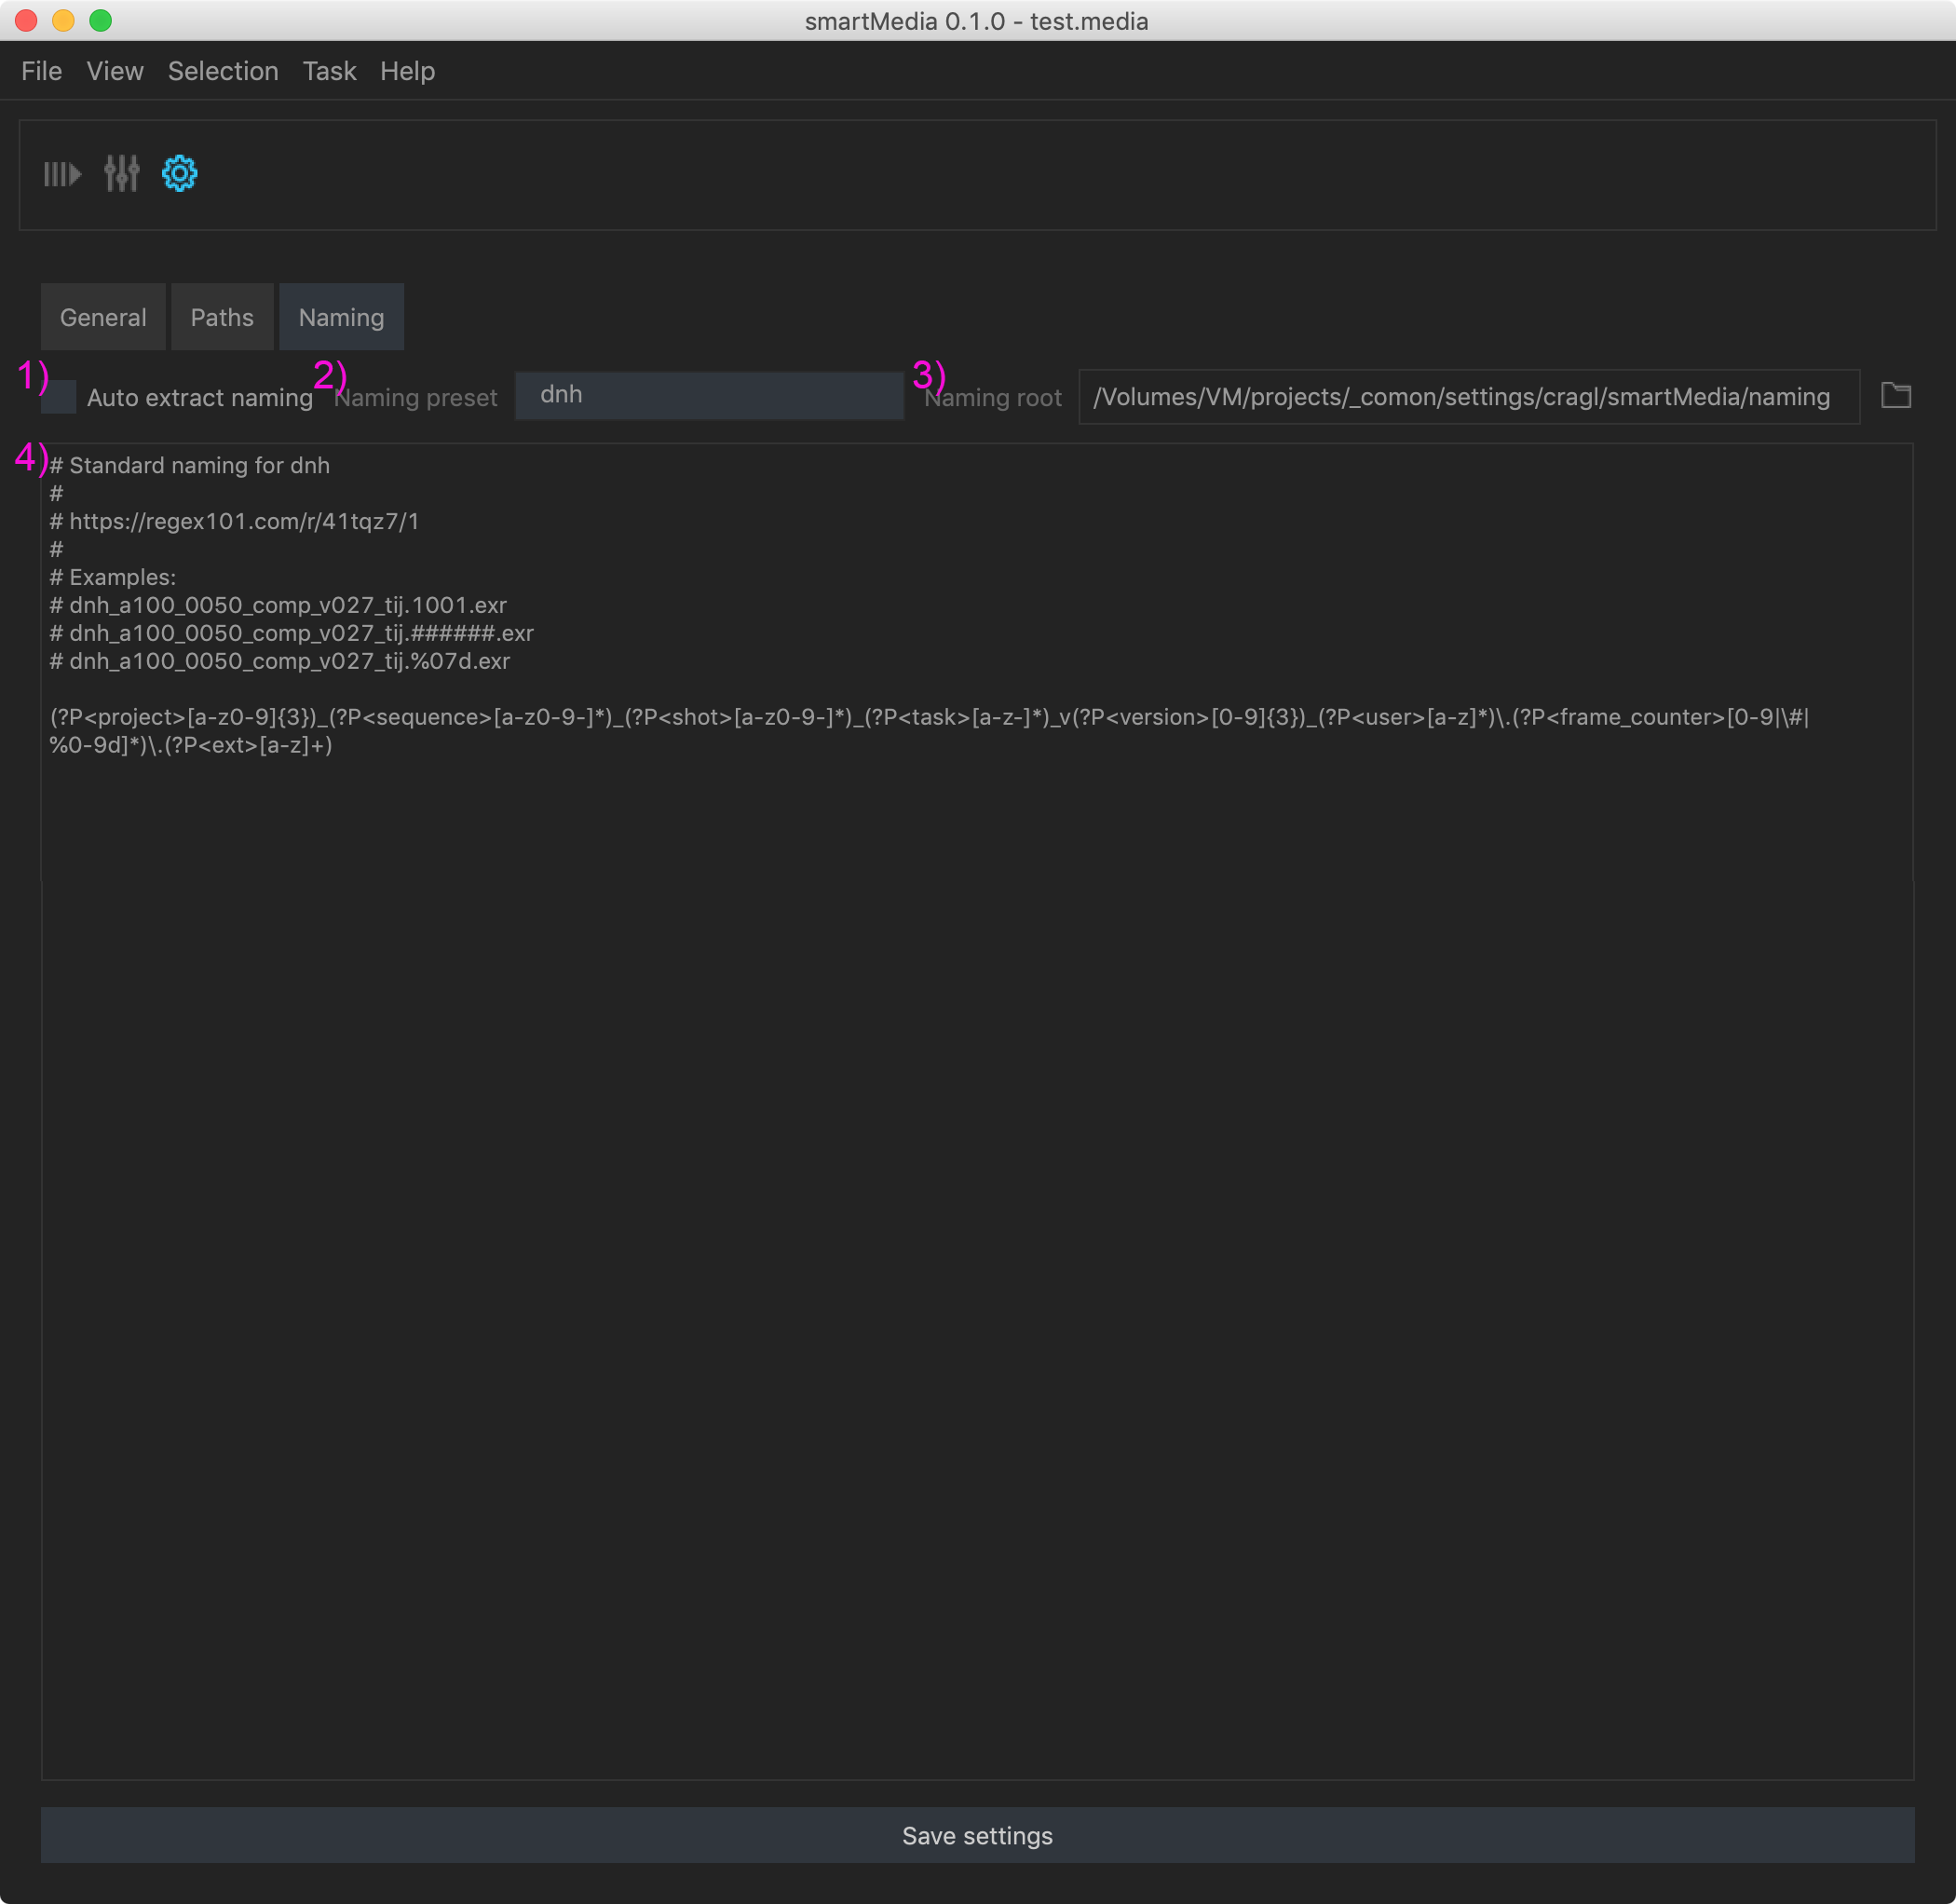
1) Auto extract naming: When checked this will automatically try to extract naming values from an ingested source by going through all defined naming patterns to see if one matches. If it finds one it will extract the naming values.
2) Naming preset: Select a naming preset to load into the editor below. The selected naming preset will be applied to all sources that you ingest from then on. Choose the empty value at the top to disable extracting any naming from a source when ingesting. Keep ‘Auto extract naming’ checked so that smartMedia automatically detects and applies the matching pattern when ingesting new sources.
3) Naming root: Choose the root directory that smartMedia uses to search for naming patterns. By default this root points to a local user path. However when working in a team it might be advisable to point to a location that all machines in your team can access. This enables then to use the same patterns across multiple machines. Each naming pattern is stored in a separate simple text file. Note: Files starting with an underscore get ignored from showing up in the naming preset drop down menu. This lets you easily hide files in the window.
4) Naming pattern:
Here you can define any naming pattern. This uses regular expressions. Any
line in here starting with a # as well as empty lines will be skipped. This
lets you add comments around your pattern and lets you try out different
patterns by commenting some out. The first line that does not start with a
# and that contains characters will be used as pattern.
For more information on naming please have a look at the naming section.