Quickstart
Let’s ingest and convert some media to see how smartMedia works.
Setting Nuke executable
Let’s launch smartMedia. If you are inside Nuke navigate to your menubar and choose cragl -> smartMedia -> open smartMedia. If you would like to launch smartMedia standalone navigate to your smartMedia installation folder and into the standalone folder and click the start batch file for your currently used operating system. See the appendix page for requirements to launch smartMedia in standalone mode.
The first time you launch smartMedia, you will be asked to set a Nuke executable. This occurs only when running in standalone mode. This step is required to set up once so that smartMedia knows where it can find Nuke. Nuke is required for smartMedia as it uses Nuke for rendering your tasks. You can always add additional Nuke executables afterwards in the settings and switch between these if needed. So browse to your Nuke executable and click OK. You are now ready to go.
Ingesting elements
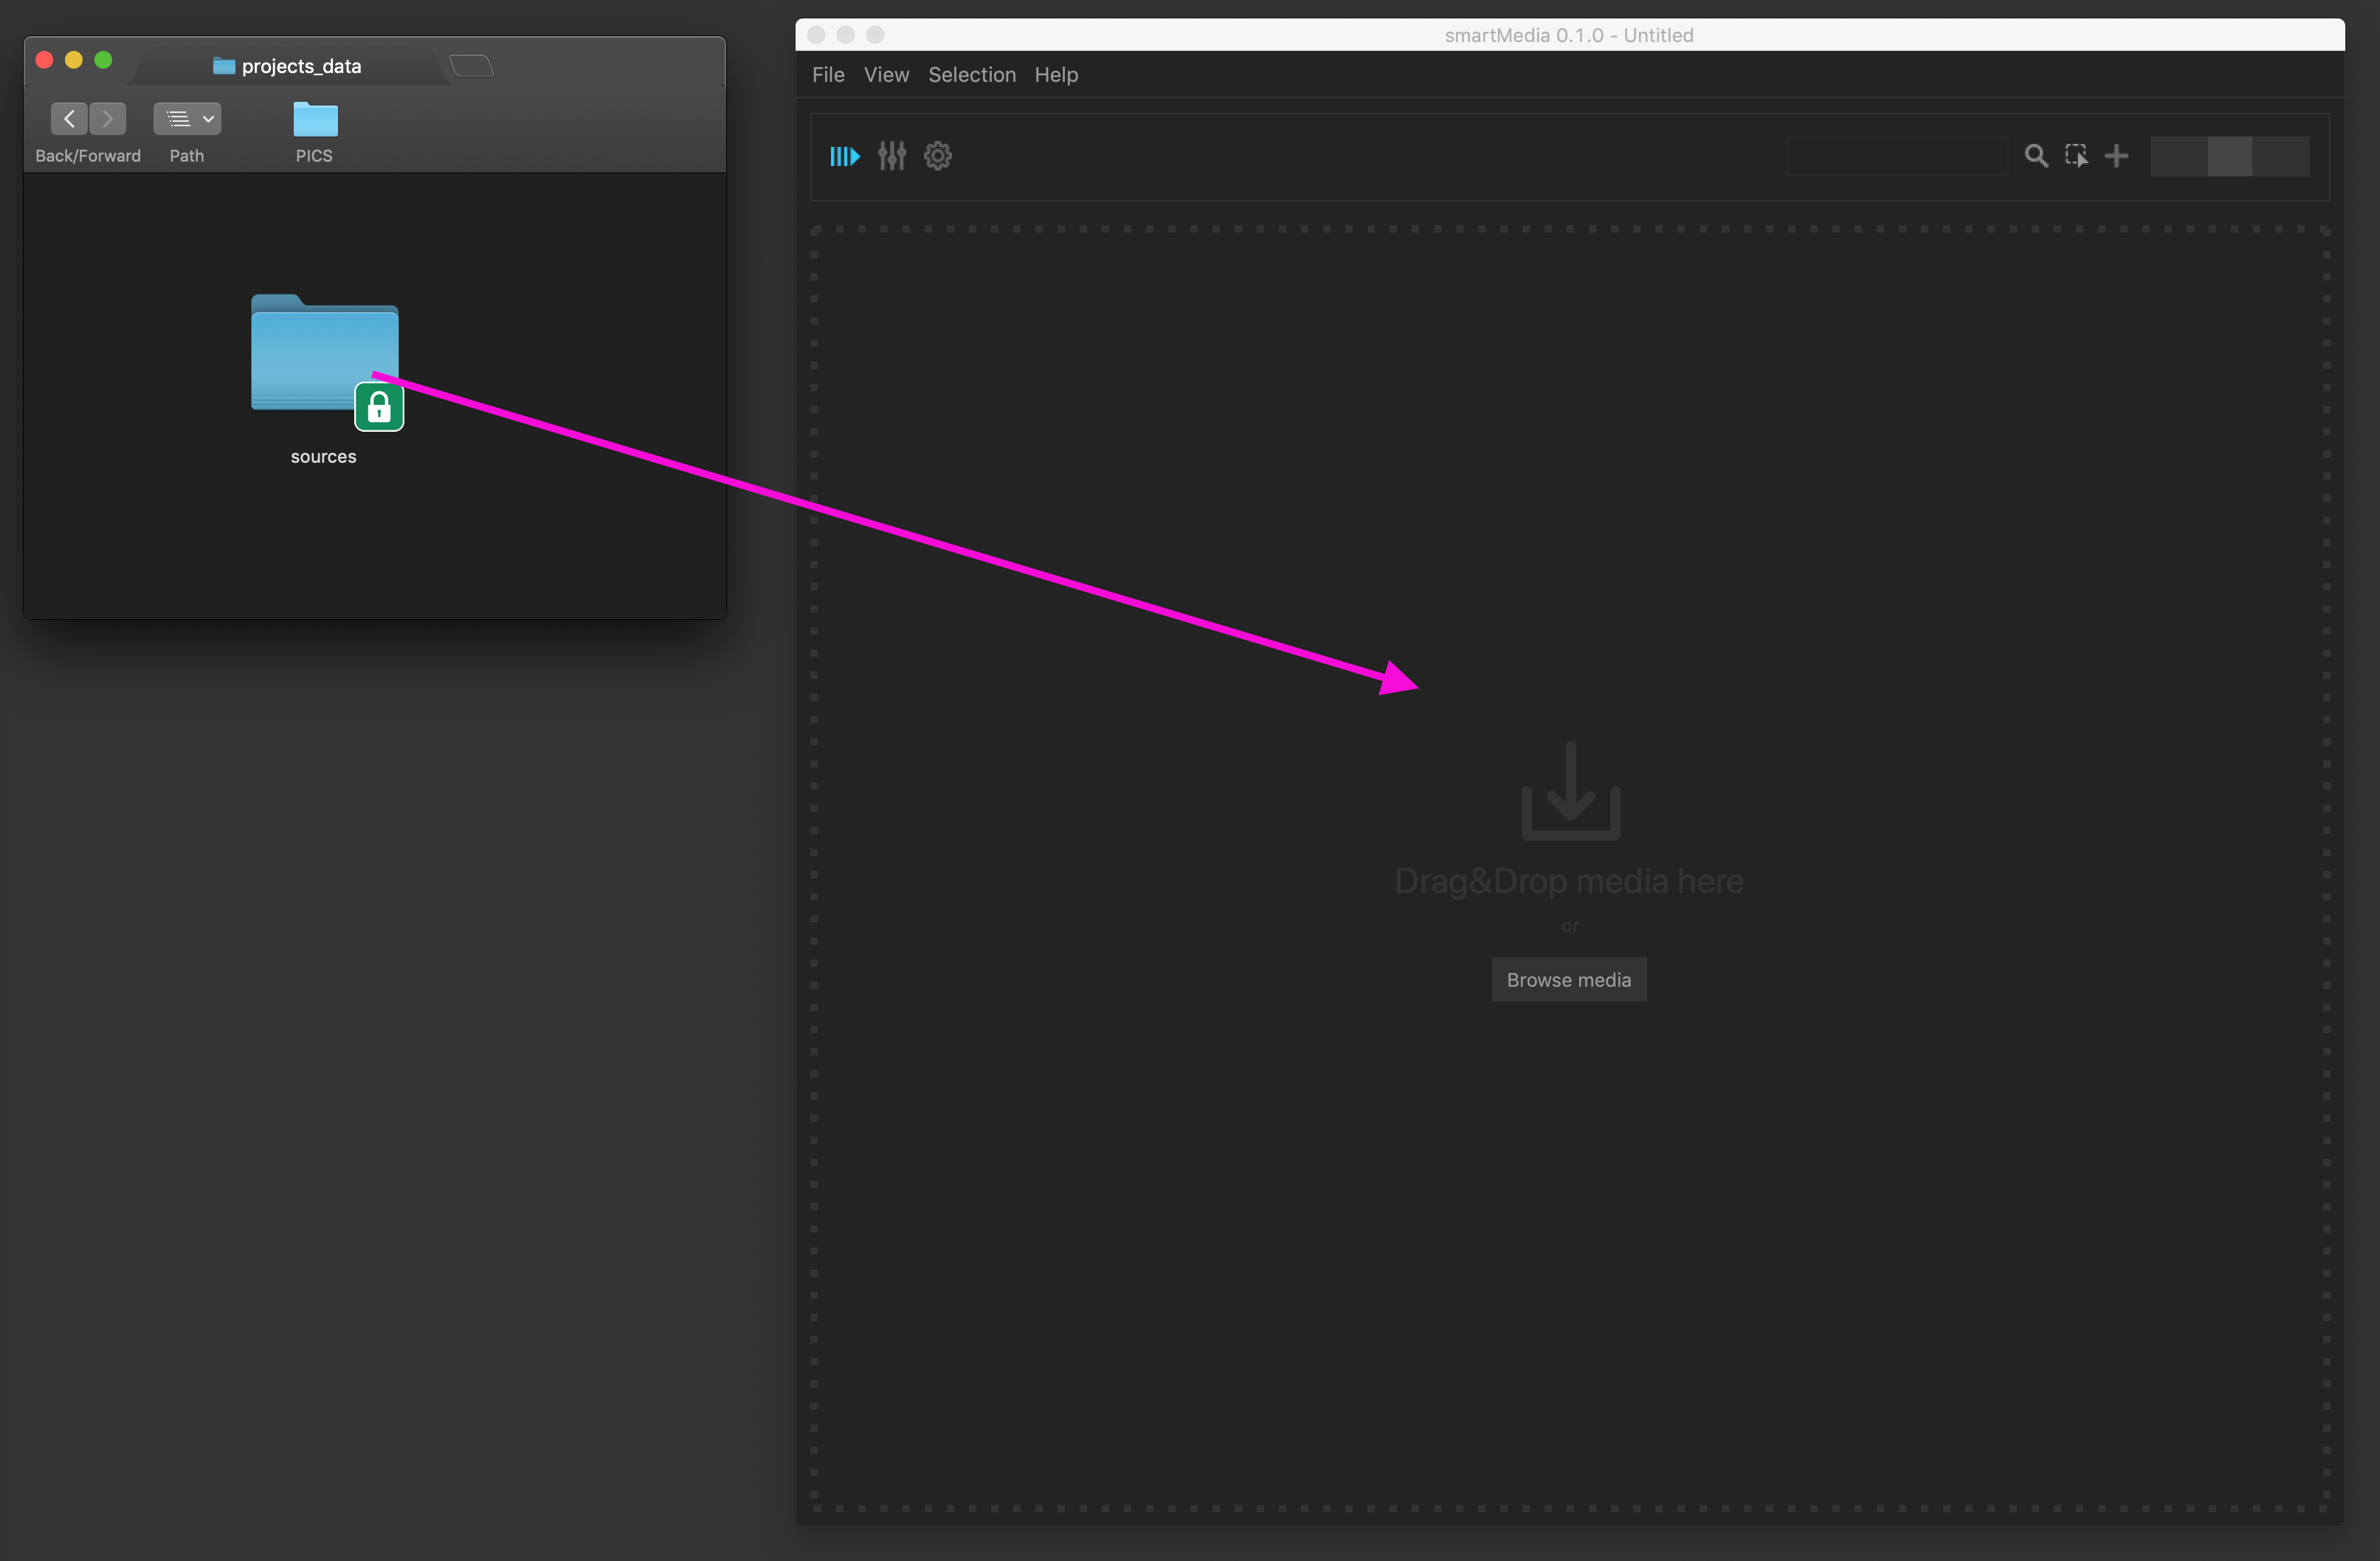
Before converting media, let’s get some sources into smartMedia. To do that simply drag and drop one or multiple media files onto smartMedia. You can drop folders with any nested folder structure onto smartMedia and it will scan your dropped folders for media and ingest these automatically for you.
smartMedia ingests all sources for you automatically. It will automatically collect all the sources metadata, render a thumbnail and extract naming information that you can use down the line when rendering tasks. This will be discussed further below.
You can feed in any media that Nuke can read and write. So for example you can ingest image file sequences (exr, tiff, dpx, jpg, png, cineon, hdr, etc) but also videos (red, mp4/h264, prores, DNxHD, uncompressed, etc) into smartMedia.
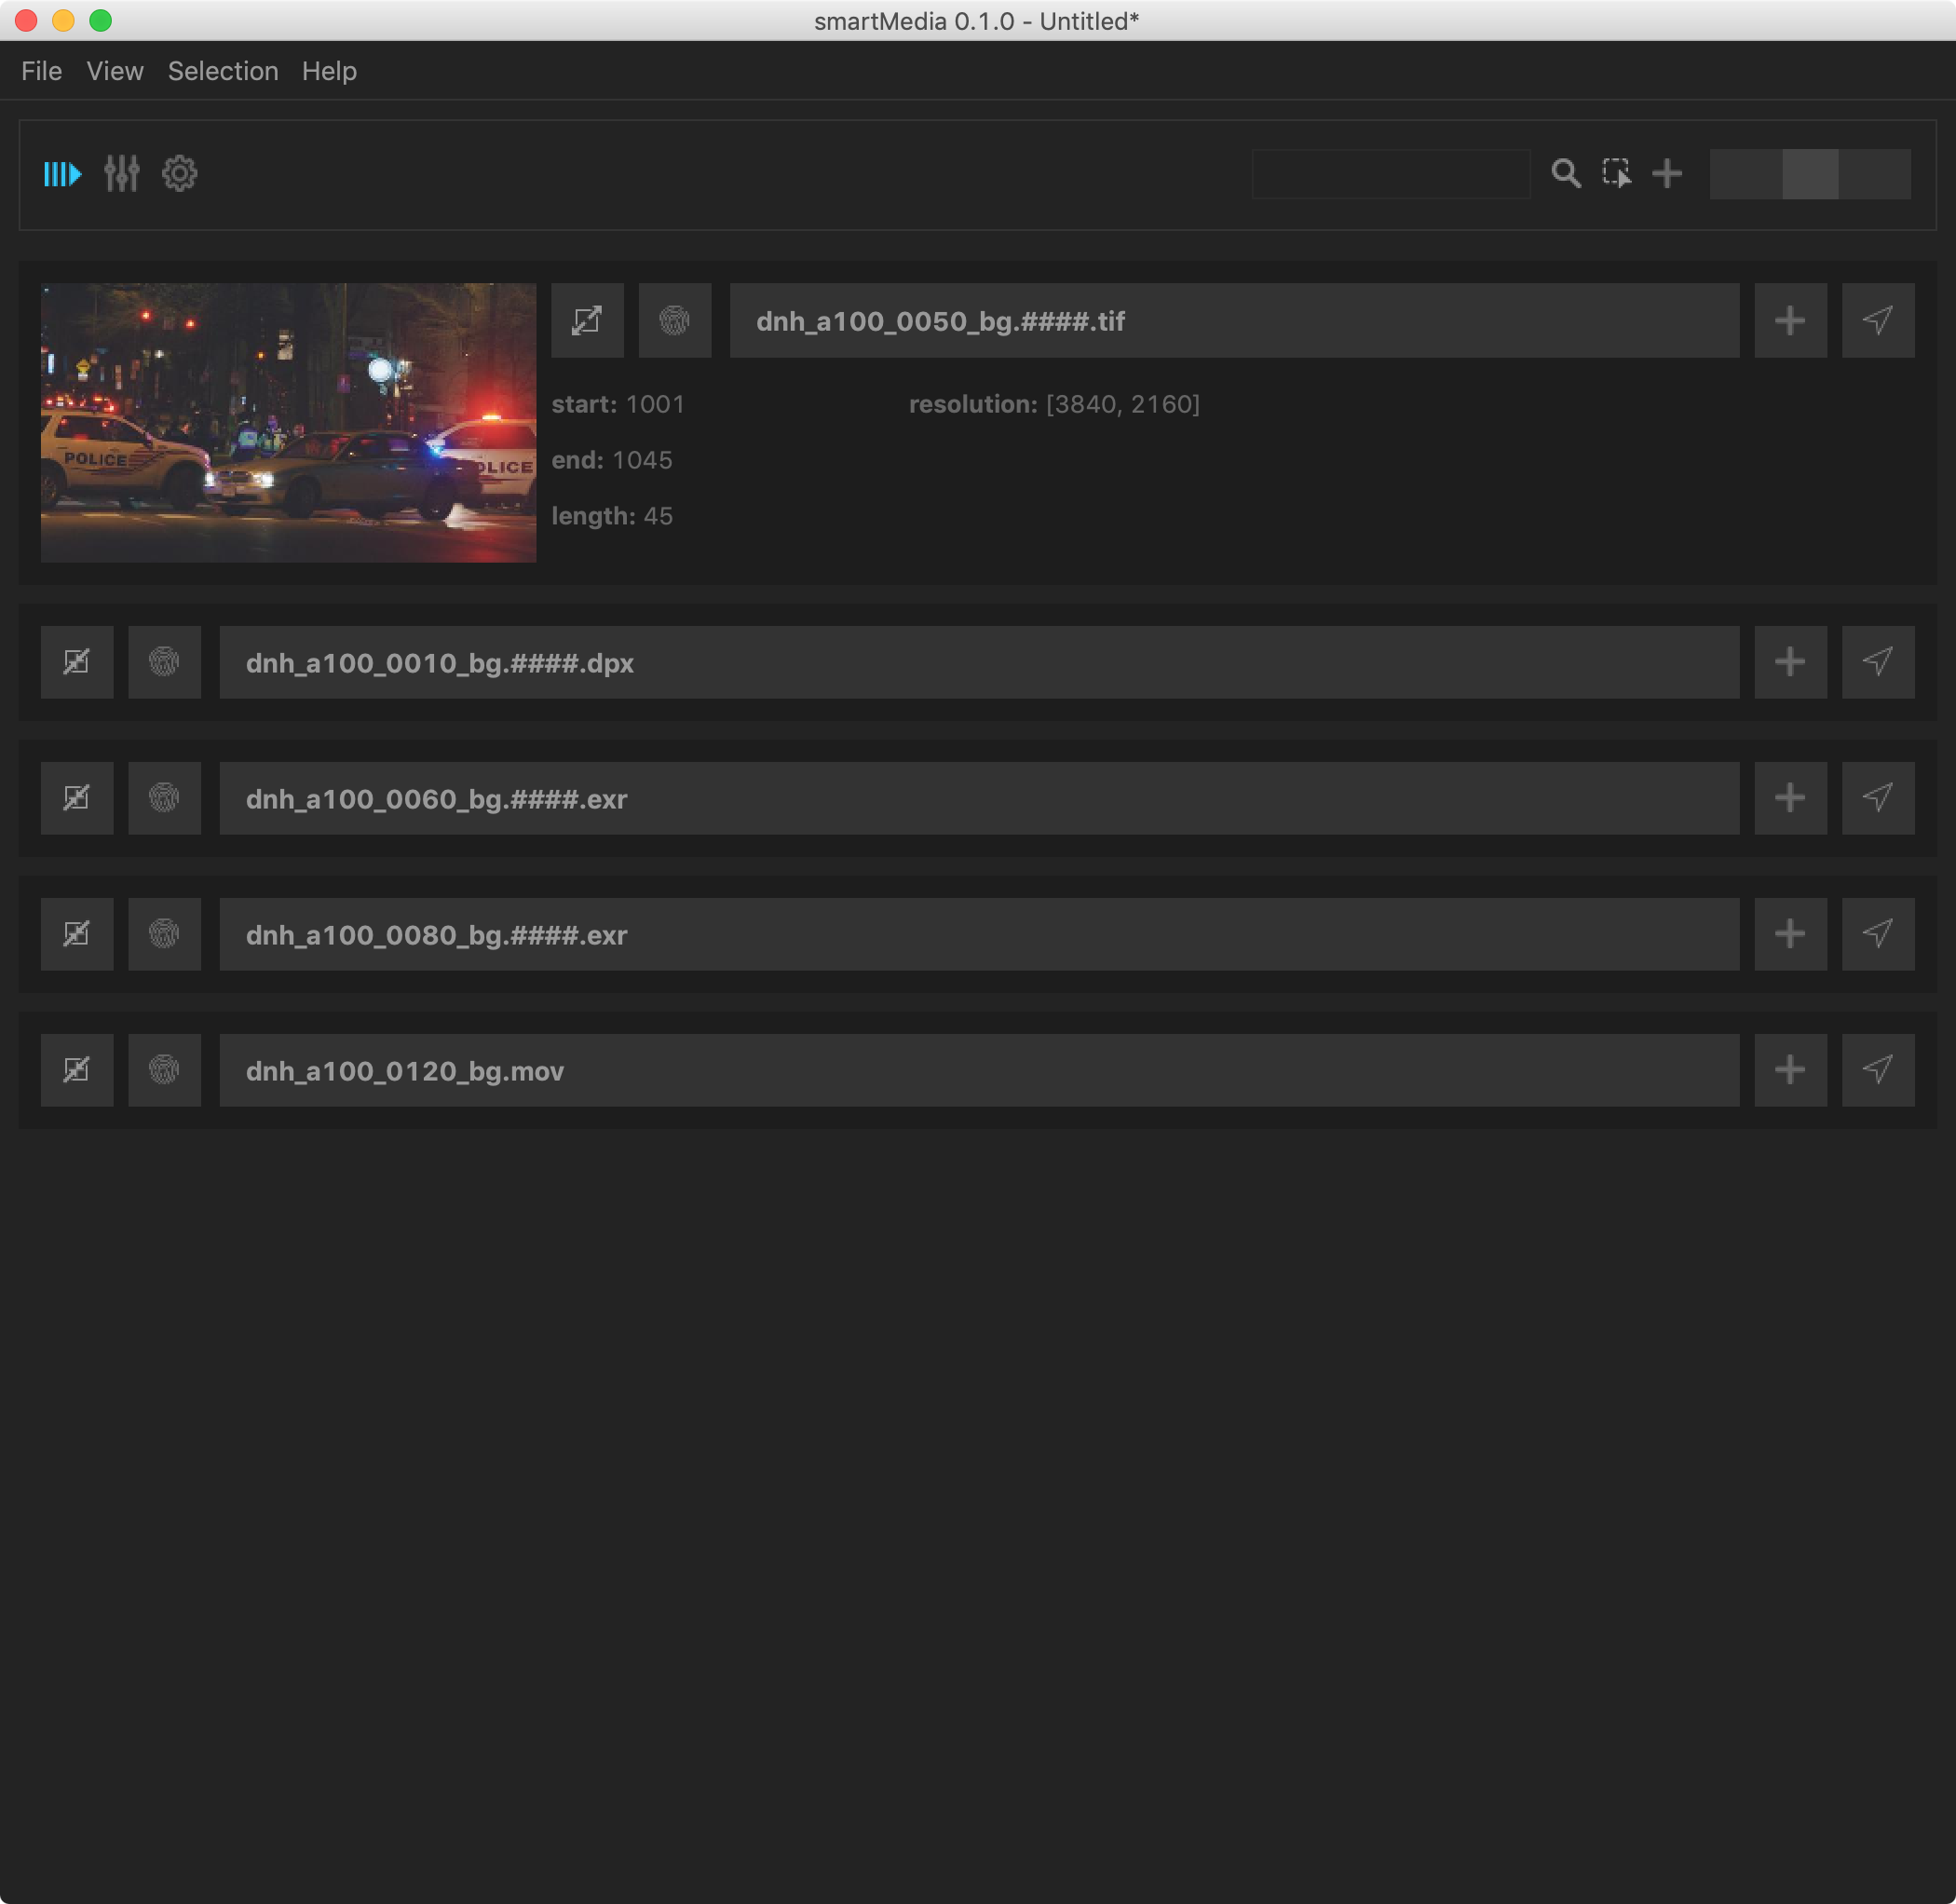
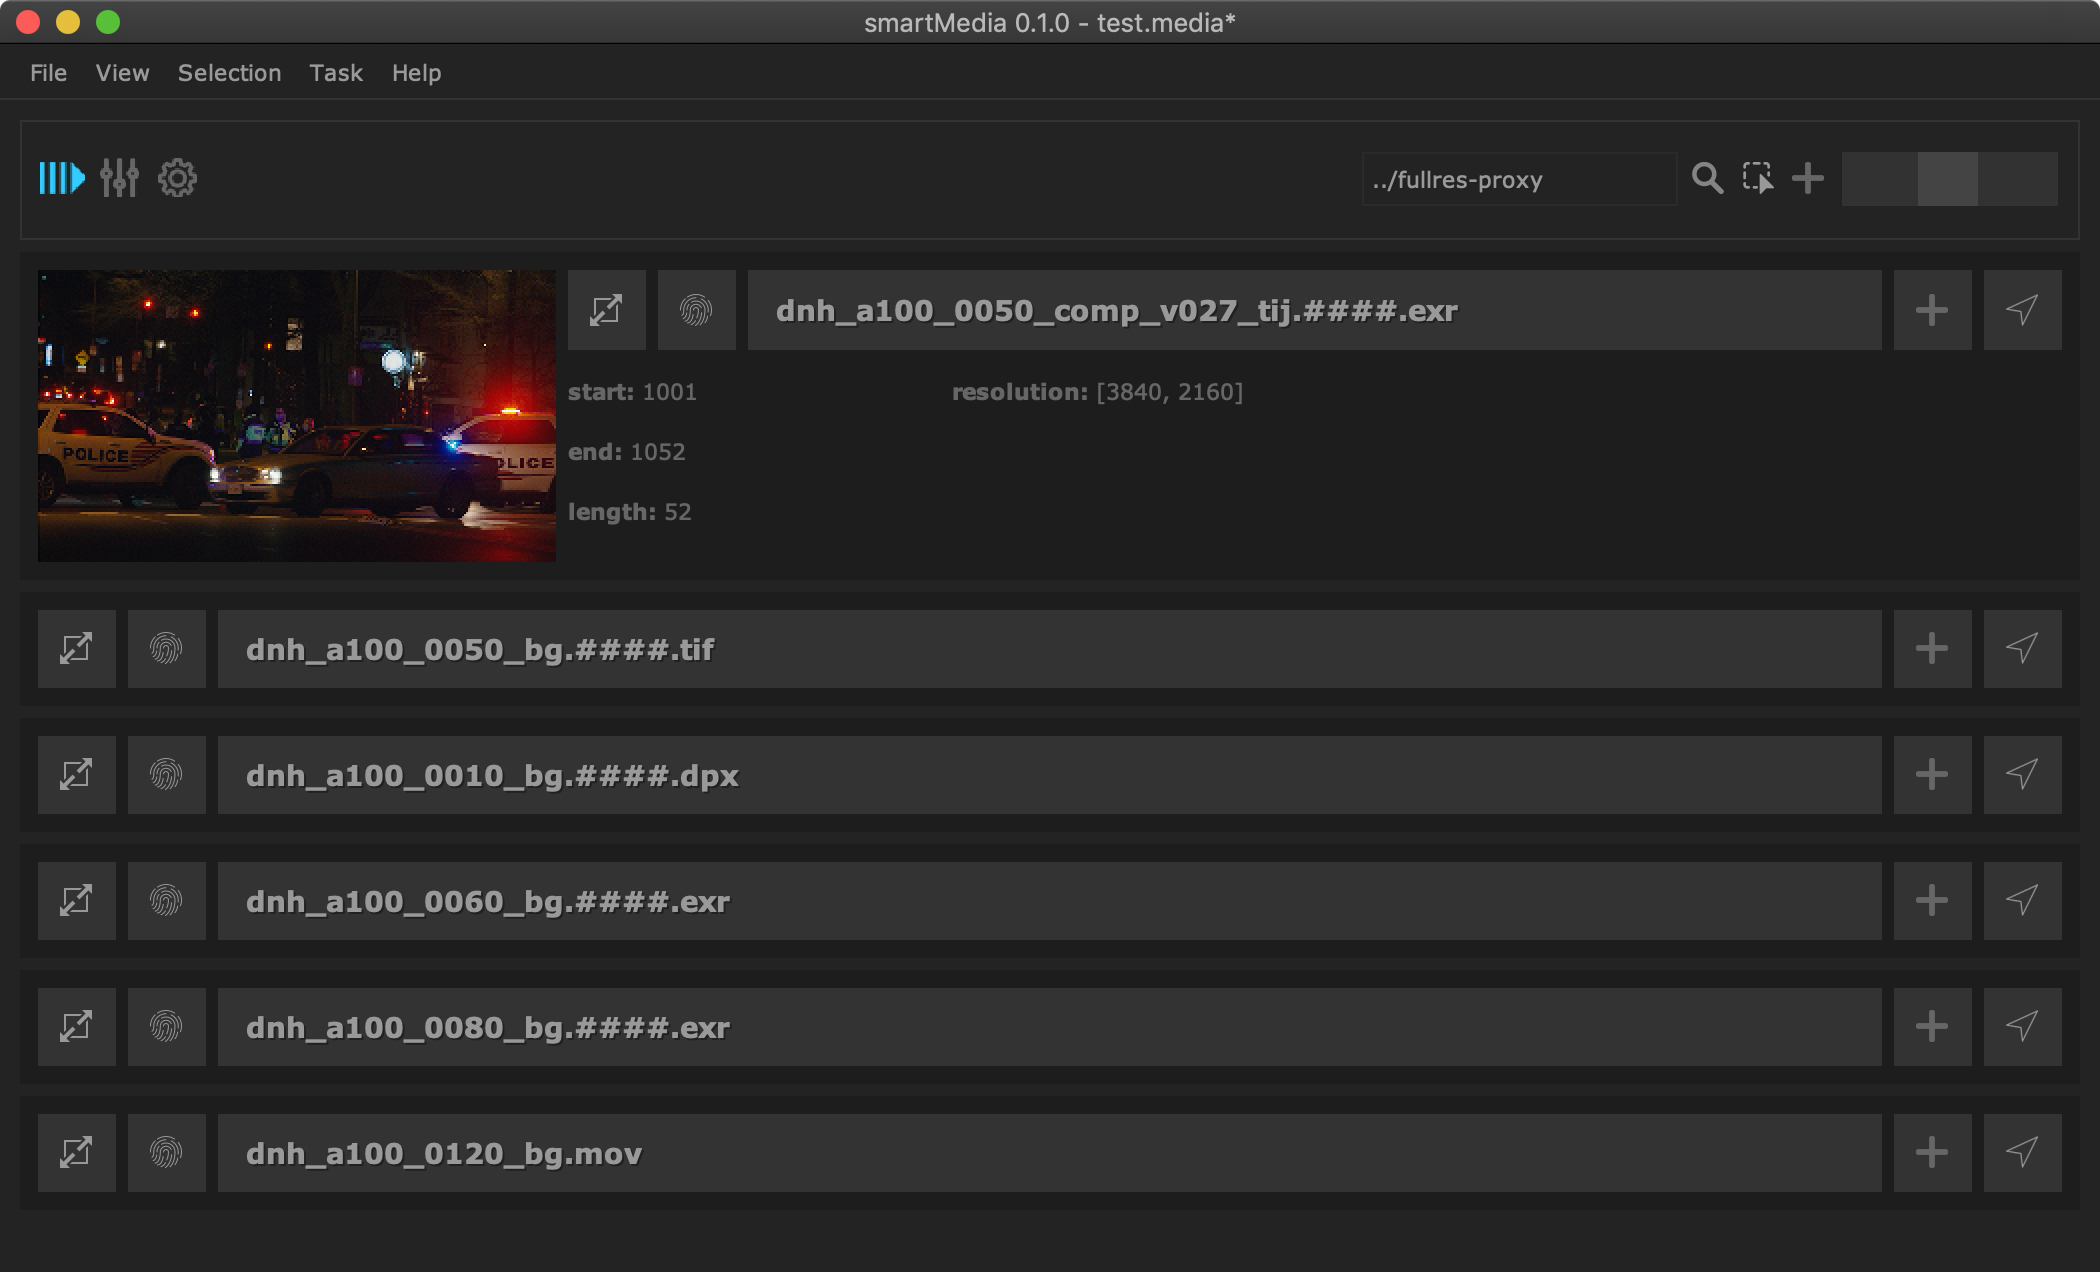
All ingested media gets listed in the jobs list:
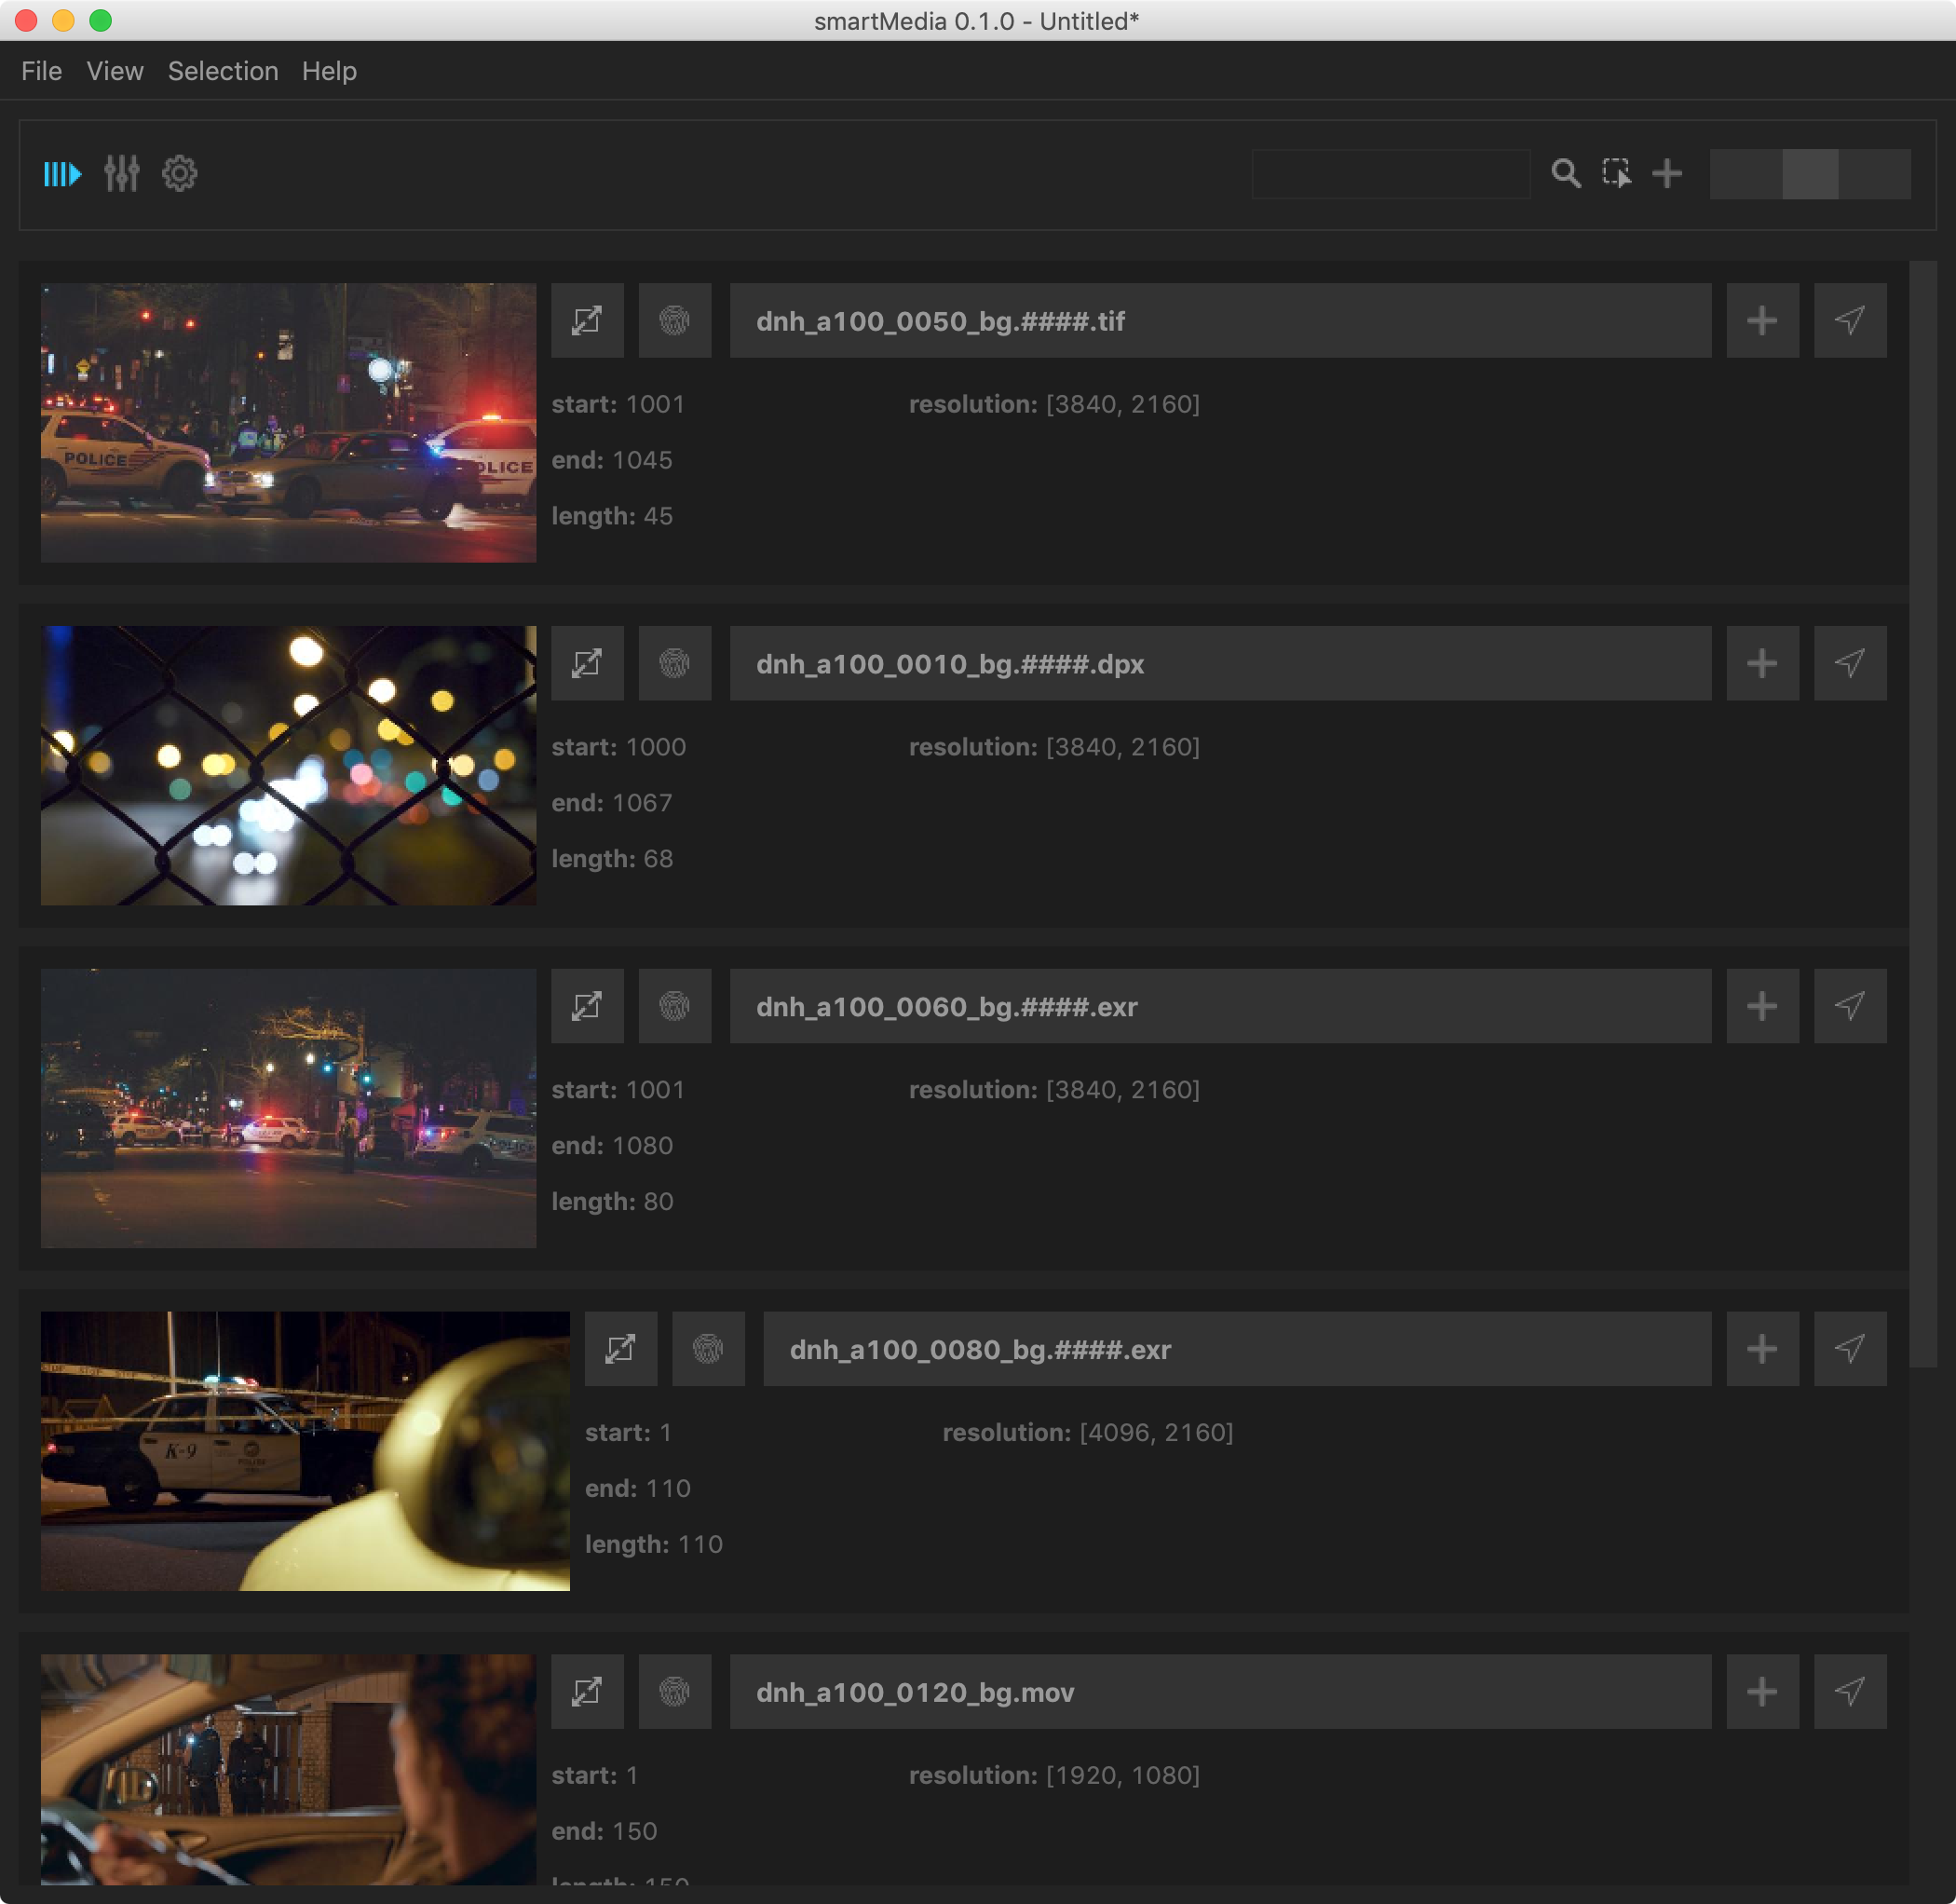
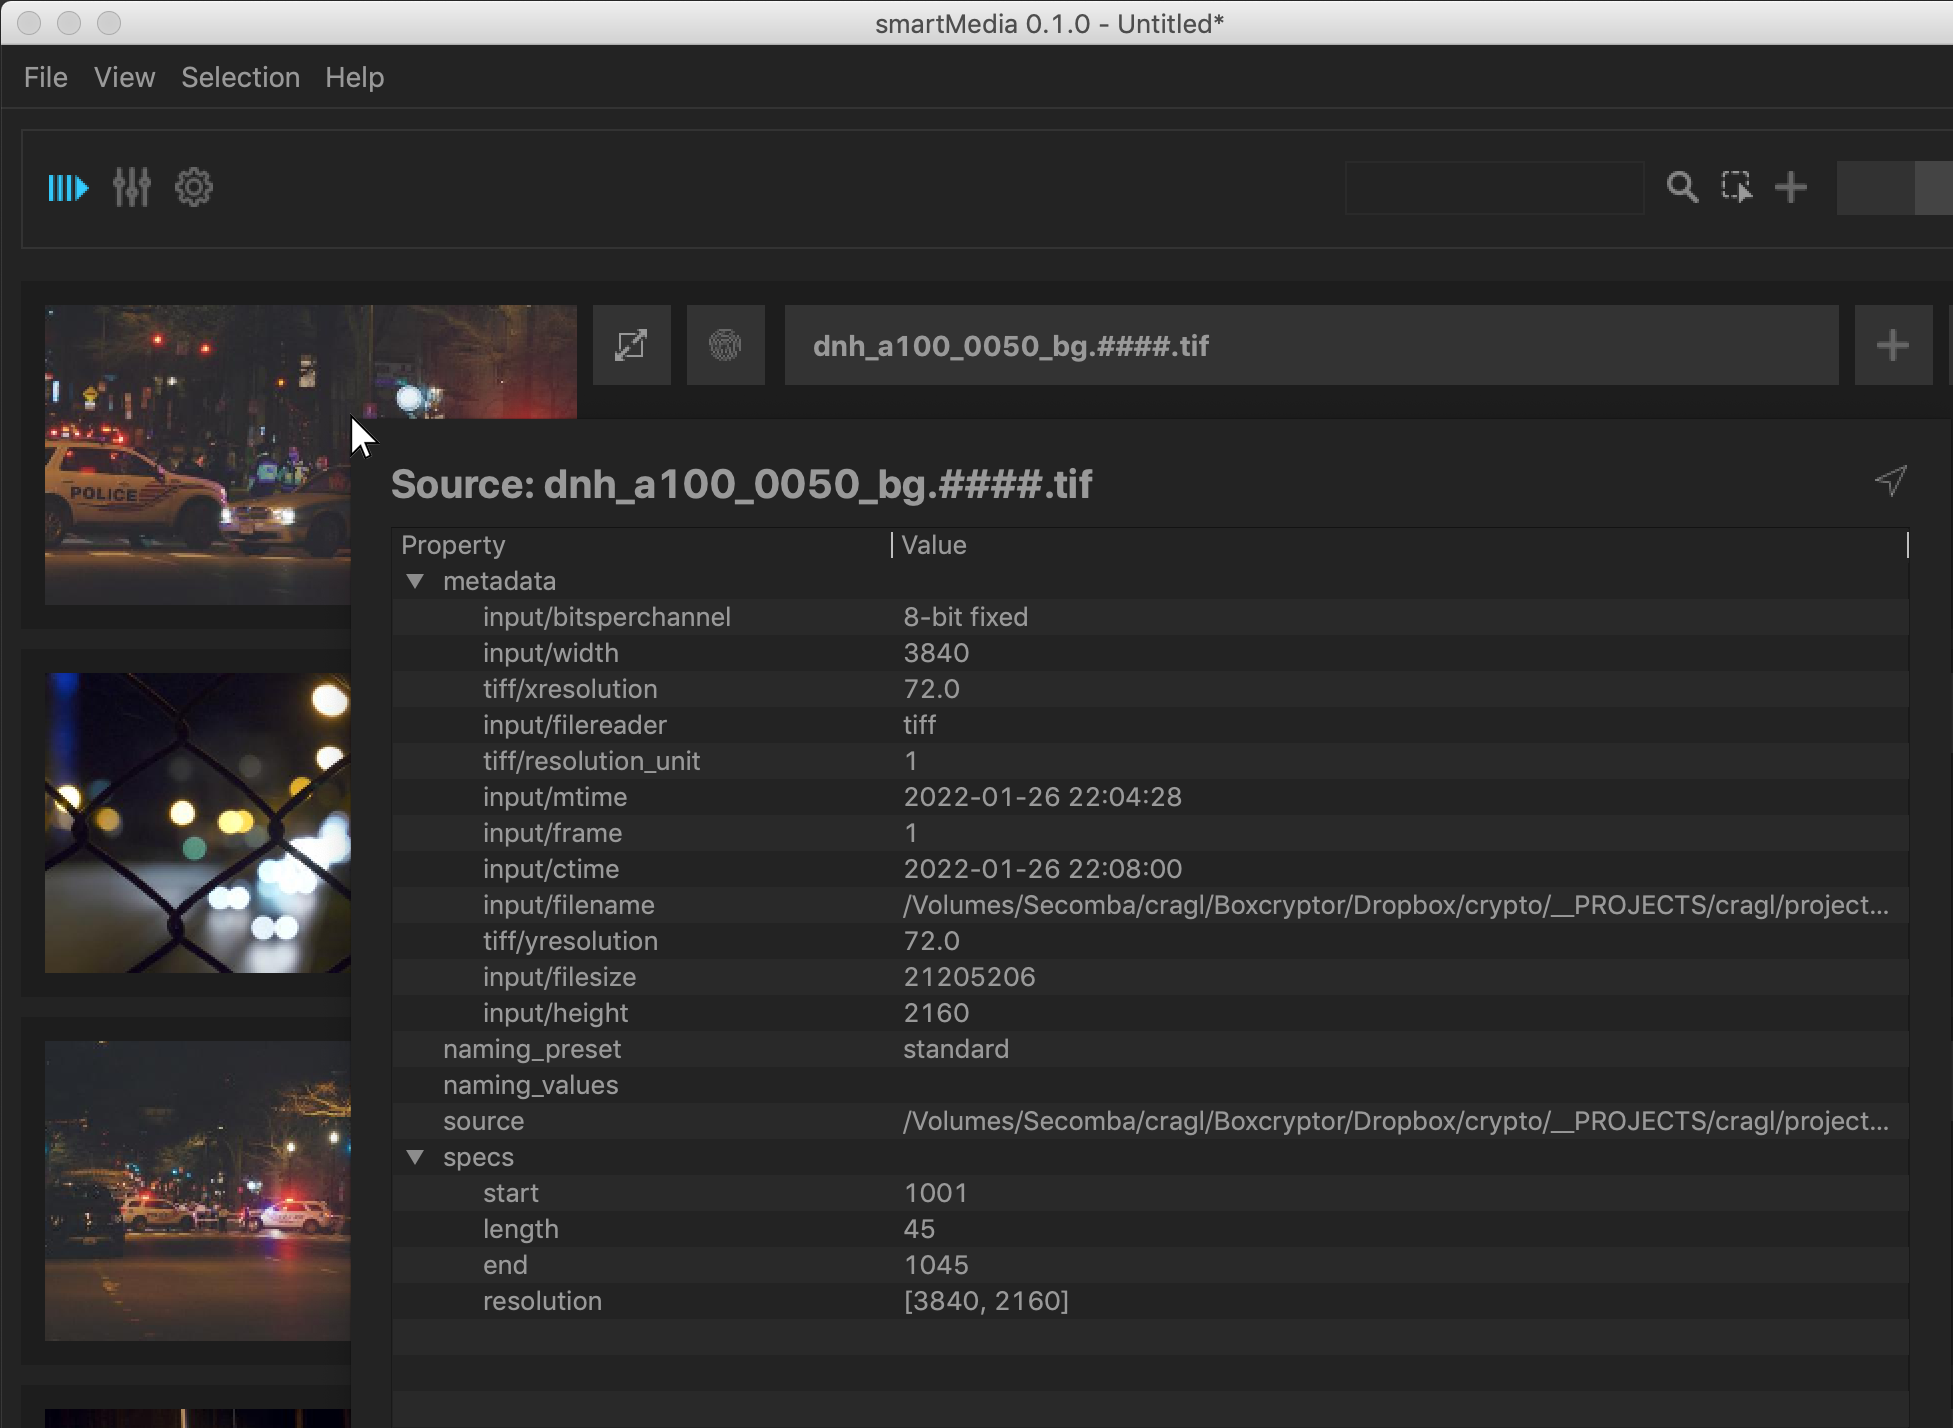
Each media gets shown in one row and contains a thumbnail, the source’s base name and some metadata. Let’s hover over one source and press Alt + I to show all metadata:
Let’s make some space and concentrate on the first item. You can double click the title of any other item to toggle between hiding or showing it. Or navigate to View -> Contract all jobs.

This hides all sources and all its tasks which we will have a look at in a minute. Double click the title of the first item to expand it so that we can concentrate on this item.
Saving our media list
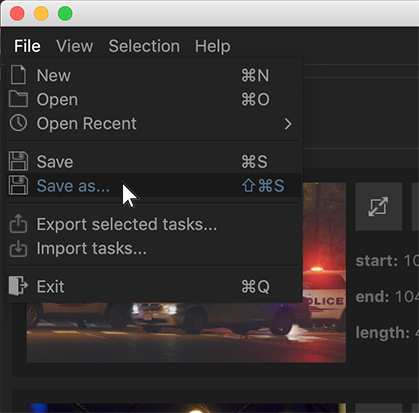
The list of media can be saved so that you can come back to it at a later stage and switch between lists of media. Click File -> Save as…. Browse to a folder where to save this media list to and set a name.
To load the media list choose File -> Open and browse to your .media file. Or load it straight from the Open Recent list. Or simply drop your .media file into smartMedia.
Note
Any change to a source or task gets stored for you automatically so you don’t need to care about that. Saving in smartMedia stores the list of media that is associated with your file.
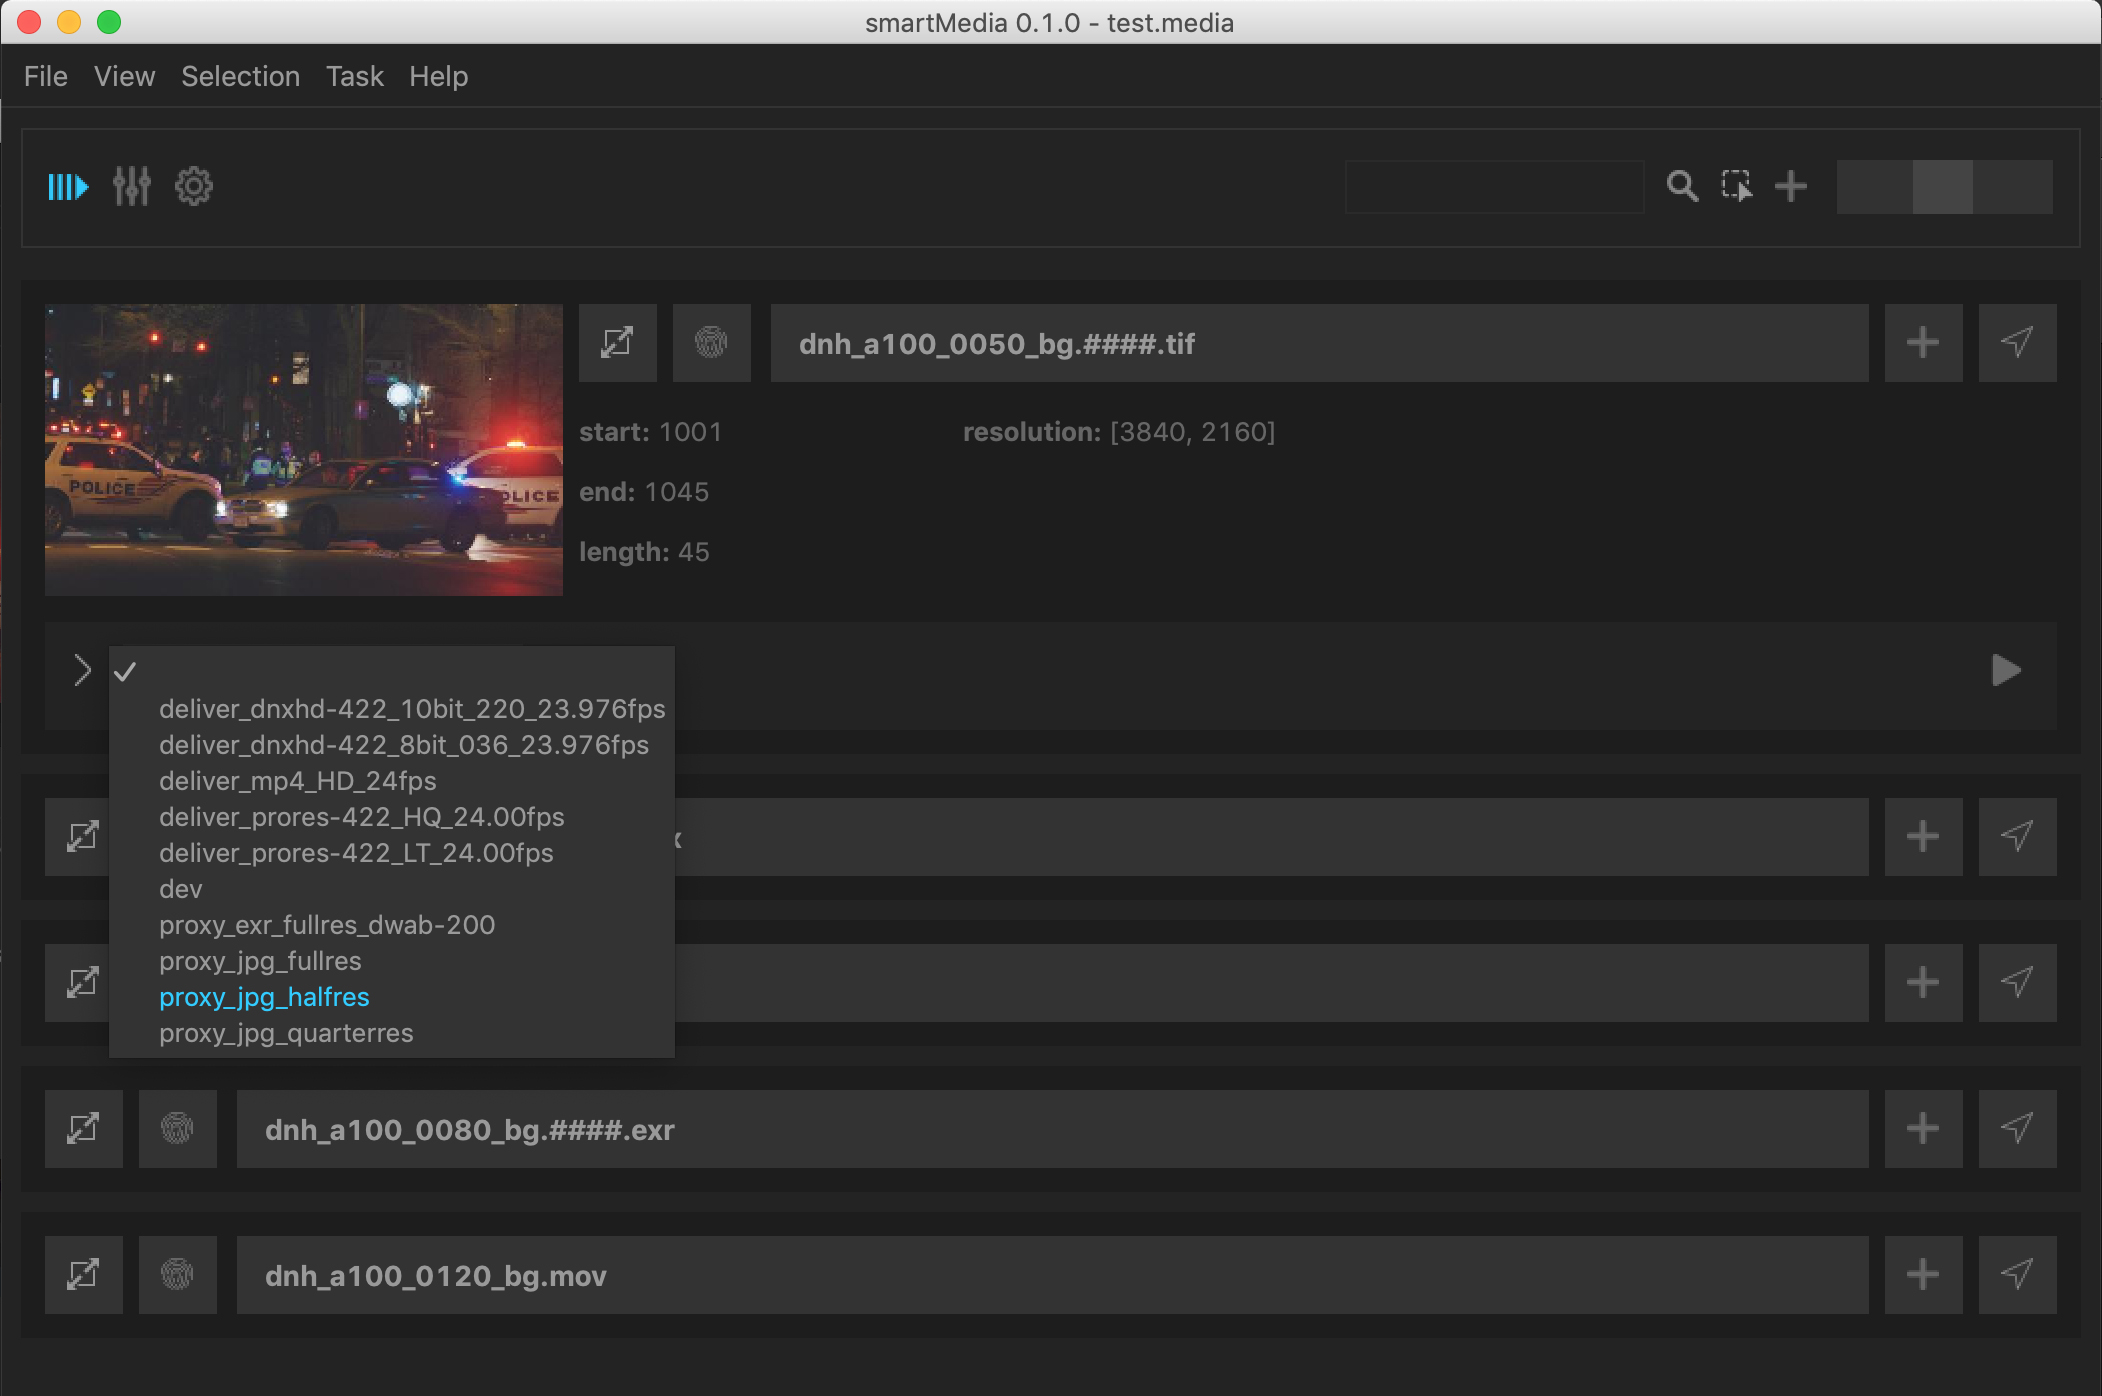
Creating a halfres proxy
smartMedia works with the concept of adding tasks to your sources. Each task converts your source into one specified format.
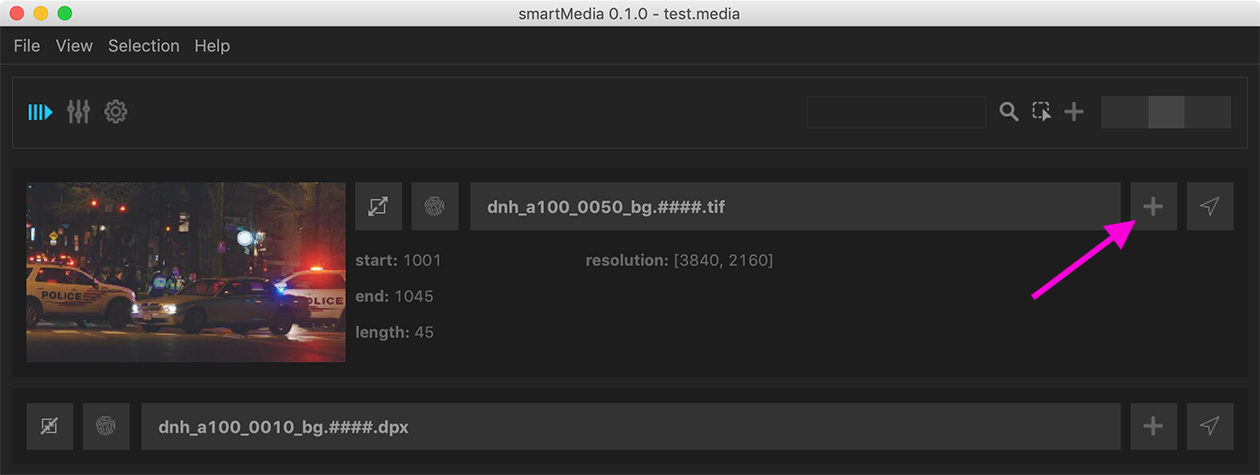
Let’s create a halfres jpg proxy for our source. Using proxies speeds up your work files tremendously. For that create a new task by clicking the + button on the right. Or simply hover over your source and press the + button on your keyboard.
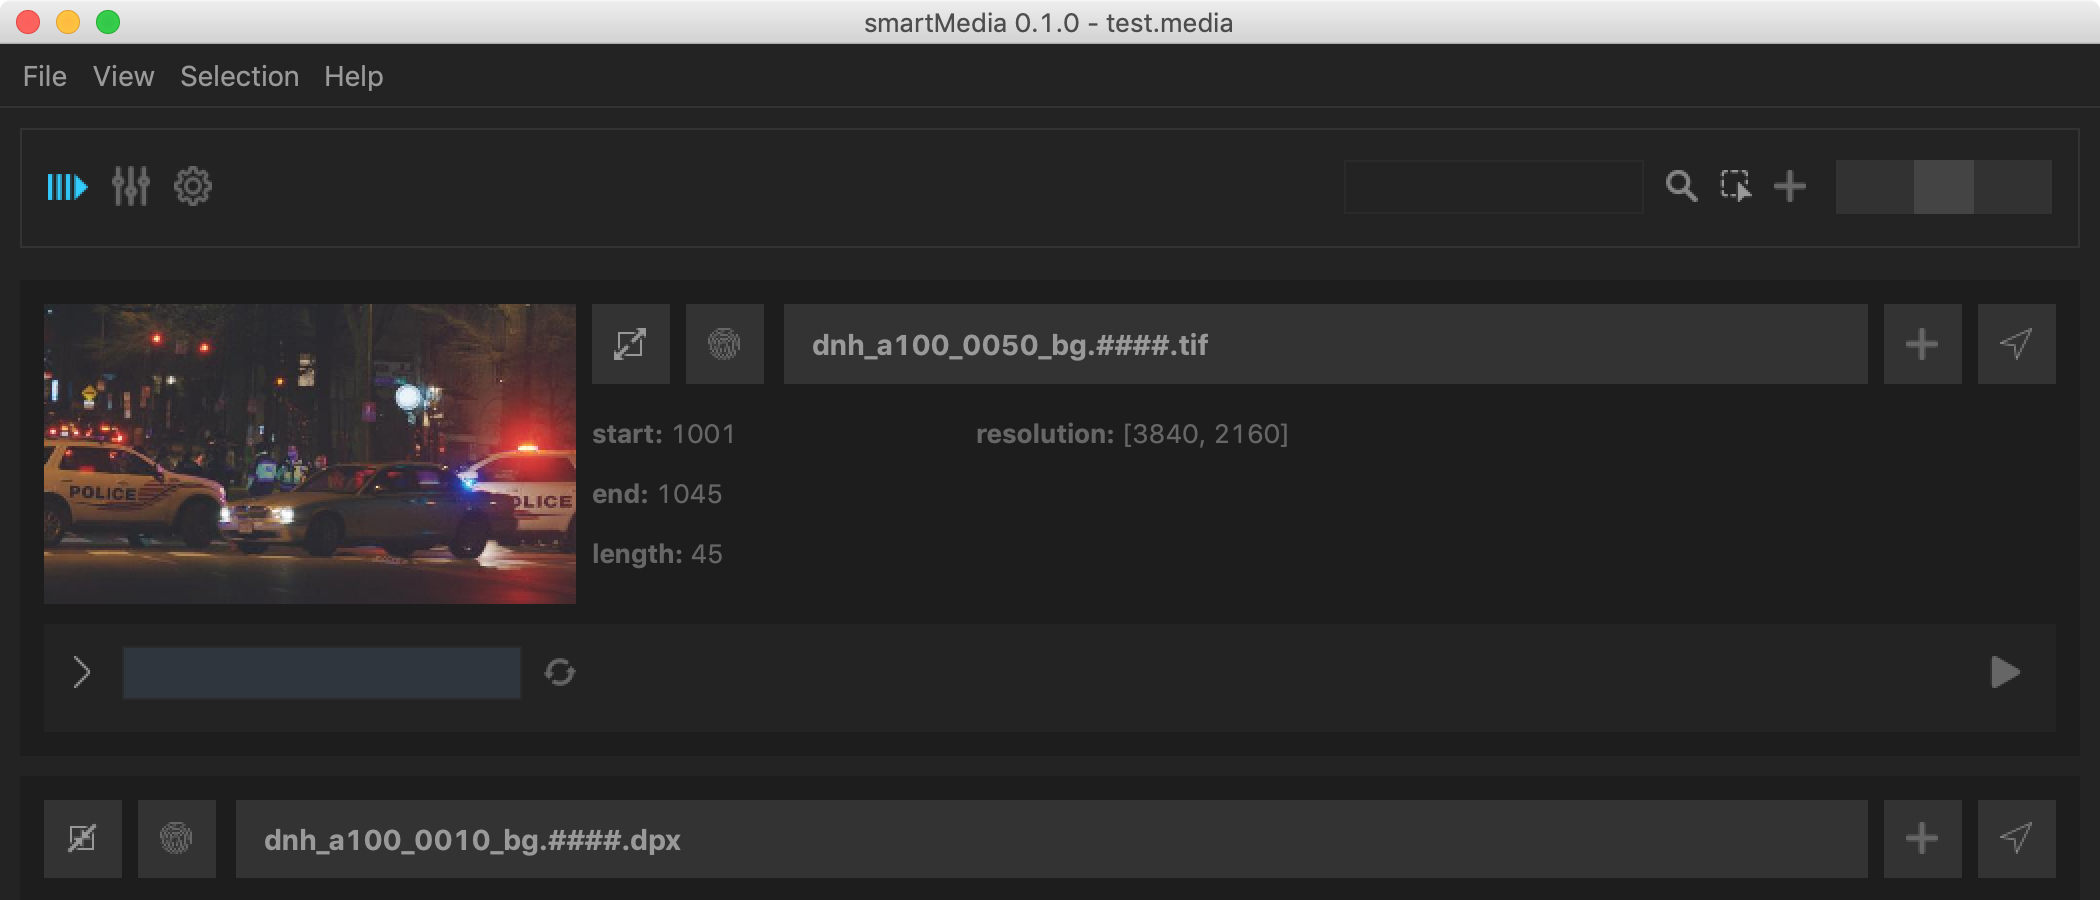
A new task gets created below your source. Each source can have as many tasks as you like:
smartMedia ships with a hand full of presets that you can use right away. Later, we see how to create new presets. For now, let’s use a pre-built preset. Choose ‘proxy_jpg_halfres’ from the presets dropdown menu.
As soon as you select the preset, everything gets set up automatically for you based on how a preset has been configured.
By default, all presets render next to the source (later we see how to change this). Next to the preset dropdown menu you see the output name of your file.
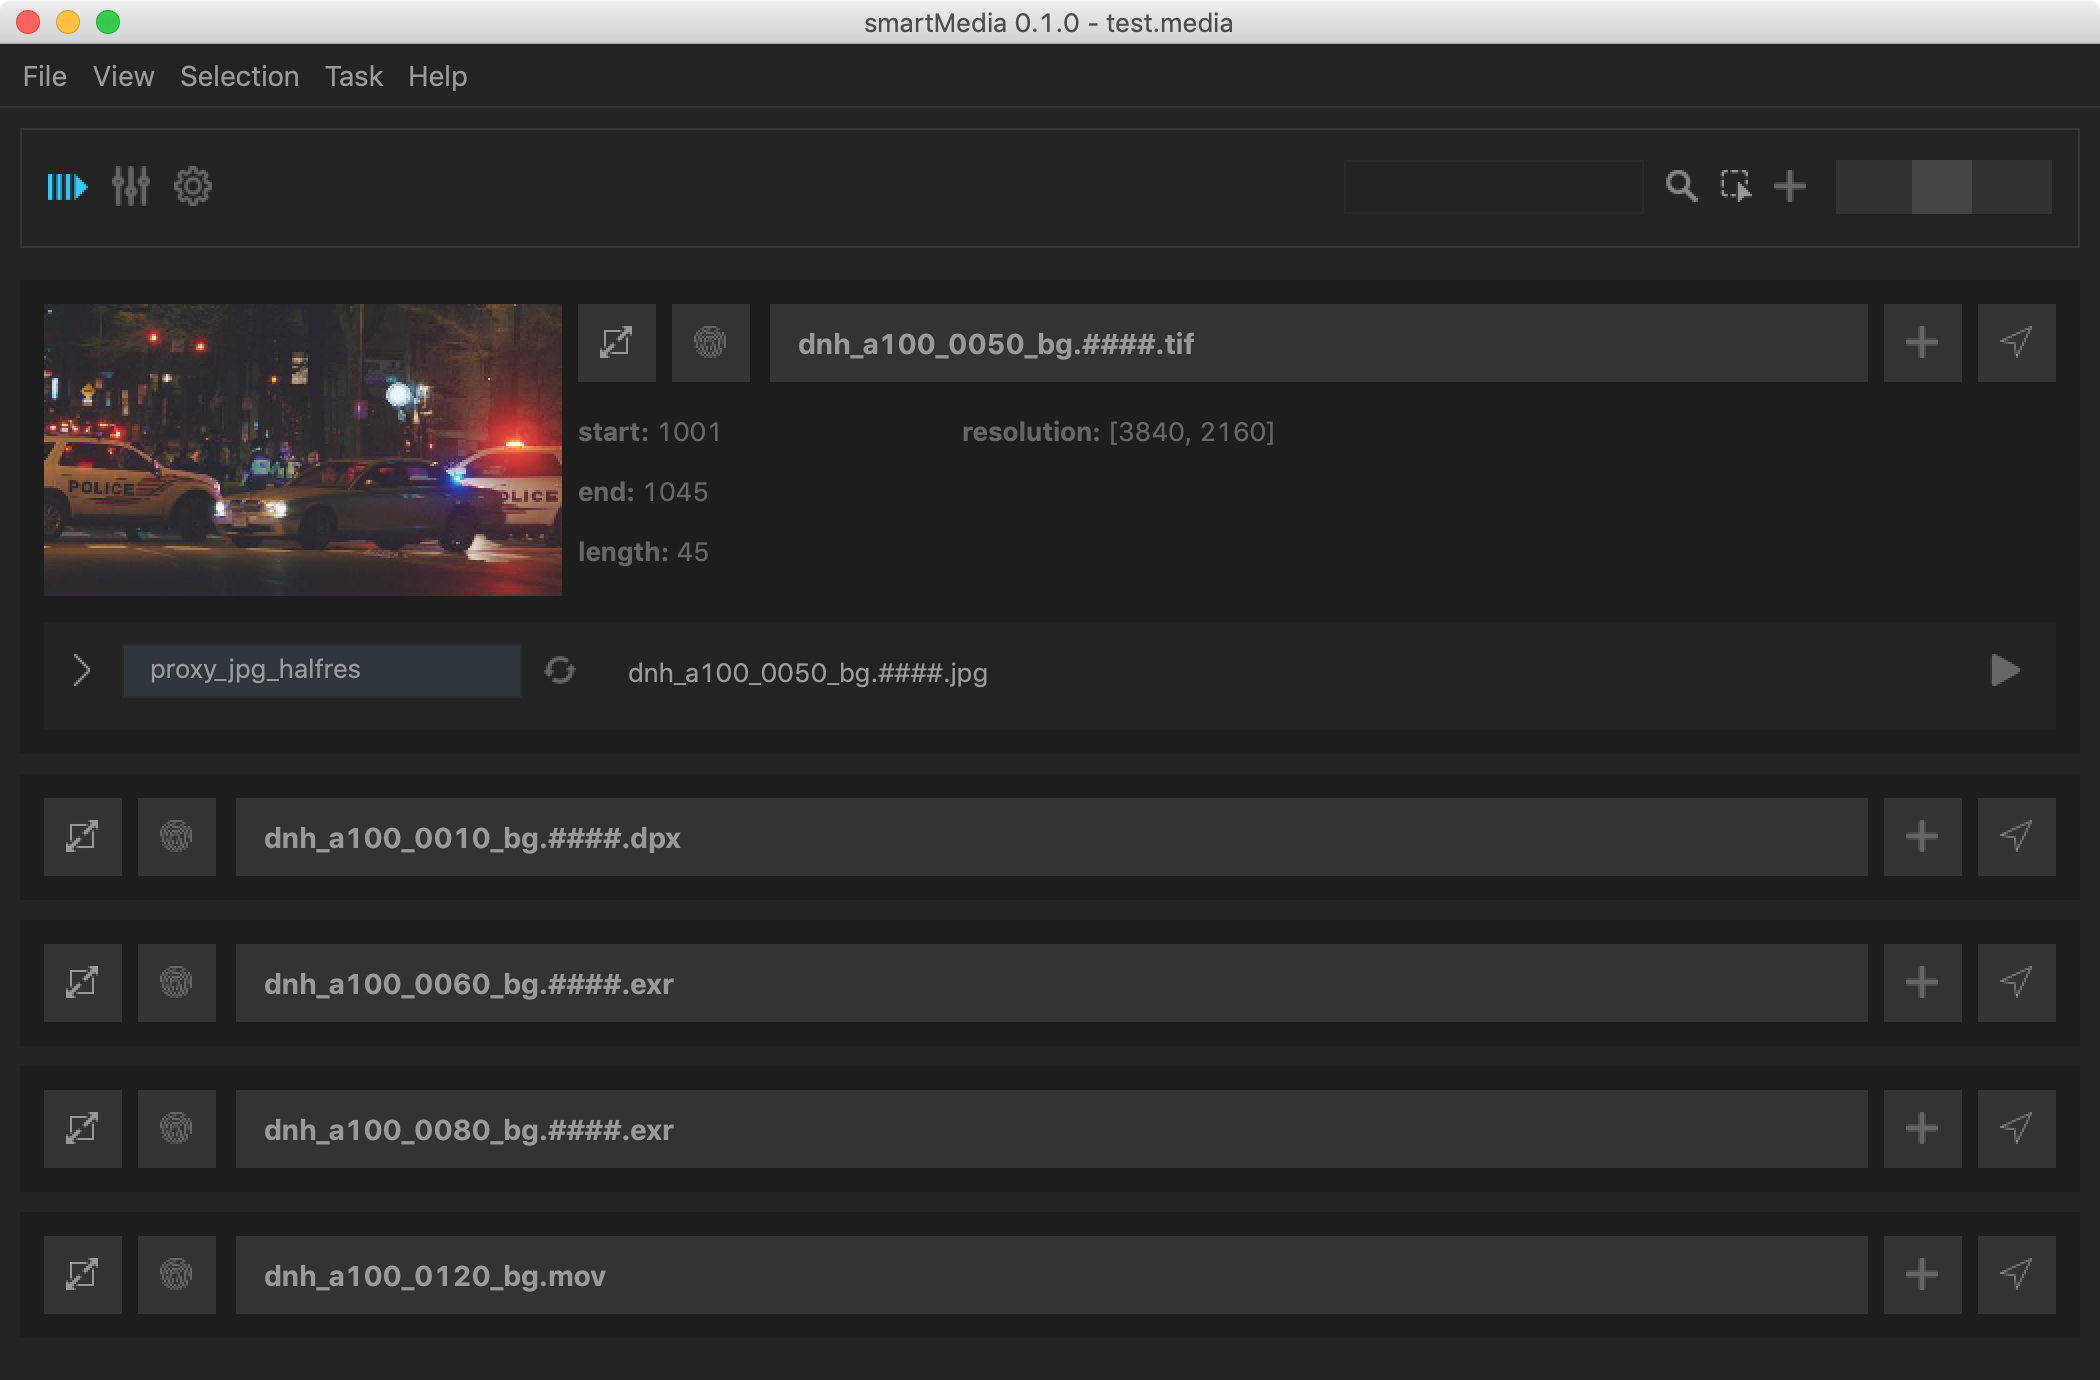
Hover over it to see the absolute path where this task will render to. If you want to render to a different path click the file name in the middle. This opens a browser that lets you browse to a new location. Let’s leave the path for now and render next to our source.
To kick off a rendering click the render (play) button on the right:
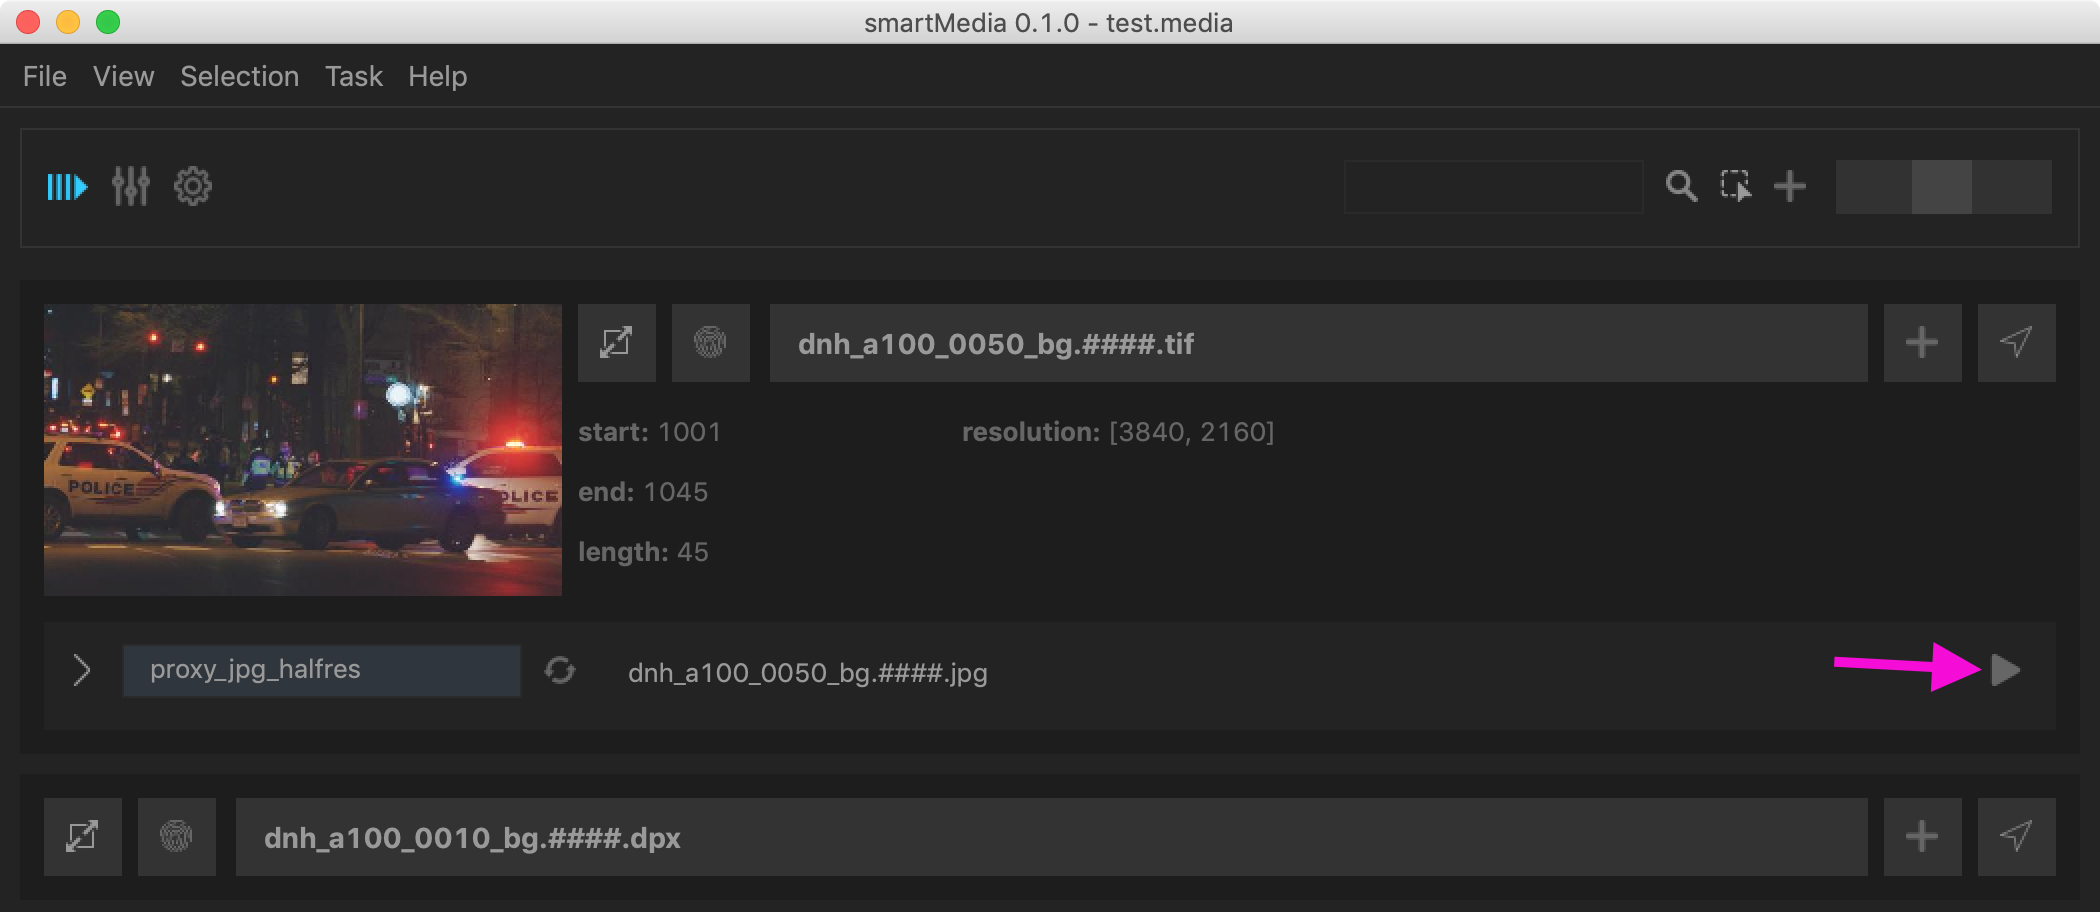
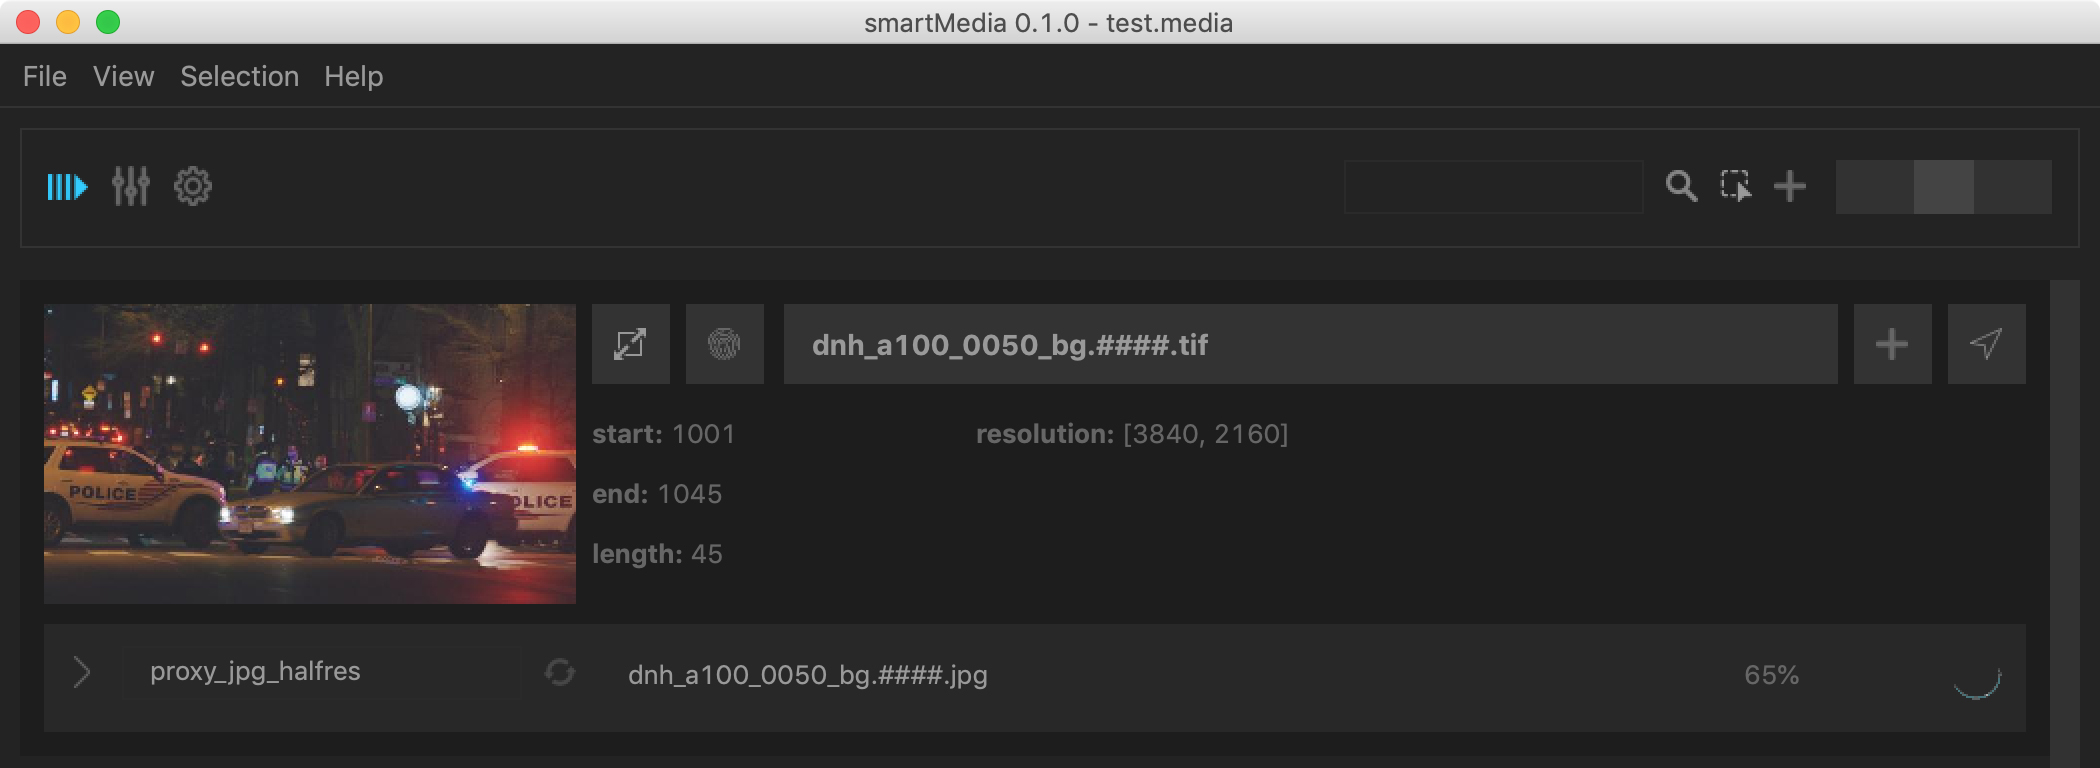
The job renders in the background and shows you a progress.
Once the rendering has finished it shows you a green ‘finished’ status.

From here you can now reveal the rendering by clicking the reveal button next to the green ‘finished’ status. Or right click the task and choose ‘Reveal -> Output’ (shortcut: Alt+O):
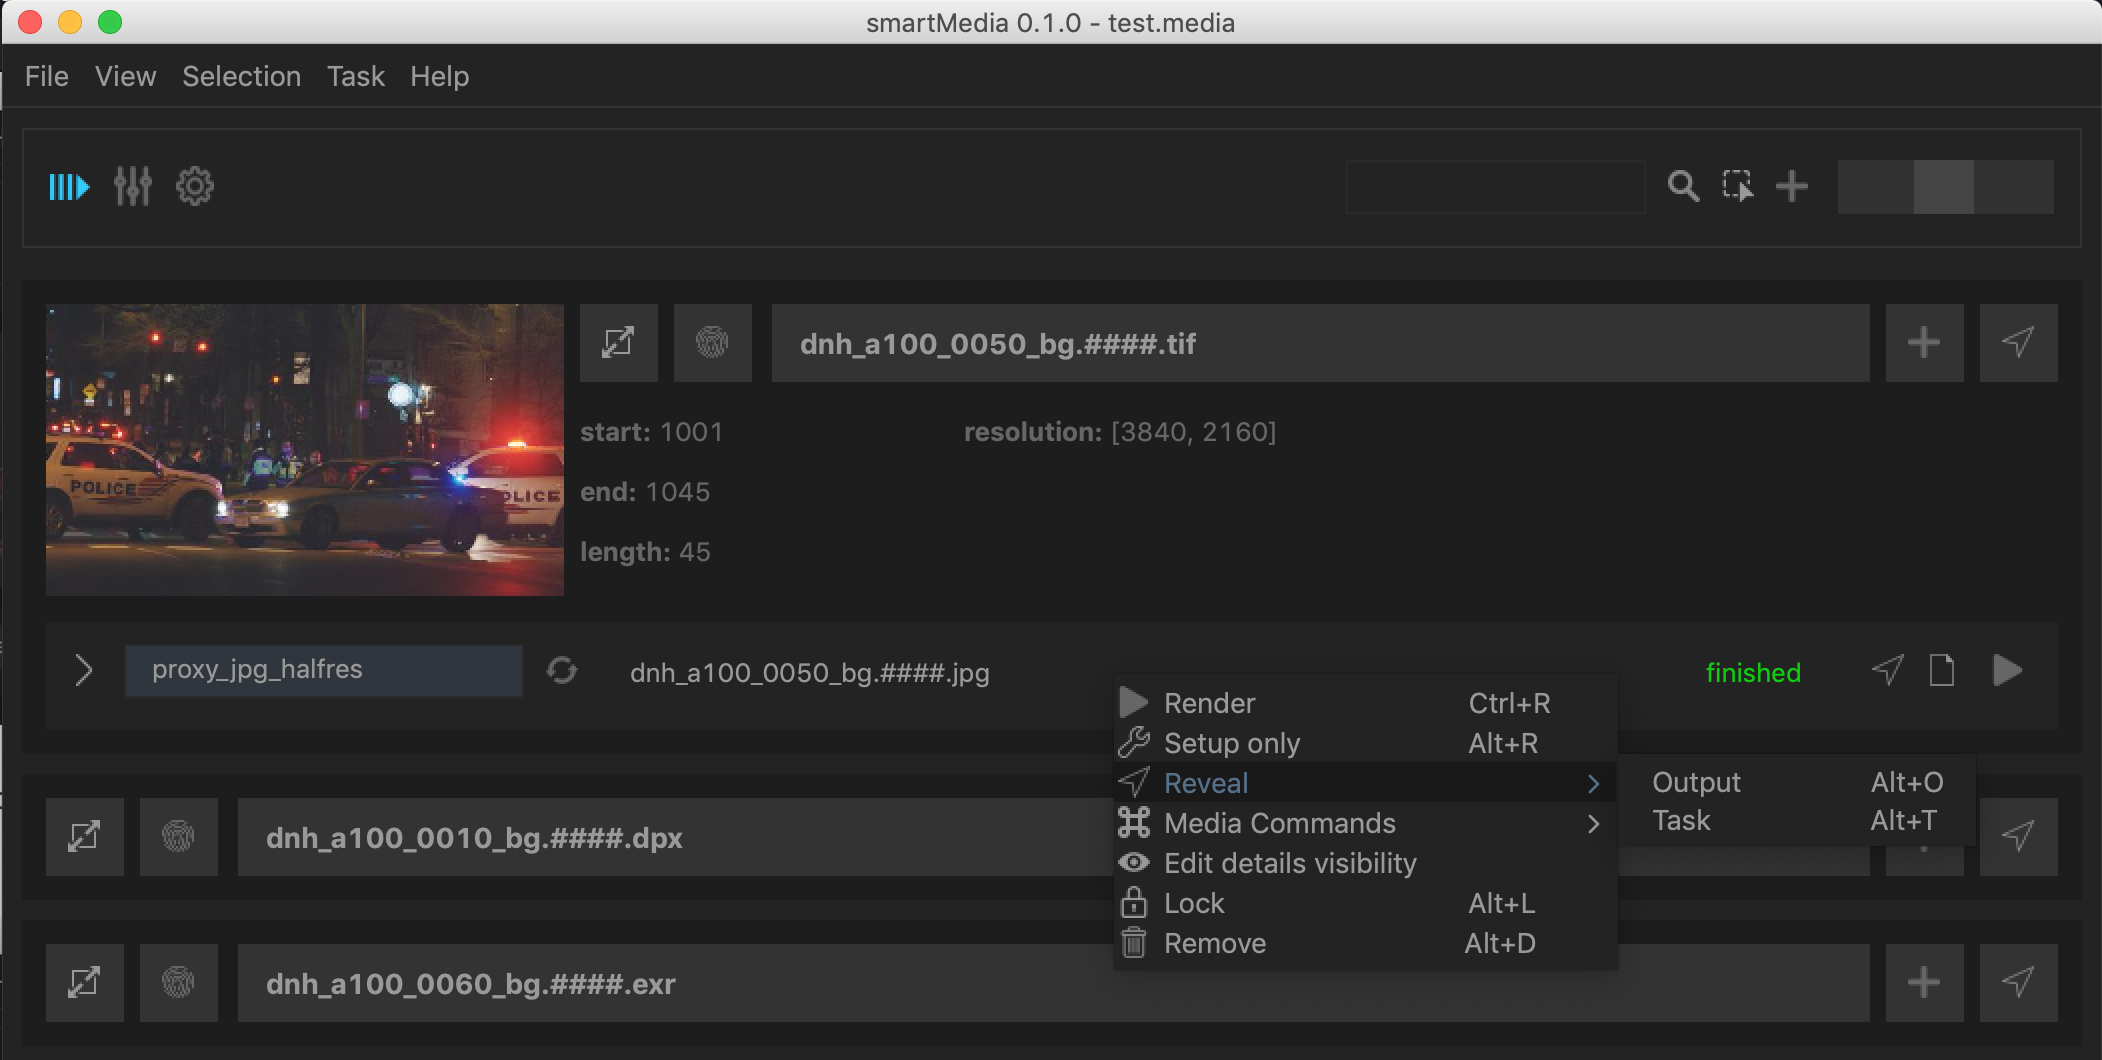
The context menu offers many more features which we will see later in more details. You can also send the rendering straight to RV or any other media player like DJV, etc.
Bulk creating fullres proxy jpgs
After having created one proxy, let’s now see how you can quickly set up and render many tasks inside smartMedia with minimum effort.
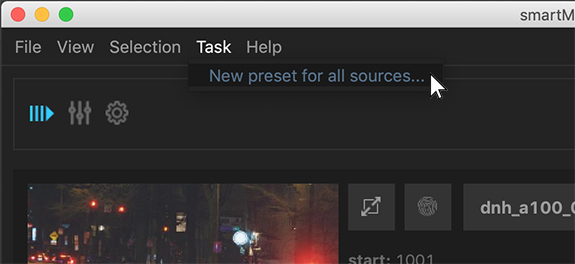
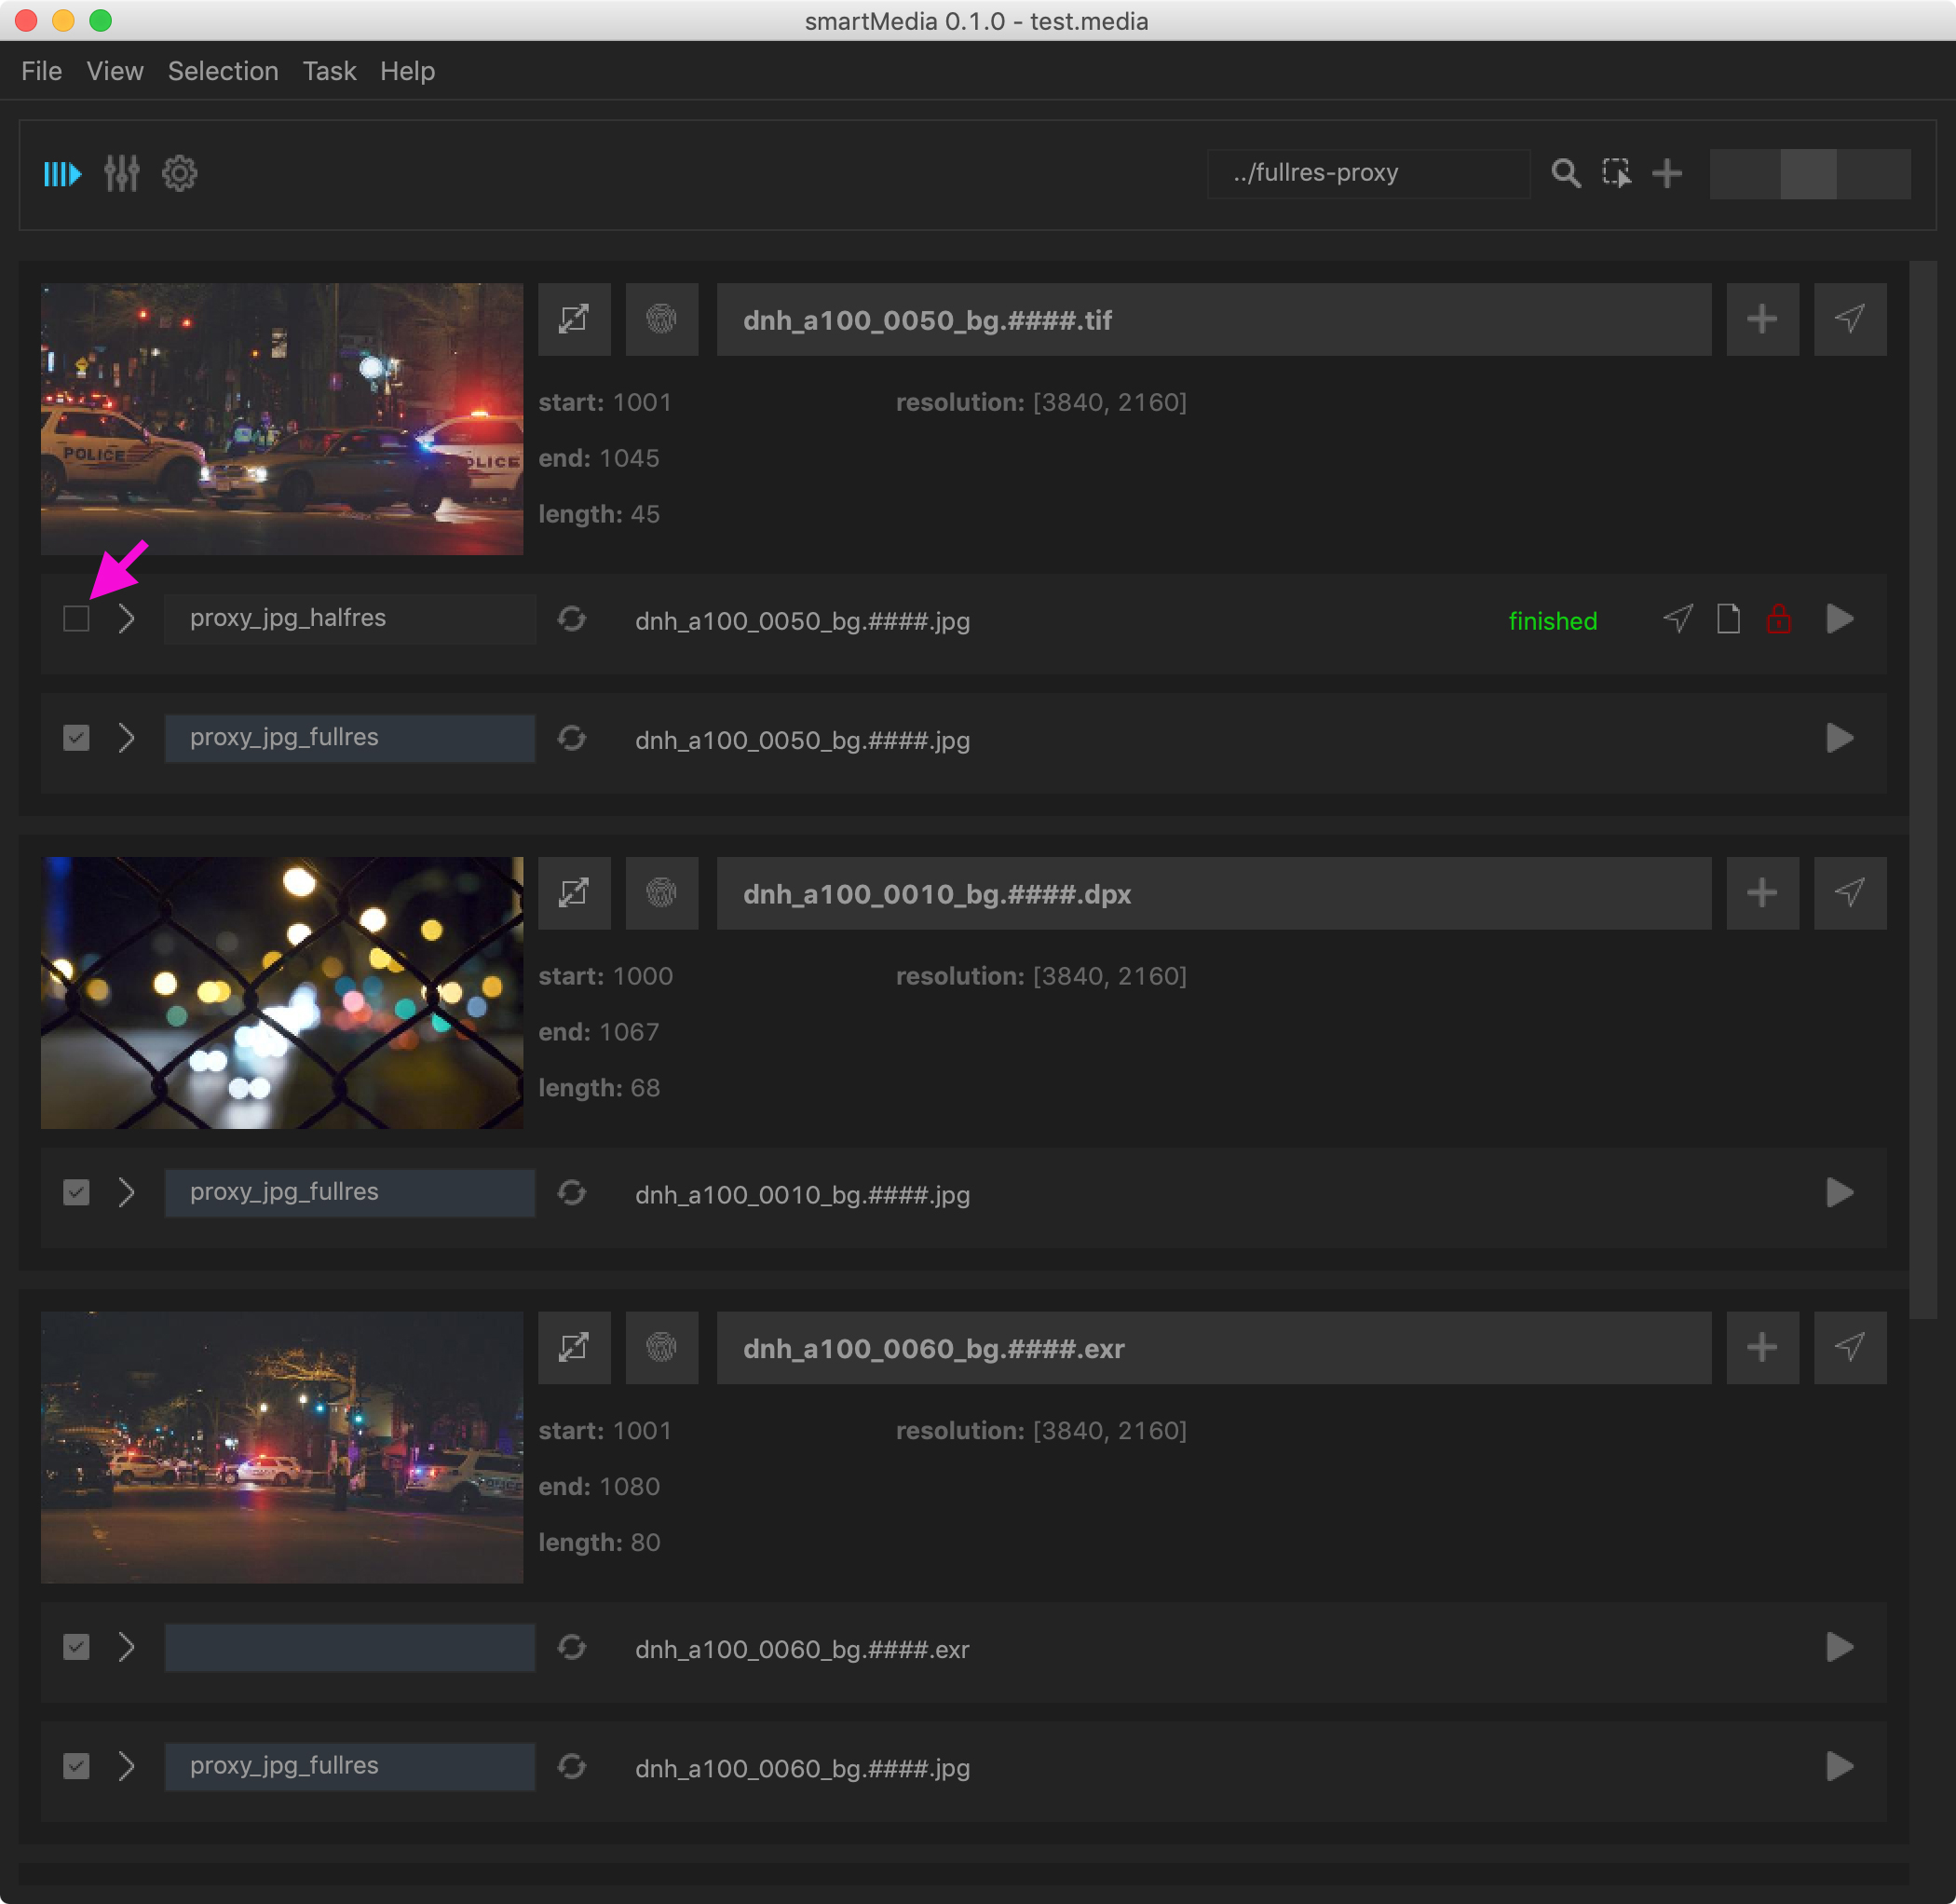
Let’s create fullres proxy files for all of our sources inside a dedicated proxy folder that sits next to our source. As we have previously seen, we could click the plus button for each and every source and select the needed preset. But there is a shortcut. Navigate to ‘Task -> New preset for all sources…’.
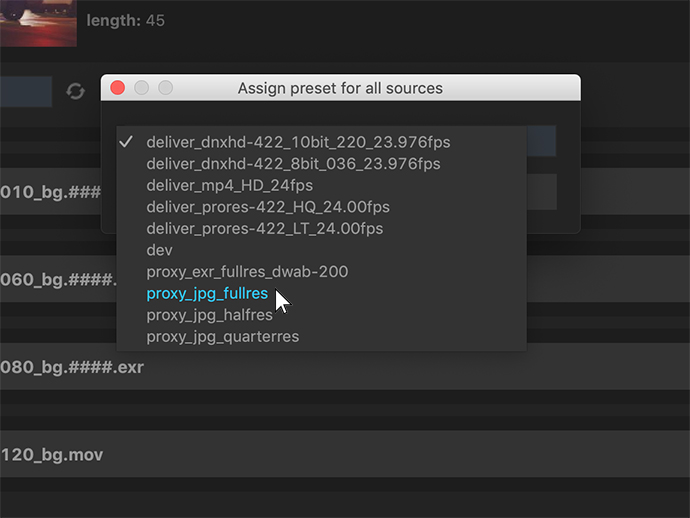
The upcoming dialog lets you add a selected preset to all sources. Select the preset ‘proxy_jpg_fullres’ and click ‘Add’
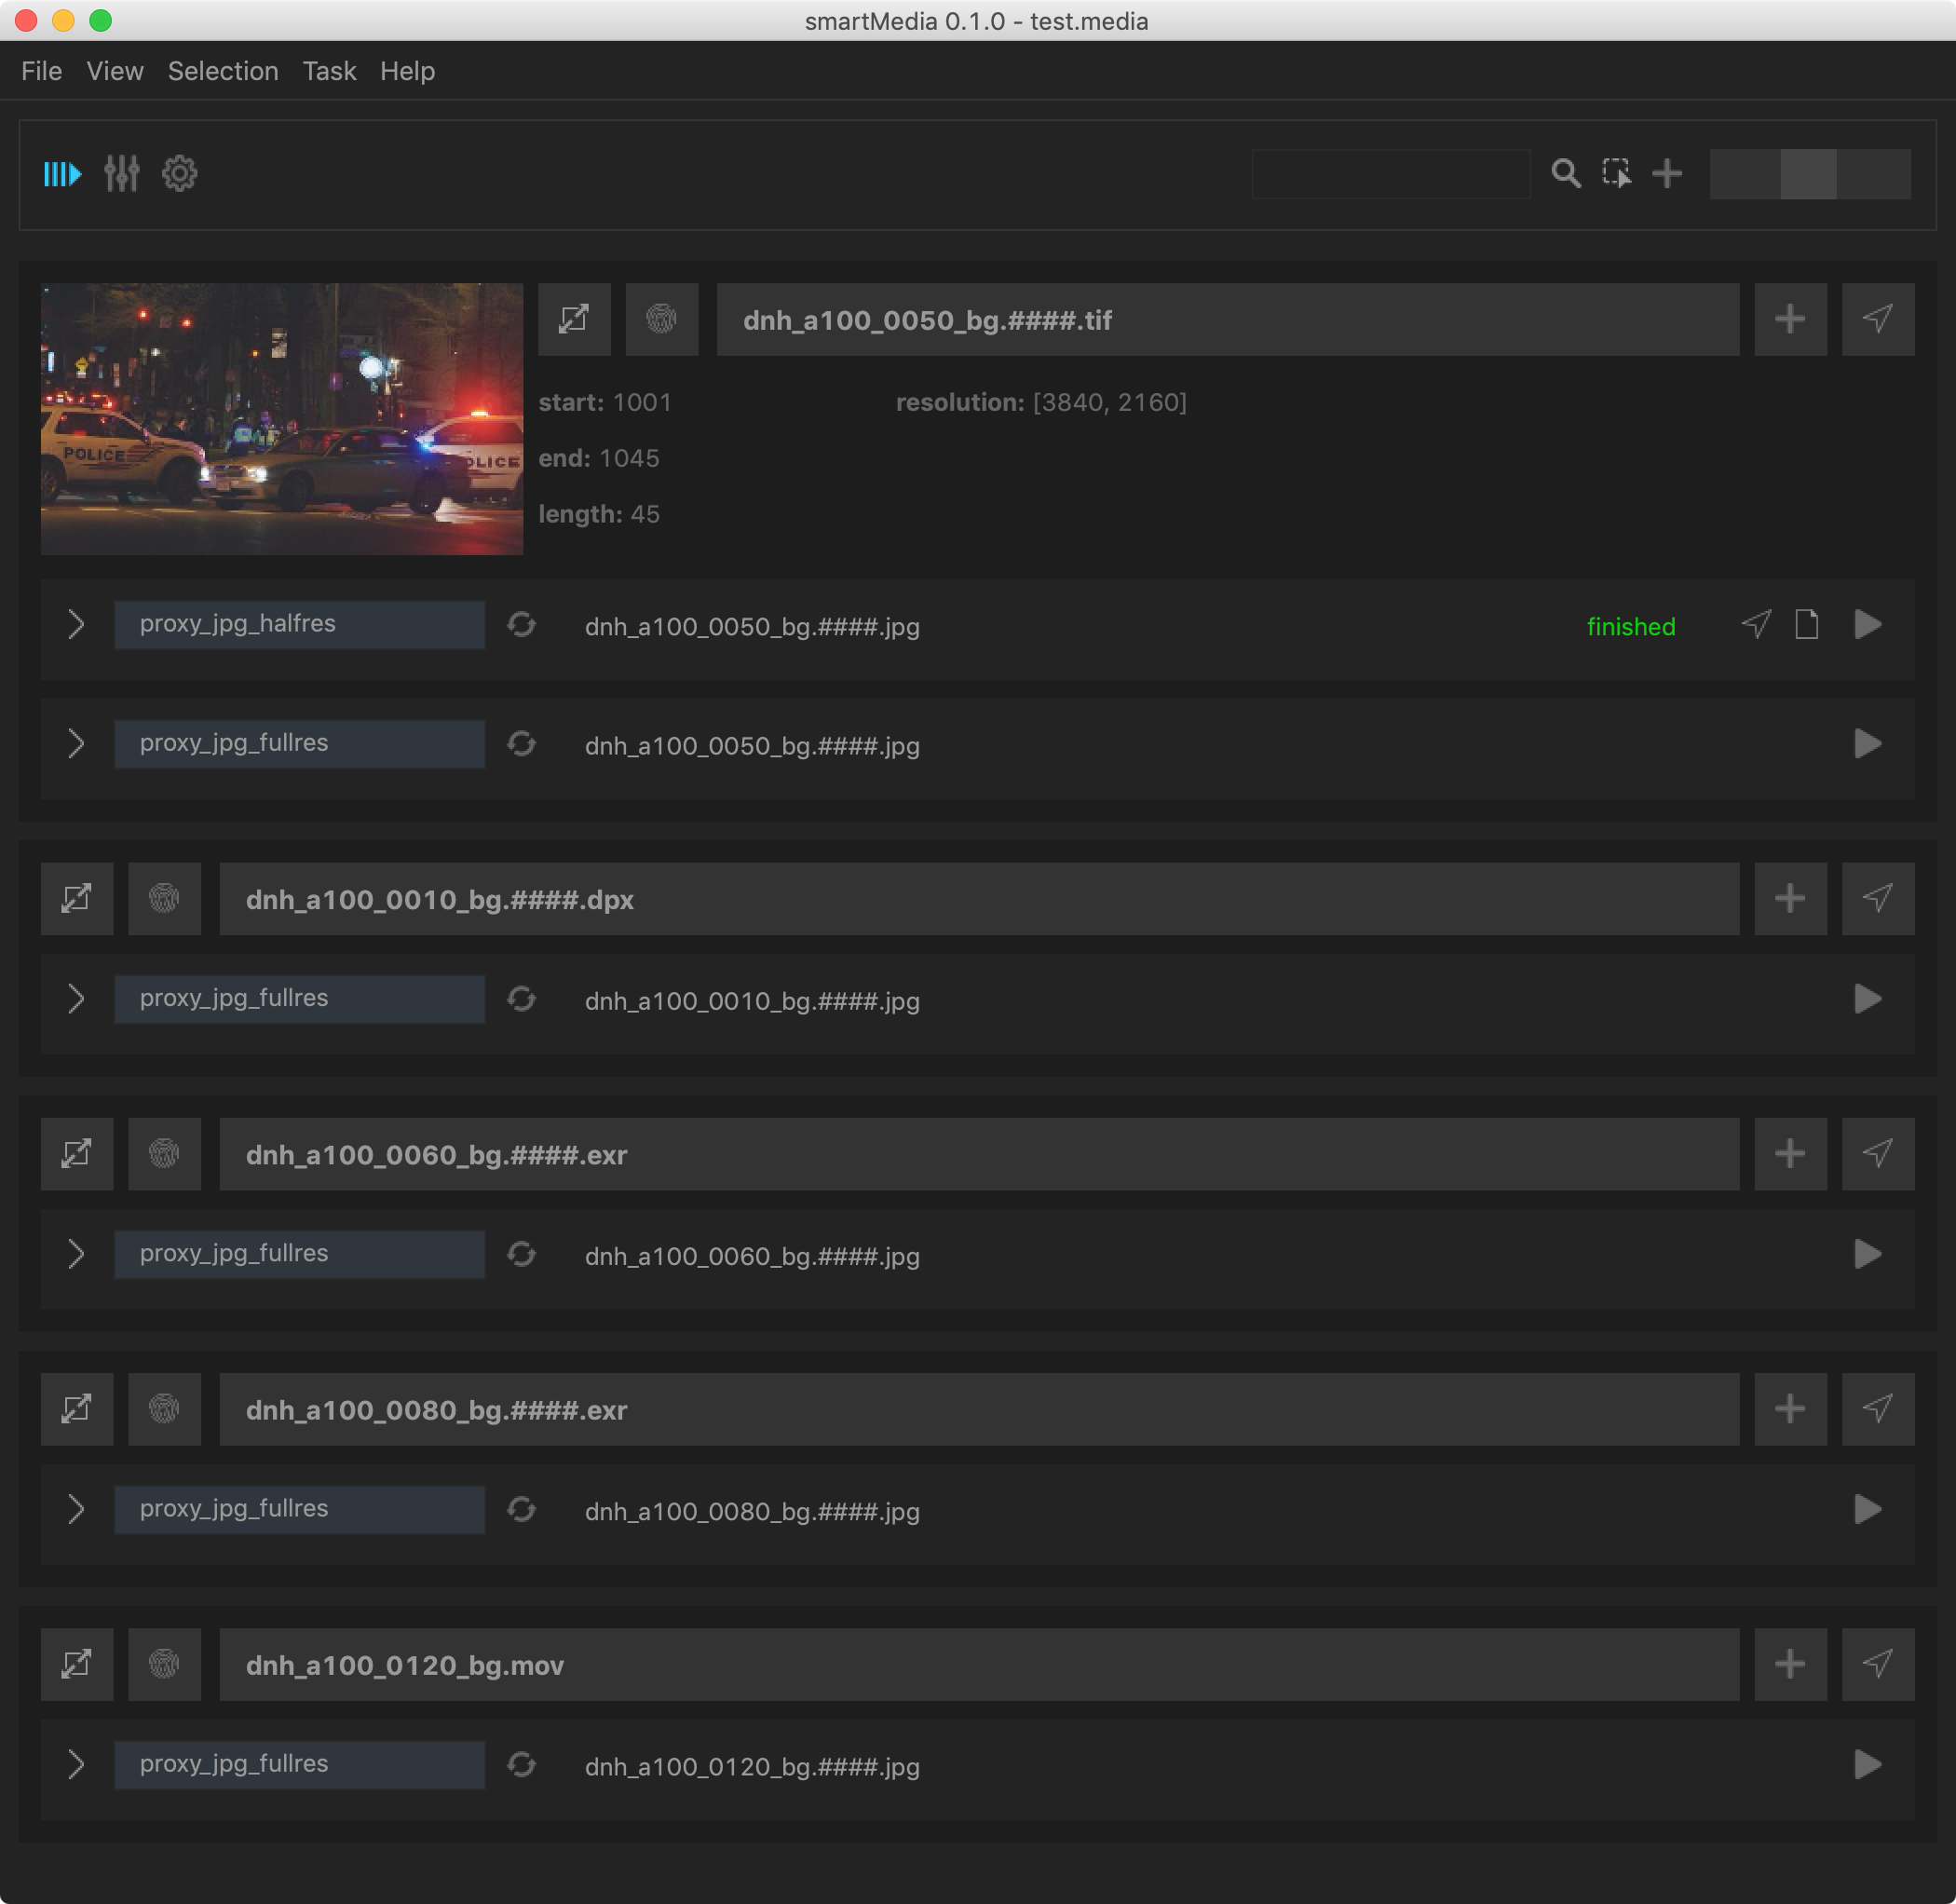
The ‘proxy_jpg_fullres’ preset was now added to all sources:
Next, let’s set up where to render to. As previously seen, we could now enter a render path for each and every output. But there is a quicker way. smartMedia offers an output root feature that you can use to bulk set up render locations to render into the same location for all source or to bulk set up relative per source. This will then automatically change the render location for each and every source. Note that executing this, this would also change the render location for all tasks - i.e. also for our previously rendered path. Let’s exclude it from any changes by locking that task so that no further changes will apply until we unlock it again. For that right click the finished task and choose lock from the context menu:
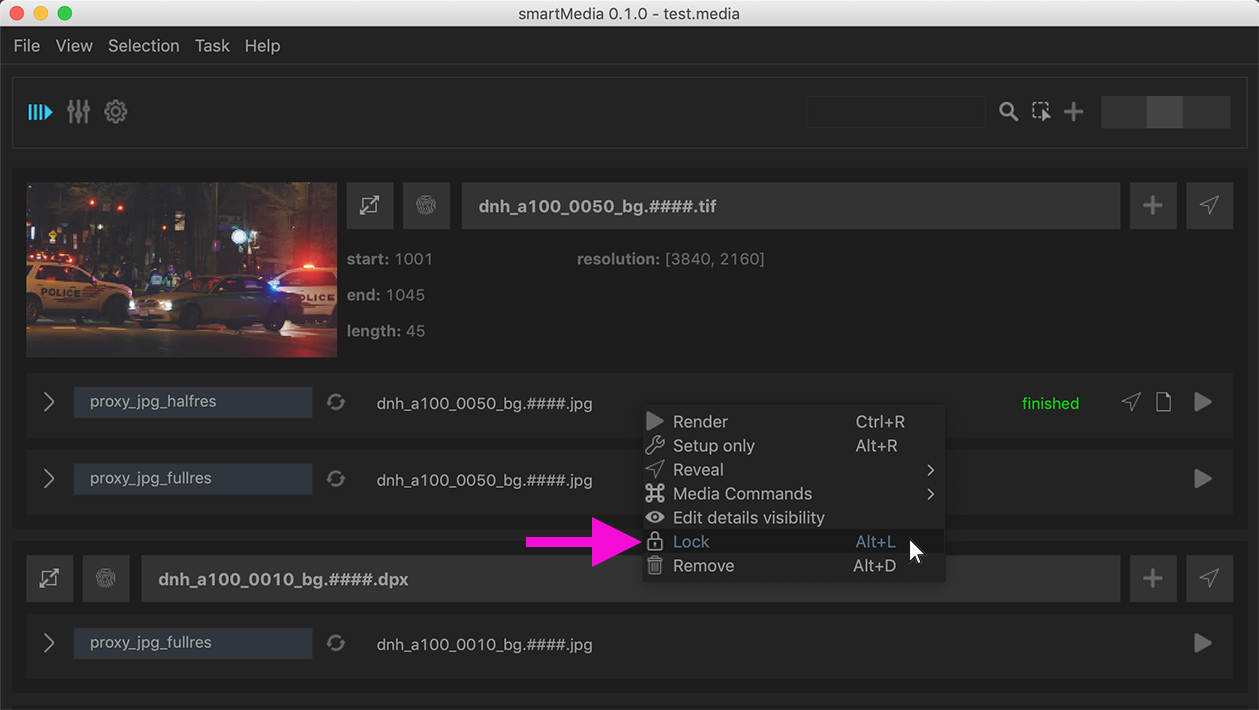
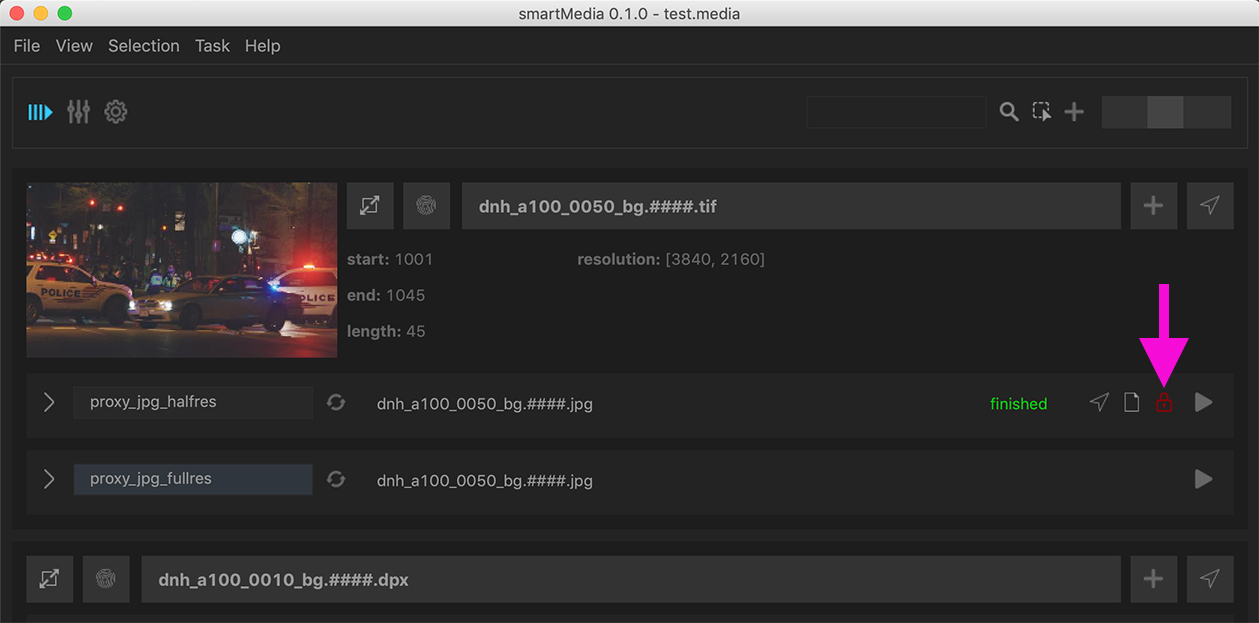
The task is now locked which gets indicated with the lock symbol. With that it cannot be altered anymore and the output path won’t change. To unlock the task simply click the red lock again.
Using output roots
Now that we have locked our previously finished task we are ready to use the output root functionality to bulk set up all render paths at once.
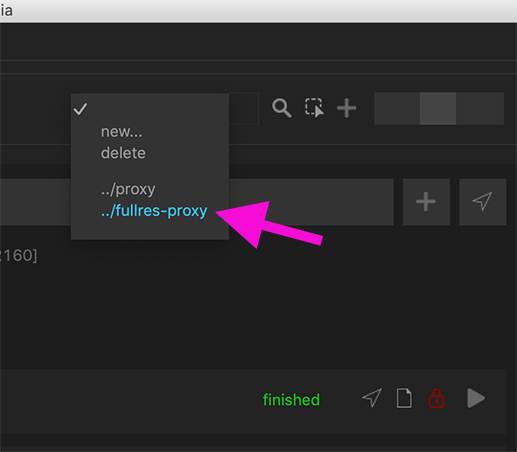
Navigate to the rectangle next to the magnifying glass:
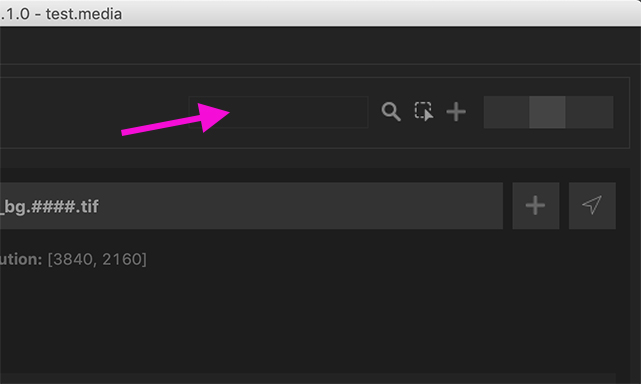
Click the rectangle. In the dropdown menu you can choose from creating a new output root, delete the currently selected and select relative and absolute output roots:

By default, smartMedia offers a relative output root labeled
../proxy. This will go up one directory from the source (which means ..)
and then use a folder called proxy. Let’s create a new relative folder
that renders into a folder fullres-jpg next to the source. For that click
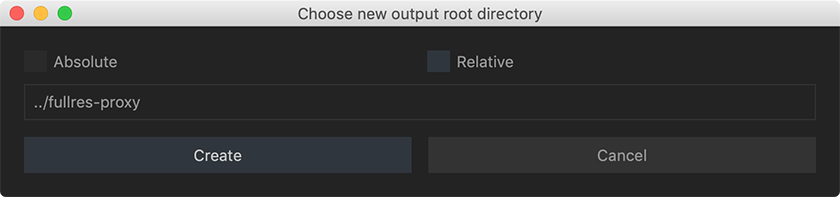
‘new…’ in the dropdown menu.
In the upcoming dialog make sure to have the ‘Relative’ checkbox checked since
we want to bulk set up output paths relative for each source. In the path field
enter ../fullres-proxy and click ‘Create’.
The new output root is now available in the dropdown menu:
Activate it. Since this will change all output paths for all active tasks you will be asked to confirm that step. Click OK.

The output paths get set up for each task and you are ready to render. Let’s expand all jobs. Execute from smartMedia’s menu bar: ‘View -> Expand all jobs’. In order to bulk render all tasks let’s select all tasks by selecting ‘Selection -> Select all’. This shows selection boxes for each task. Uncheck our previously locked task.
Finally, execute ‘Selection -> Render selected’. All tasks will render into a ‘fullres-jpg’ folder next to their source.
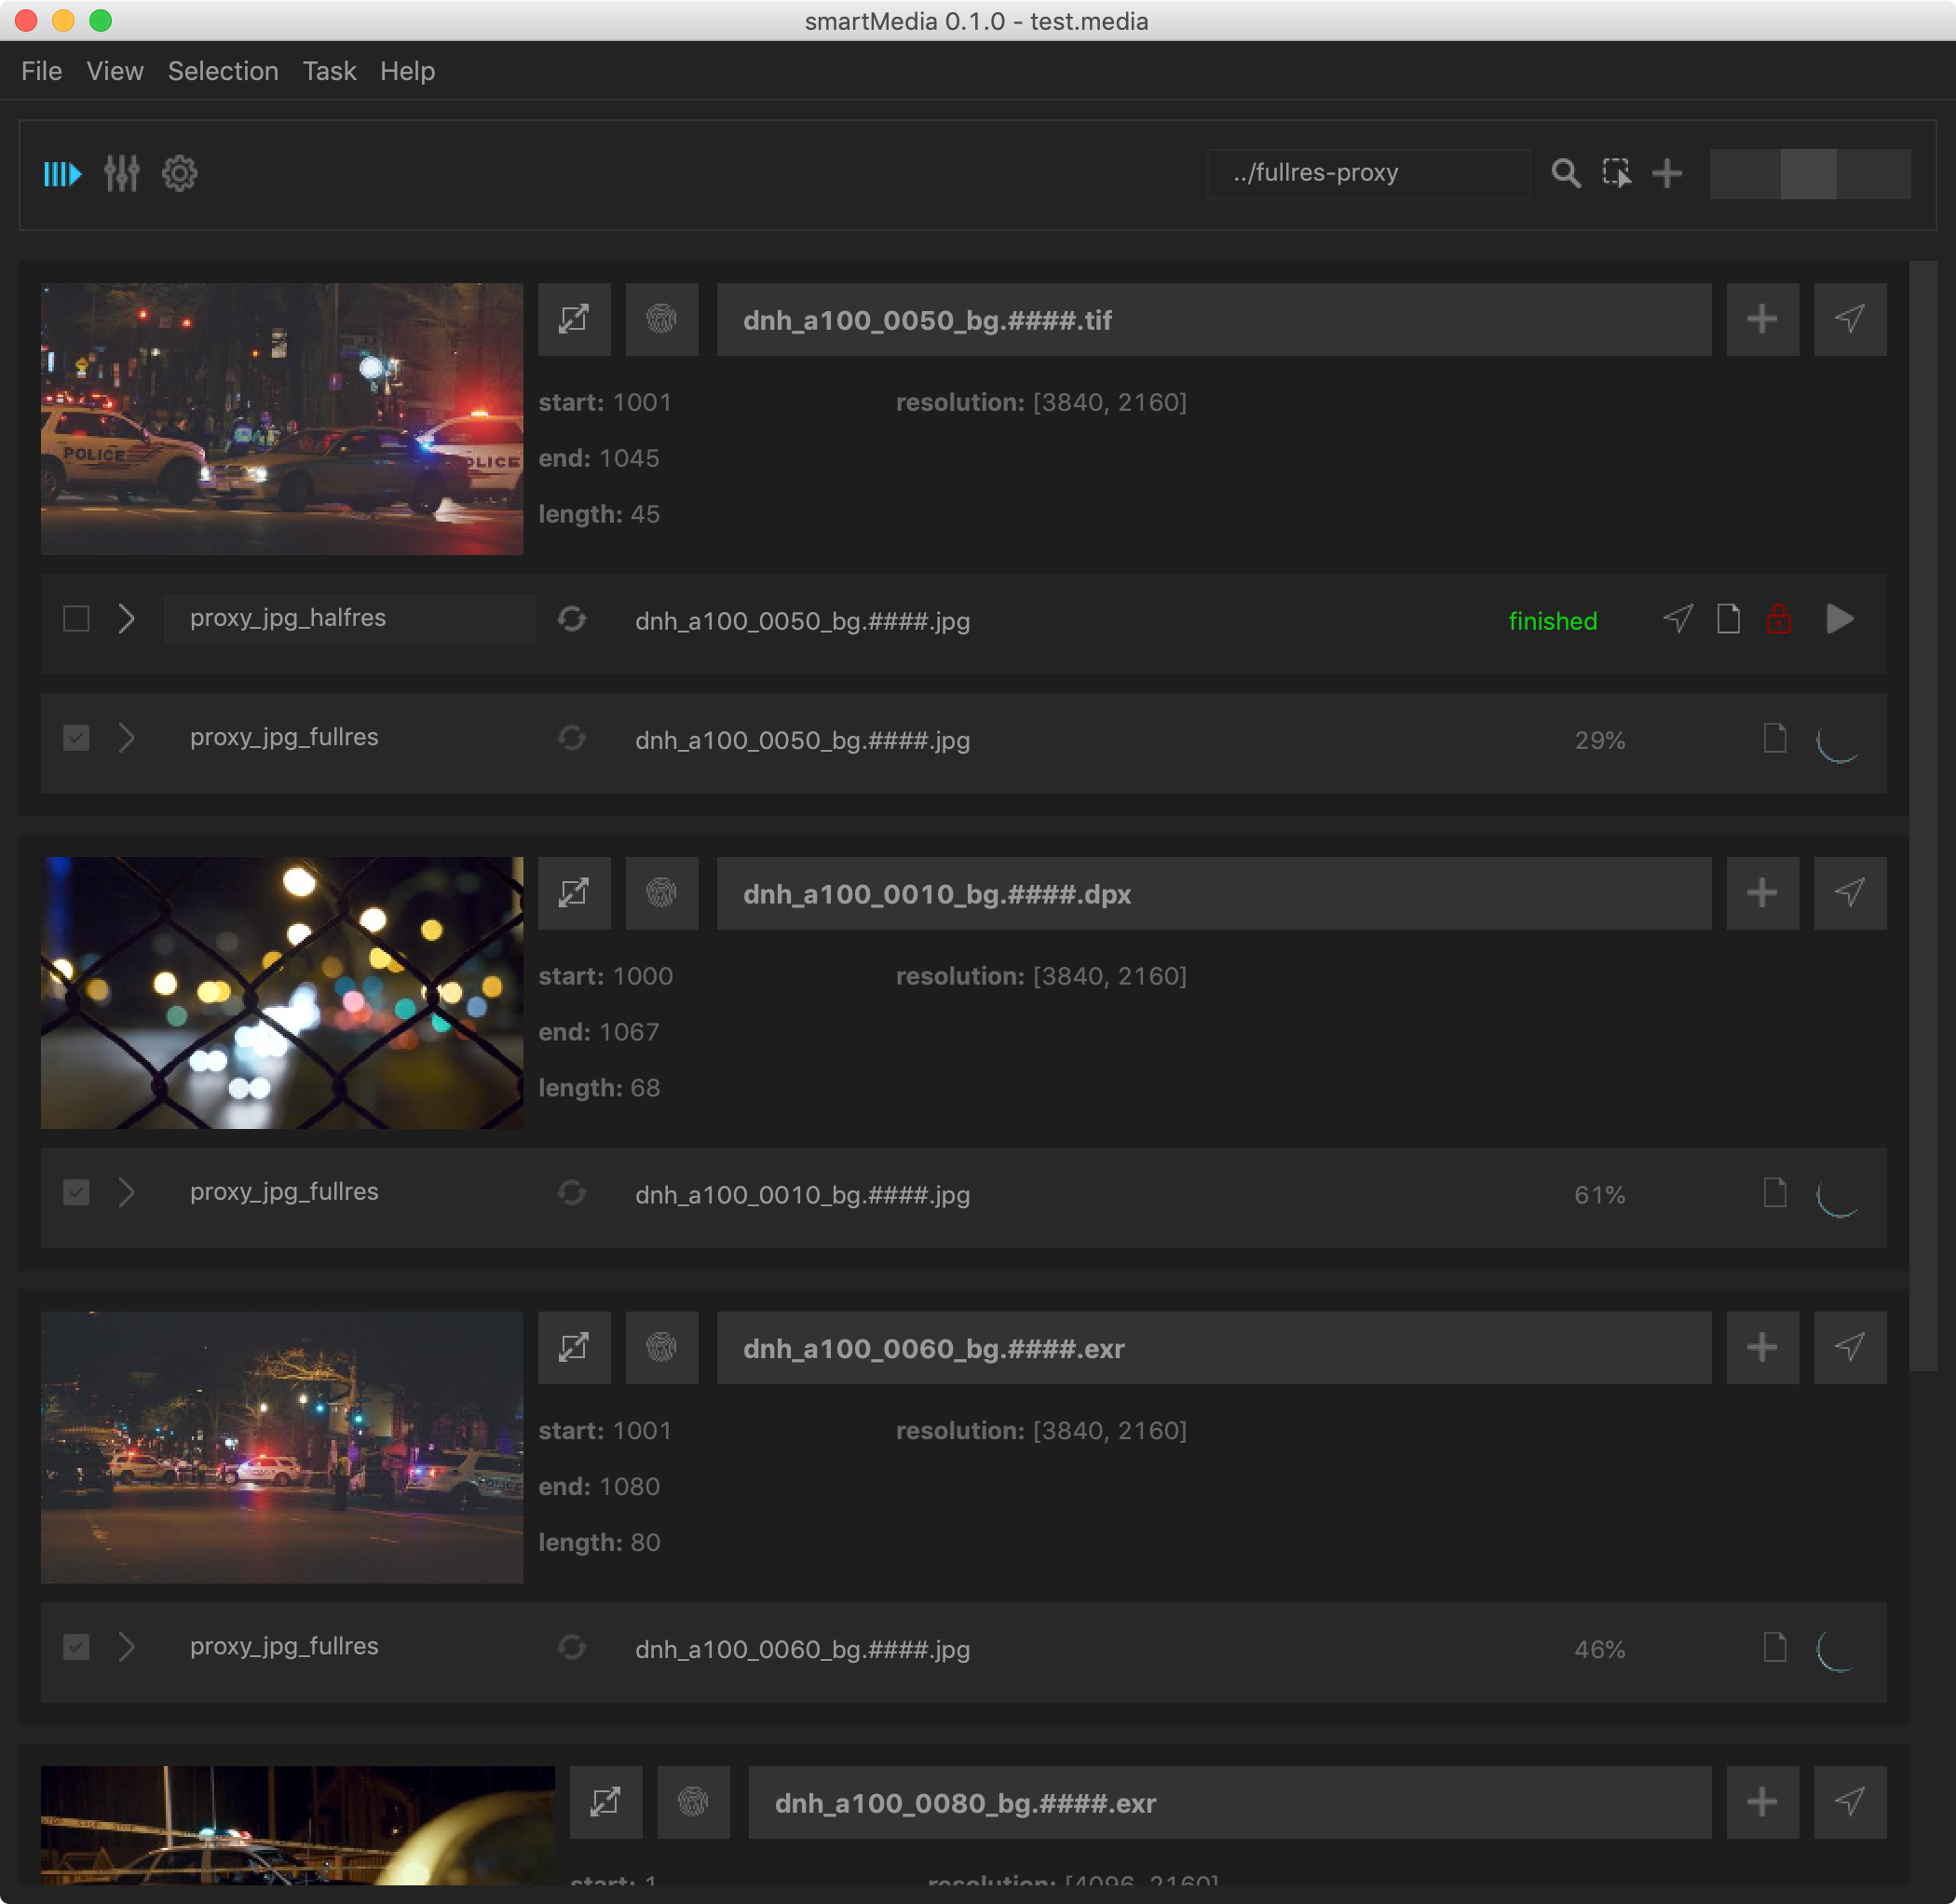
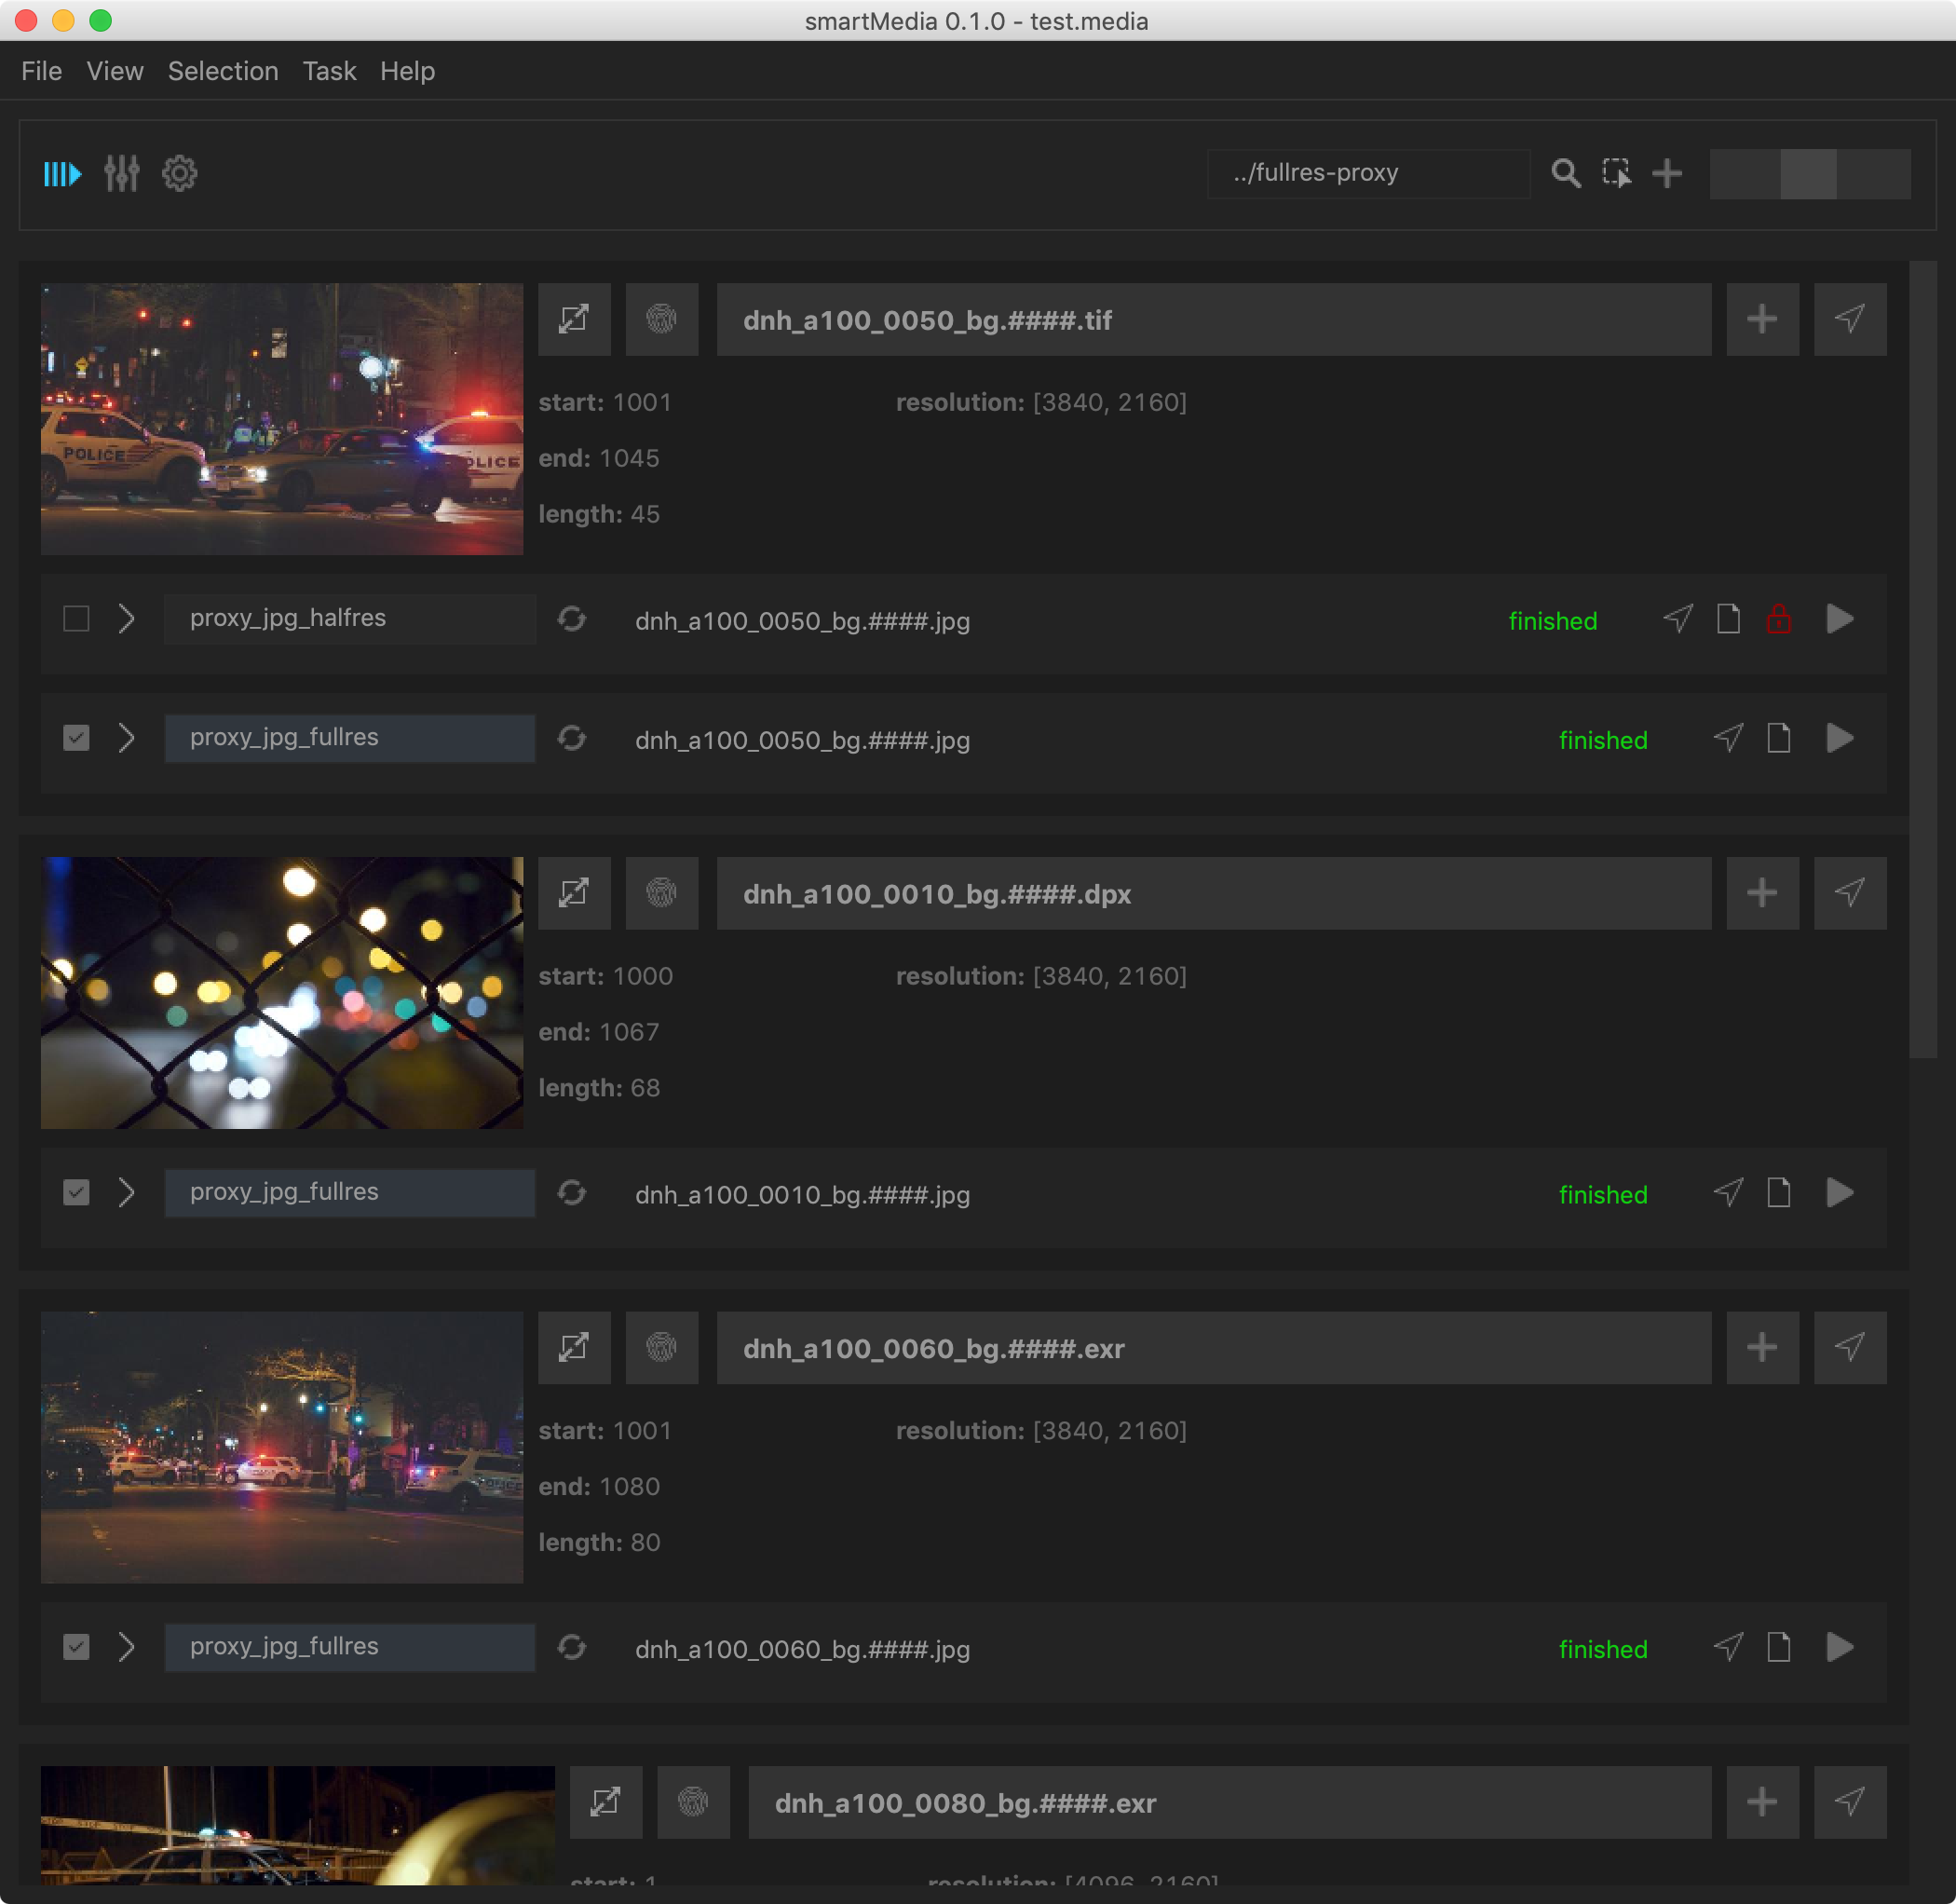
The proxys finish one after the other and are finally all finished:
Creating a DNxHD rendering for our comp output inside Nuke
Let’s use smartMedia inside Nuke to transcode our final exr rendering as a DNxHD video that we can then send to our client. And let’s add a slate and burnin information to it and set a comment to describe the changes that we applied in our sent version.
Select your (rendered) Write node or a Read node to transcode, navigate to Nuke’s menubar and choose: ‘cragl -> smartMedia -> send selected to smartMedia’

The file gets ingested into smartMedia:
Create a new task and select the preset ‘deliver_dnxhd-422_8bit_036_23.976fps’.
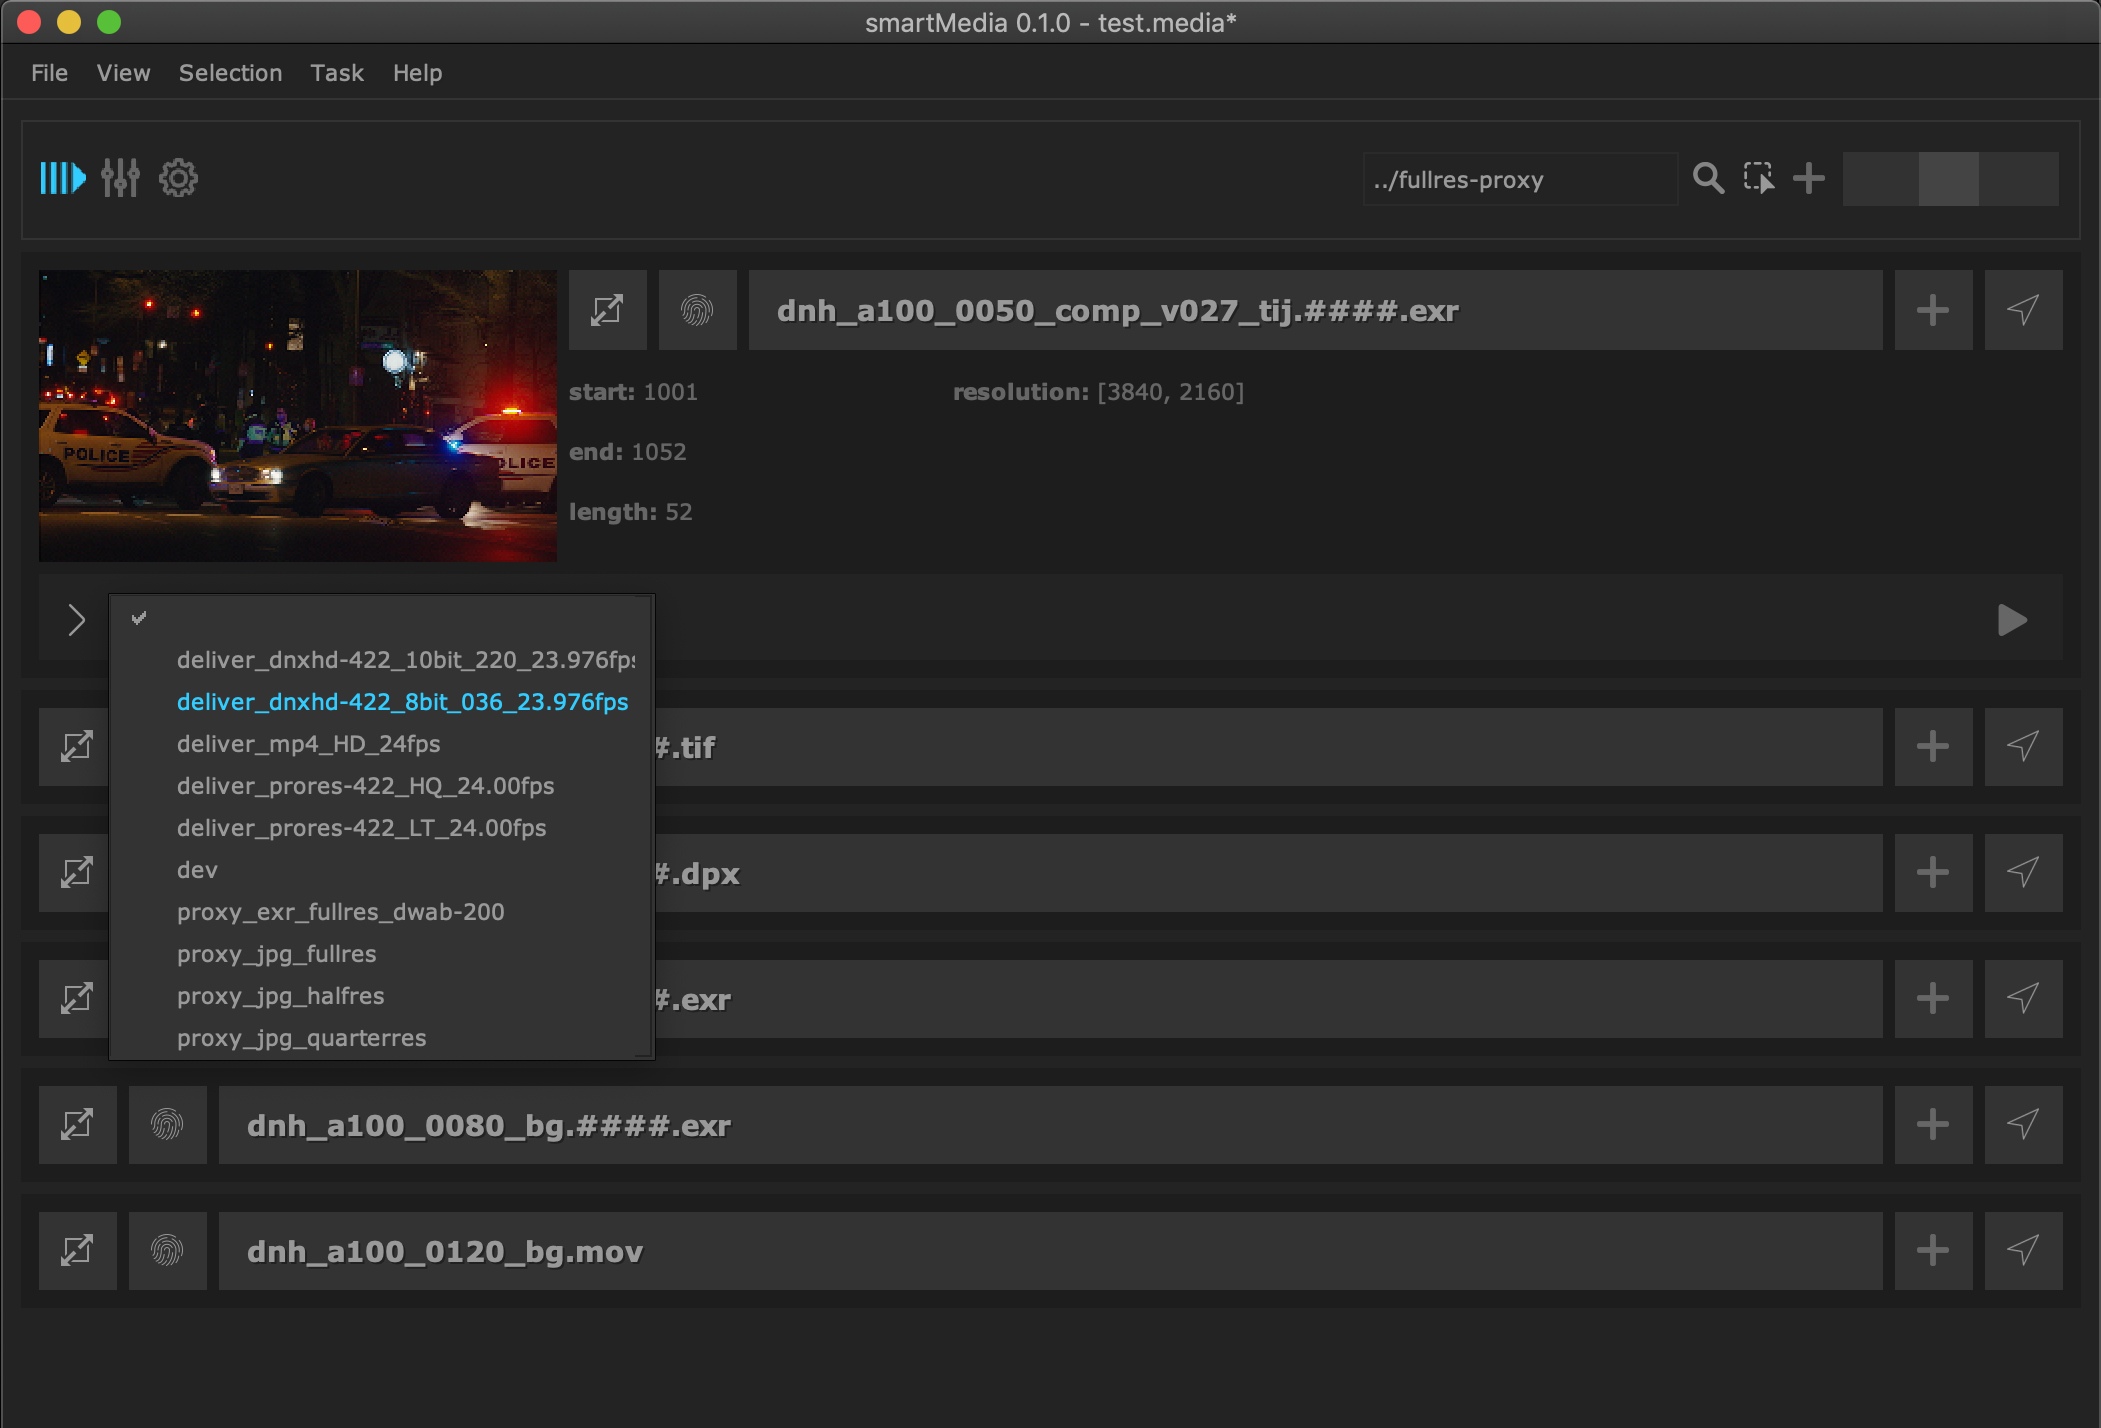
Each task contains several output details that you can edit to your needs. Click the arrow on the left:
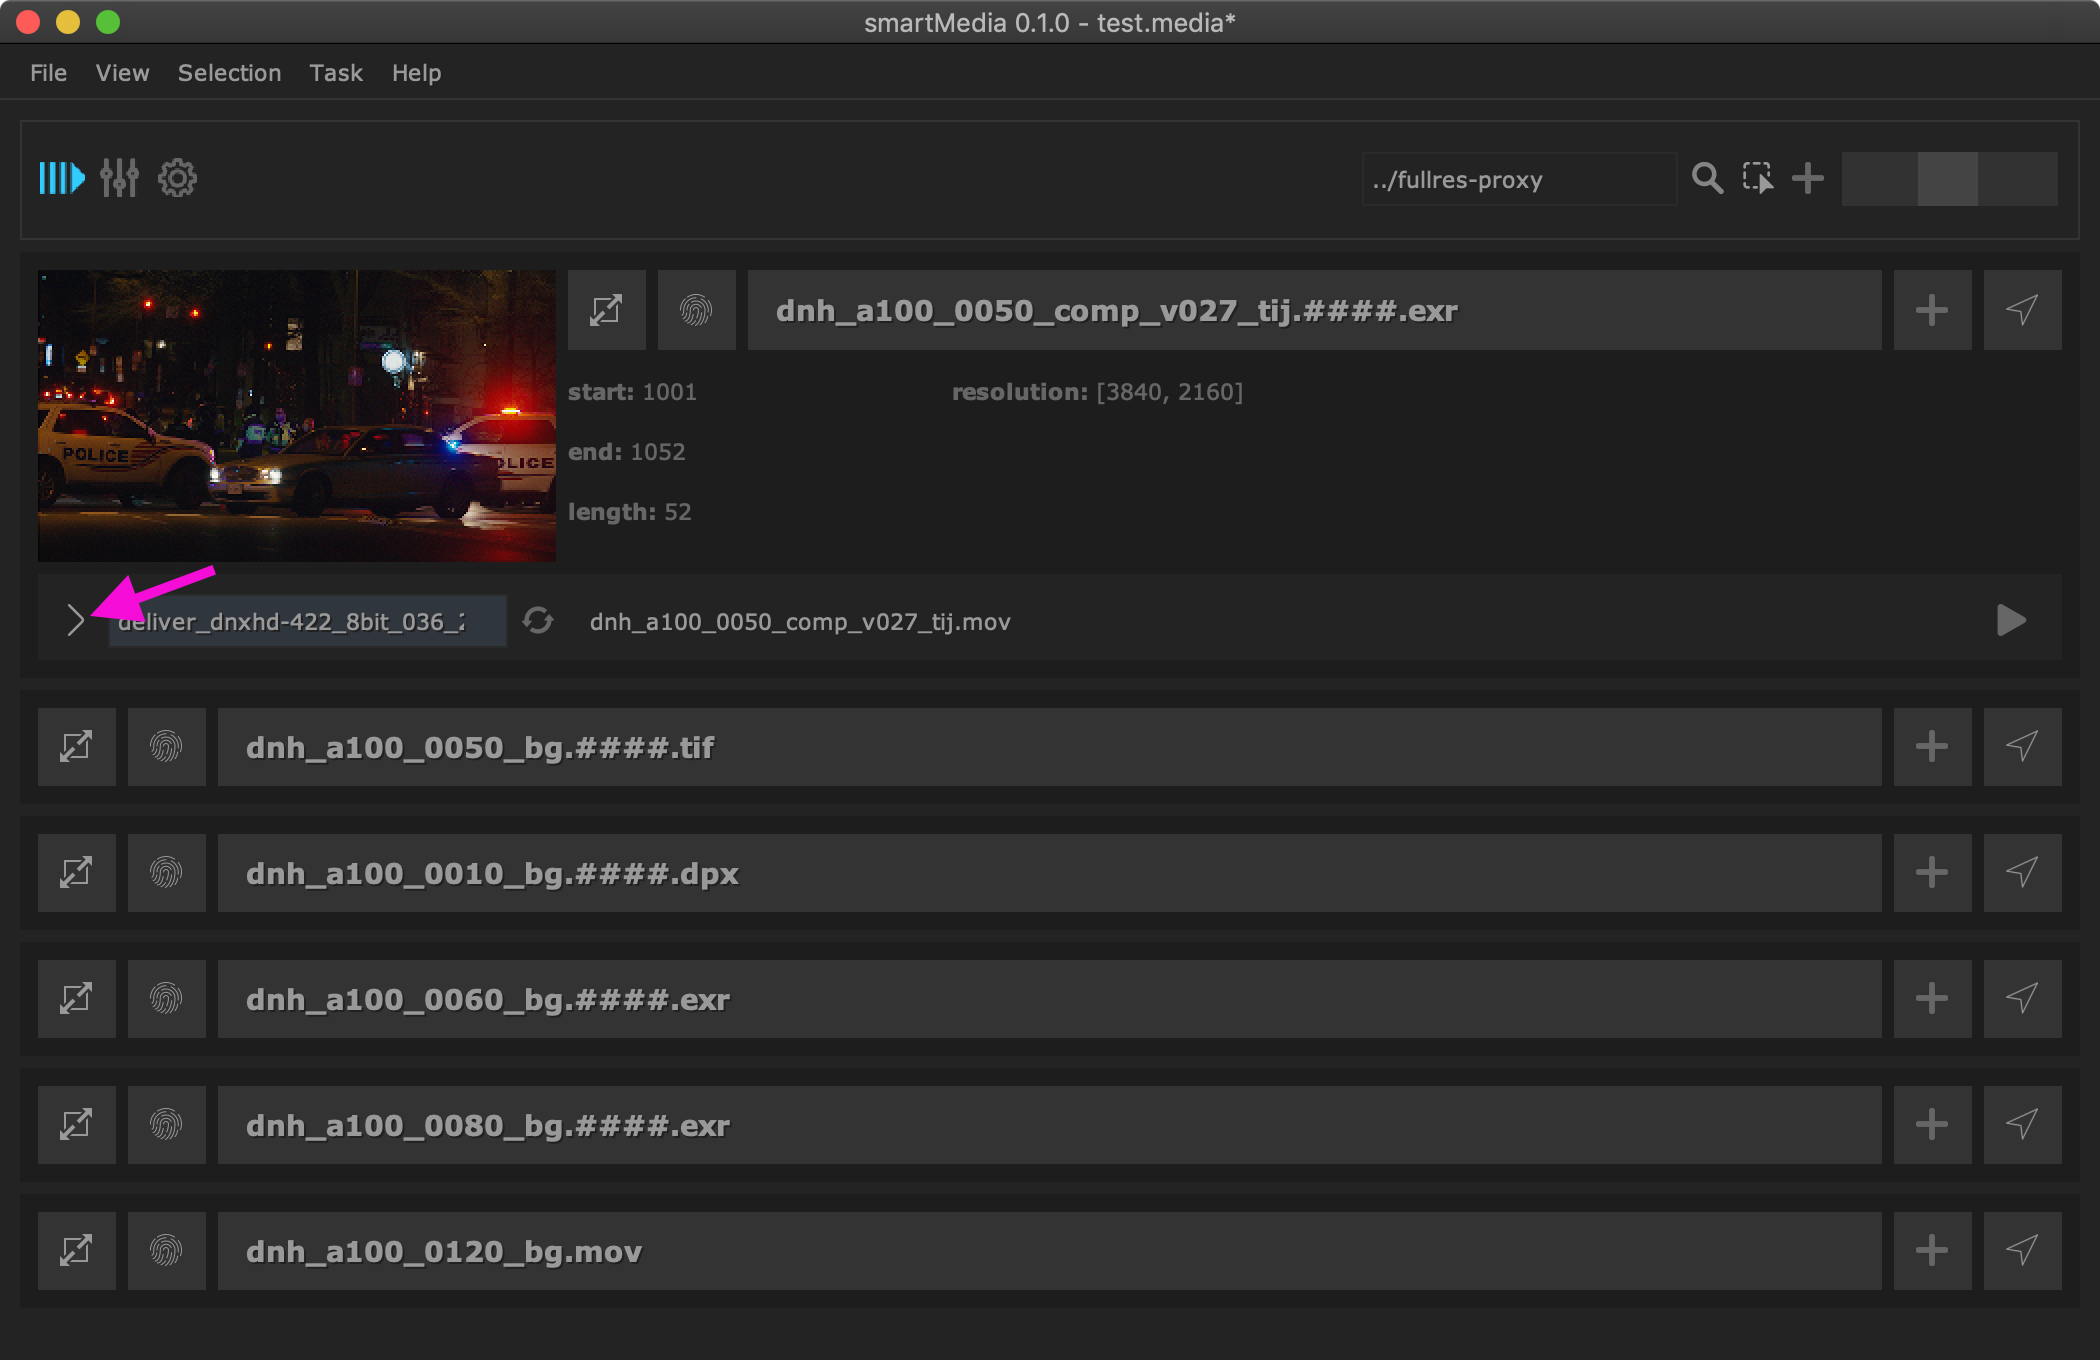
This expands all details for the current task:

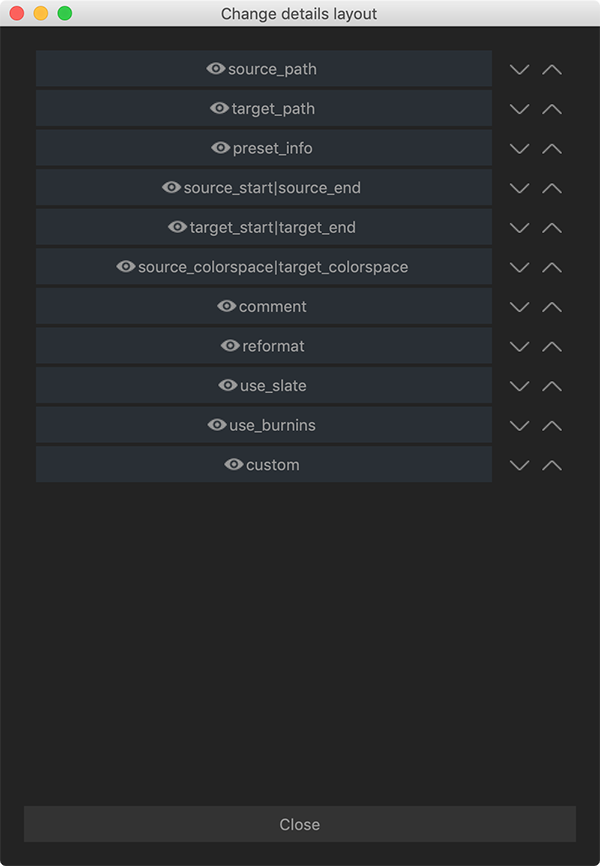
By default smartMedia shows all details. Depending on your needs that is exactly what you need. But you can also hide certain details and update the order of these. Right click inside the details panel and choose Change details layout:
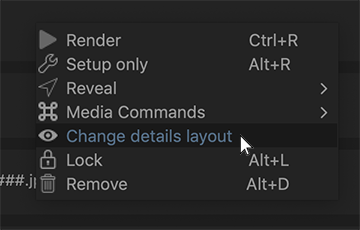
In the upcoming window you can turn on and off the visibility of certain details. And you can also update the order. These changes apply to all tasks.
By default, this preset renders a slate and burnins as seen below:
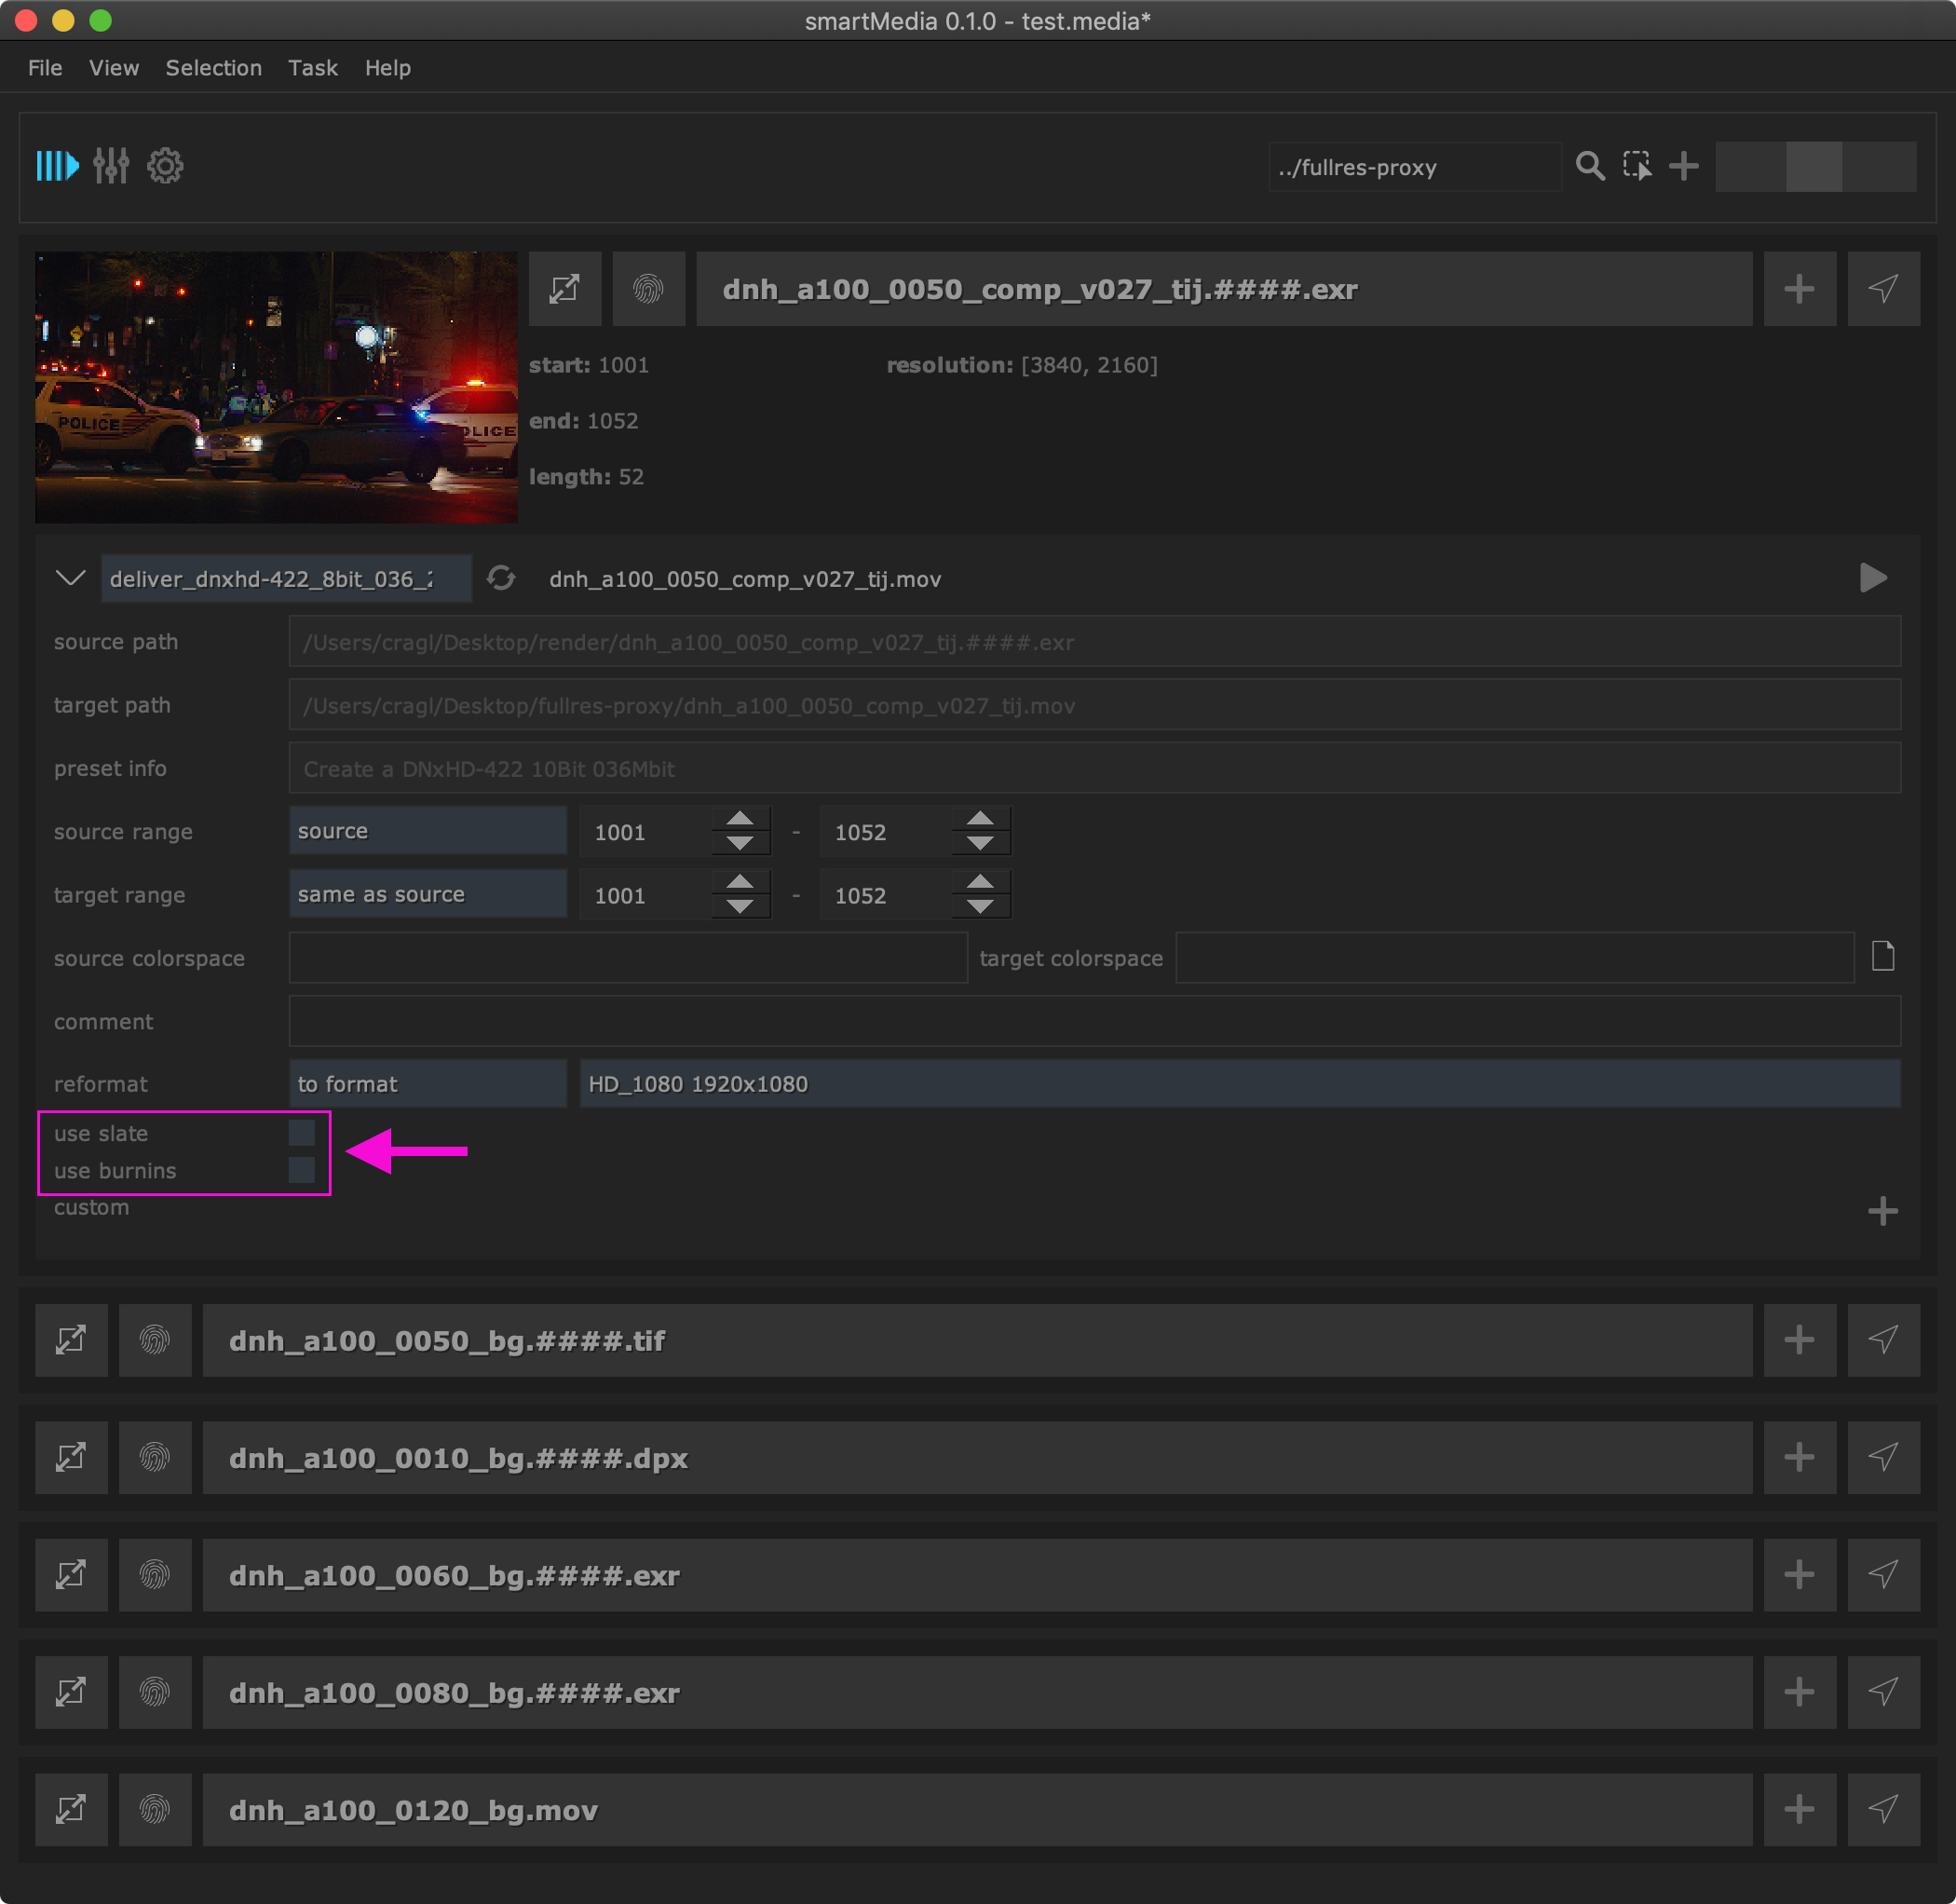
Let’s keep these but let’s also add a comment that gets shown in the slate. Later we learn how to retrieve comments automatically from a data base. For now let’s add a comment manually:

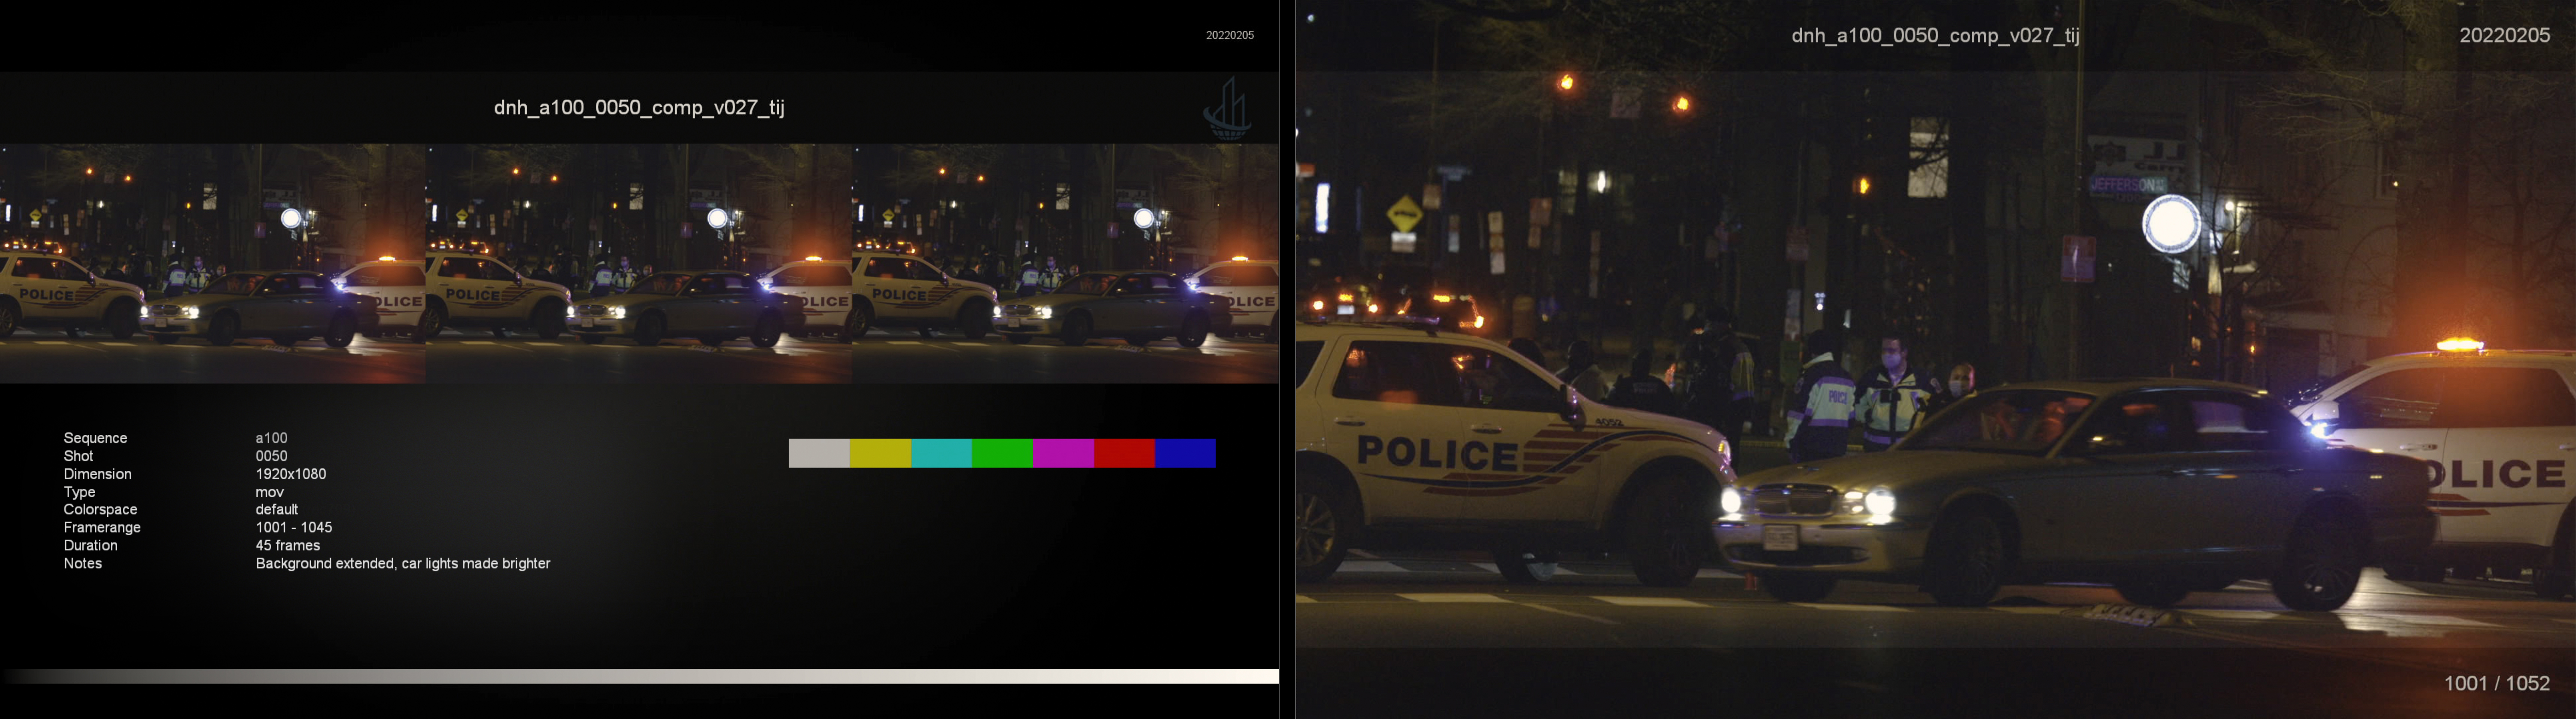
Set an output path and render the file. It contains a slate and burnins. The slate shows our entered comment:
Later we will see how to update the burnins and slate information to your needs.
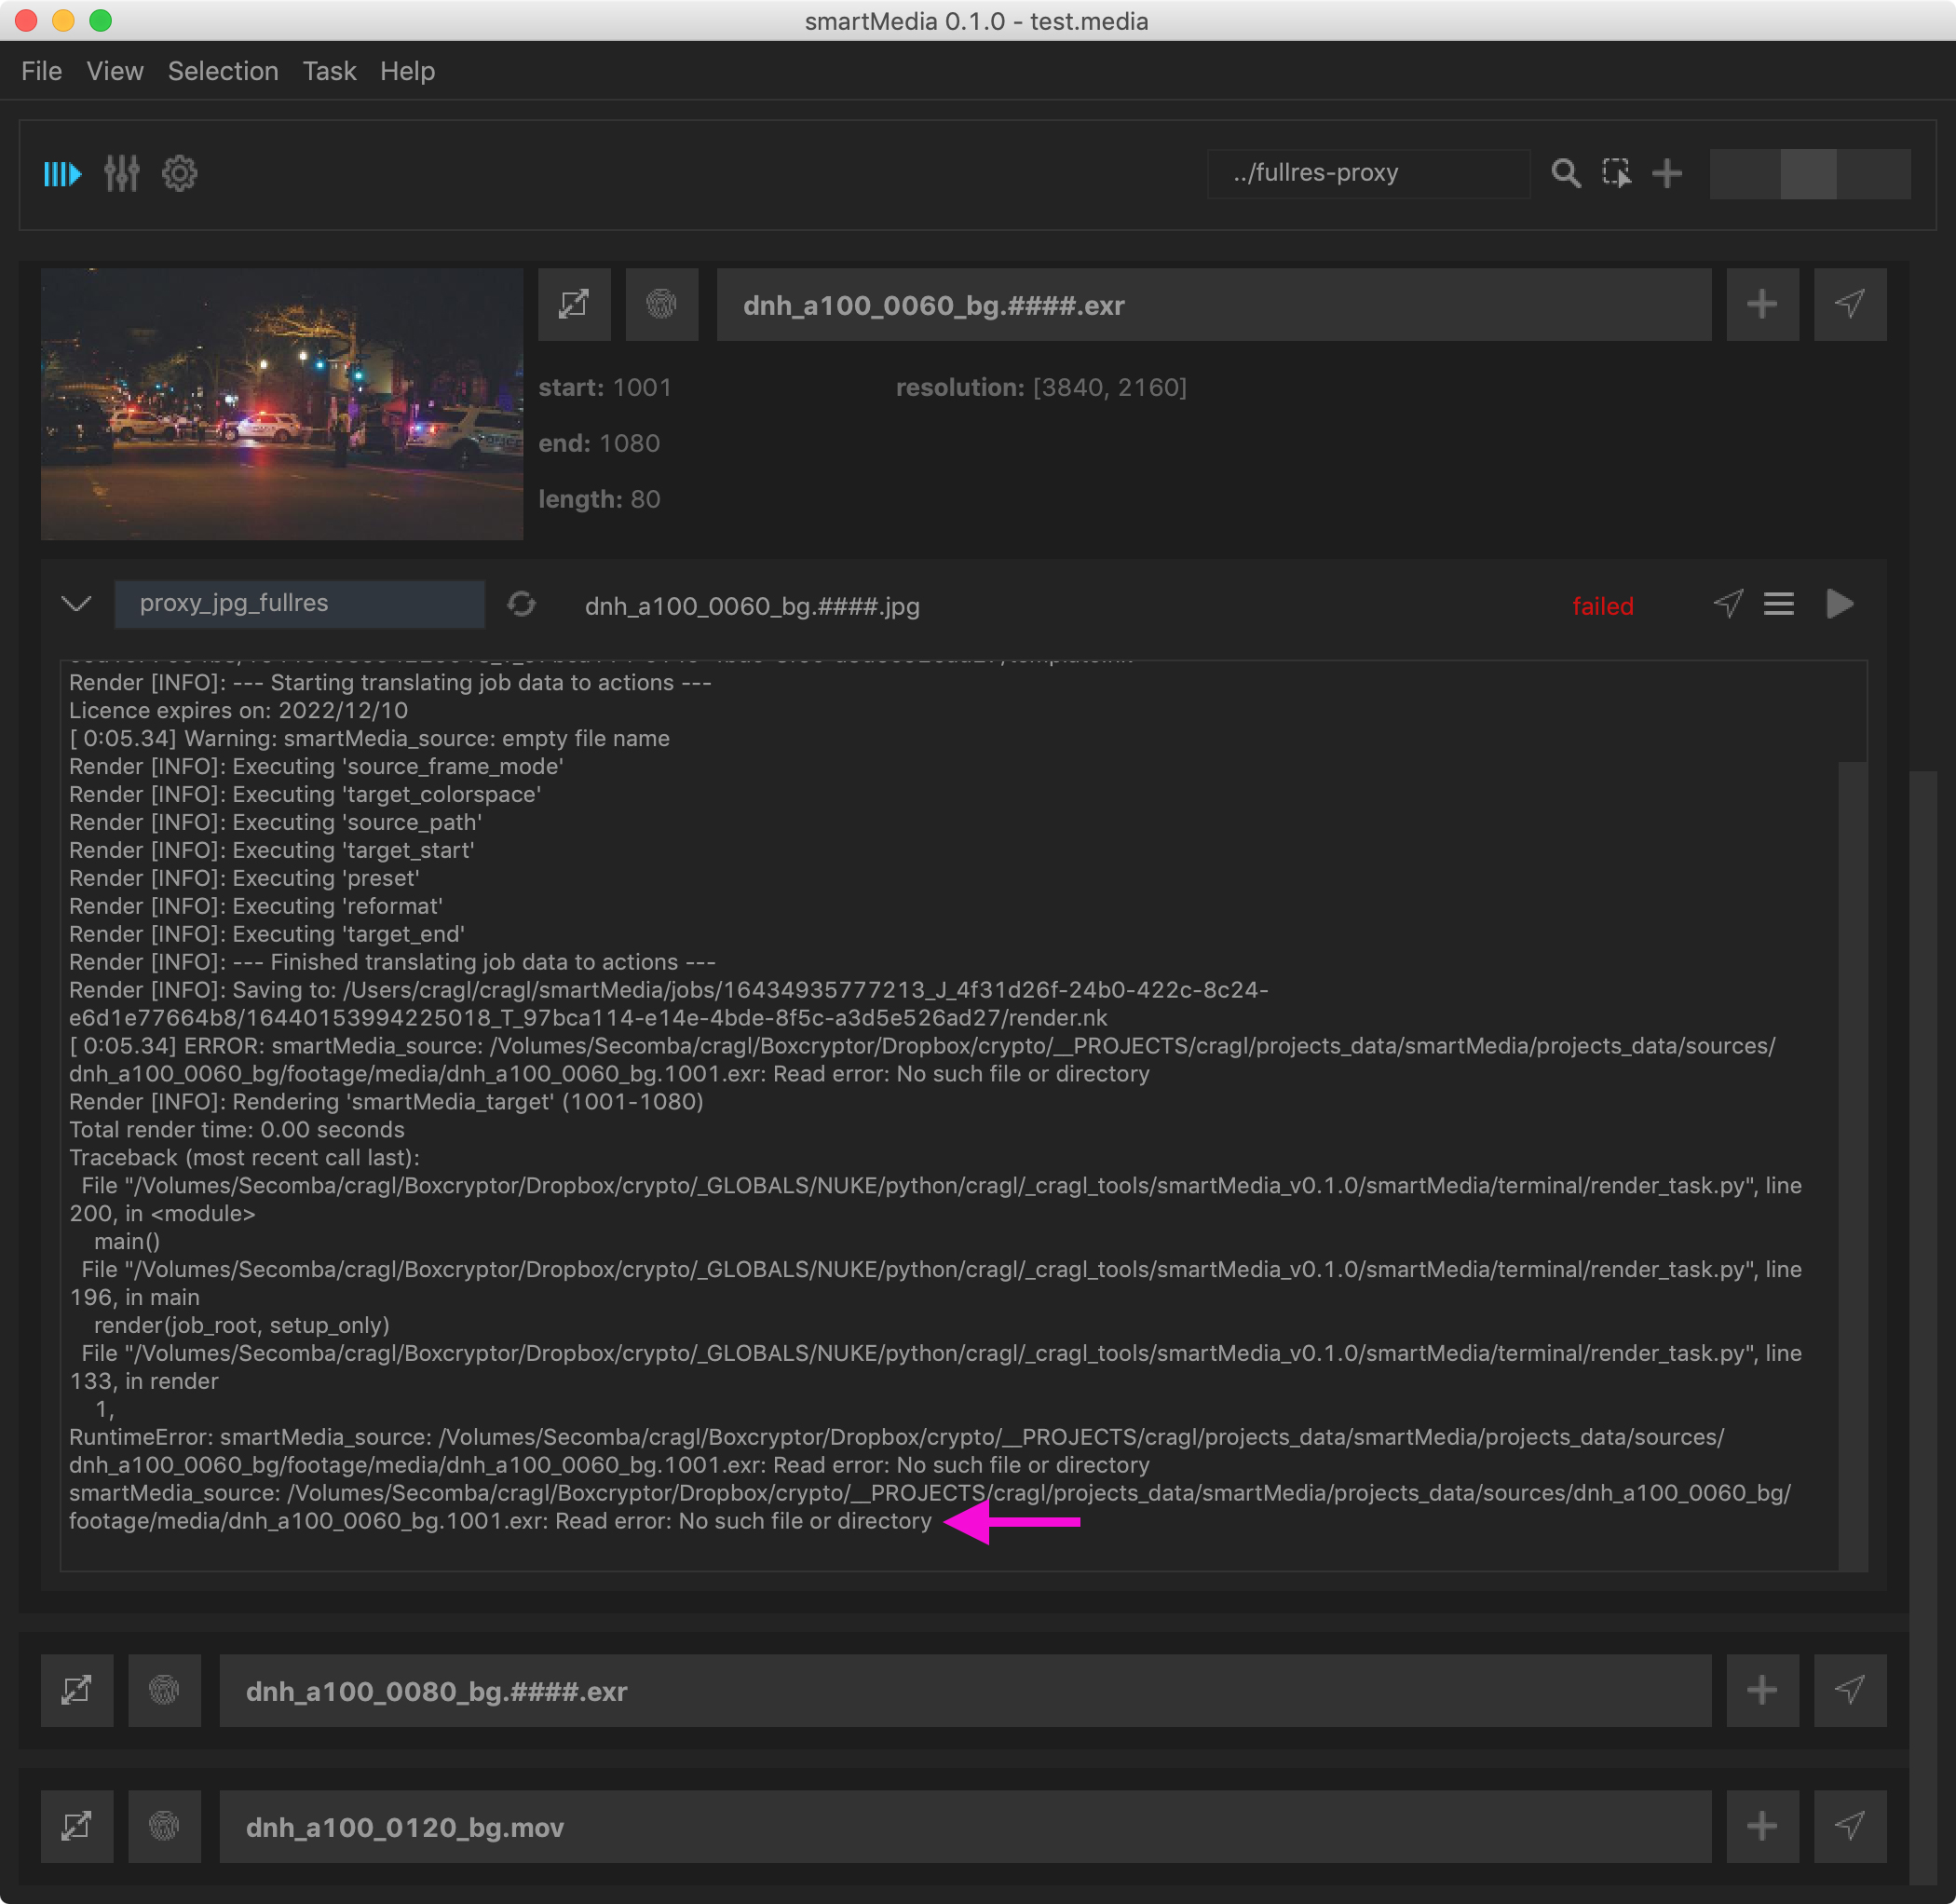
Dealing with render errors
smartMedia will inform you about tasks that did not render successfully. The status indicates ‘failed’. In order to see why it failed click the job log button:
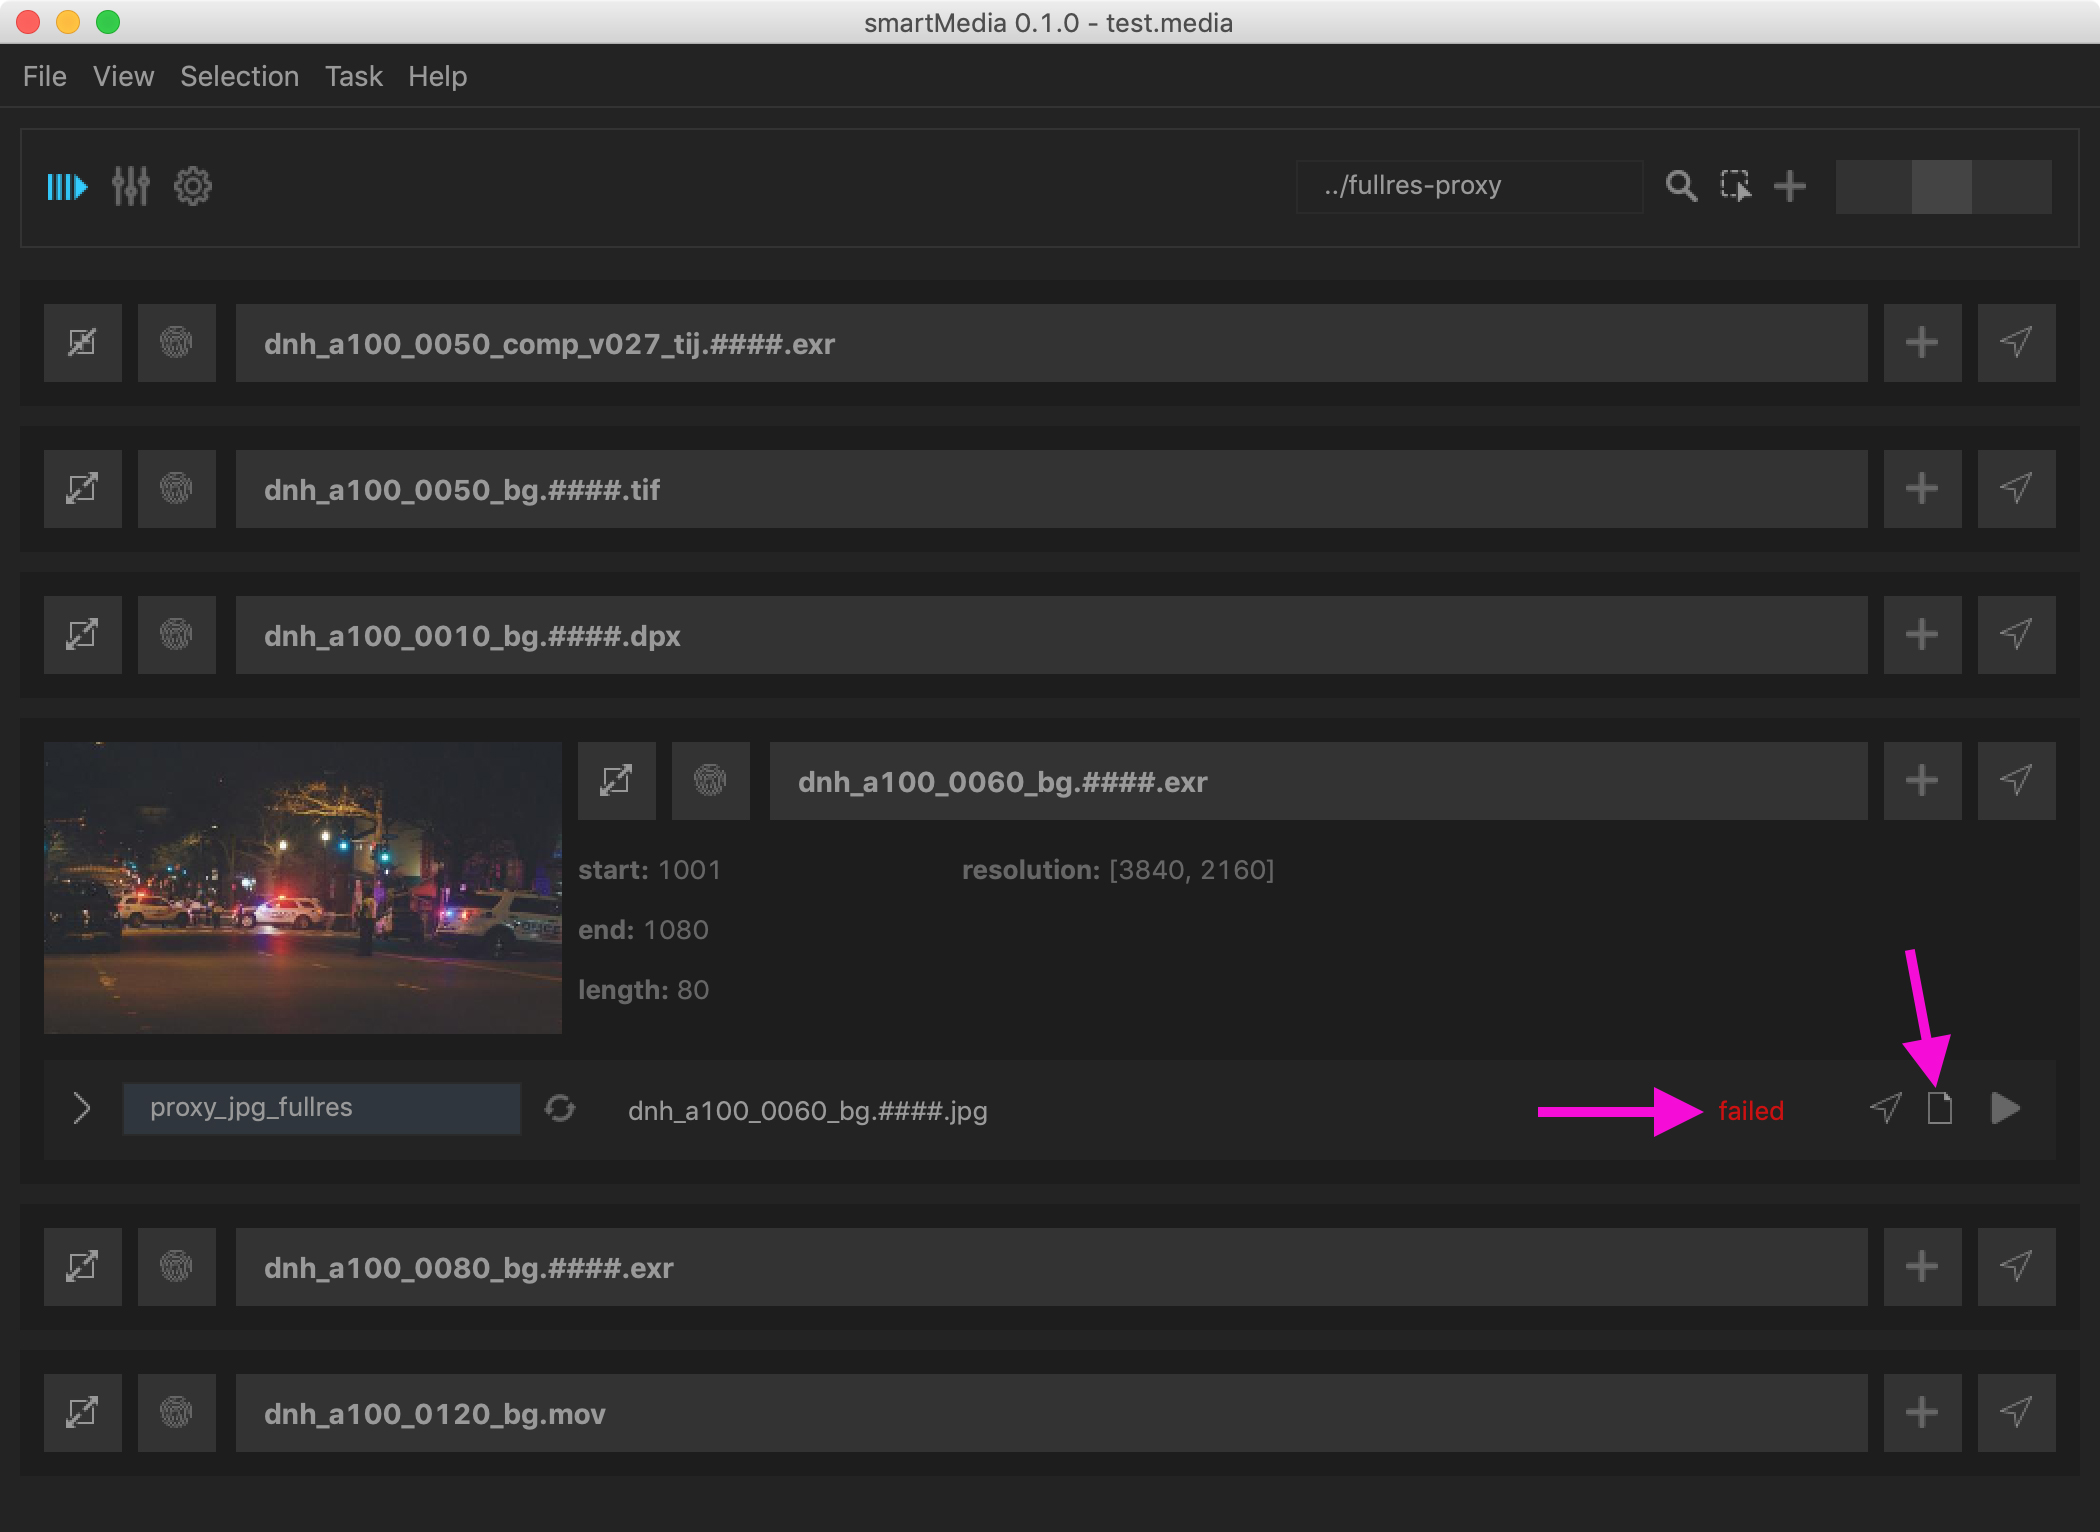
The job log contains useful information about setting up the task and rendering it. In that example, the task failed due to frame 1001 that is missing.