Main window
The smartElements browser is the main window where you browse your media and where you insert media into your DAG.
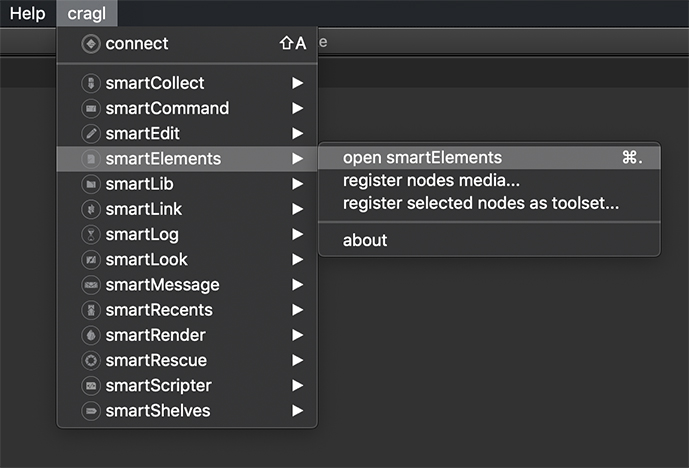
In order to launch the smartElements browser navigate to Nuke’s menu bar and choose cragl -> smartElements -> open smartElements
A quicker way is using the shortcut: Ctrl + .
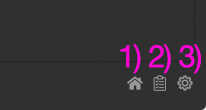
The browser contains three sections that you can either toggle using the
buttons at the bottom right or by using Ctr + 1, Ctrl + 2 and
Ctrl + 3:
Main section (
Ctrl + 1): Shows the media.History section (
Ctrl + 2): Shows the ingestion history and their logs.Settings section (
Ctrl + 3): Shows the settings.
All three sections get discussed in the following.
Main section
The main section is where you access your media. The main section contains multiple widgets that get described below.
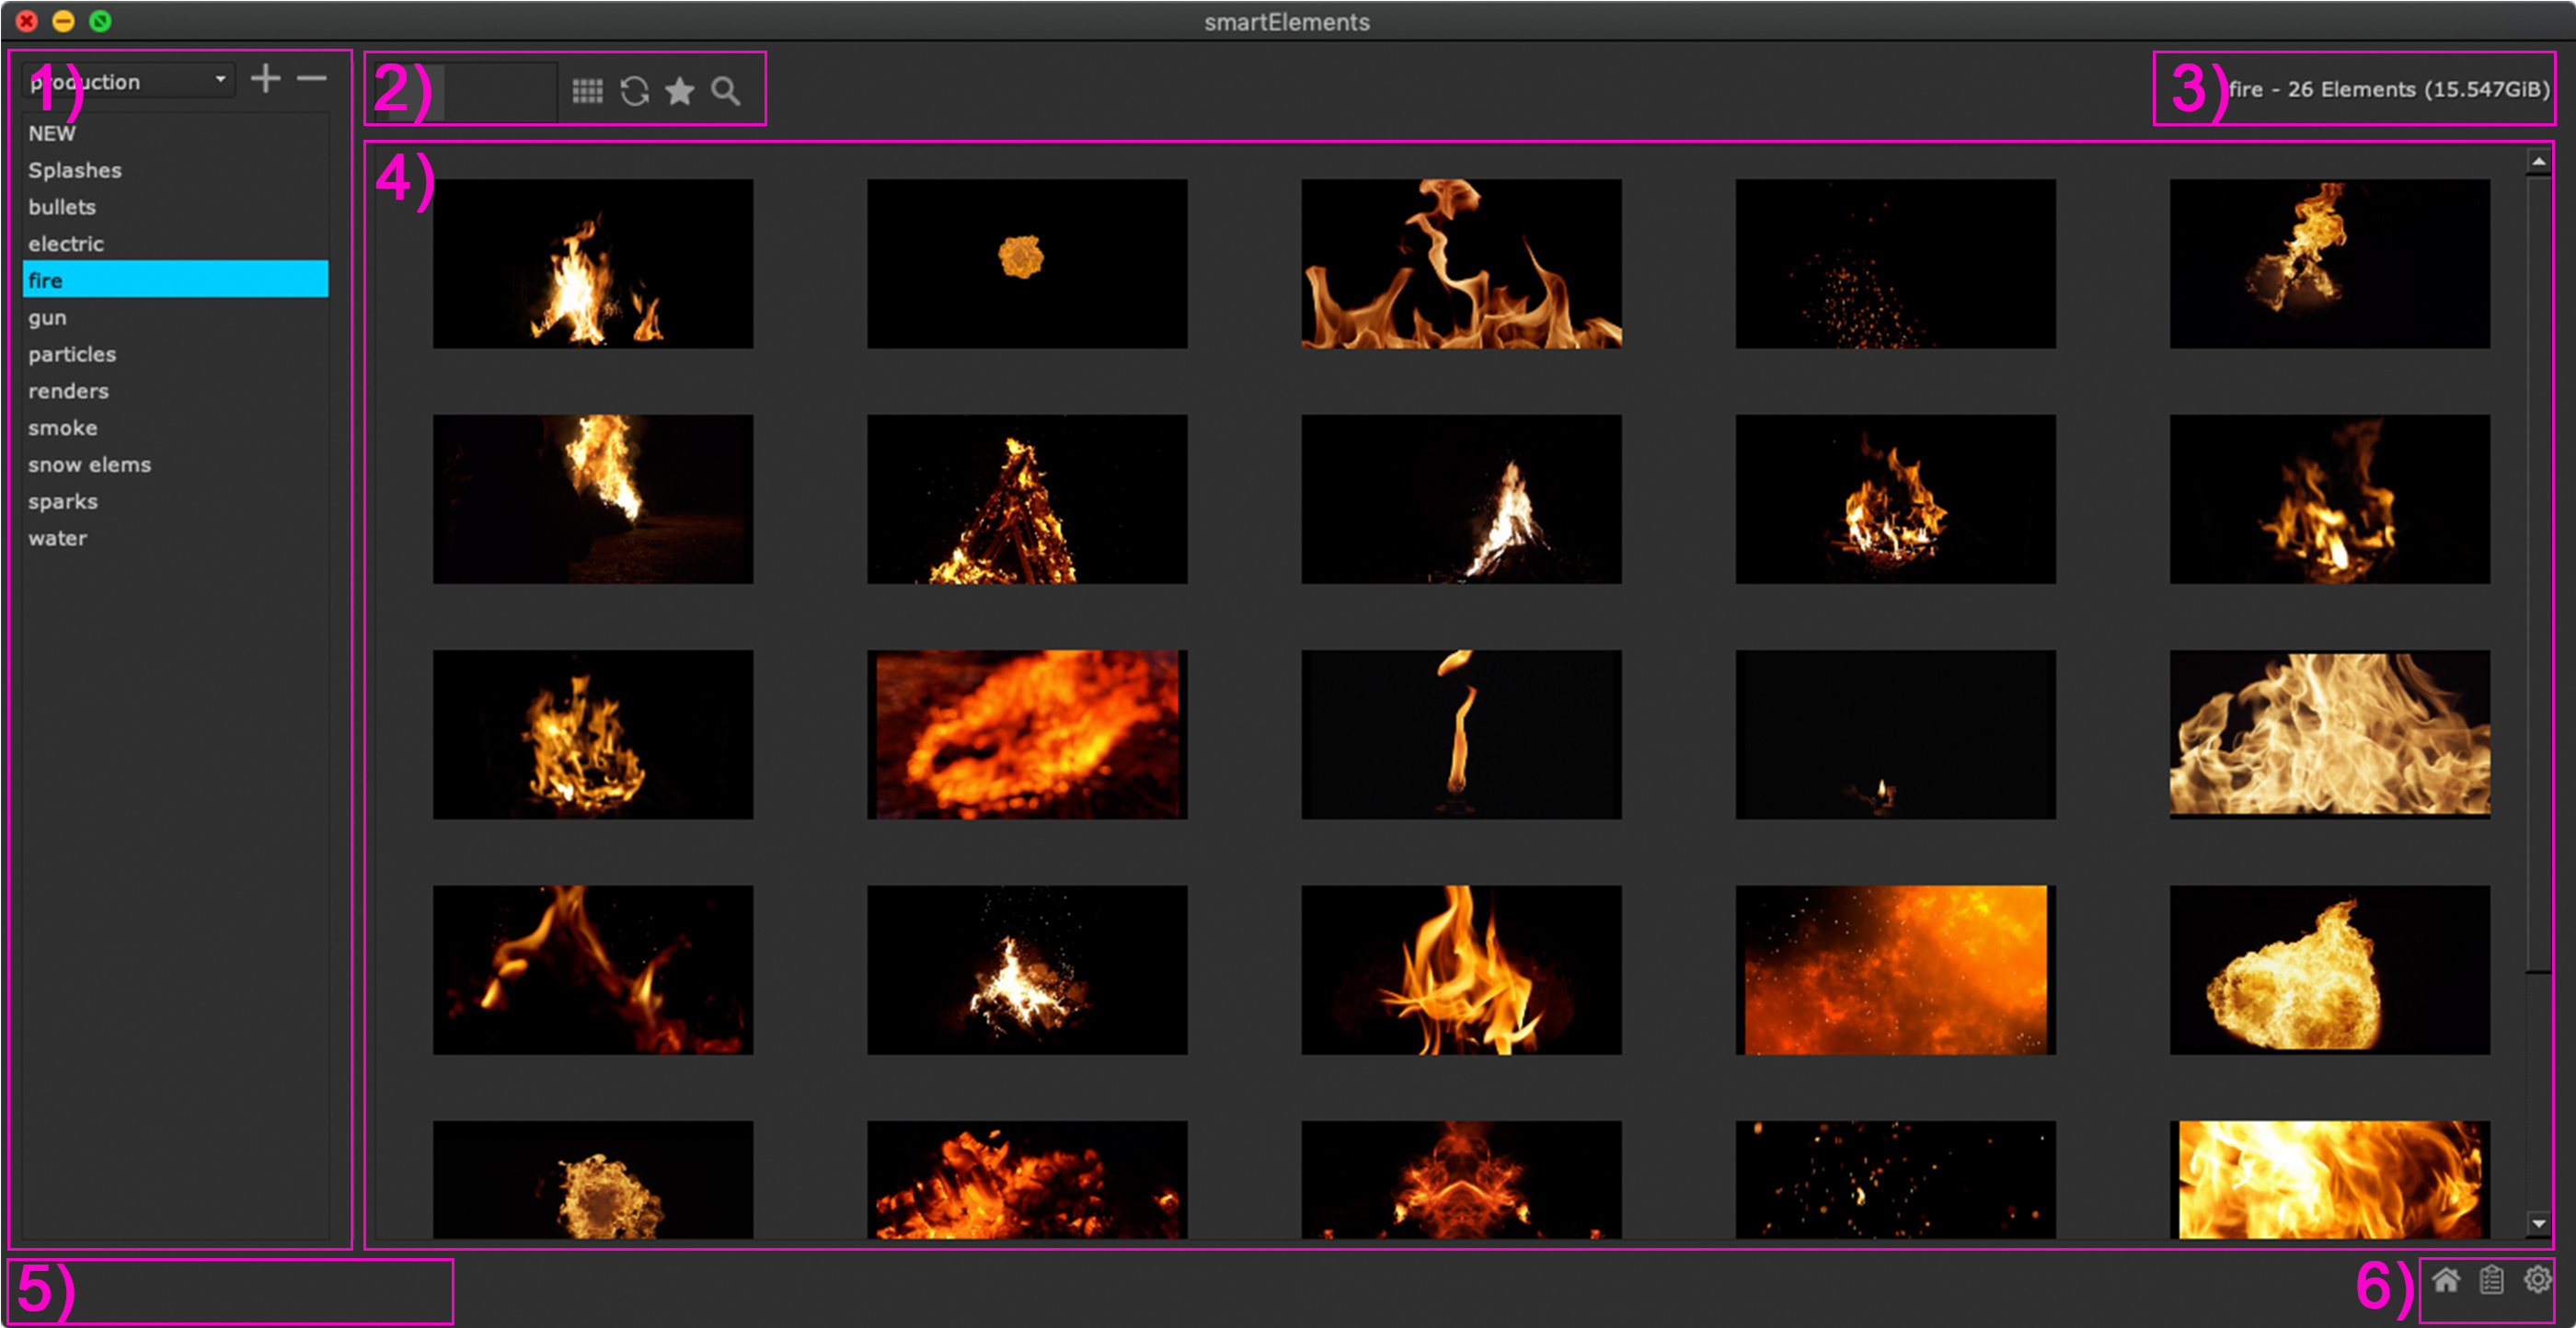
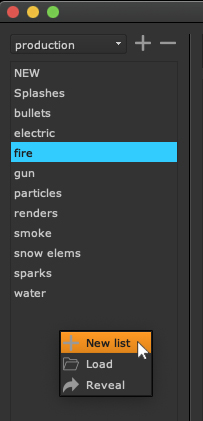
1) Stacks/ lists: This section contains a drop down menu to switch between stacks. Below you find all lists of the currently stack. Media lives inside the lists. To load a list double click it or select a list and hit enter or right click and choose Load from the context menu.
2) Viewing mode: Here you can adjust the media size, switch between thumbnail and list view, reload the currently selected list, toggle between showing all media or only favorite media and searching media.
3) Information: here you can see information about the currently selected list. It shows you the number of media in the list as well as the overall size of all media.
4) Library: Here you see all media of the currently selected list.
5) Status: Here you see status information when loading media from a list or when ingesting media to smartElements.
6) Section toggles: Use these three buttons to toggle between the home view (Ctrl + 1), the history view (Ctrl + 2) and the settings view (Ctrl + 3).
Working with stacks and lists
smartElements is build up on stacks. Each stack contains multiple lists. Media lives inside these lists. So you have all the control to categorize your media. Both stacks and lists are nothing more than folders on your server, your desktop, your cloud or somewhere else on your machine or somewhere on your network or any other location that your machine can access.
Stacks let you keep all elements for one specific show. Or you can use stacks to your advantage to create one stack for each user. Or create a stack for all your toolsets and further categorize the toolsets inside lists. Or you use just one stack and don’t further categorize - You decide how to use this feature. The first time you launch smartElements, you will be using the default stack.
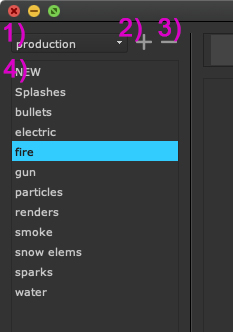
You can use the drop down menu at the top left (1) to switch between stacks. Use the + button (2) to browse to a new stack. The browsed stack will be added to the stacks drop down. Use the - button (3) to remove a stack from the stacks drop down. Note: This will only remove the stack from the stacks drop down. It will not delete any folders or media.
Each stack contains lists (4) that you can use to further categorize elements. In order to create new lists, right click the lists view and choose New list.
In order to load a list right click a list and chose Load or simply double click it or select it and hit your enter key. The lists media will be loaded in the library view.
Working with playlists
smartElements lets you collect any elements from any stack and any list into a playlist. This is useful to group elements from various locations into one spot. playlists can then be shared within your team. You can create as many playlists for you and your team as needed.
Click the playlist toggle to show/hide the playlist section:

Tip
Use the shortcut ctrl + down arrow to show the playlist section and ctrl + up arrow to hide it.
The playlist section is located at the bottom and looks like the following:

On the left you see a list of all playlists. Use the search input to search for a specific playlist. Click any playlist from the list to view its elements. Click the + button to create a new playlist or import an existing playlist. Playlists are stored as .json files. Click the - button to remove the currently selected playlist from the list. This will only remove it from the list, it will not delete the playlist on disk.
In order to add to the playlist simply drag and drop one or many elements into the playlist. You can collect elements from any list and any stack into a playlist:
Any element in the playlist behaves exactly like any other element, i.e. they contain a right click menu with various actions and can be brought into your working file by dragging and dropping into your node graph.
Tip
You can also get playlists added automatically via an environment variable. This is useful to make sure your team has certain playlists available automatically without the need to import them manually. For more information about that see the environment variables documentation for CRAGL_SMARTELEMENTS_ADDITIONAL_PLAYLISTS.
History section
The history section shows you the history of all ingested media. Each media ingestion gets one logged in smartElements and here is where you can access the logs.

Right clicking a log shows a context menu in which you can export the log, reveal the log and delete the log:
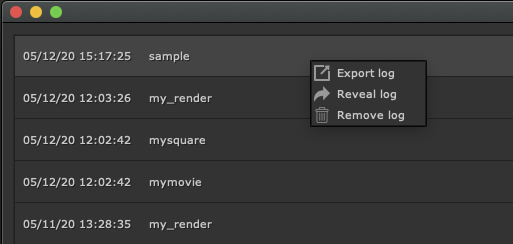
Click the Flush history button to remove all finished job logs.
Settings section
The settings section lets you customize smartElements to your needs. It contains two tabs:
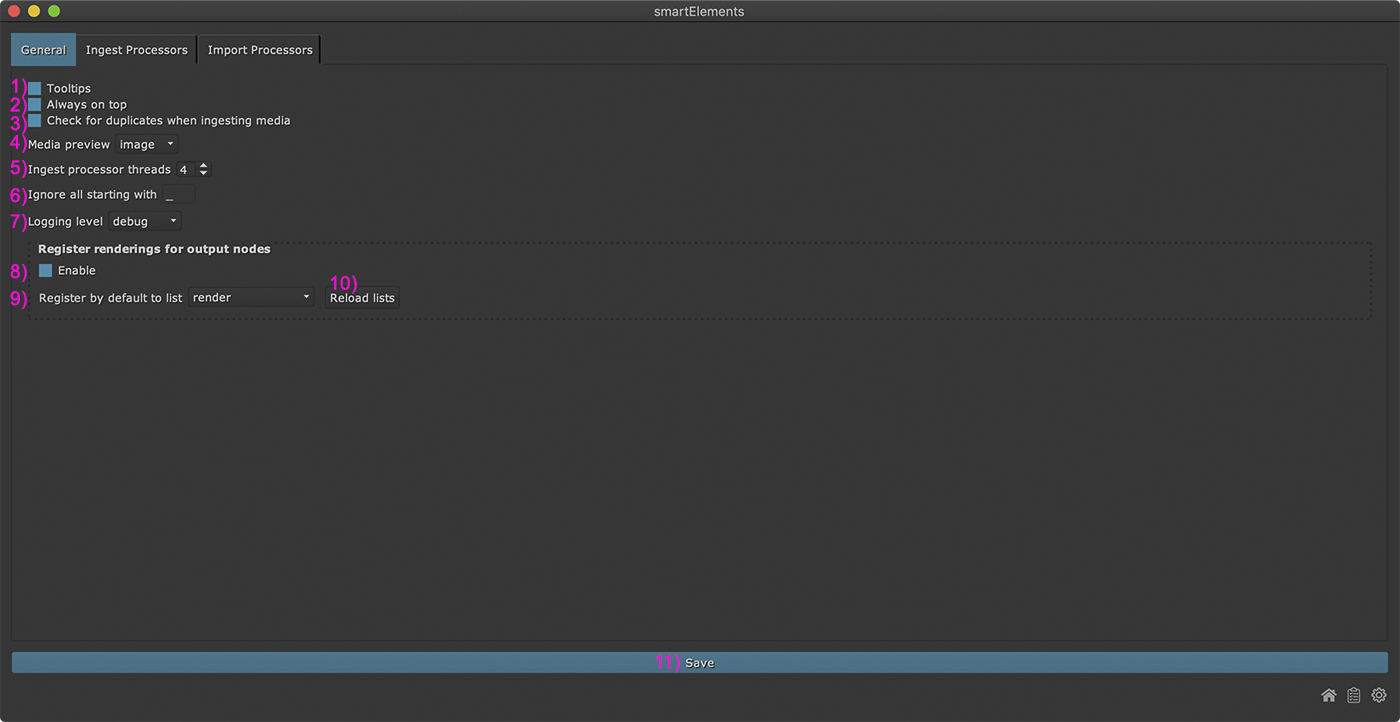
General: General settings to customize smartElements.
Ingest Processors: Adjust the settings for built-in and custom ingest processors. Only adjust if needed.
Import Processors: Adjust the settings for built-in and custom import processors. Only adjust if needed.
General settings
The general settings tab contains general settings to customize smartElements to your needs:
The following customizations are available:
1) Tooltips: If checked this will show tooltips for all major widgets. Requires a restart of smartElements to become effective.
2) Always on top: If checked the smartElements browser will always stay on top. Otherwise, it will go to the background when clicking somewhere out of the smartElements window. Requires a restart of smartElements to become effective.
3) Check for duplicates when ingesting media: If checked this will pre check all lists of the current stack to see if any media that got dropped into smartElements in order to ingest it is already contained in any list. This will only check all lists of the currently selected stack. If media is already contained then this will show a notification and ask if you want to ingest the media to the currently selected list as well. This features prevents from re-ingesting already contained media. Keep in mind that this will just compare media names to check for any duplicates, it will not compare the actual content.
Note: Depending on the amount of elements in your lists, keeping this feature enabled will take a moment to process.
4) Media preview: Determine to use a video preview or a static image for media inside the library. Note that Nuke-11 does not support a video player and will only use static images, regardless of the set value here. Also note in order to view videos a h.264 encoder and decoder need to be installed on your machine, otherwise you will not be able to see video previews. If that is the case or if you simply prefer static images over videos then make sure to select ‘image’ here. Requires a restart of Nuke to become effective.
5) Ingest processor threads: Set the number of processor threads that ingest media to smartElements in parallel. Requires a restart of Nuke to become effective.
6) Ignore all starting with: Ignore all stacks, list and library media that start with this character/these characters. This is useful to temporarily disable stacks/lists/media from loading.
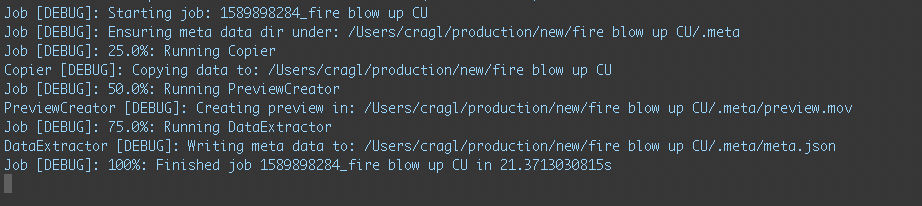
7) Logging level:
Set the logging level to use for smartElements. Using the debug level gives
the most information. As an example, setting the level to debug and
ingesting media will print all the ingestion steps to your terminal. This will
look something like this:
Requires a restart of Nuke to become effective.
8) Enable register rendering outputs: If checked this will enable the auto registering of rendered node outputs to a selected list once the rendering has finished. If enabled, this will create a custom smartElements tab on output nodes that you can use to determine the list where to auto register rendered media to. If unchecked then the smartElements will not be added to newly created output nodes and will also not auto register the renderings.
9) Register by default to list: Determine where to auto register rendered outputs to once the rendering has finished. This will set the list in a Write node when it gets created. The list can be adjusted afterwards using the list drop down menu in the Write node’s properties.
10) Reload lists: Click to reload all available lists in all stacks.
11) Save: Click to apply the settings. Note that some widgets require a restart of smartElements or even Nuke to take effect. Please refer to the widget’s tooltips or the documentation here to see which widgets require a restart of smartElements or Nuke to become effective.
Ingest processor settings
The second tab Ingest Processors contains a text field (1) in which you can configure the processors that run when ingesting media. These settings work out of the box and there should not be a change needed. However, if required you can change the processor’s settings here. The settings are stored in a dictionary type where each processor is stored in another nested dictionary. In case you create custom processors you can drive them by custom settings in here and they will pick these values up.
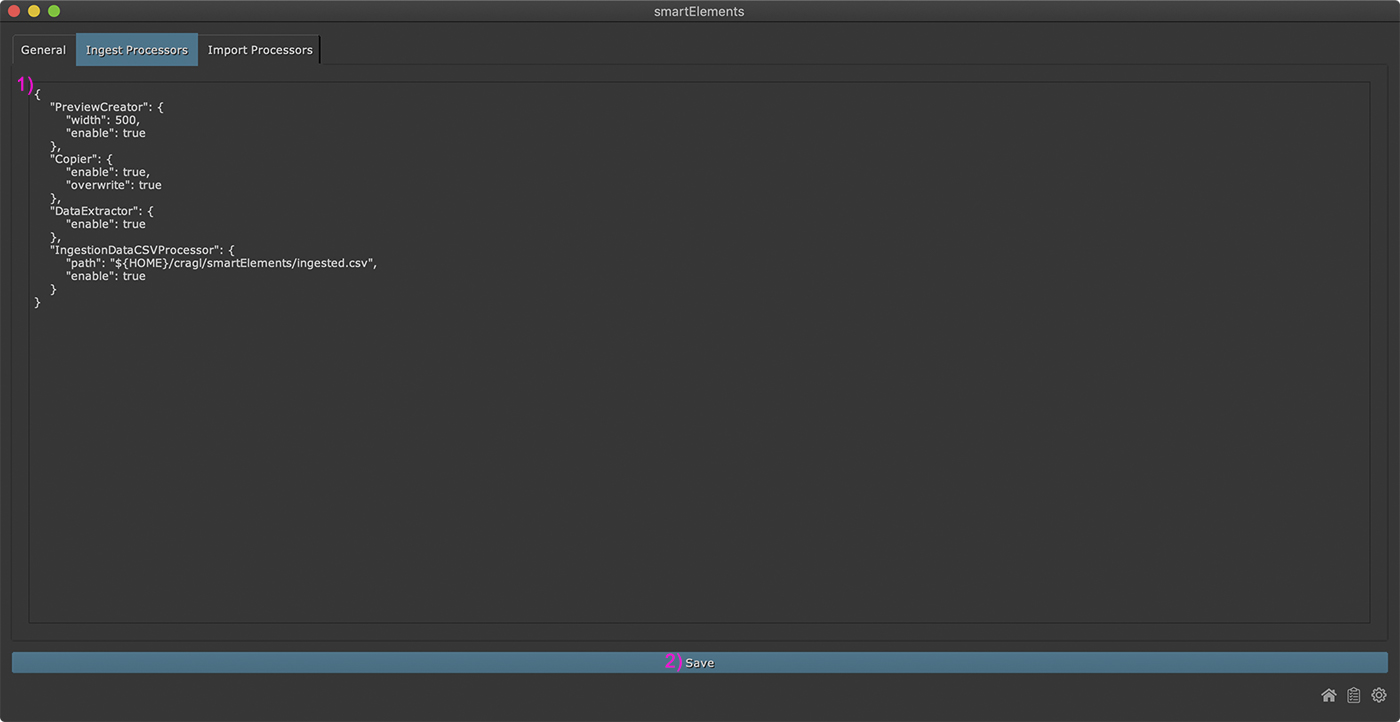
As soon as you click the save button (2), the settings dictionary will be validated. In case the settings are not a valid dict type, you will be informed about it.
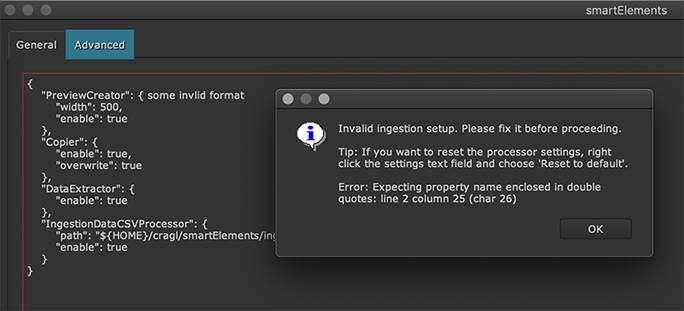
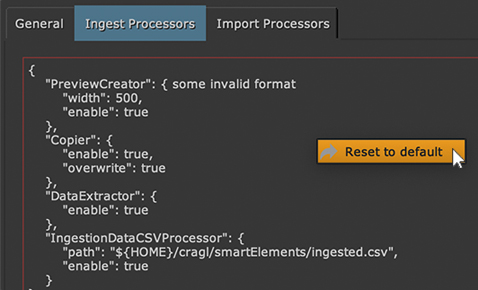
In case you ever get lost, you can reset the ingestion setup to the default value. Right click the text area and choose Reset to default from the context menu.
Import processor settings
The third tab Import processors contains a text field (1) that lets you configure the behavior of import processors. This works identically to ingest processors, whereas import processors are run when importing media into your DAG. These processors are driven by configuration and you can adjust the built-in import processor’s configuration here and add additional configurations for your own import processors. Using the configuration in here you can quickly enable and disable the processors and adjust their behavior without the need to edit any python module.

Like the ingest processors text field, the import processors settings text field will also inform you about any invalid settings when trying to save. You can also right click it and reset to the default value.