Keeping track of new elements
Sometimes, it gets hard to keep track of what elements are new and consequently what elements you have all available. This issue becomes apparent when your elements library starts to grow in the thousands and especially when several users are involved with element ingestions. Luckily, smartElements contains several features to keep track with new element ingestions so you get a better overview of what you have available.
Creating an element ingestion Report
The element ingestion report functionality lets you create a report in various formats for element ingestions within a given time range for the currently viewing sack.
Right click a list and choose ‘Generate new elements report…’ from the context menu:

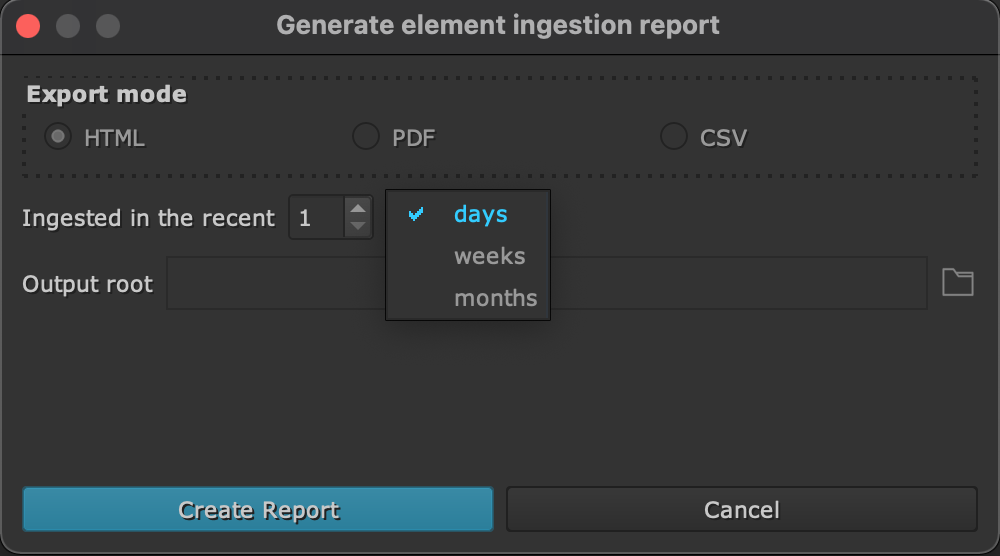
This launches a dialog in which you can specify the time range of newly ingested elements to put into a report. You can export as HTML, PDF and CSV file. Choose an export root directory and click the create button:
This will create an element ingestion report in the specified format.
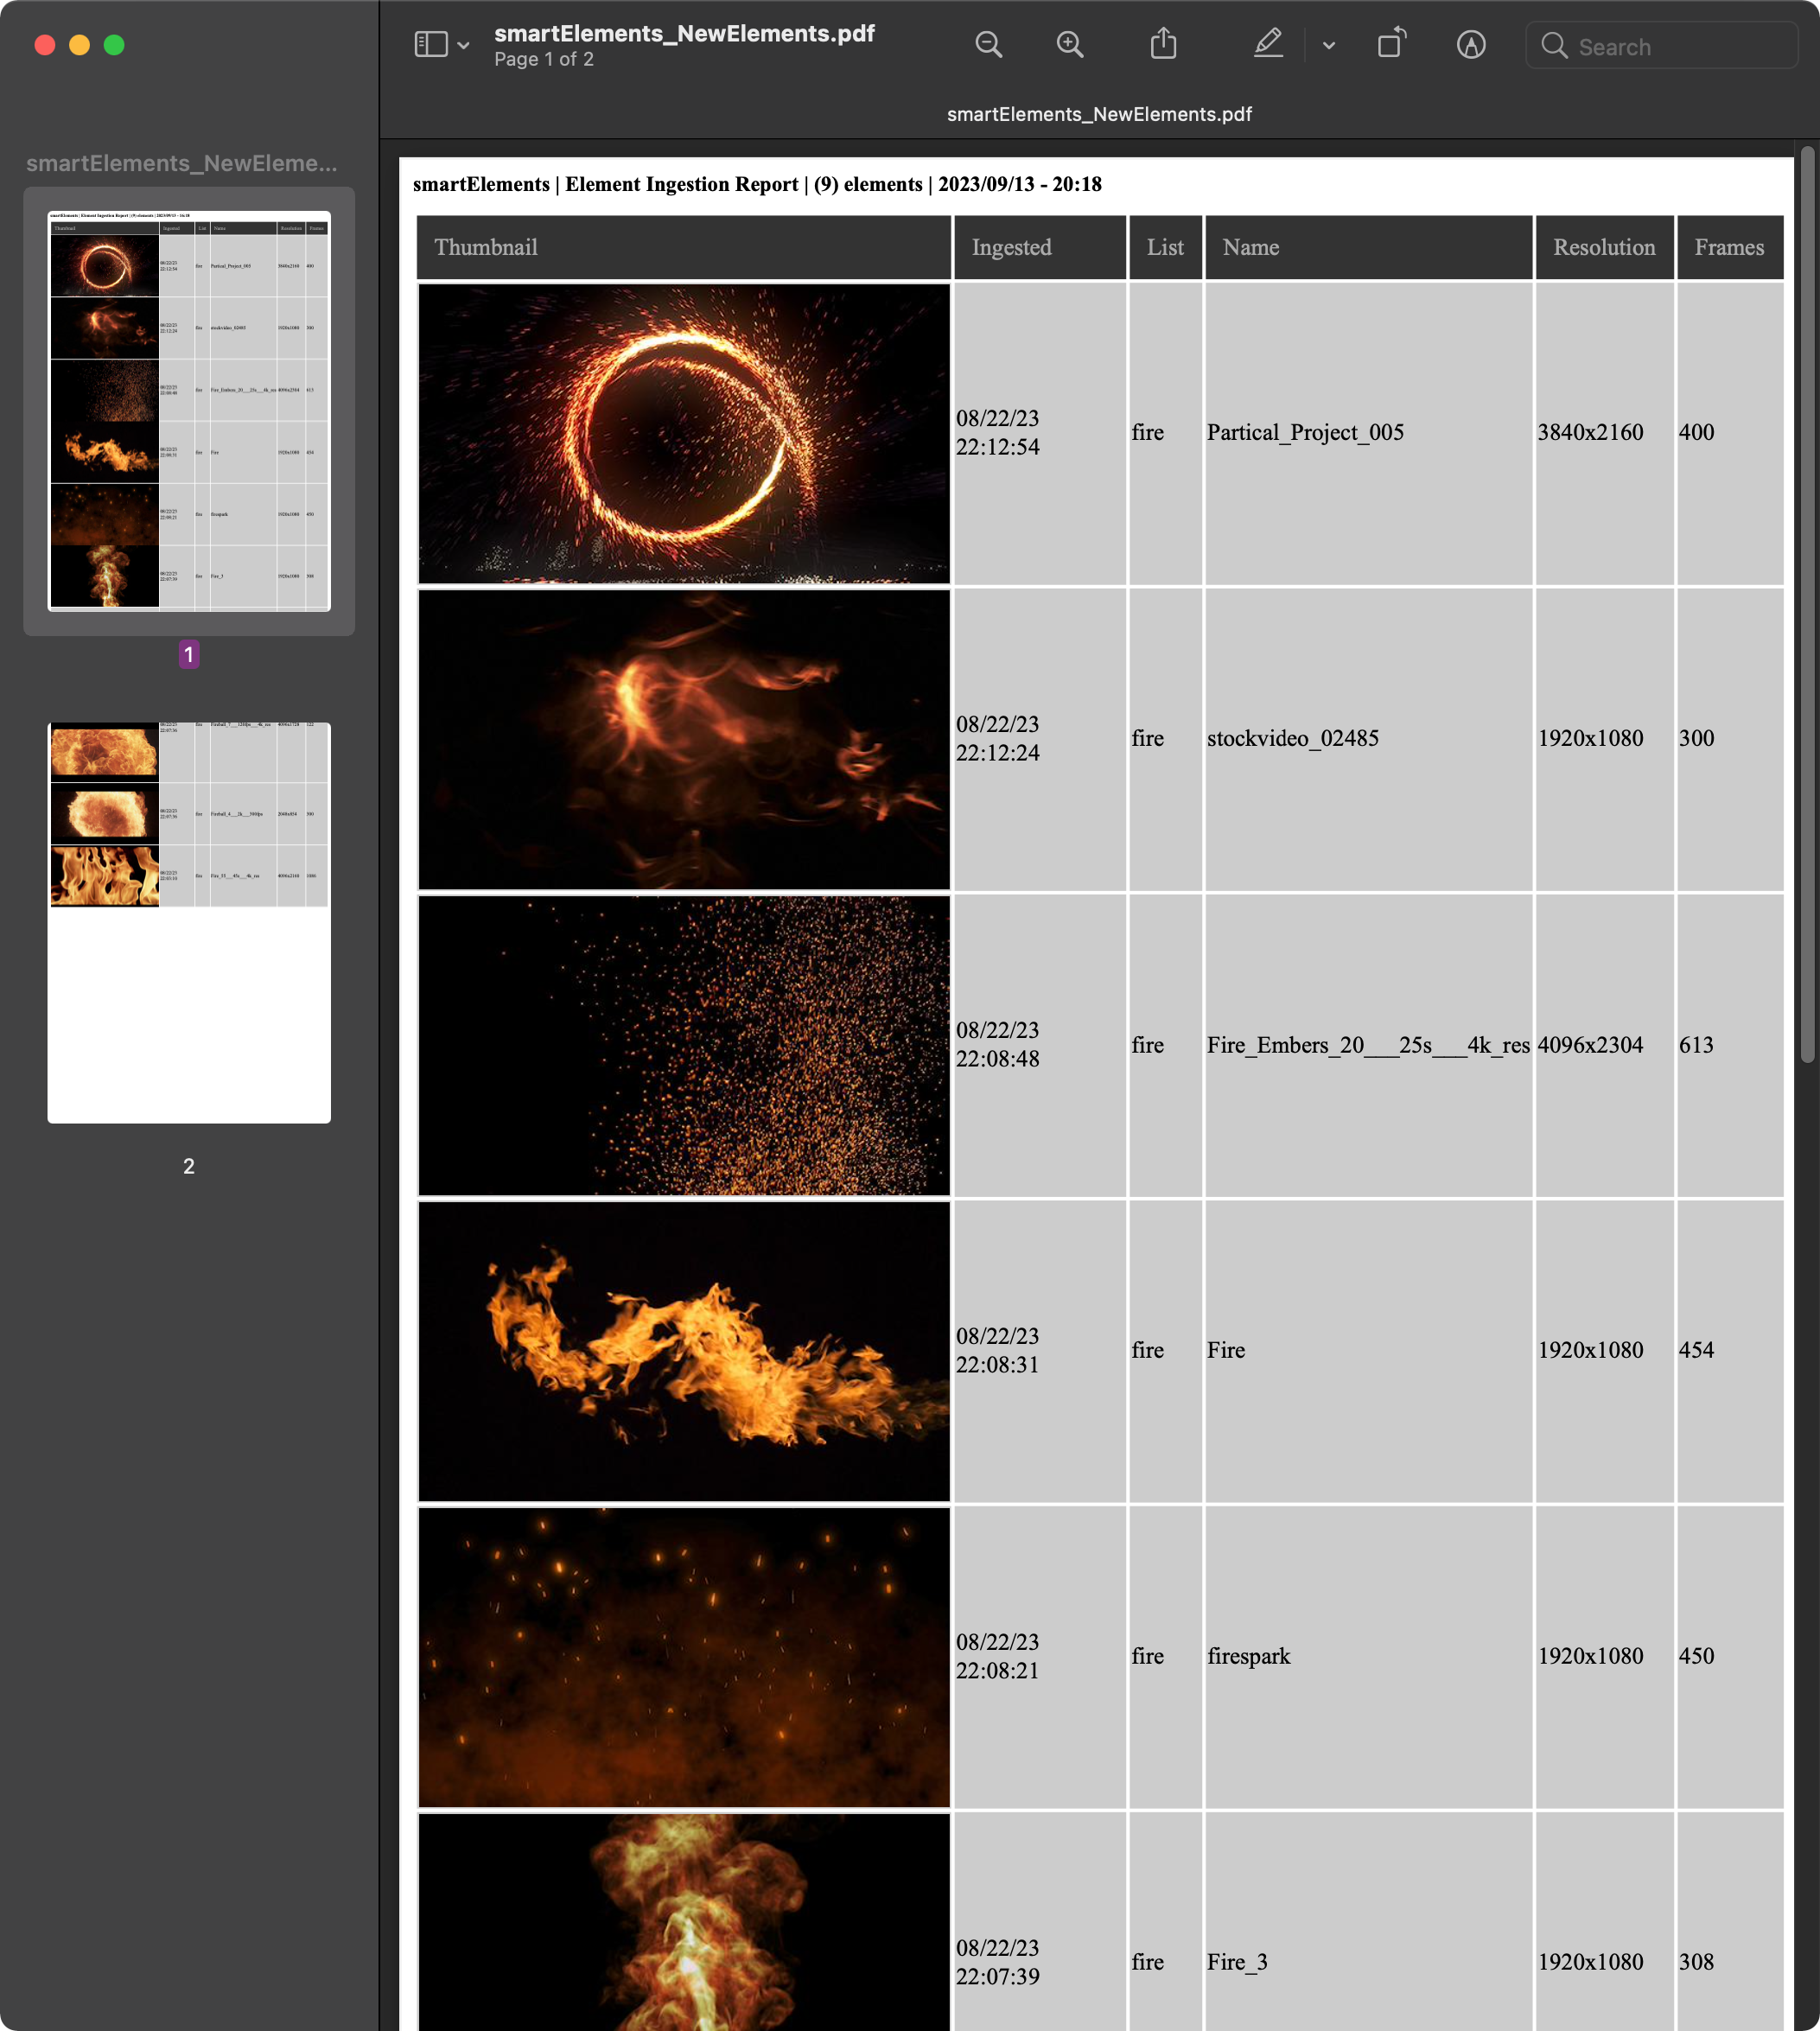
Element ingestion report as pdf
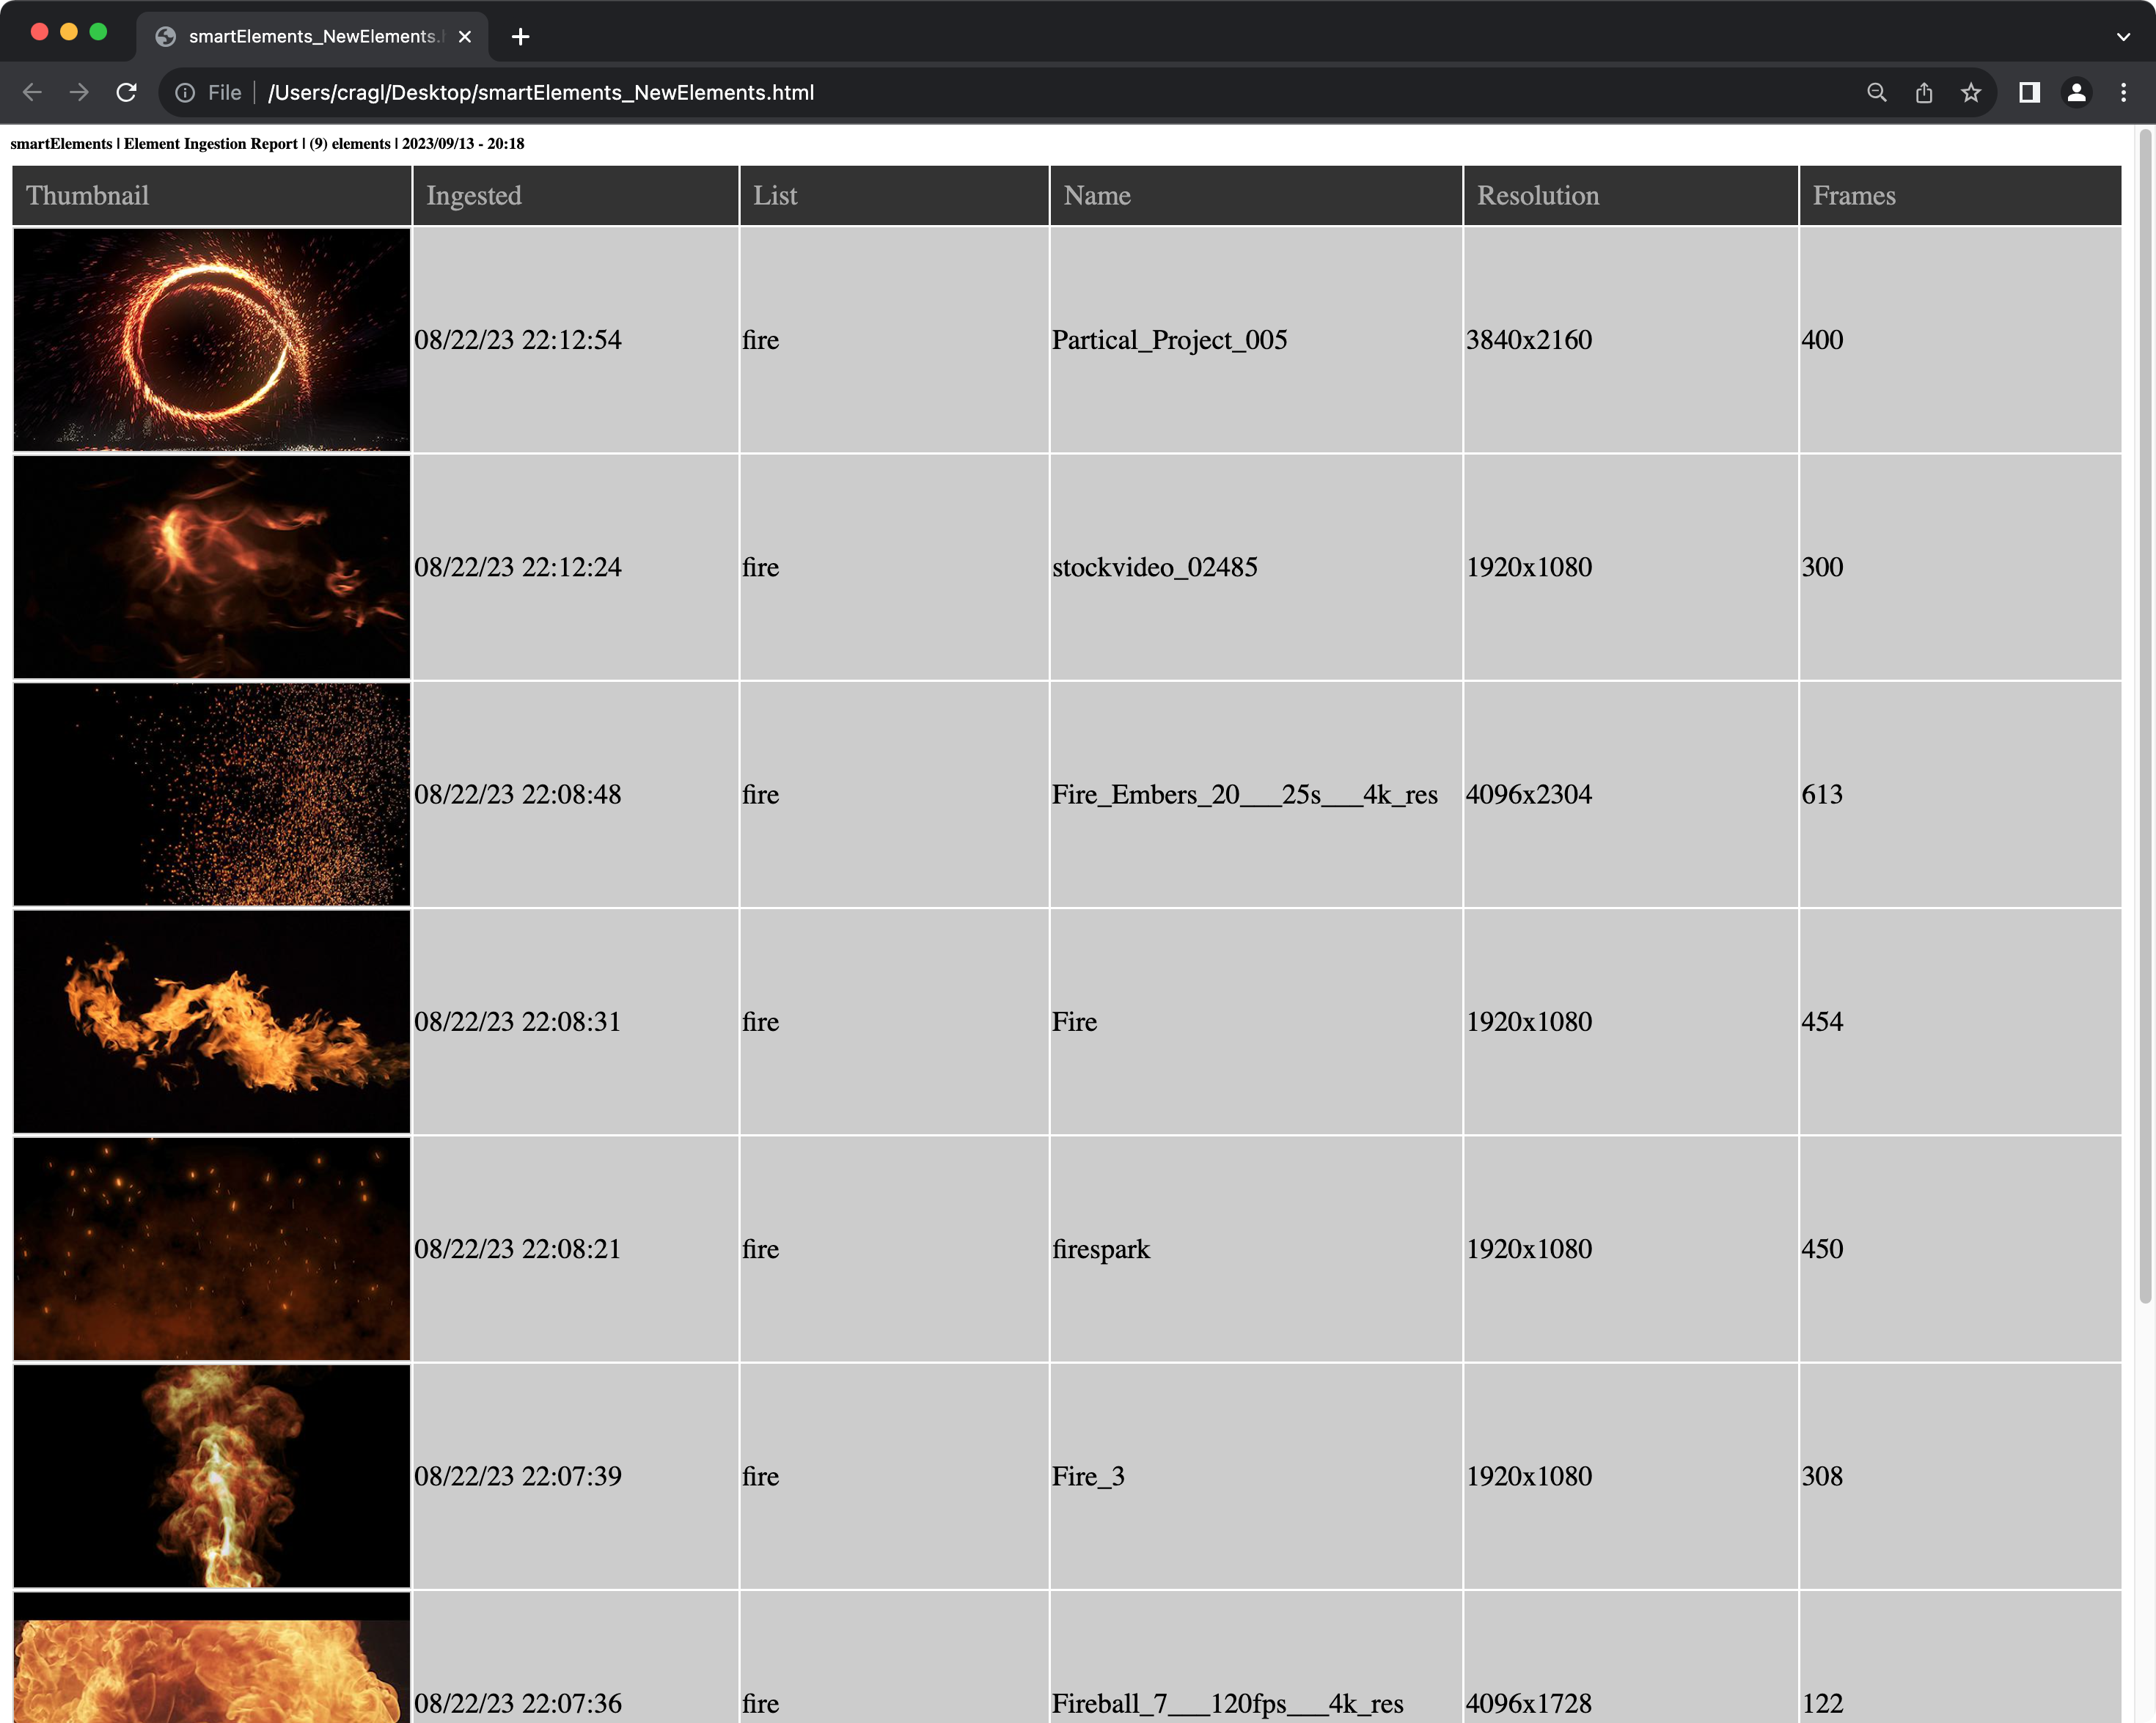
Element ingestion report as html
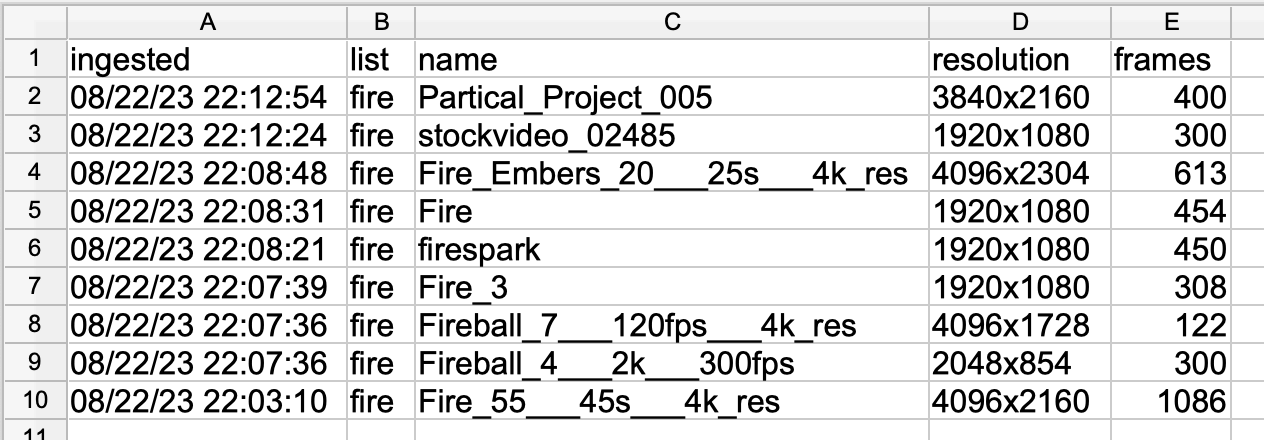
Element ingestion report as csv
Tip
Interesting thing to note: HTML exports reference the element’s thumbnails directly. That being said, if the thumbnail of an element gets changed then this change will also occur in the HTML file automatically. That does however not account for PDF report exports.
Marking new elements
smartElements-2.24.0 gained functionality to get newly ingested elements automatically marked for you. This accounts only for elements that weren’t ingested by yourself of course as you should probably know what you ingested. The following video shows how this feature works:
In the settings section enable the checkbox ‘Inform about new elements’:
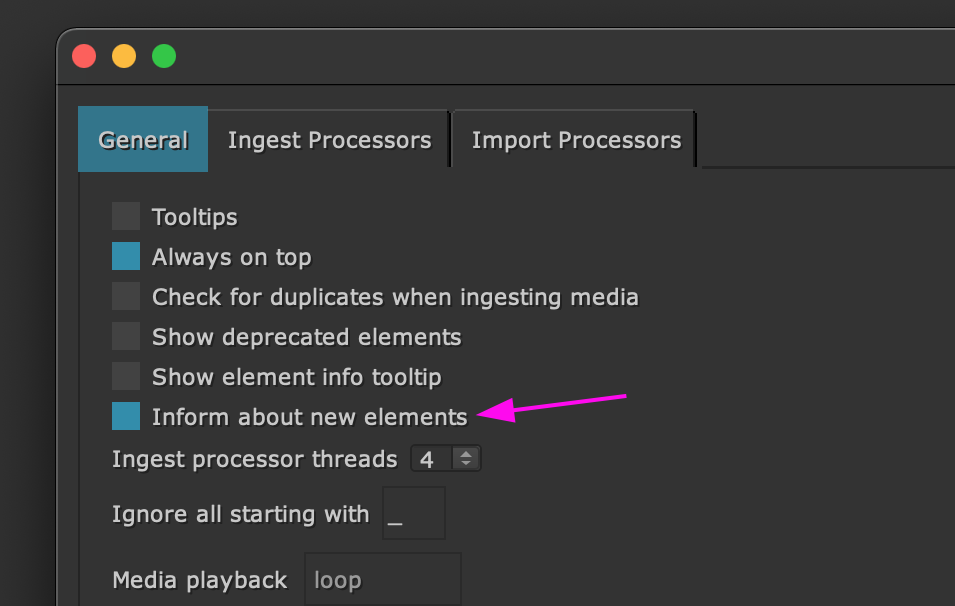
Turn this checkbox on to get newly ingested elements marked.
By default, this checkbox is turned off. Turning it on marks all new elements that get ingested from now on with a green border:
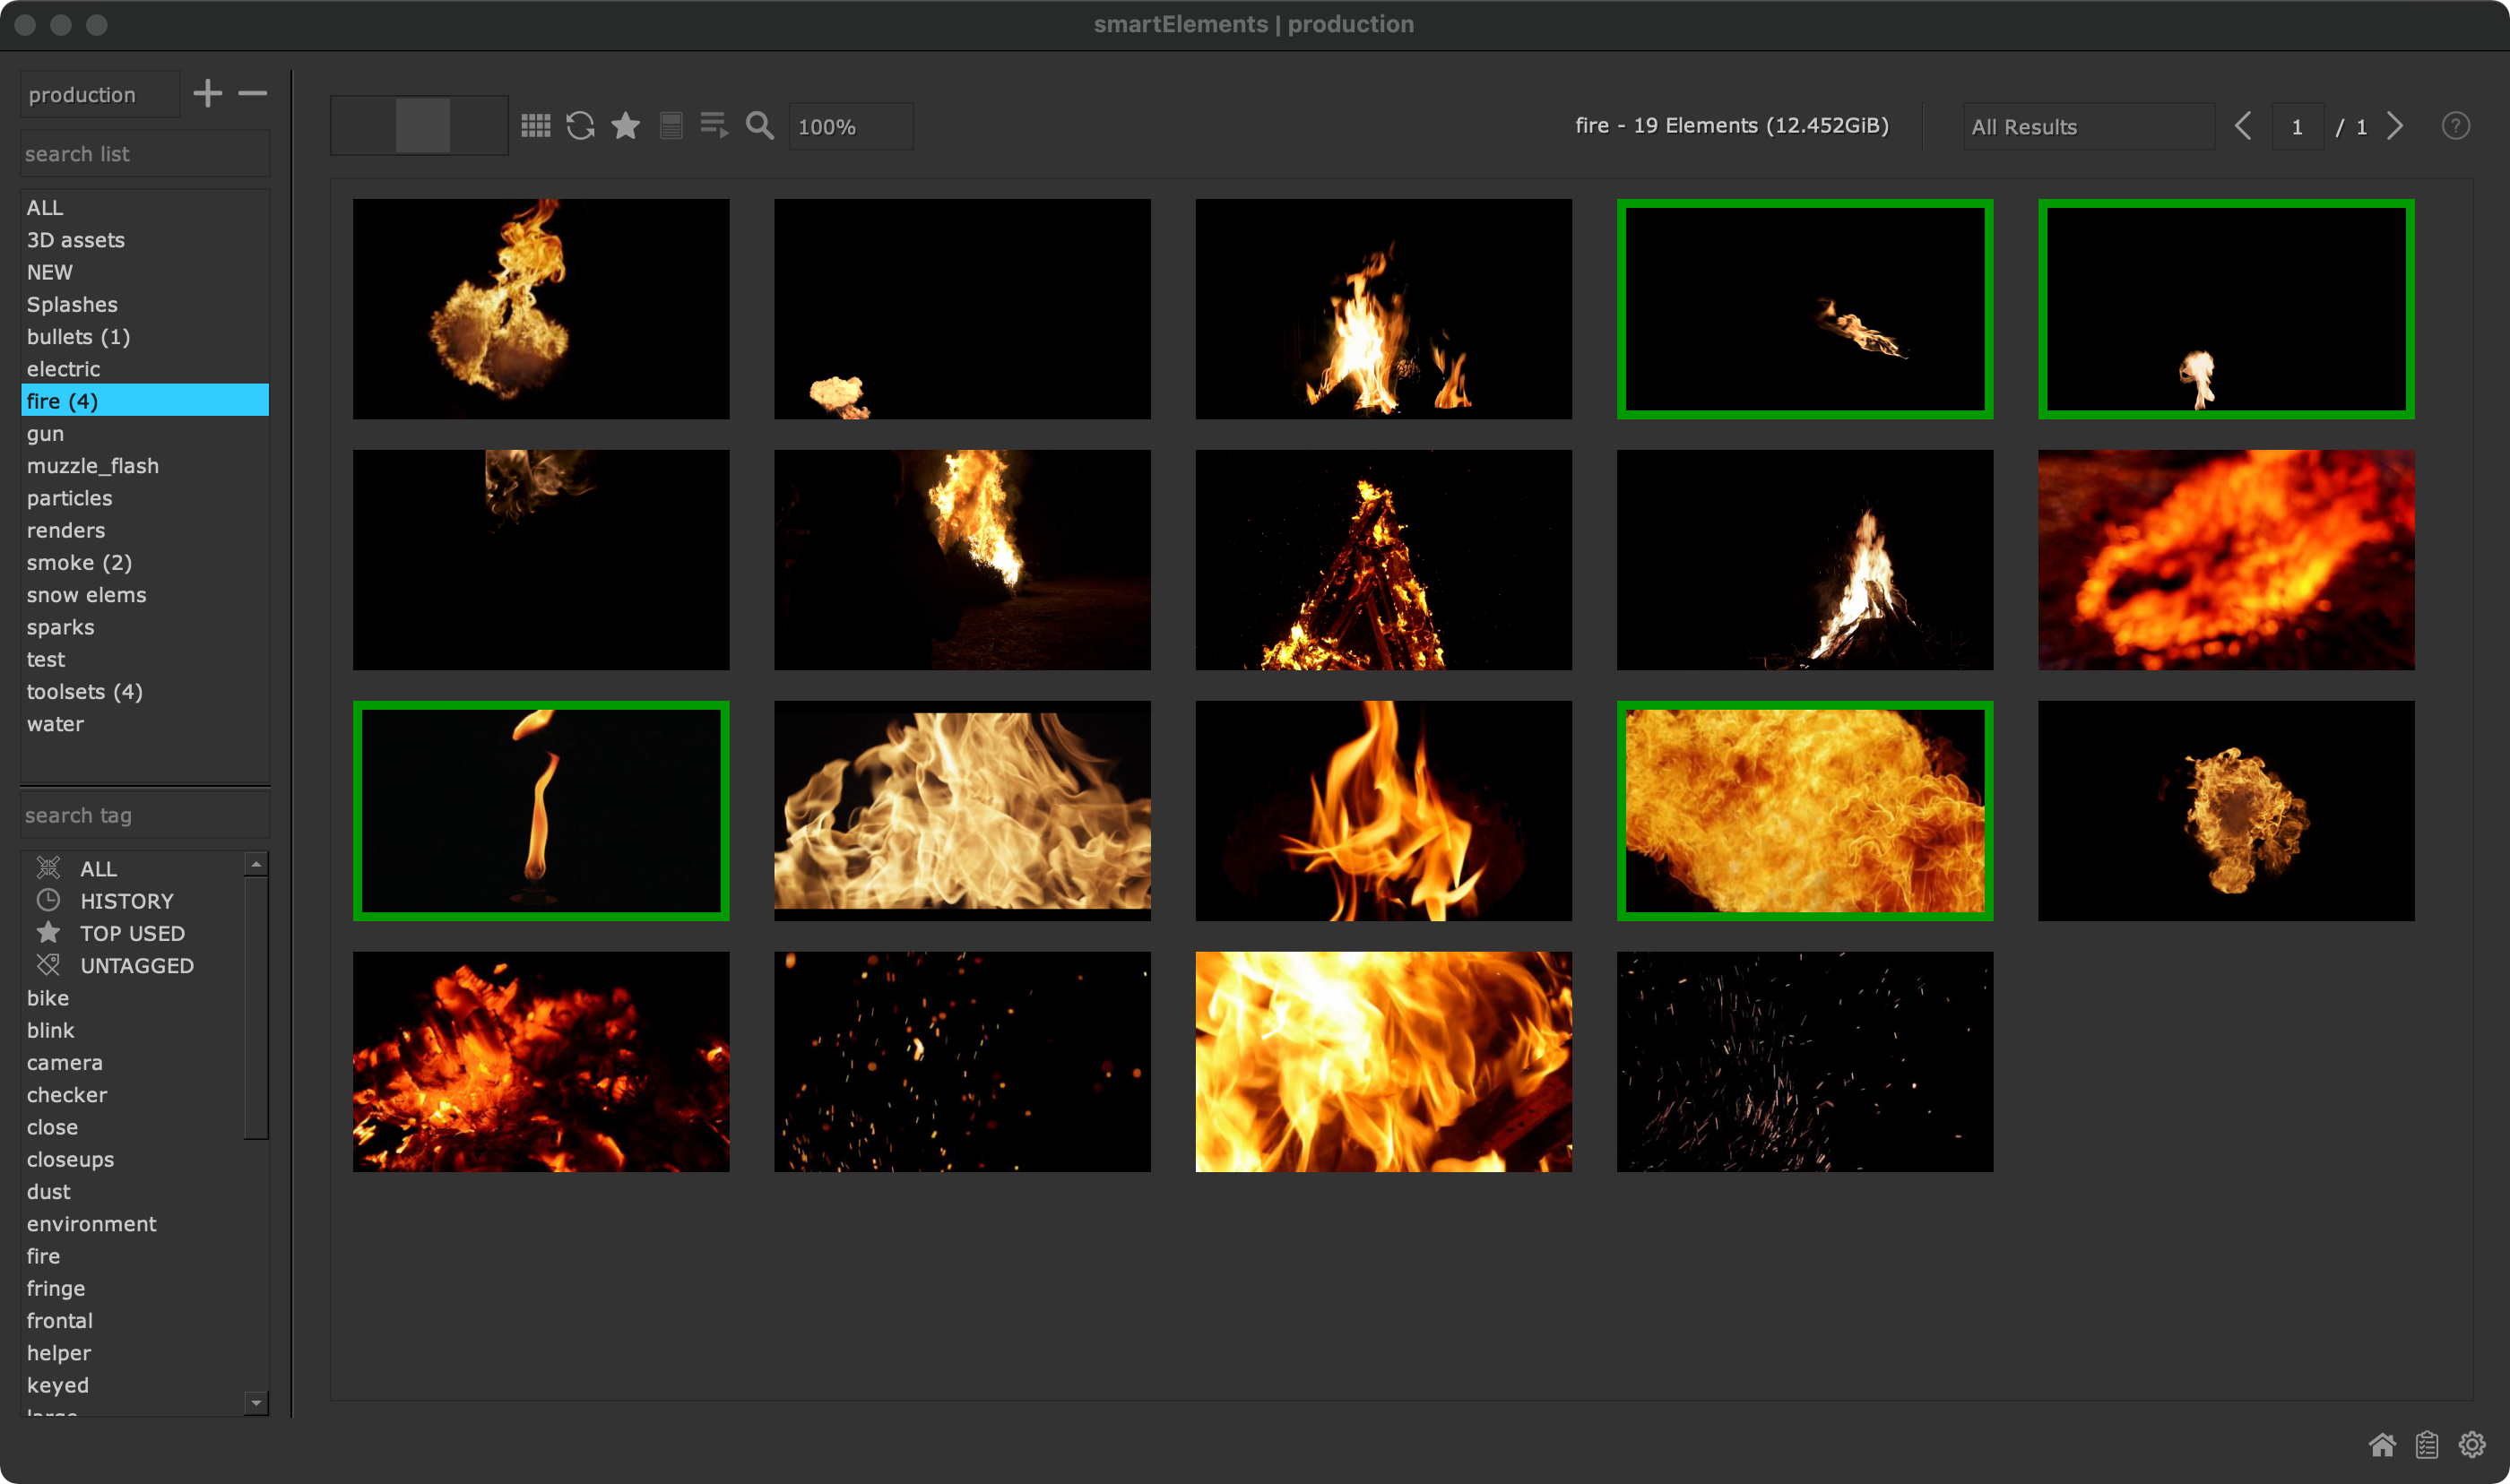
New elements are wrapped with a green border
To mark an element as seen (and thus to remove the green border) select one or multiple elements and choose ‘Mark as seen’ from the context menu (shortcut: M) :
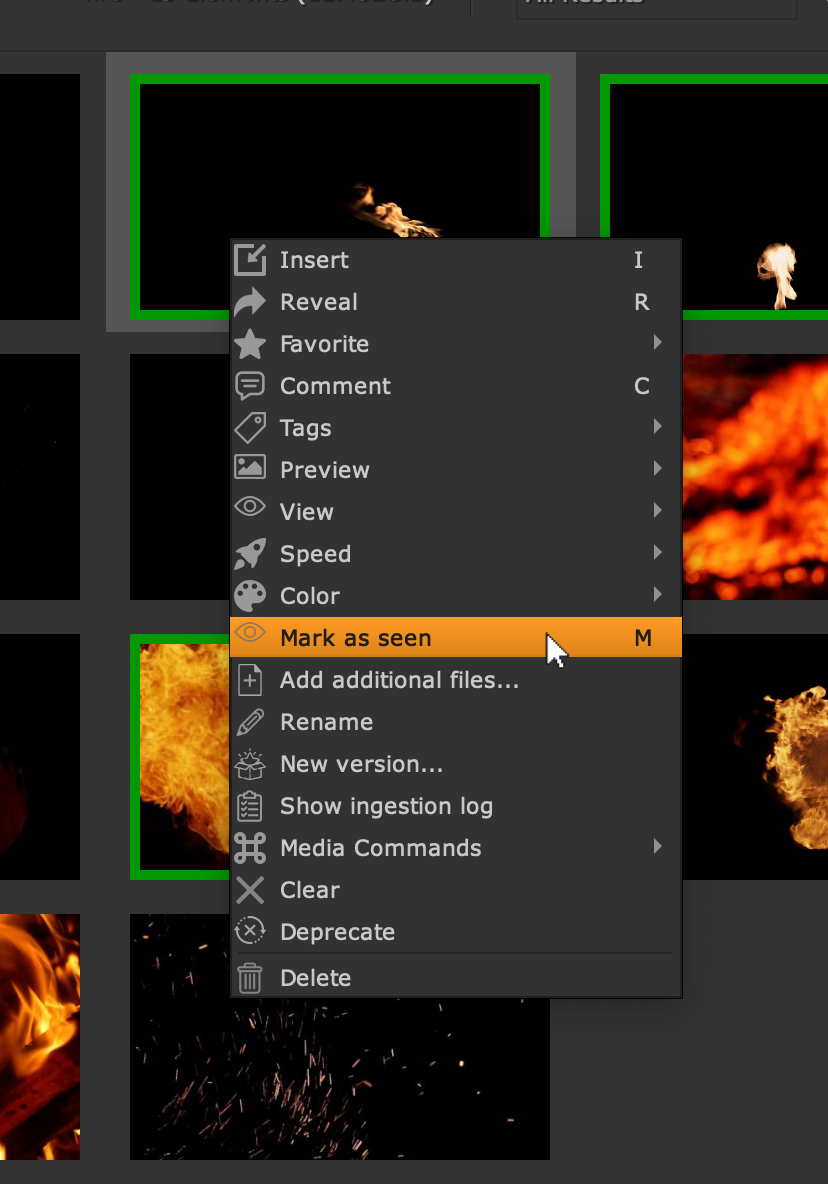
Mark all selected elements as seen
Right click any list in the list section and choose ‘Mark all as seen (all lists)’ to mark all elements in all lists as seen:
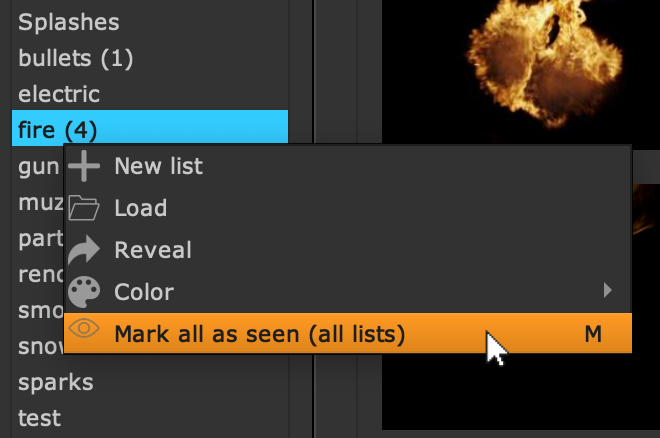
Mark all elements as seen
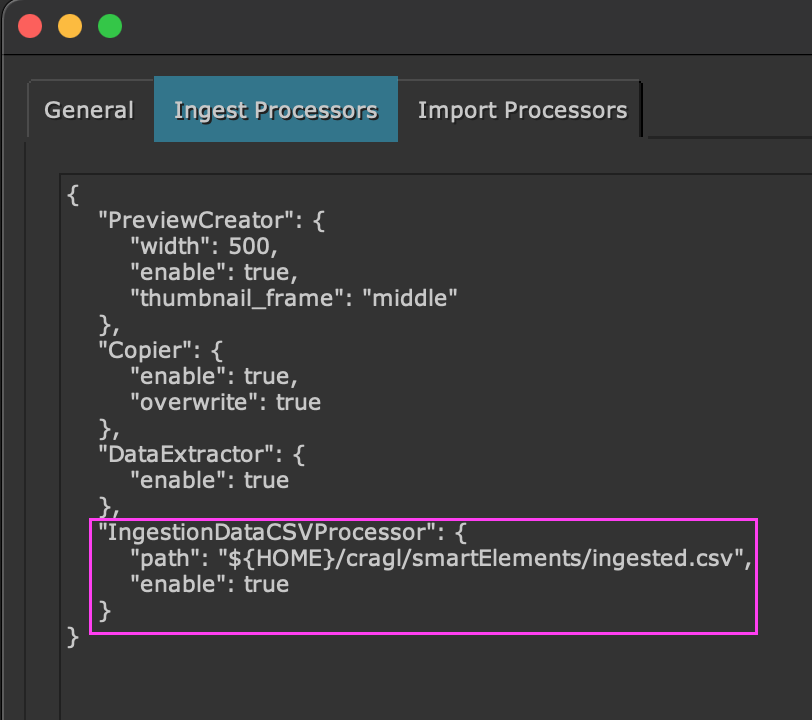
Ingestion CSV log
smartElements keeps track of element ingestion in a CSV file in the following location:
~/cragl/smartElements/ingested.csv
In the smartElements ‘Ingest Processors’ settings you can set the path where to save the csv file to. The csv file will only be created when ‘enable’ is set to ‘true’ (the default value). Set it to ‘false’ to turn this off.
Live Filter
Another way to find elements is by using smartElement’s live filter. This feature lets you categorize and find elements that match multiple criteria of your choice across all category lists. The criteria can be as simple or complex as you need it.
As an example, think about these queries:
> Get me all HD resolution fire elements tagged with ‘smoke’.
> Get me all mov and .exr elements that contain the metadata key ‘city’.
> Get me all Explosion elements that are exr sequences which are tagged with ‘smoke’ that are at least 100 frames but less than 300 frames long and have a metadata key ‘epic’ included.
> Get me any element that is either named ‘dust’ followed by a number or ‘smoke’. The element should have at least 50 frames or it should be a mov file.
What makes this filtering feature so powerful is the fact that any new element ingested that matches these criteria gets added automatically to the live filter list so you don’t need to do any manual categorization.
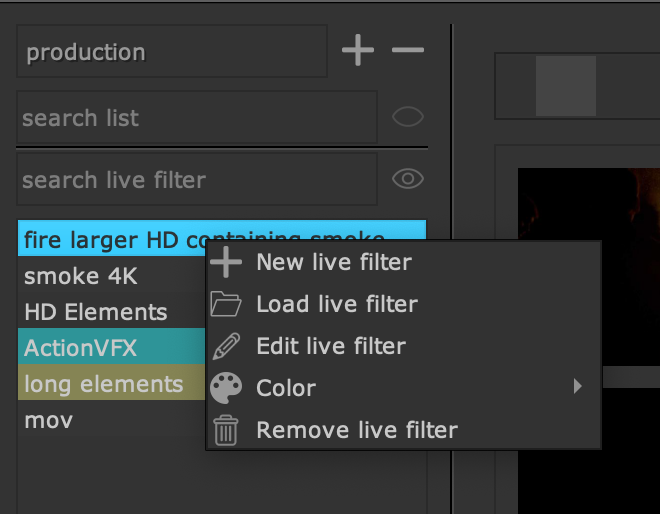
The list section on the left contains three sections to find elements: By category (list), by live filter and by tag. Click the live filter eye icon to expand the live filter section. In the live filter section on the left right click an empty space and choose ‘New live filter’ from the context menu.
The LiveFilter Editor launches. It looks like the following:
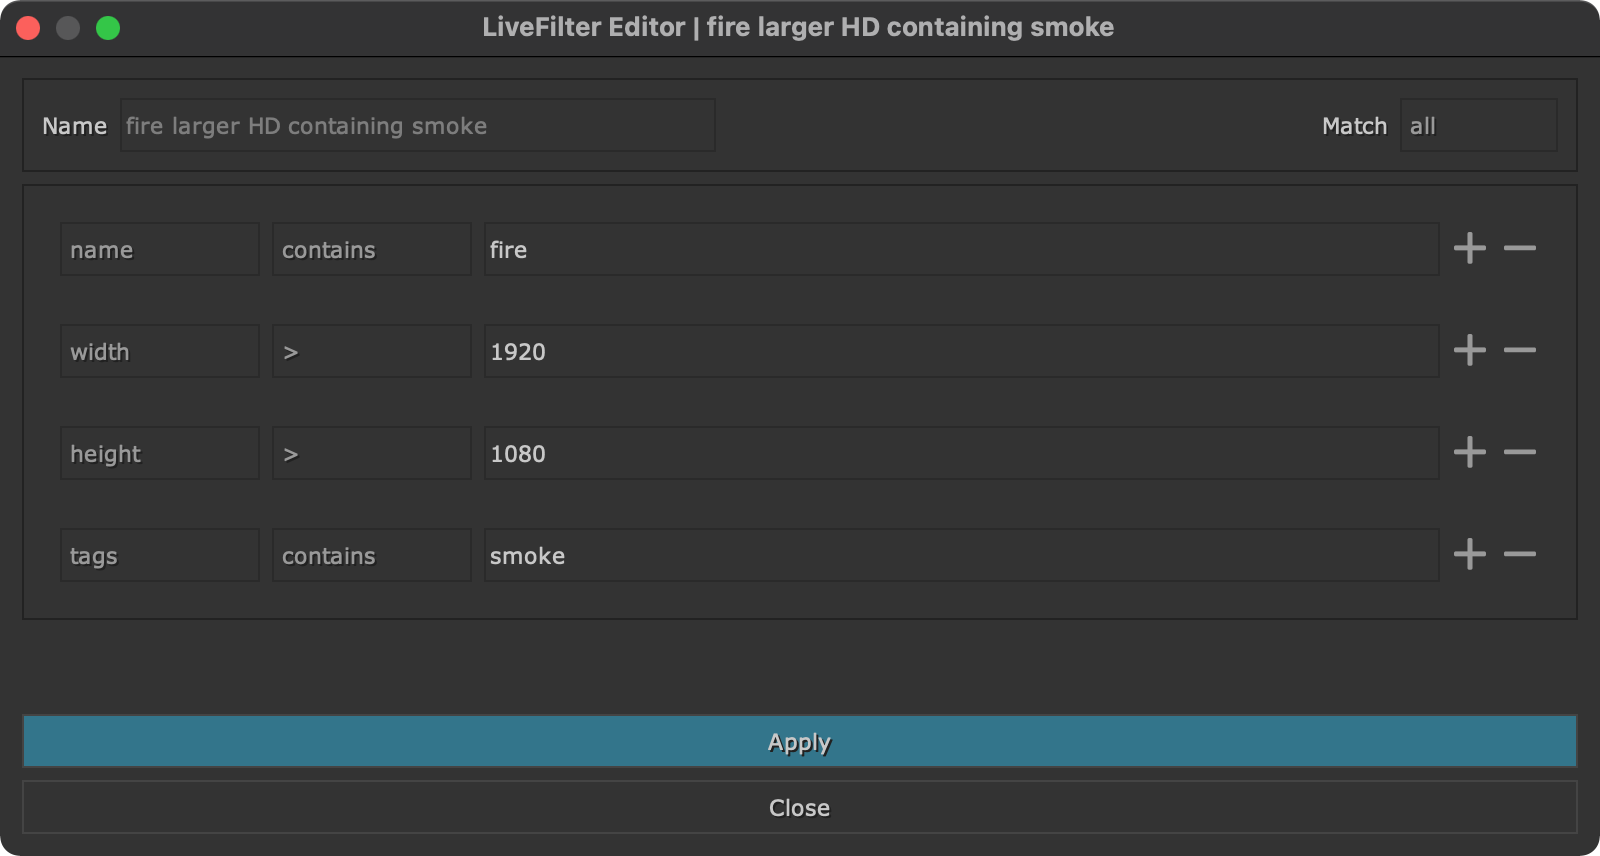
In here you can enter a name for the live filter and apply rules to your needs. In the ‘Match’ dropdown at the top right you can choose how to match elements:
all: Returns all elements that match all the given criteria.
any: Returns all elements where at least one of the given criteria is a match.
To apply a live filter, double click it or right click it and choose ‘Load live filter’ from the context menu. In the context menu you can edit live filter, assign a custom color to them and also remove them again when they are no longer needed.