Sequence Cut
The sequence cut window lets you create a sequence cut for selected versions. This can help you to watch all latest versions of your shots in context and helps to see the current state of your projects.
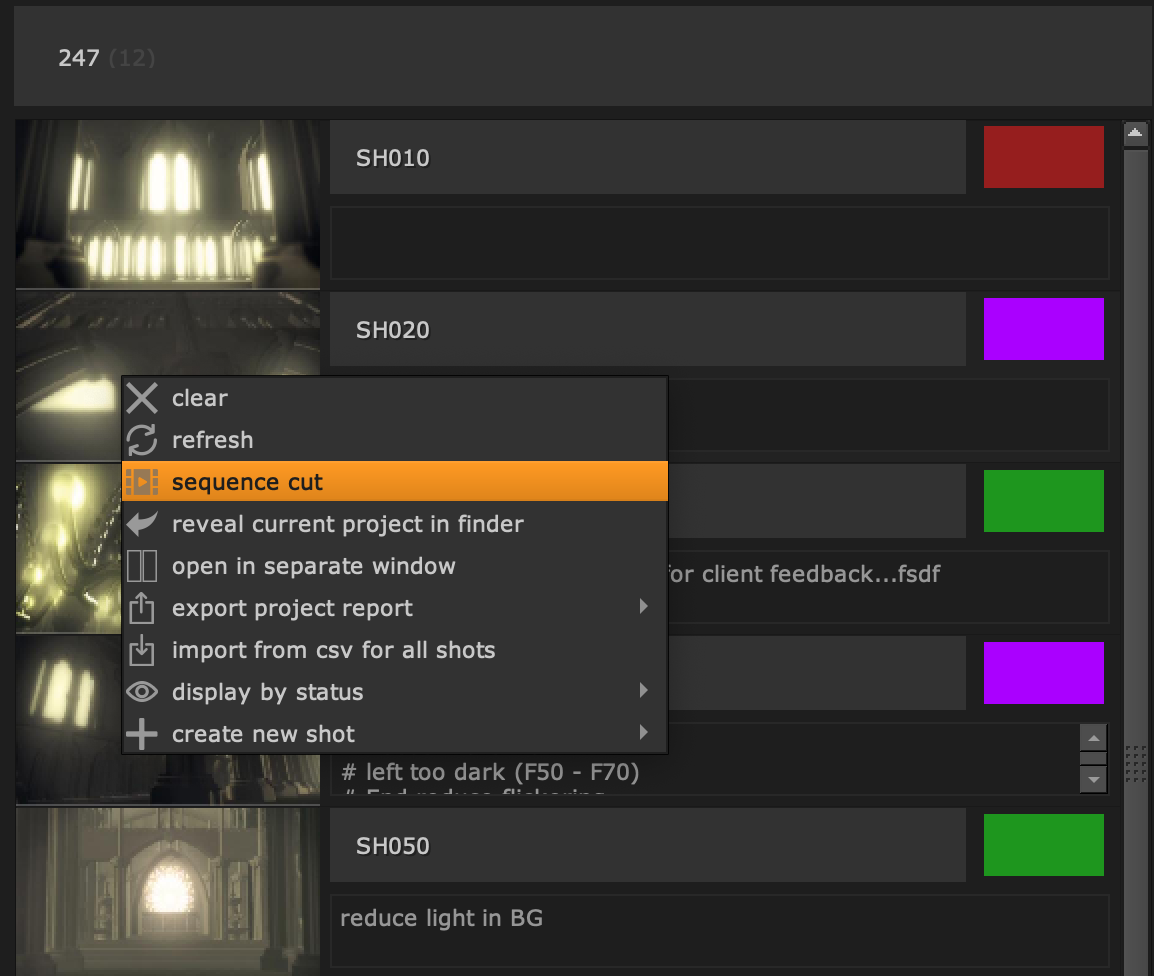
In order to launch the sequence cut window right click any shot in the project view and select the ‘sequence cut’ command from the context menu:
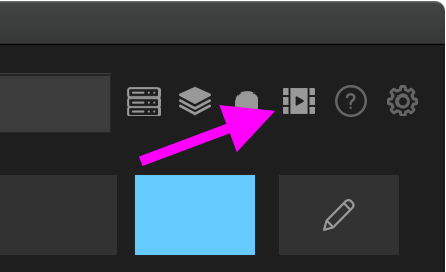
Alternatively, click the sequence cut button at the top right:
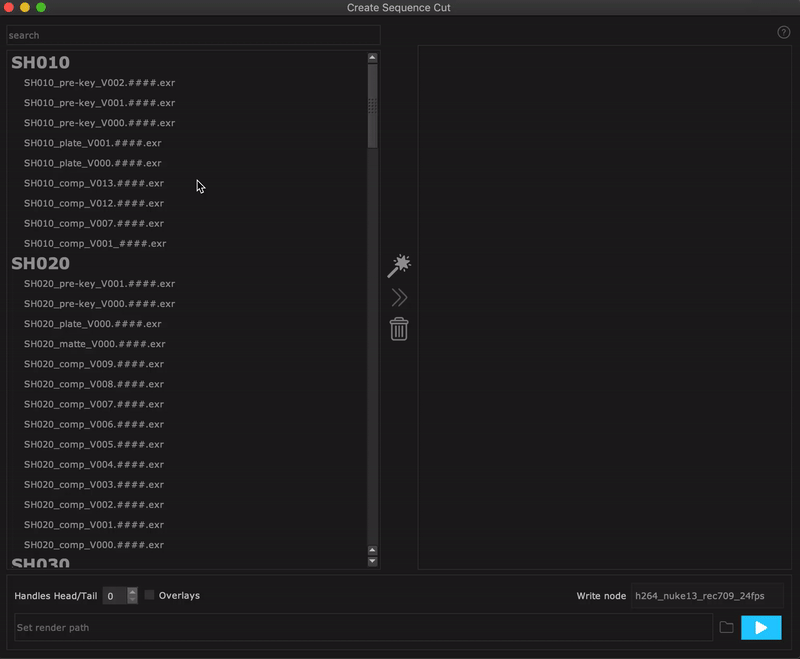
The sequence cut finds all versions of all shots of your current project. The sequence cut window contains the following widgets:
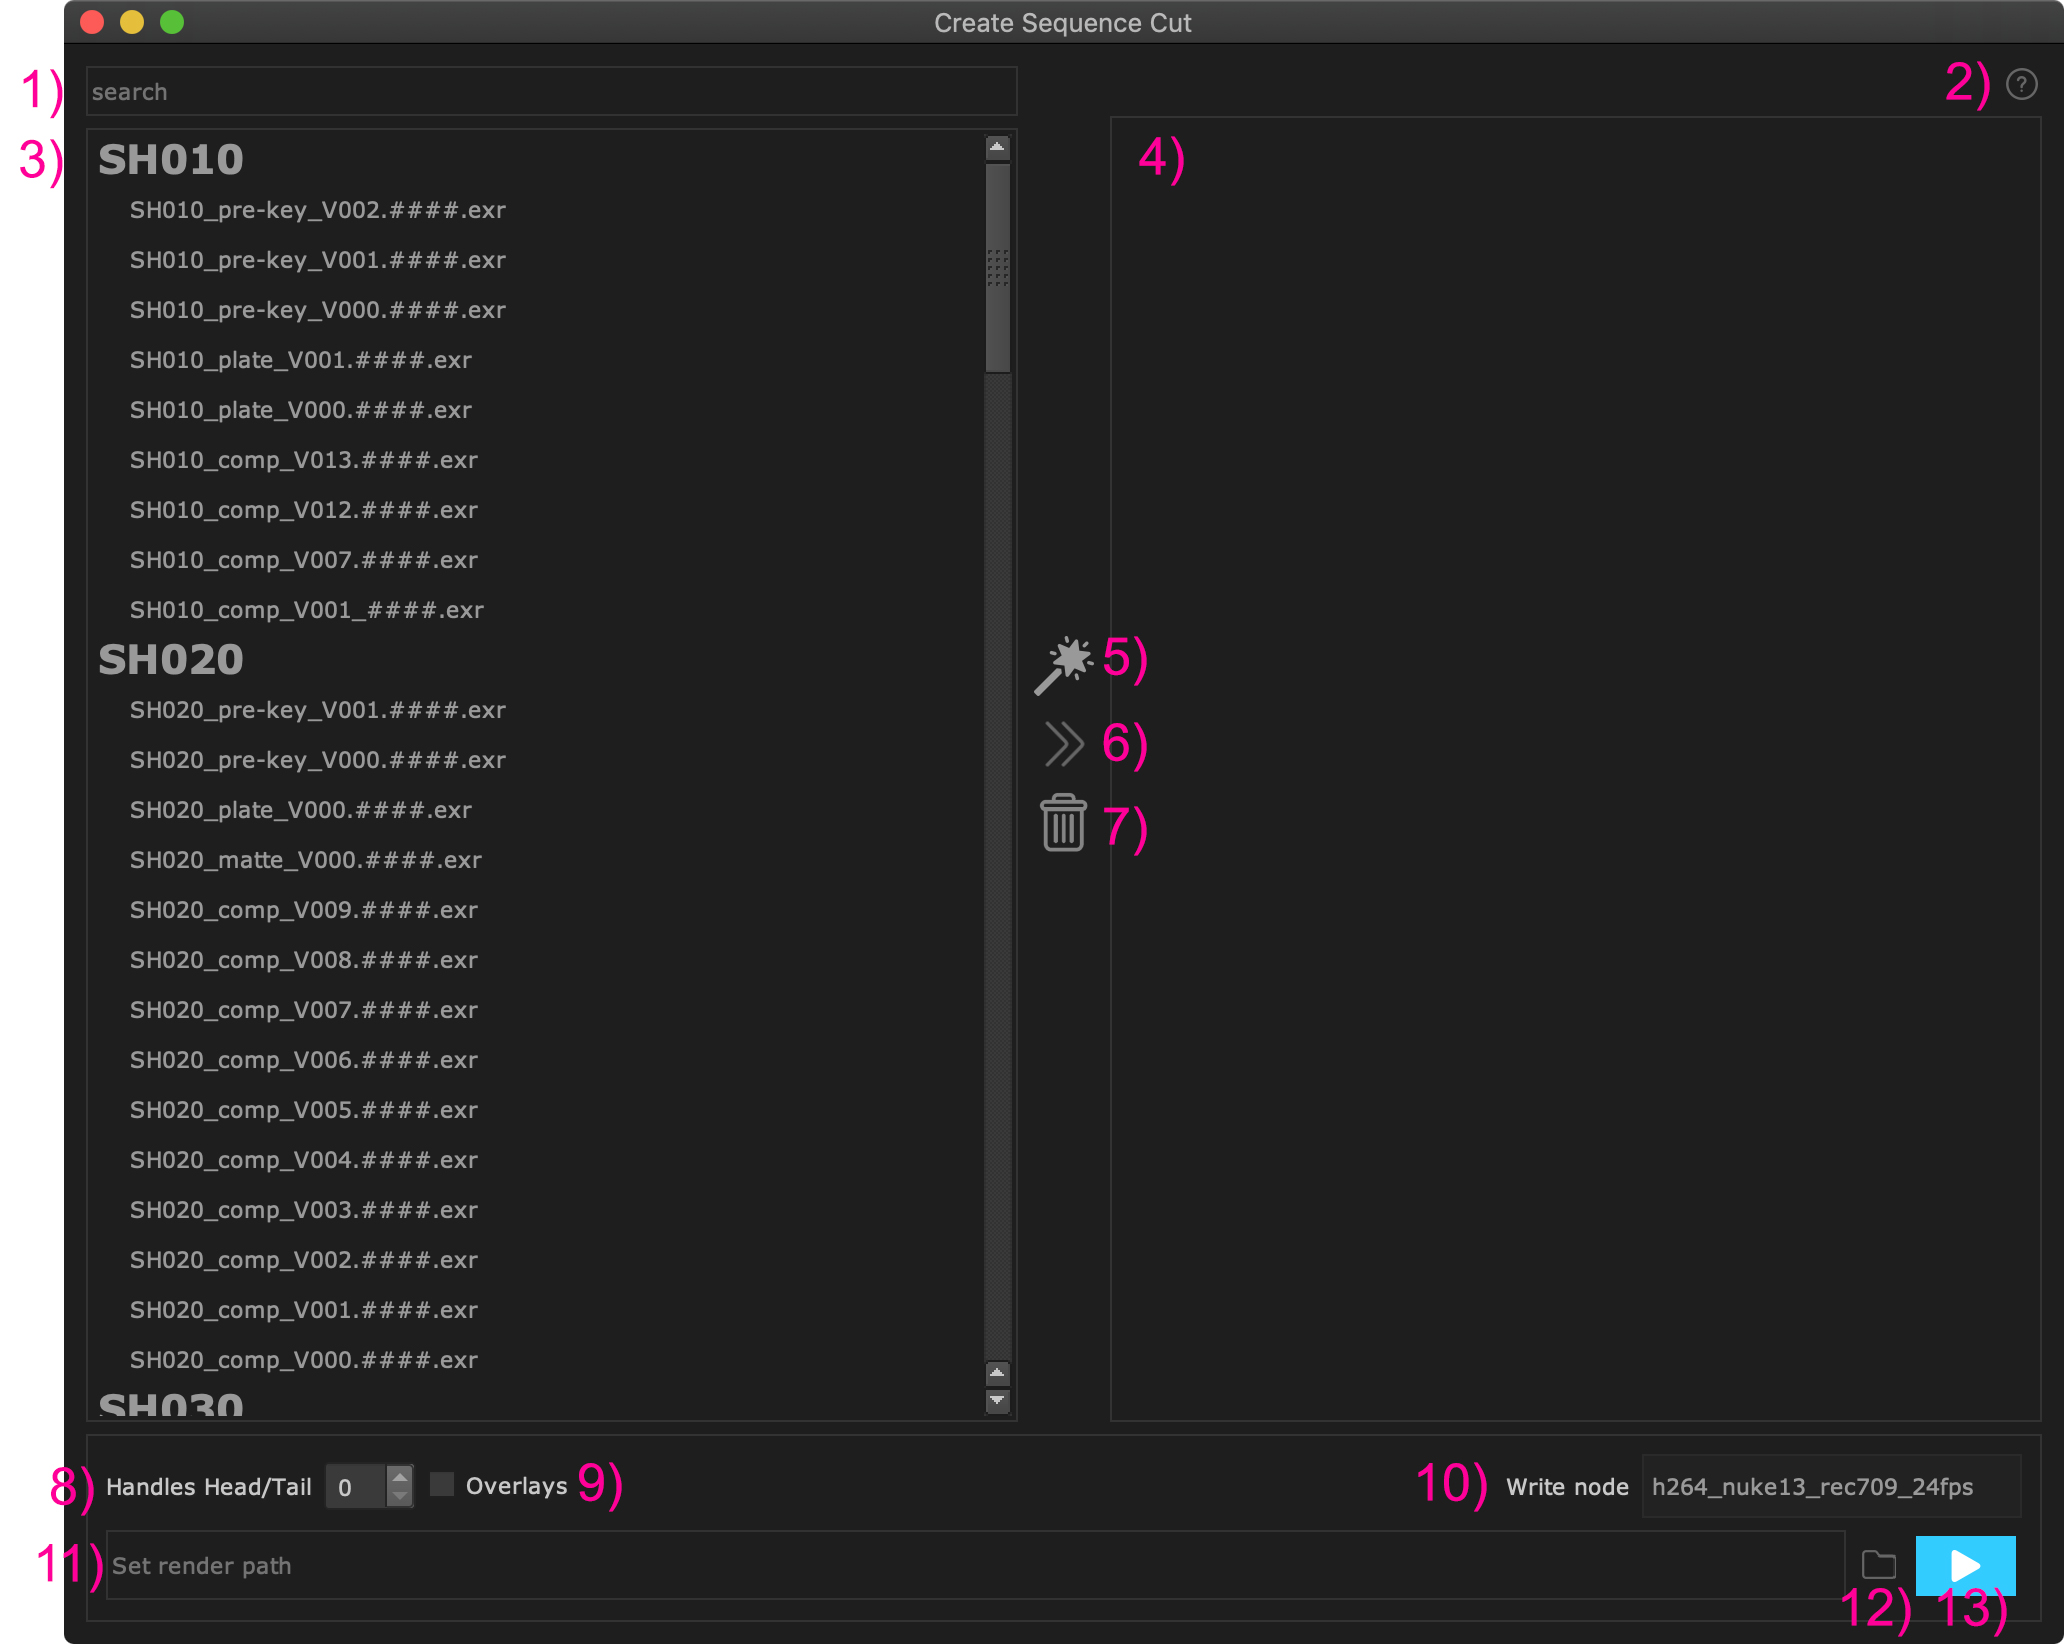
1) Search: Use this input to search for versions in the available versions list.
2) help: Click to navigate to the sequence cut online documentation. That is this page that you are currently watching.
2) Available versions: Here you see all versions on disk, grouped by shots. Drag and drop them to the right to use them in the sequence cut. Tip: Drag a version into the node graph to bring the version into your working file.
4) Picked versions: Here you see all versions that will appear in the sequence cut. Items at the top appear first, items at the bottom appear at the end. Click and drag to change the order.
5) Select most top: Click to select the most top element for each shot. This can be used in conjunction with the search field to add the most recent elements of a specific task for each shot.
6) Add selected versions: Click to add all selected versions from the left to the right. Tip: You can also simply drag and drop versions from the left to the right.
7) remove selected versions: Click to remove the selected versions from the right. Tip: To delete versions you can also simply select versions and press the delete button on your keyboard.
8) Handles: Set the head and tail handles for all versions.
9) Overlays: Check to show overlays.
10) Write node: Choose which Write node and thus which codec to use for the sequence cut. You can add your own Write nodes. The Write nodes are located here:
[path to smartLib_vX.X.X]/cpXX/smartLib/sequence_cut/write_nodesAny .nk file in that folder shows up in the dropdown list. Each .nk file should contain a Write node set up to your needs.11) Render path: Here you can set up the render path to render the sequence cut to.
12) Browse render path: Click to browse a render path.
13) Render: Click to render the sequence cut.
How it works
In order to create a sequence cut follow these steps:
Drag and drop a version from the left list to the right list. Or select one or many versions and click the add button (6).
The timeline goes from top to bottom: Versions in the picked versions list (the list on the right) that appear at the top will be shown first, versions at the bottom appear last. You can click and drag versions in the right list to reorder them.
Set handles (8) and overlays (9) if needed.
Select a Write node to use for rendering (10).
Set a render path (11).
Click the render button (13).
Tip: You can click the Select most top button (5) to select the
most top version for each shot. You can also use that feature in conjunction
with the search (1) field. As an example, to get all latest comp
versions type comp in th search field and click the Select most top
button (5). Then click the Add button (6) to add the selected versions
to the right list.