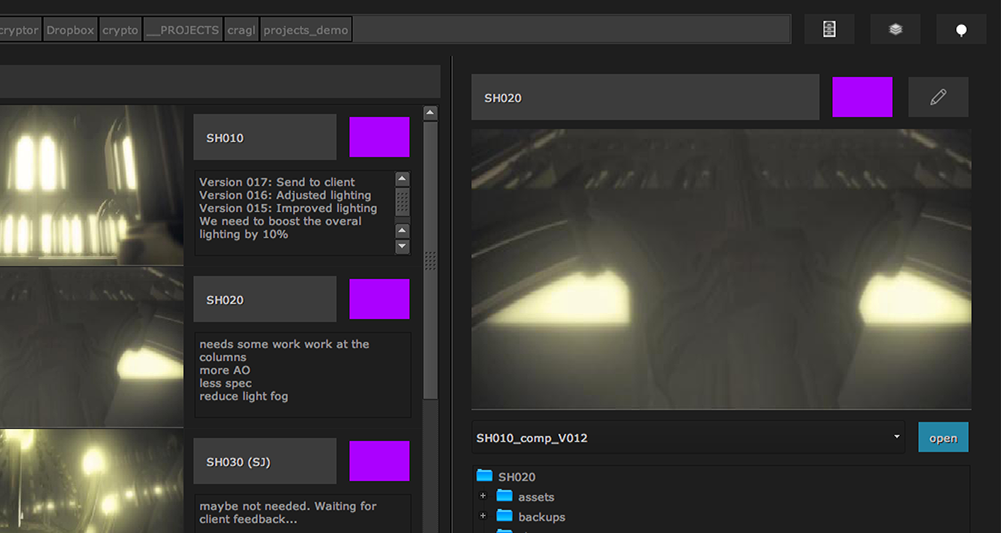
Shot section - Additional functions
smartLib’s shot section at the right hand side of the smartLib main window offers various options to organize your shots that you should be aware of to get the most out of smartLib. Let’s have a closer look at these options.
Shot thumbnail right click menu
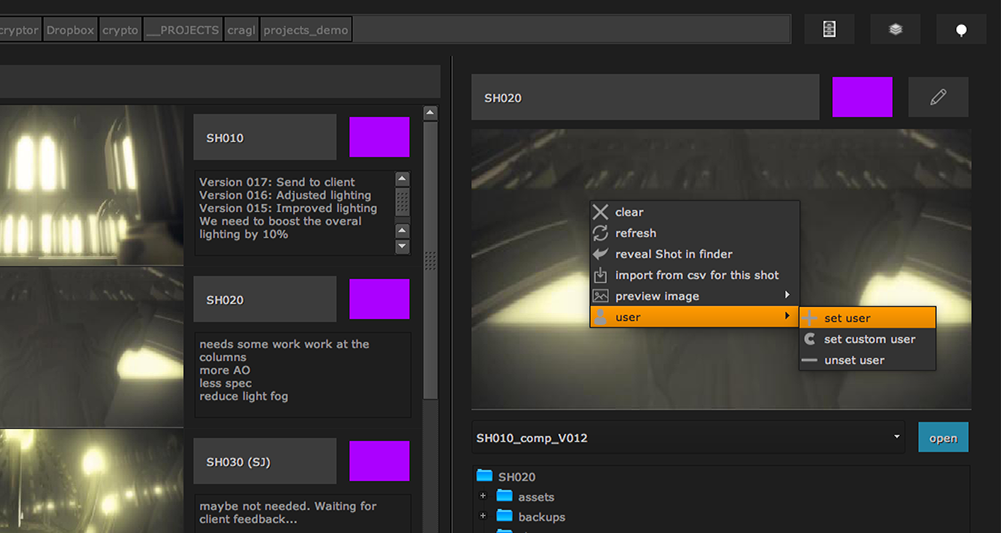
The shot thumbnail contains a right click menu with these options:
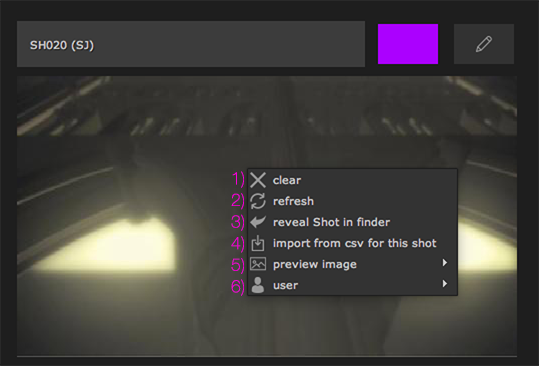
1) clear: This clears the shot being shown in the shots sections
2) refresh: Refresh the shot section including the thumbnail as well as the folder and file hierarchy.
3) reveal Shot in finder: displays the shot in your explorer/ finder.
4) Import from csv for this shot: Import data from csv file for this shot. For more information please refer to Importing data from csv file for shot.
5) preview image: browse an image to set as the shot’s thumbnail. See Setting a shot thumbnail.
6) user: Set or unset a user for this shot. See Assigning user to shots.
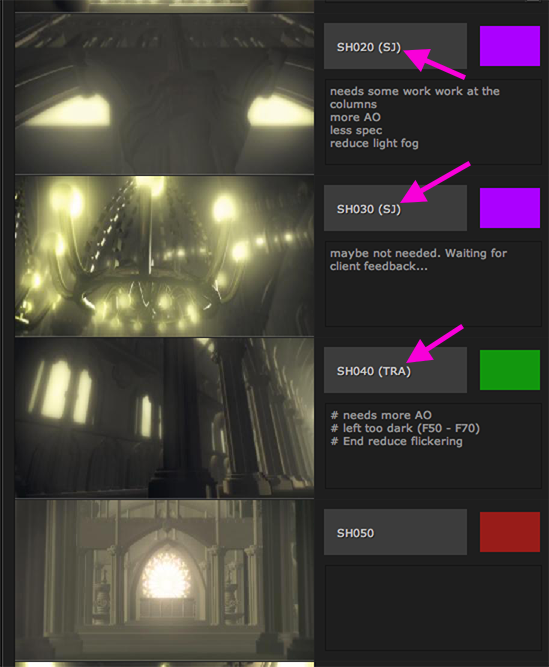
Setting shot status
To set the shot’s status simply click the shots status button. There are three status types:
red: not started
yellow: in progress
green: done
The shot’s status will be also updated in the project view.
Tip
You can additional custom status in the settings window.
Writing shot comments
You can use the shot’s comment section to write down some comments. If the comment section is hidden click the comments toggle at the top right of the shot.
As soon as you leave the comment section the comment will also be shown in the project view. All user using smartLib in your team can see the comments.
Setting a shot thumbnail
Shot thumbnails help you with faster navigating in the project view. The thumbnail is displayed in the shot thumbnail section as well as in the project view for each shot. To set a shot thumbnail you can use one of these methods:
1) Right click the thumbnail image and choose set preview image. You can then browse your system and set it manually.
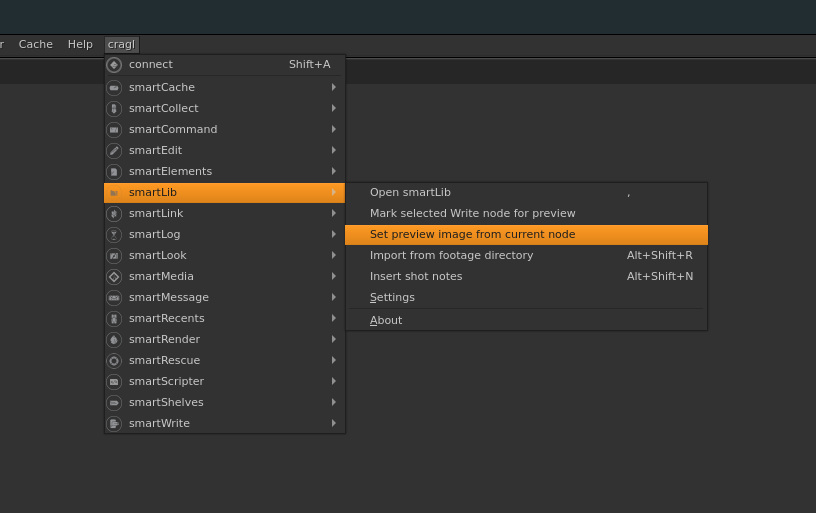
2) You can also set a thumbnail directly inside your current shot that you are working in. Simply select the node from which you like to create a thumbnail from. This can be any node you like. After it has been selected navigate to cragl -> smartLib -> set preview image from current node. The shortcut is Alt+Shift+P.
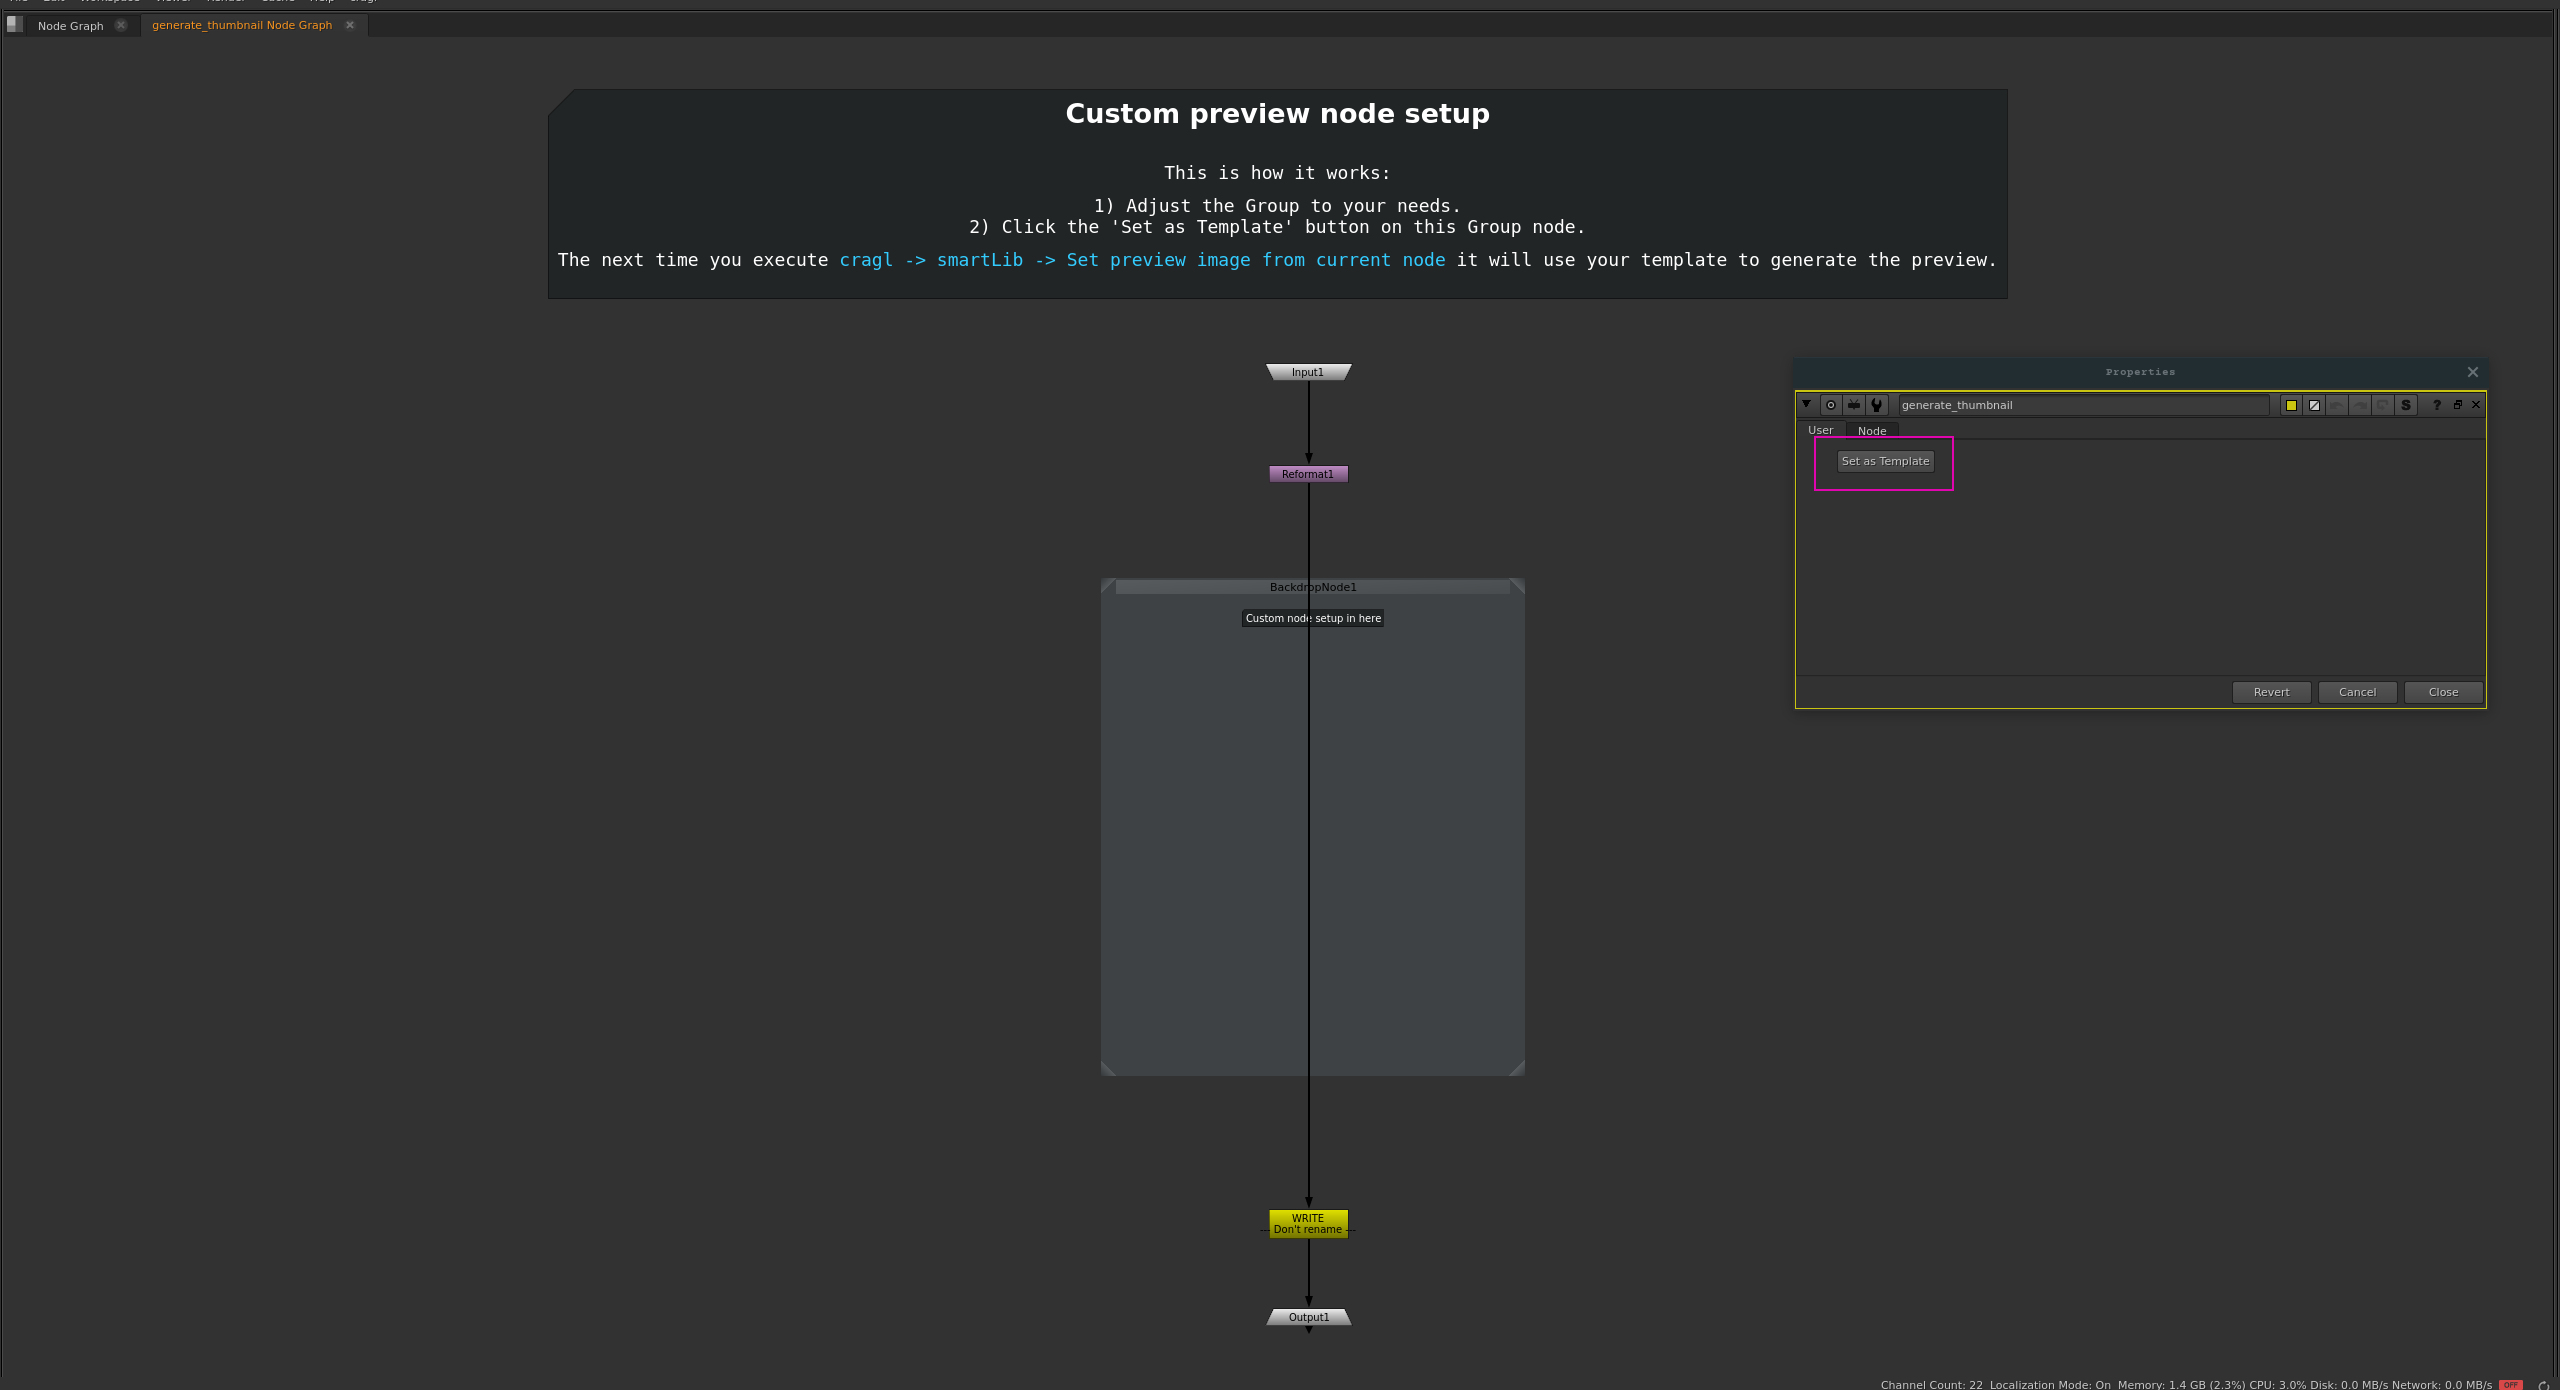
Using a custom node thumbnail node setup
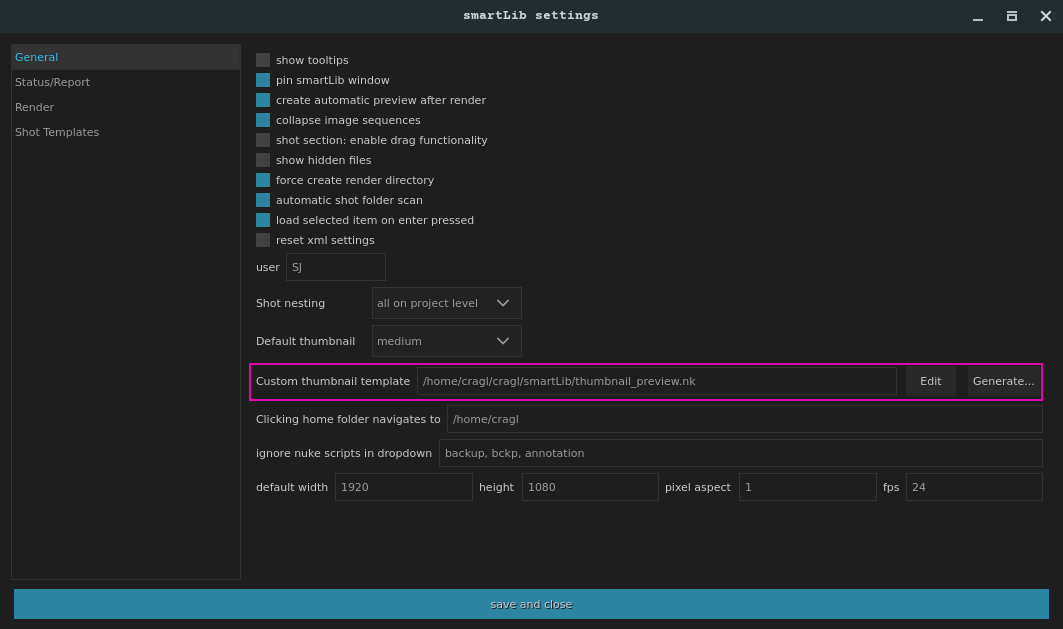
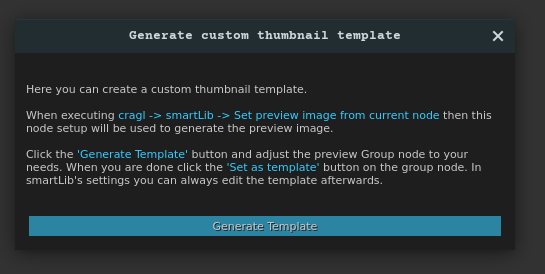
smartLib uses a node template to generate the thumbnail preview. If needed, you can update the template to your needs. For that, navigate to smartLib’s settings. In here you find the ‘Custom thumbnail template’ section. Click the ‘Generate…’ button:
The upcoming dialog describes how to use the custom thumbnail feature:
As described in the dialog above, adjust the node setup to your needs. Once you are done, click the ‘Set as template’ button. Your custom node setup gets now used whenever you create a thumbnail.
Here is a screen video that show cases the custom thumbnail template workflow in a nutshell:
Assigning user to shots
You can assign shots to artists so that everybody knows who is working on which shot.
Your can set a fixed user that is always set when executing the set user command which is described below. To set a fixed user, open the settings: cragl -> smartLib -> settings.
In the general tab, you will find the input user:
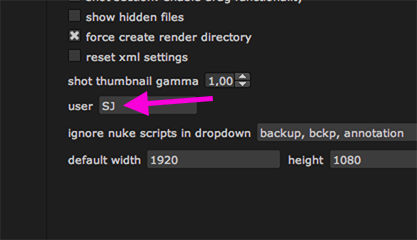
In here you can enter your user name. Choose your name or a user abbreviation.
To assign the fixed user value to a shot, simply right click the shot thumbnail and choose user -> set user.
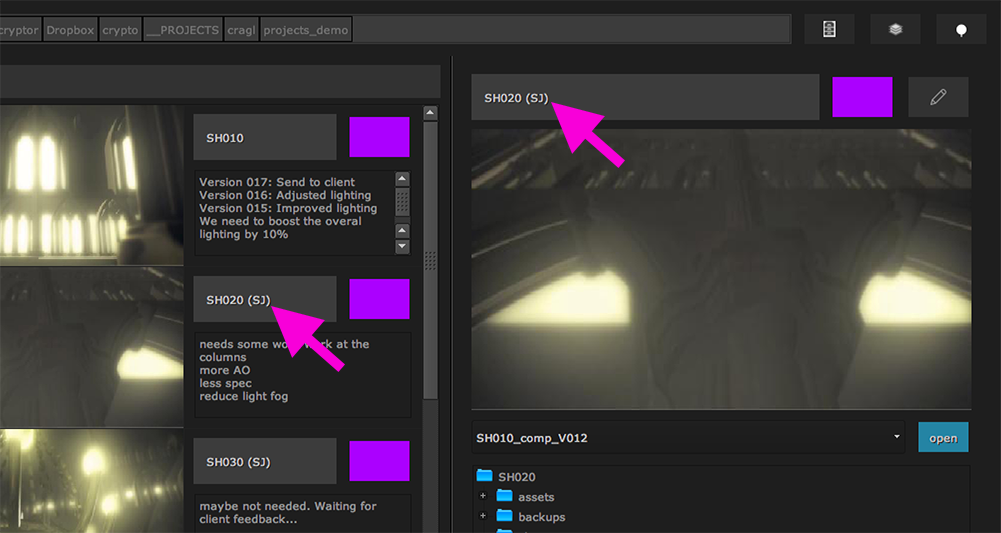
The shot’s title in the shot section as well as in the project view section will now contain the entered user so that everybody know who is working on which shot.
You can set a custom user name by choosing user -> set custom user. This opens a dialog in which you can enter a custom name to assing to the shot.
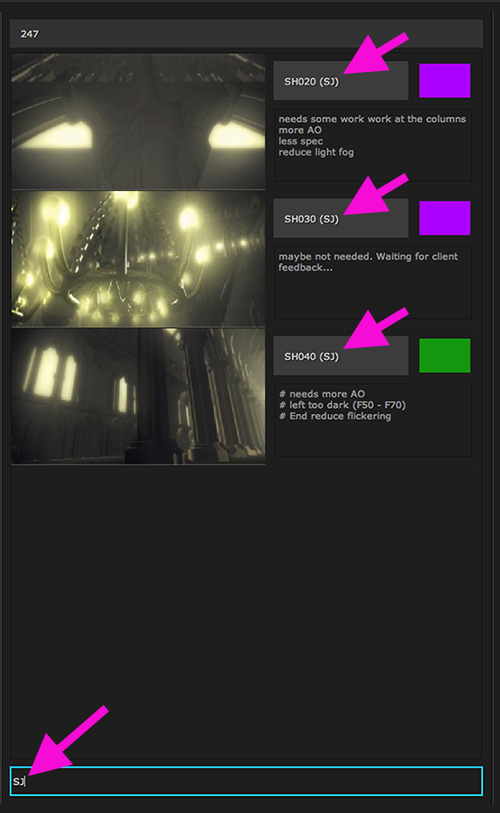
In addition, you can filter shots by user. Simply enter the user name into the search field at the bottom of the project view and it will only show shots that are assigned to this user.
Un-assigning user from shots
To clear the shot assignment, simply right click the shot thumbnail and choose user ->unset user. This will remove the name from the title in the shots section and in the project view.
Importing data from csv file for shot
You can import data from a csv file for this shot. Please also refer to Importing data from csv file. To do so, right click the shot thumbnail and choose Import from csv for this shot. This will launch a browser that lets you browse to the csv file that contains the data to import. Browse to the csv file, select it and click the open button. You need to confirm importing the data by one more dialog, as this will update the data to the data of the csv file. There is no undo functionality.
This functionality will only update the data from the csv file for this shot. At the moment, this is set up to update the shot’s status to the give value of the csv for the shot’s row, as well as the comments.
If you wish to update all shot’s data, you can do so by executing the command Import data from csv for all shots in the project view. For more information on that, please refer to Importing data from csv file
Note
The csv file must contain the columns shot, status and comment and the csv file’s columns must be separated by comma. Using a different separator will unlikely create the expected result.
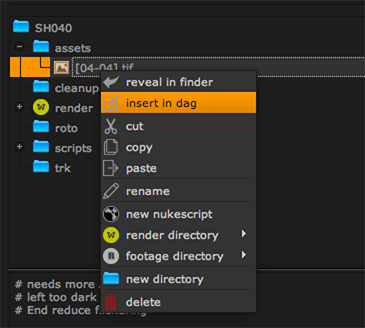
The folder and file structure
The shot view contains the folder and file structure as you see it in your explorer. This section contains a right click menu which offers you several options to edit your hierarchy directly inside smartLib:
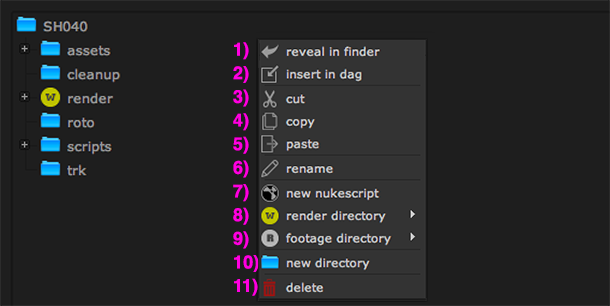
1) reveal in finder: Reveal the selected item in your explorer/ finder.
2) insert in dag: Insert the selected item in your nodegraoh. Works with footage and nuke scripts.
3) cut: Cut the selected item(s).
4) copy: Copy the selected item(s).
5) paste: Paste the selected item(s).
6) rename: Rename the selected item.
7) new nukesript: Create a blank nukescript at the selected location.
8) render directory: Set and unset a render directory.
8) footage directory: Set and unset a footage directory.
9) new directory: Create new directory/ directories.
10) delete: Delete the selected item(s).
Creating a directory or several directories in one go
To create a new directory right click the hierarchy and choose new directory. A dialog shows up in which you can type in the name of the new directory.
Instead of creating several directories one by one you can create them in one go. In the dialog you need to separate them by a comma. By hitting the OK button all directories will be created in one go.
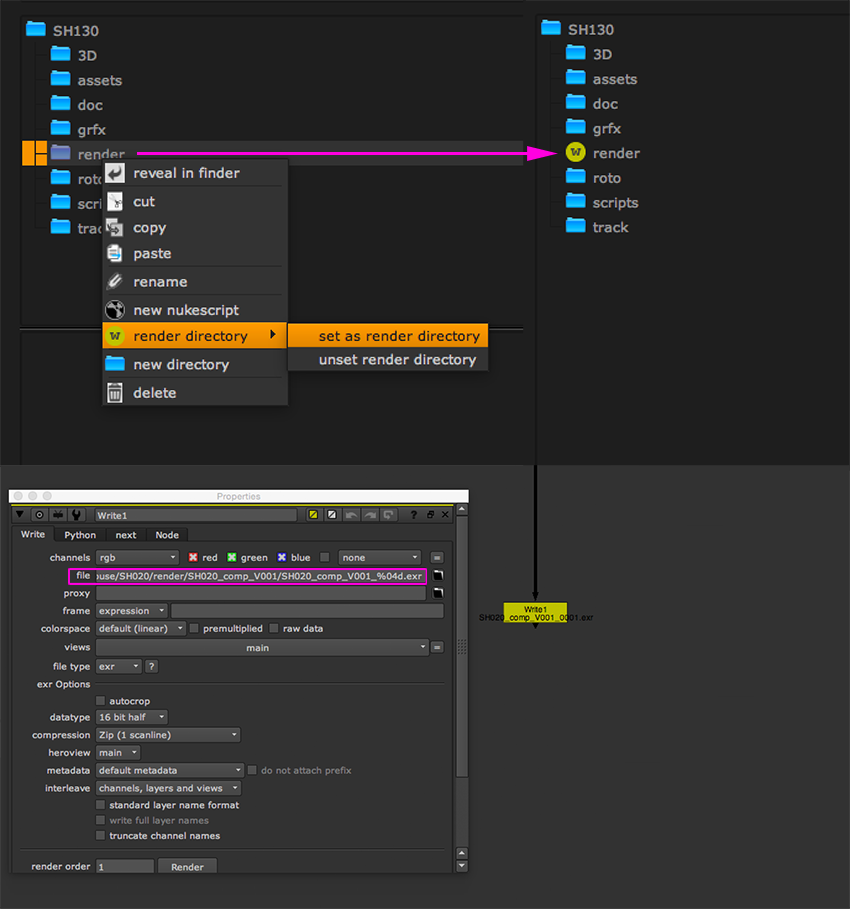
Setting a render directory
You can use the hierarchy to set up a render directory. Whenever you create a write node in your shot then the render path inside the write node will be automatically set up so you don’t need to set a path manually.
To set a render directory select a folder from the hierarchy, right click and choose render directory -> set as render directory. The folder icon changes to a small yellow circle with a “w” in it which indicates a render directory.
To unset a render directory you can right click it and choose render directory -> unset as render directory.
Tip
When it comes to rendering smartLib will always check if the render directory exists and if it doesn’t then smartLib will create it automatically for you.
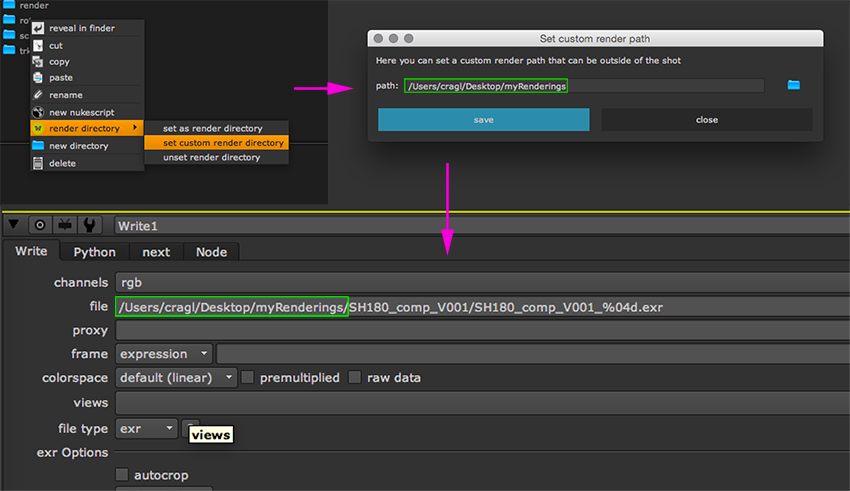
Setting a custom render directory
Besides setting a render directory inside the current shot or the shot template you can now also set the render directory outside of the shot. To do so right click the hierarchy and choose render directory->set custom render directory. A window will show up in which you can either browse to the desired path or enter it manually. When the path is set simply click the save button. The render directory is now successfully set up outside the current shot. Whenever you create a write node in that nukescript the render path will be set up automatically and point to that set render path. The path can always be changed the same way described above.
Note
Setting a custom render directory outside the current shot works also for shot templates. In smartLib’s settings section, navigate to the shot templates section and set up a custom render path the same way as described above. Whenever you create a new shot from that template then the custom render path will take place setting up the write node automatically to point to that set path.
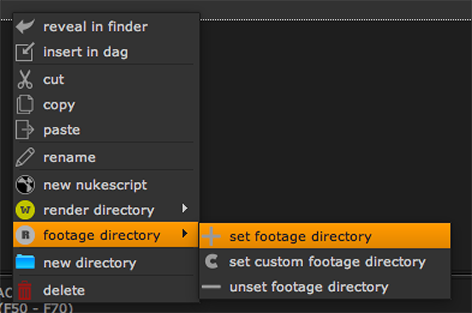
Setting a footage directory
Besides setting a render directory in- and outside your current shot smartLib offers the same functionality for your footage. By setting a custom footage directory this will always start your browser in the set footage directory.
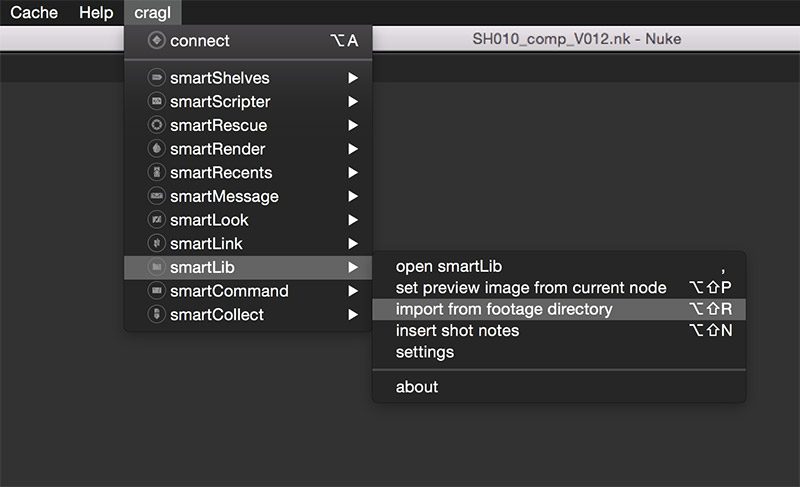
To import footage into your nuke script navigate to your menu bar and choose cragl->smartLib->import from footage directory or use the shortcut alt+shift+R.
Getting assets into the nodegraph
You can drag footage from smartLib directly inside your dag. If you drag a nuke script into your dag all nodes of that selected nukescripts are appended to your current nukescript.
To insert footage or a nuke script into your nodegraph you can also right click an item in your shot right click menu and choose insert in dag.