The smartLib main window
You can access smartLib via NUKE’s menubar: cragl -> smartLib -> open smartLib.
The shortcut to launch smartLib is the comma key.
Tip
The easiest way to launch the smartLib main window is to use the shortcut which is the comma key. If required, you can change this shortcut to your needs by updating the smartLib’s menu.py.
The smartLib main window is split into 5 sections:
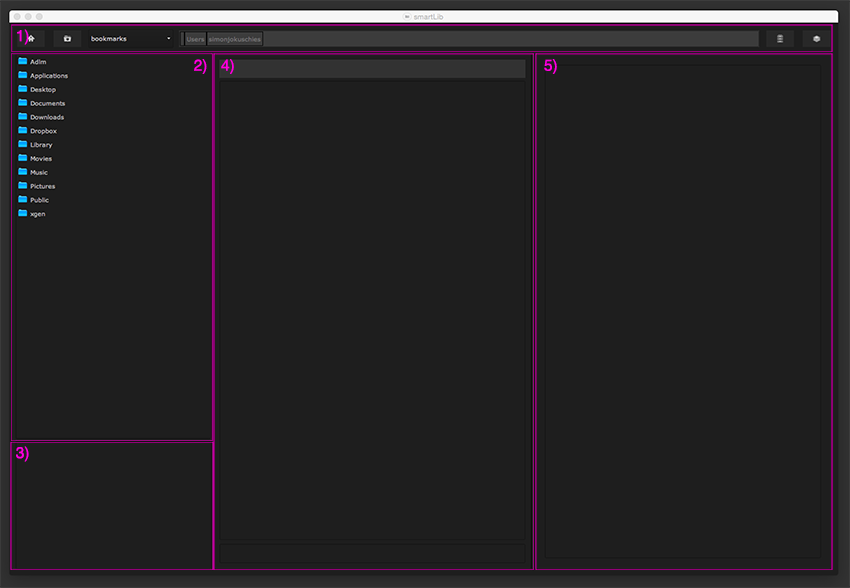
1) Navigation
2) System
3) Project bookmarks
4) Project view
5) Shot section
To navigate between different projects and shots, you work from left to right. The general workflow is to use the System section to browse to your project. Then drag it into the Project View section in the middle. From here, drag a specific shot into the Shot section on the right hand side.
Let’s have a closer look on all sections to understand how smartLib works and see the functions it offers.
1) Navigation

1) This button navigates you to your user home directory.
2) With this button you can jump one folder up in the hierarchy.
3) Here you can set bookmarks to quickly switch between different locations on your system. For further information see Working with bookmarks.
4) This section shows you the currently browsed path in your system section. You can jump to previous folders directly in here by just clicking inside the url.
To enlarge the system- and shot sections, you find two buttons at the top right:
5) Press this button to toggle the visibility of the system section.
6) Press this button to toggle the visibility of the current shot.
7) Toggle to force the smartLib window to stay on top of all other windows.
Navigating manually
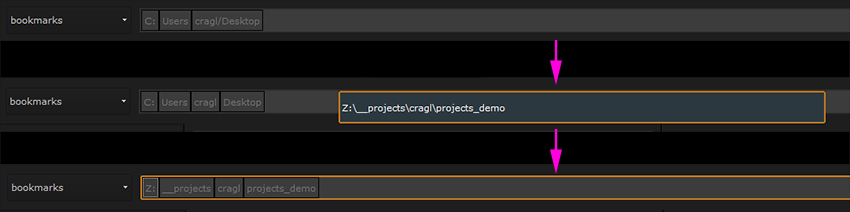
You can set a url manually by right clicking the current url. This will show an input displaying the current location. You can paste a copied path or type in the url that you like to switch to manually.
Working with bookmarks
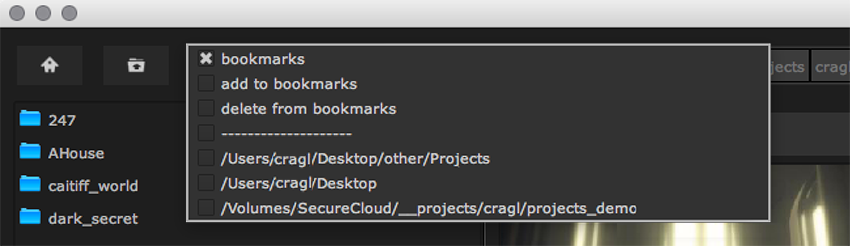
You can set bookmarks to quicker jump to different locations in your system section. To bookmark your current location just choose “add bookmark” from the bookmark drop down list. The current path will then be appended to the bookmark list. To delete a bookmark, simply select a bookmark to jump to the location and then choose “delete bookmark” from the drop down.
2) System
In the system you will find your systems folder structure. This is the same structure that you see in your explorer. To navigate inside a folder just double click it. So here you can browse your system and navigate to your project folder. If you need you can right click the system section and refresh the current folder.
The system section contains a right click menu with three options:

1) refresh: Refreshes the system section
2) reveal in finder: Reveal the selected directory in your explorer
3) new folder: Create a new folder. Will pop up a dialog to enter a folder name
You can use the system section to navigate to the folder that includes all your shots. You can then drag the folder including all your shots to the middle section which represents the project view.
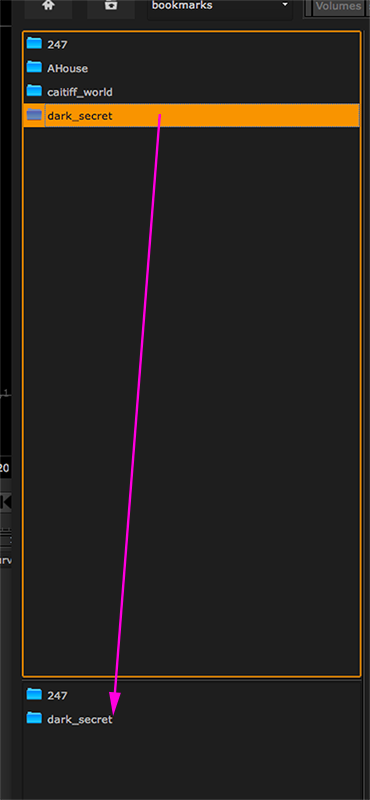
3) Project bookmarks
When you have navigated to a project you can bookmark a specific project in the project bookmark section below the system section. Just drag the folder you like to bookmark to the project section below. If you need you can set a name in the upcoming window.
smartLib works by opening the folders that include all shots: To open a project simply drag the folder that includes all shots from the system section or from the project bookmark section to the middle section which is the project view. Just keep in mind to drag the folder inside the project section that includes all your nuke shots.
4) Project view
As soon as you have dragged the folder into the project view that contains all shots of your project you will see all your shots in the list.
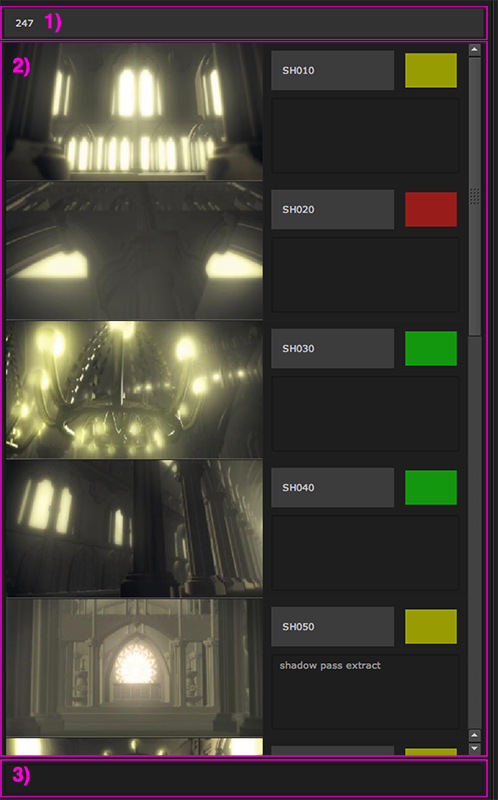
1) At the top you find the name of the project.
2) In the middle you find all shots sorted by name. Each shot is arranged in a row, containing a shot thumbnail, the shot name, the shot’s status and a comment section.
3) At the bottom you find an input field to search a shot from the project list by name.
The project view offers various additional functions to support you with organizing your projects. For more information, please have a look at the Project view - Additional functions to get the most out of smartLib.
5) Shot section
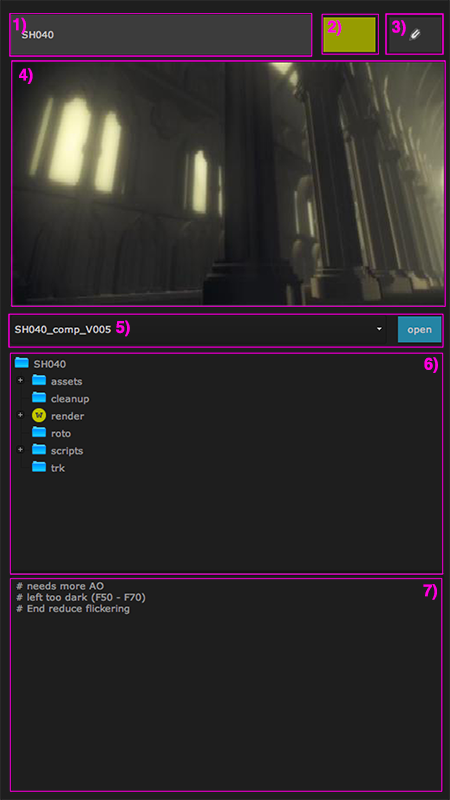
To enter a shot in the shot section simply drag and drop a shot from the project section into the shot section.
The shot section contains several elements:
1) The shot name
2) The shot’s status
3) Toggle show/ hide comments section at the bottom
4) Shot thumbnail
5) Nukescripts list of the current shot
6) Shot’s folder and file structure
7) Comments section
The shot section offers various additional functions to support you with organizing your shots. For more information, please have a look at the Shot section - Additional functions to get the most out of smartLib.