Quickstart
The following section shows you how to get started with smartRescue. We will use smartRescue to create a backup file where we kill all Viewer nodes from our working file. This is a good starting point to see the general workflow of how to use smartRescue. Afterwards, you can browse the steps section to see all the steps smartRescue offers you. And you can start creating your own steps.
After having followed the installation and launching section, you will be able to open smartRescue. Let’ start using it now.
Setting up our Nuke executable root
If you are running smartRescue in Nuke, you can skip this section, otherwise keep reading.
Before we can process our steps, we need to tell smartRescue once where it can find the Nuke executable to use for processing the working file. When launching smartRescue for the first time, you will be prompted to set up the Nuke installation root directory it as seen in the image below:
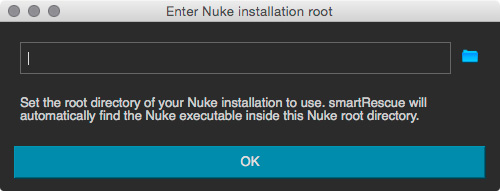
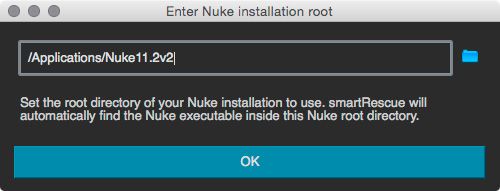
Simply browse to your Nuke installation root directory and smartRescue will automatically browse this folder for the Nuke executable.
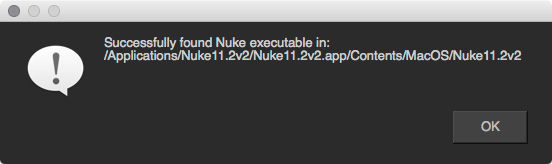
You can always change this path in the settings section if you want to use a different Nuke executable.
Setting the file(s) to process
First, we need to decide which working files we would like to rescue. We can either drag and drop a file or a folder or click anywhere in the window and this opens a browser that we can use to browse to a specific .nk file. When dragging in a folder, smartRescue will operate on all files.
Tip
It is sometimes easier to have a standard location that you will always use as ‘files to operate on’. Please follow the Tips and tricks section to see how to set it up.
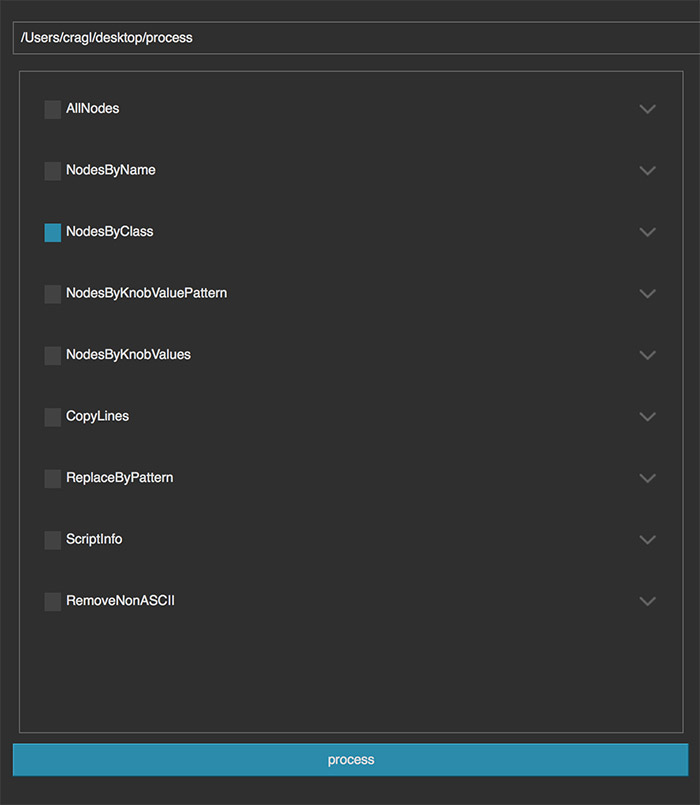
After you have set your working file or folder to operate on, the main window changes its layout and shows you all offered steps:
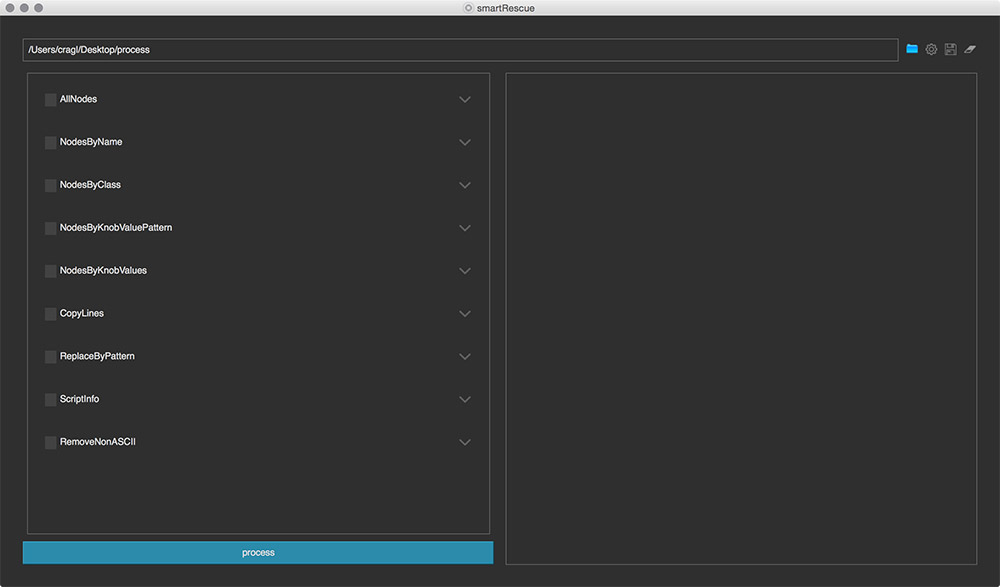
At the left you see a list of all steps that you can execute for your selected working file(s). Simply activate steps by clicking their checkbox. At the top you see the path that you are working in. Clicking the blue folder icon next to the path lets you change the path. At the right you see a log output area. We will see this one in action in just a second.
Let’s start fixing our working file.
Setting up our steps
Often, a potential source for a broken working file that doesn’t open anymore is, when a certain knob value in your working file is set too high and the machine is not able to process this value anymore. Or, your Viewer node is connected to a corrupt node and generating the resulting image is not possible anymore. In this case, it is sometimes useful to simply remove all Viewer nodes from your working file to ensure no image result gets processed when opening the working file.
As a first step, we can remove all Viewer nodes from the working file and see if the working file opens again without crashing.
Let’s tick the box at the left of the step which is called NodesByClass. This step lets us handle all nodes by a given class. When having enabled the checkbox, it gets tinted blue and this tells us that this step will be executed for our selected working file(s).
We can also enable several other steps and these will then all be executed on our working file(s). But let’s keep things simple in the beginning and just use the step that we just enabled.
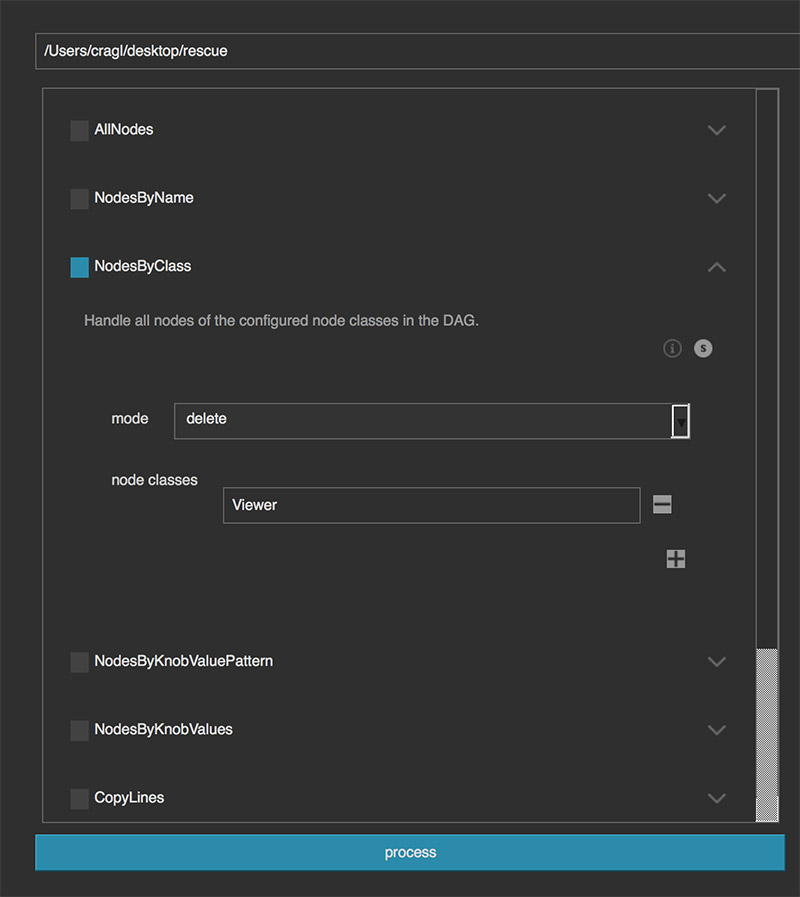
Let’s delete all Viewer nodes in our working file. For that we can configure our step to do exactly that. Click the arrow next to the checkbox as seen in the following screenshot:

Clicking this arrow button toggles the configuration section for this step which looks like the following:

In here we can chose a mode and thuse decide what to do with the nodes that match:
- delete: Will delete all matching nodes
- disable: Will disable all matching nodes
- disconnect: Will disconnect the nodes from the tree.
Let’s use delete for now so that we delete all Viewer nodes. Next, we need
to tell smartRescue, which nodes we would like to delete. Click the plus
button. This adds a new input to the interface. In here, let’s type in
Viewer. If required, you can handle more node classes. For that, simply
click the plus button again and add another class name.
Tip
To get the class name of a node, you can create a new node of any class, select it and press the I key. This opens an info window and in the following section you can read its class:

Please note, that some nodes are versioned using a major version. For example, the node class name for the current Merge node is not Merge but Merge2. Just using Merge would match only ‘old’ Merge nodes of the previous version.
After having set the mode to delete and having added the Viewer class to the step, the configuration for our step should look like the following:
Processing
Let’s click the blue process button at the bottom left. The step gets processed in the configuration that we set up. In our case, all Viewer nodes were removed from the working file. By default, smartRescue will not perform these changes directly on the working file, but will create a copy of our working file and operate on this copy. This behavior can be changed in the settings section if required. The window shows us a detailed log information of what happened behind the scenes:
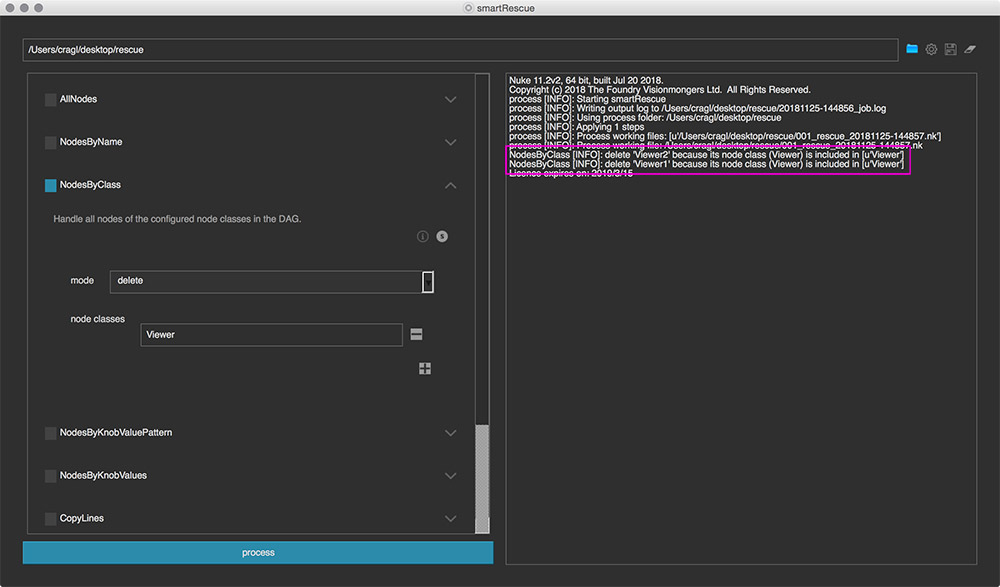
Let’s have a look at these two lines:
NodesByClass [INFO]: delete 'Viewer2' because its node class (Viewer) is included in [u'Viewer']
NodesByClass [INFO]: delete 'Viewer1' because its node class (Viewer) is included in [u'Viewer']
Our working file contained two Viewer nodes: Viewer2 and Viewer1. smartRescue deleted both these nodes from our copy working file. We can now try to open this working file and see if deleting the Viewer nodes has solved our problem. If not, we can further trouble shoot our working file.
Let’s have a quick look inside our selected process folder.
In the beginning, our folder to process contained only one file 001.nk. After having processed our step, we will now find two new files:
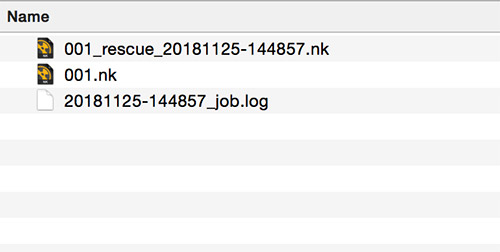
<workingfile-name>_<date>-<time>.nk
Example: 001_rescue_20181125-144857.nk
This is the file that the step was processed on which does not contain any Viewer nodes anymore. As mentioned, by default smartRescue does not process steps directly on the original working file but this behaviour can be changed in the settings section if required.
<date>-<time>job.log
Example: 20181125-144857_job.log
This is a log file that contains all information of the log output that we see in on the right hand side of the smartRescue main window. This file exists was created so that we can keep track of the changes that were performed.
Conclusion
And that’s pretty much the general workflow:
- Select the working file(s) to process.
- Enable the desired steps and configure them as required.
- Click the process button.
smartRescue offers a lot more steps that you can use to your convenience to changes nodes of your working file. All these steps are discussed in the steps section.