smartScripter Main Window
The quickstart section of the previous chapter should have given you a good understanding of how to use the smartScripter. Let’s now have an in-depth look at the smartScripter main window.
The main section
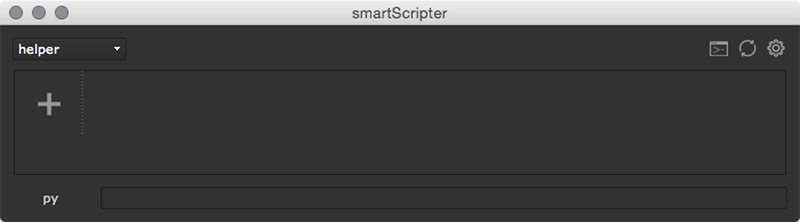
The smartScripter main section contains all needed elements to execute commands, create new commands, switch between different stacks, execute one-line arguments using the quick command prompt and access the settings to customize smartScritper to your needs:
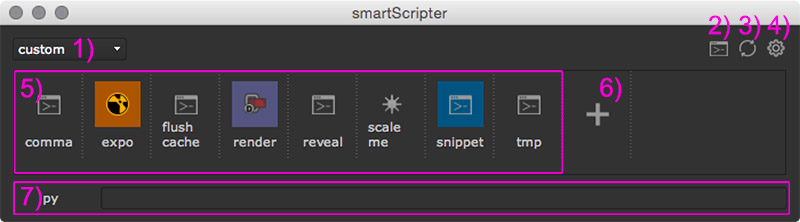
The smartScripter contains the following elements:
- 1) Stack switch: Click to switch to a different stack or creating a new stack.
- 2) Quick command toggle: Click to toggle the visibility of the quick command section.
- 3) Refresh: Click to refresh the commands table. This will re-scan for commands. This is useful when using a collaborative workflow.
- 4) Settings: Click to show the settings section.
- 5) Commands: Here are all commands of your current stack listed.
- 6) New command: Click to create a new command.
- 7) Quick command: Lets you quickly execute Python- and TCL commands.
Switching between stacks
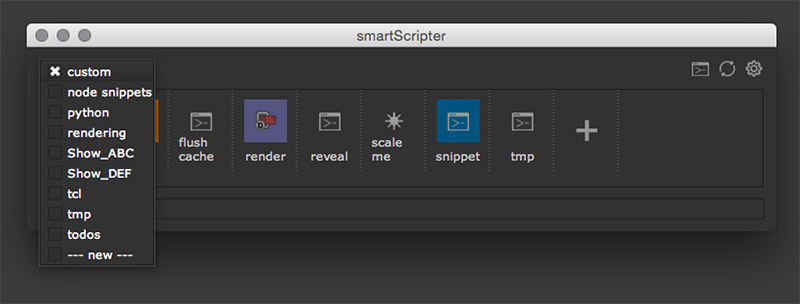
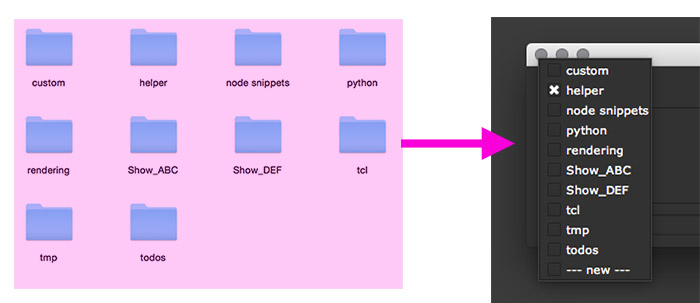
The stacks dropdown menu lets you quickly jump between different stacks:
You are completely free in laying out your stacks. Possible examples of how to organize your stacks are:
- One stack for Python commands.
- One stack for TCL commands.
- One stack for Nuke node snippets.
- Stacks for various situations (rendering, prep, keying, etc.).
- One stack per show / sequence / shot.
- One stack that contains a command for each shot. Clicking the command will insert the latest rendering of the clicked shot as a Read node into the node graph.
- One stack for temporary commands for quick tests that will be thrown away later.
- One stack for each member in your team so that you can send commands and node snippets among artists.
- One stack that contains notes for a TODO list so that nothing gets lost.
These are just a hand of suggestions that show you how you can lay out your stacks. We are sure that you come up with additional ideas.
Creating new stacks
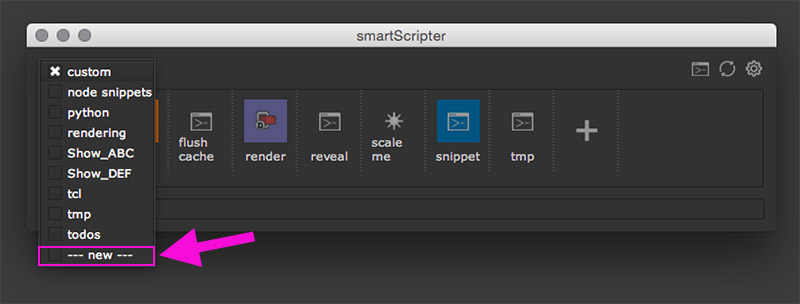
In order to create a new stack, click the stack drop down menu at the top left of the smartScripter main window. Then choose the –new– command from the bottom:
In the up coming window, enter a name for your new stack and press enter or click the blue create button.
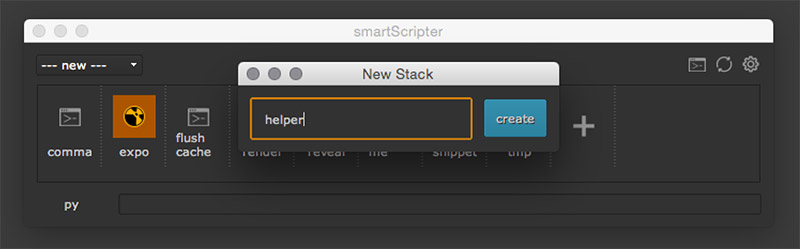
The new stack got created and automatically selected as your current stack.
You are now ready to populate your stack with commands. Please have a look at the quickstart’s populating stacks section to find out more about how to populate smartScripter with various Python-, TCL-, and Nuke node snippet commands.
Where are stacks and commands saved to?
The stacks root directory contains all stacks that you create inside smartScripter. By default, smartScripter creates the stacks root at the following location:
Linux: /home/[USERNAME]/cragl/smartScripter
MacOS: /Users/[USERNAME]/cragl/smartScripter
Windows: C:\Users\[USERNAME]\cragl\smartSscripter
WHERE [USERNAME] is your currently logged in user name.
Let’s have a look at the actual files and folders that get created. Each stack is actually a physical folder on your hard drive. When comparing the available stacks in the stacks drop down menu and the physical folders in the stacks root directory, you see that these are corresponding. So smartScripter will scan the stack root directory for directories and show them in its stack drop down menu:
Note
You can temporarily hide stacks from being shown in the stacks drop down menu. Each folder that starts with an underscore won’t be shown in the stacks drop down menu. So for instance, renaming the stack custom to _custom will hide the stack in the stack drop down menu. This is useful to hide stacks temporarily without deleting them or needing to move them to a different location.
Each stack contains commands. These commands are stored in two files for each command:
- The actual command file to execute. This file does not contain any file extension.
- Meta data information that stores the command’s language, icon and color in the interface. This is the .json file.
The commands right click menu
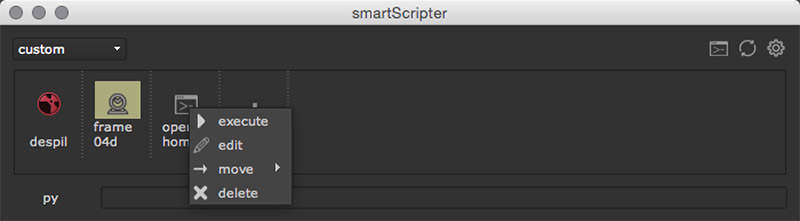
Each command has a right click menu that lets you execute the command, edit it, move it to another stack and delete it.
Editing commands
You can always edit your commands after they have been created. In order to edit a command, hover over it and right click it. Choose the edit command from the context menu.

This launches the Edit Command window that looks identical to the Store New Command window that we have already seen in the quickstart section, except it lets you edit the currently selected command. For more information about the Edit Commands window, please have a look at the Editing Commands window section.
Moving commands between stacks
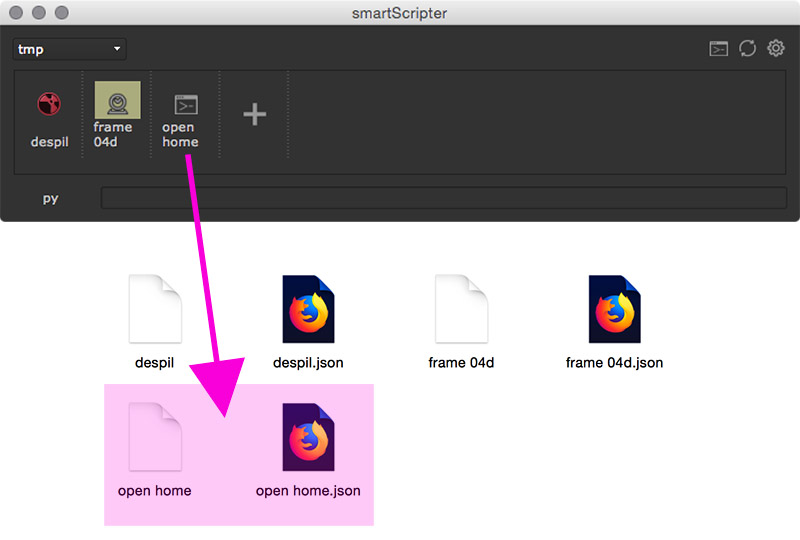
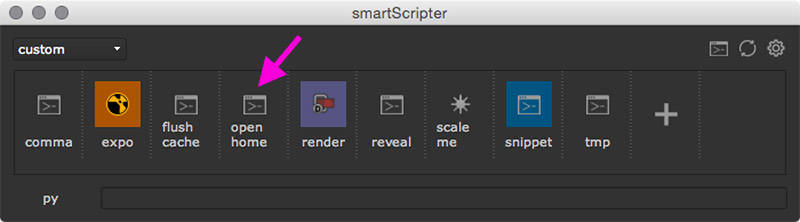
You can move commands between stacks. In order to do so, select the command that you would like to move and right click it. Choose move from the context menu. In here you can specify where you want to move your command to. In this example, let’s move the open home command to the custom menu.

The command will be moved to the custom menu.
Deleting commands
In order to delete a command, select the command that you would like to delete and right click it. Choose Delete from the context menu. In the up coming dialog, confirm that you would like to delete the command.
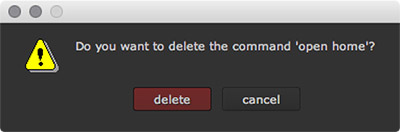
Warning
The command will be deleted immediately. There is no undo, so handle with care.
The quick command
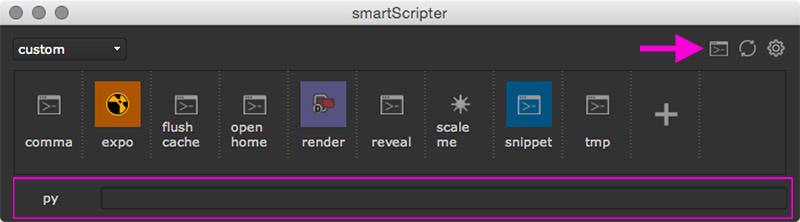
The smartScripter main window contains a quick command section that lets you quickly execute one-line Python-, and TCL commands. It is located at the bottom of the smartScripter. The command icon at the top right lets you toggle the visibility of the quick command input.
To execute a command, hit the return key while being in the quick command input field.
At the bottom left, you will find a button that reads py. This indicates that the quick input will execute the command as a Python command. But you can click this button to execute TCL commands as well.
In case your command cannot be executed (for instance due to a syntax error in your command), the input turns red.
Any successfully executed command will be stored in the history. Using the up and down arrows while being in the quick command input field lets you cycle your command history.
In the settings section, you can set to keep the command in the quick command input filed after successful command execution or to clear the input field. You can also set to close the smartScripter after successful command execution or to keep it open and you can also flush your quick command history.