Quickstart
As smartLink is a helper for nodes in our nodegraph, let’s open an Nuke script that contains some nodes. Our example script contains some Read nodes and Camera nodes.
Organizing nodes with the Backdrop Manager
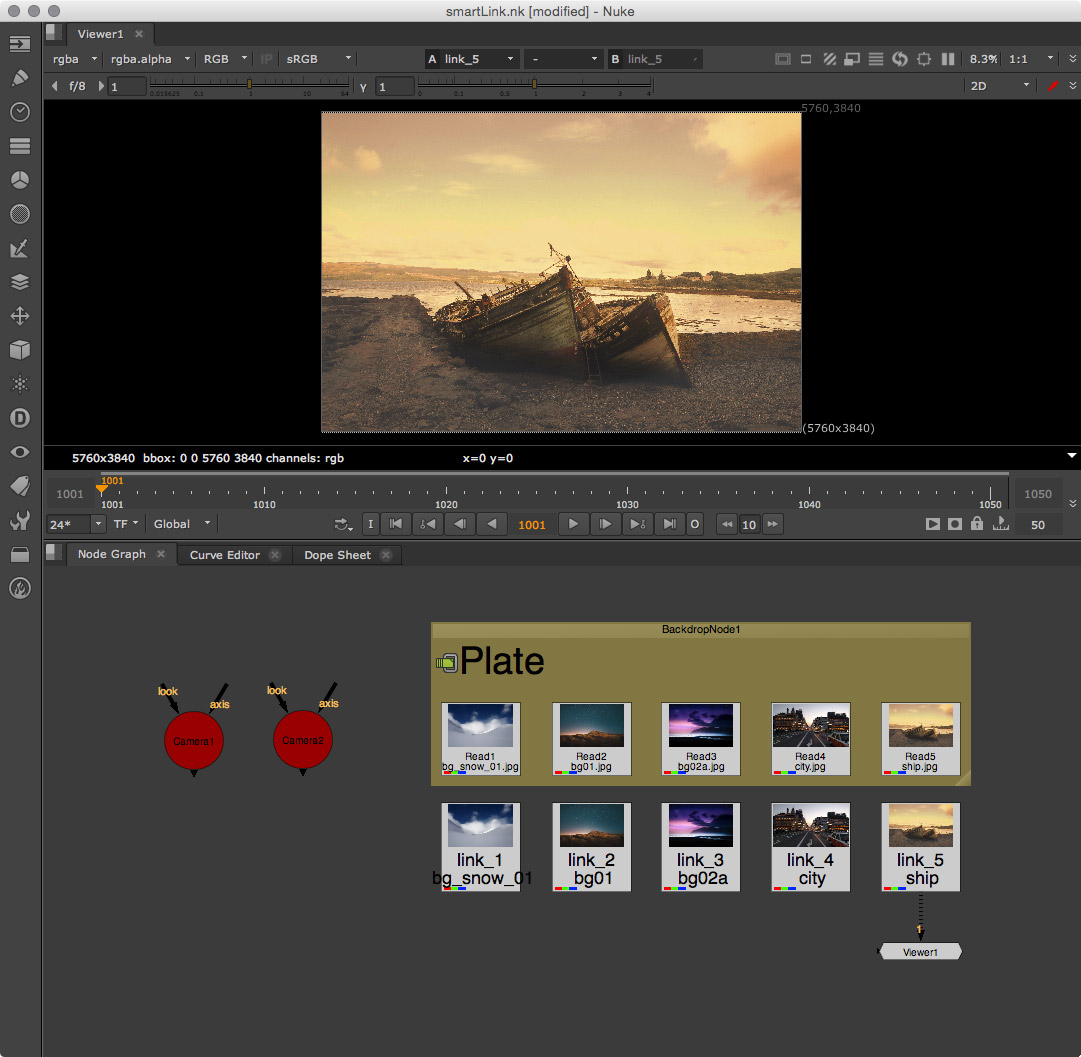
Let’s group all of our Read nodes under a custom backdrop node using smartLink’s Backdrop Manager. We will then create links for these Read nodes in order to use them down the line and keep our sources in one place. The Backdrop Manager lets us choose custom backdrops from a preset list. Custom backdrops include custom names, icons and colors and you can create your own custom presets.
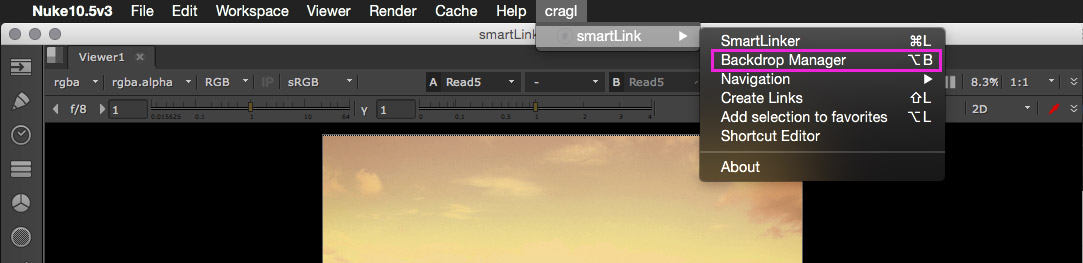
Let’s select the Read nodes and navigate to our menubar and select: cragl -> smartLink -> Backdrop Manager. A quicker way is using the shortcut Alt+B which can be changed to any other shortcut in the Shortcut Editor.
The upcoming window lets us create backdrops from a preset list. Let’s choose Plate from the drop down.
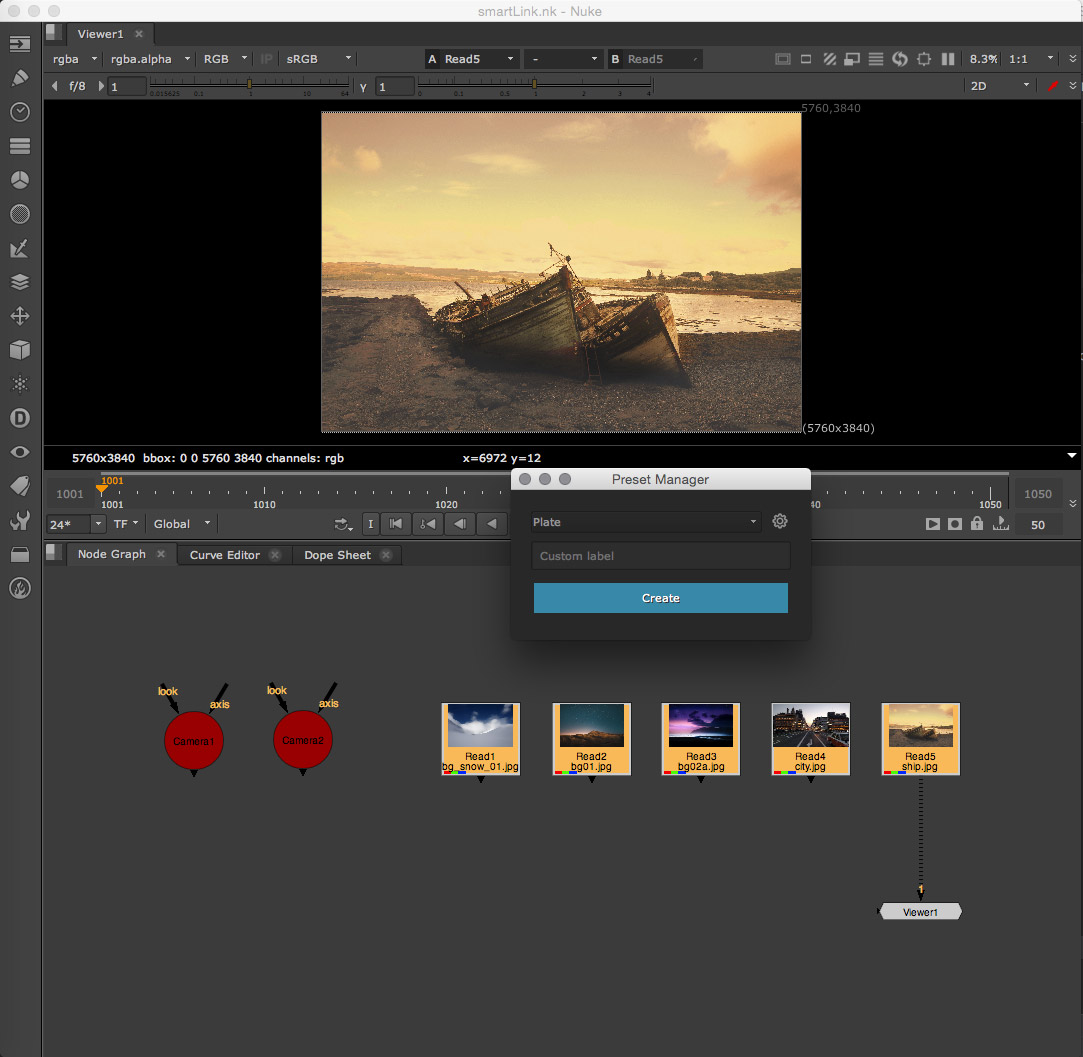
Below, we can enter a custom name that will be displayed in the label of our Backdrop node. Let’s leave it empty, so that our preset name ‘Plate’ will be used instead. Clicking the settings button at the top right lets us edit the preset backdrops and create custom ones. For more information, please have a look at the backdrop manager. When we are done, let’s click the Create button. All read nodes are grouped under a Plate Backdrop node that contains a specific label, icon and color.

Creating links
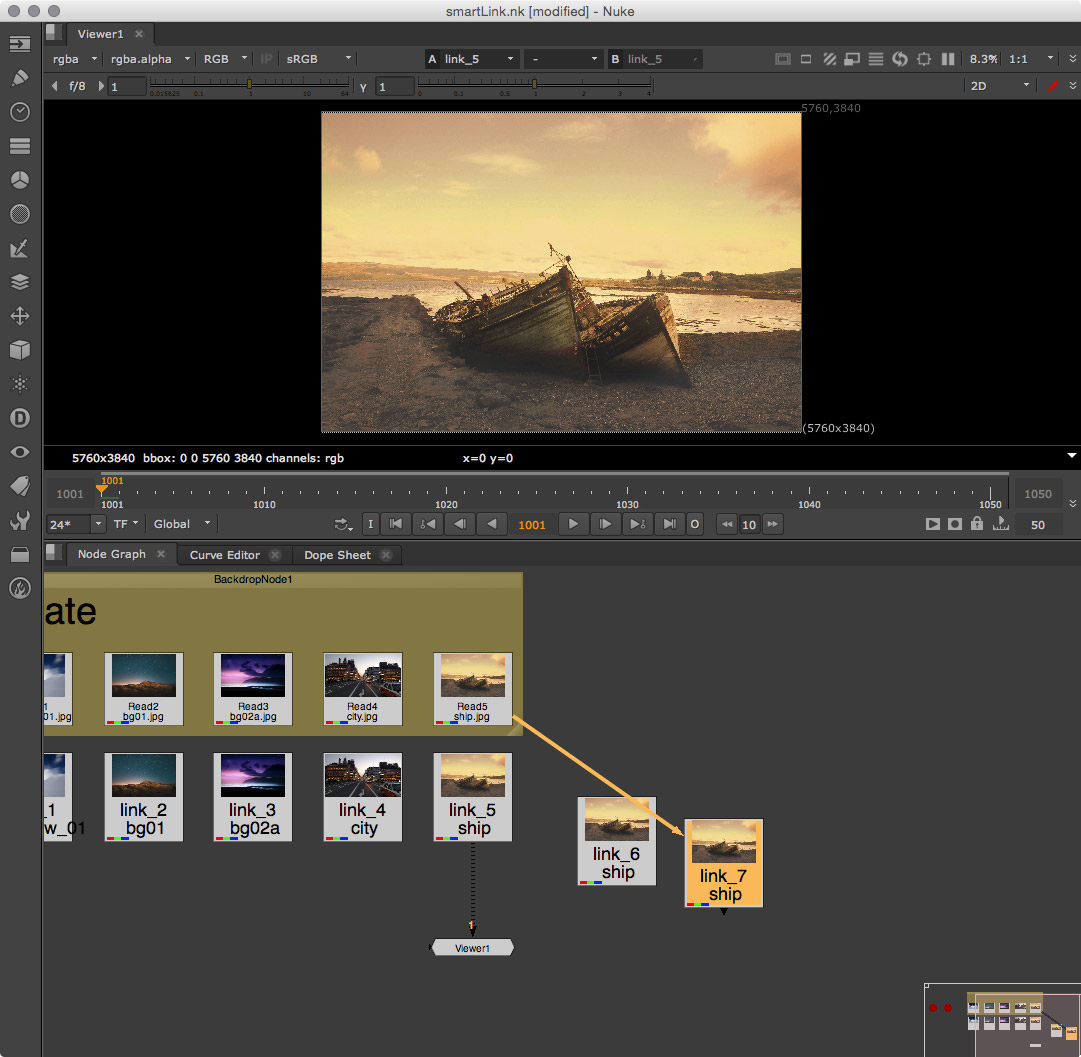
Let’s create links for all of our read nodes so that we can leave them in the Backdrop node and reference them down the line. Let’s select all of our Read nodes and press Shift+L. Links will be created for all Read nodes in one go.
Let’s create another two links for our ship Read node. By default, Nuke doesn’t support the feature of automatically connecting the representation nodes to your source nodes when copying and pasting nodes. smartLink however enables this feature. So let’s select our ship link and copy paste it. The pasted links are automatically connected to our source node and are ready to use.
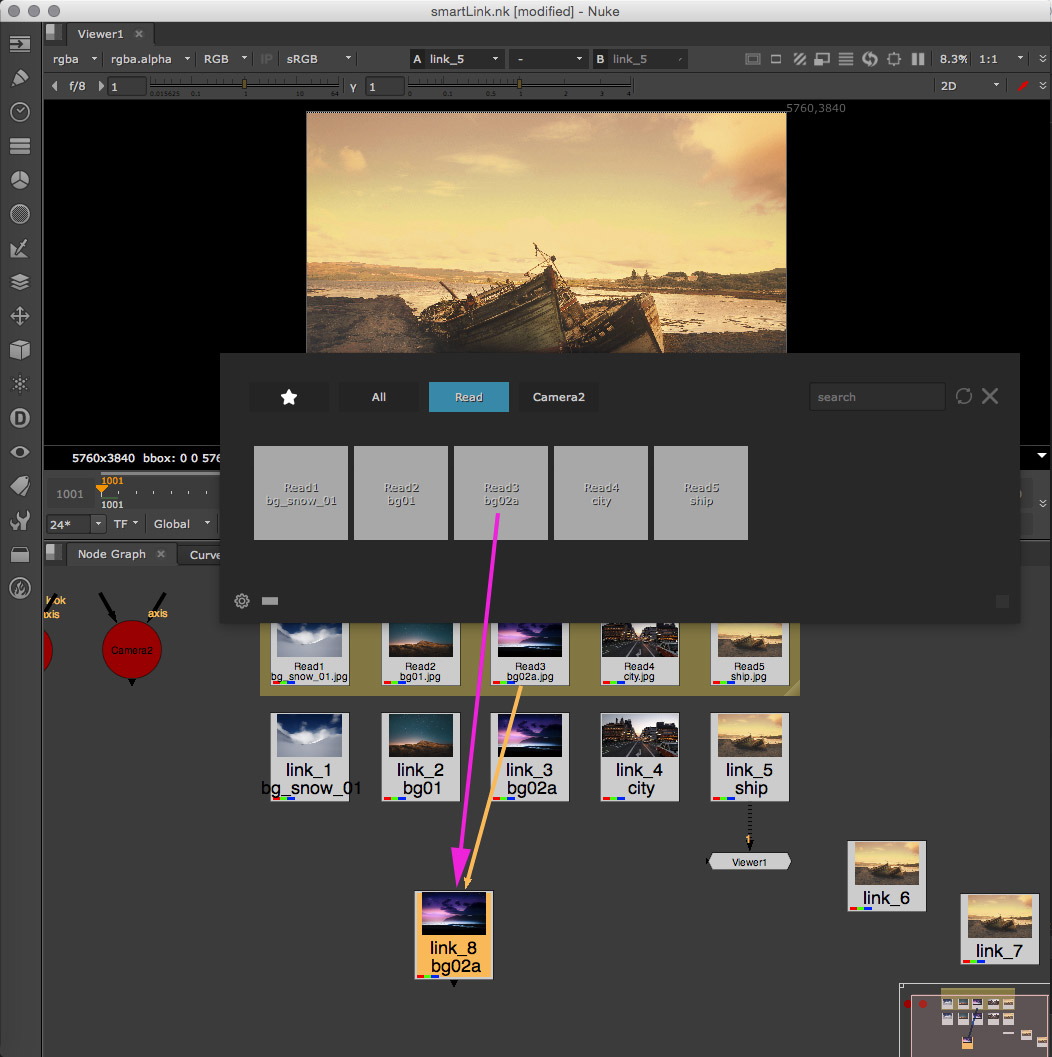
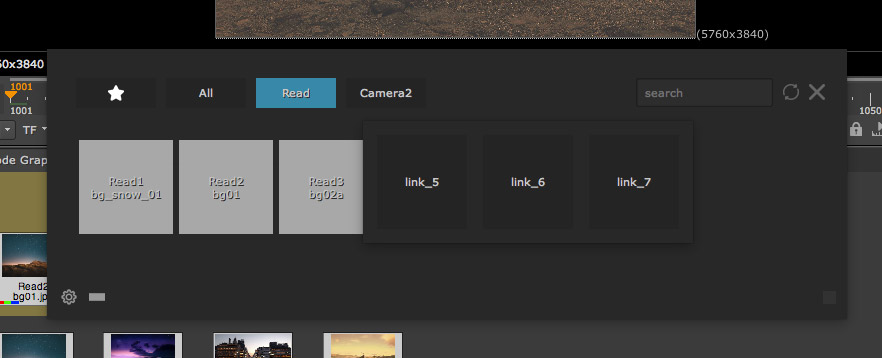
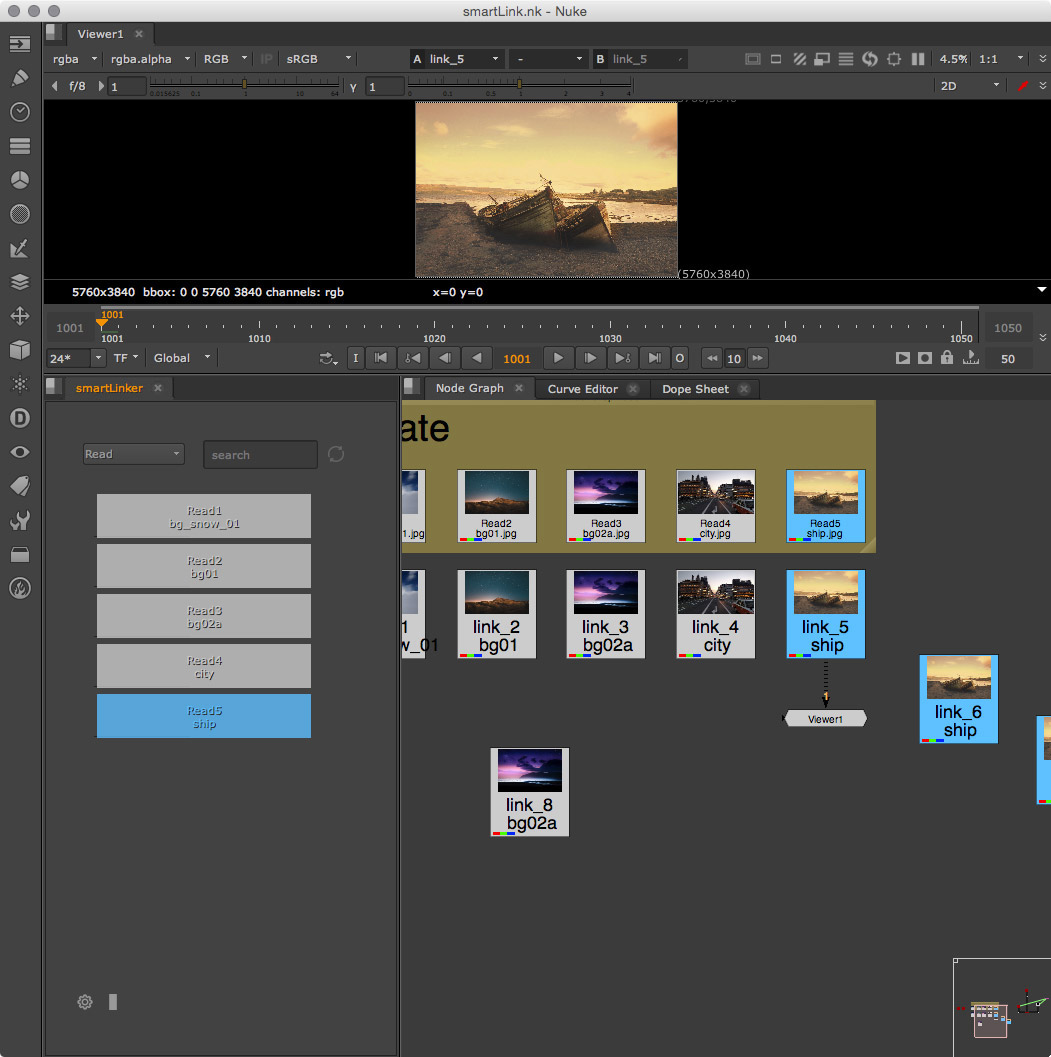
smartLink offers another way of creating links. Let’s open the smartLinker window by choosing cragl -> smartLink -> smartLinker from the menubar or simply clicking Ctrl+L (Linux, Windows) or cmd+L (Mac). The smartLinker shows up. This is the smartLink’s main window that lets you create and manage your links. At the top choose Read to show all Read nodes in our nodegraph. Let’s create another link for our Read3 node. For that, simply drag and drop the link from the smartLinker to the spot in the node graph where you would like to create the link. The link will be created at that location.
Switching node classes
The nodes in the smartLinker are grouped by node classes. Clicking the buttons at the top cycles through all node classes. Let’s for instance click the Camera tab and this will show all Cameras for our current Nuke script.
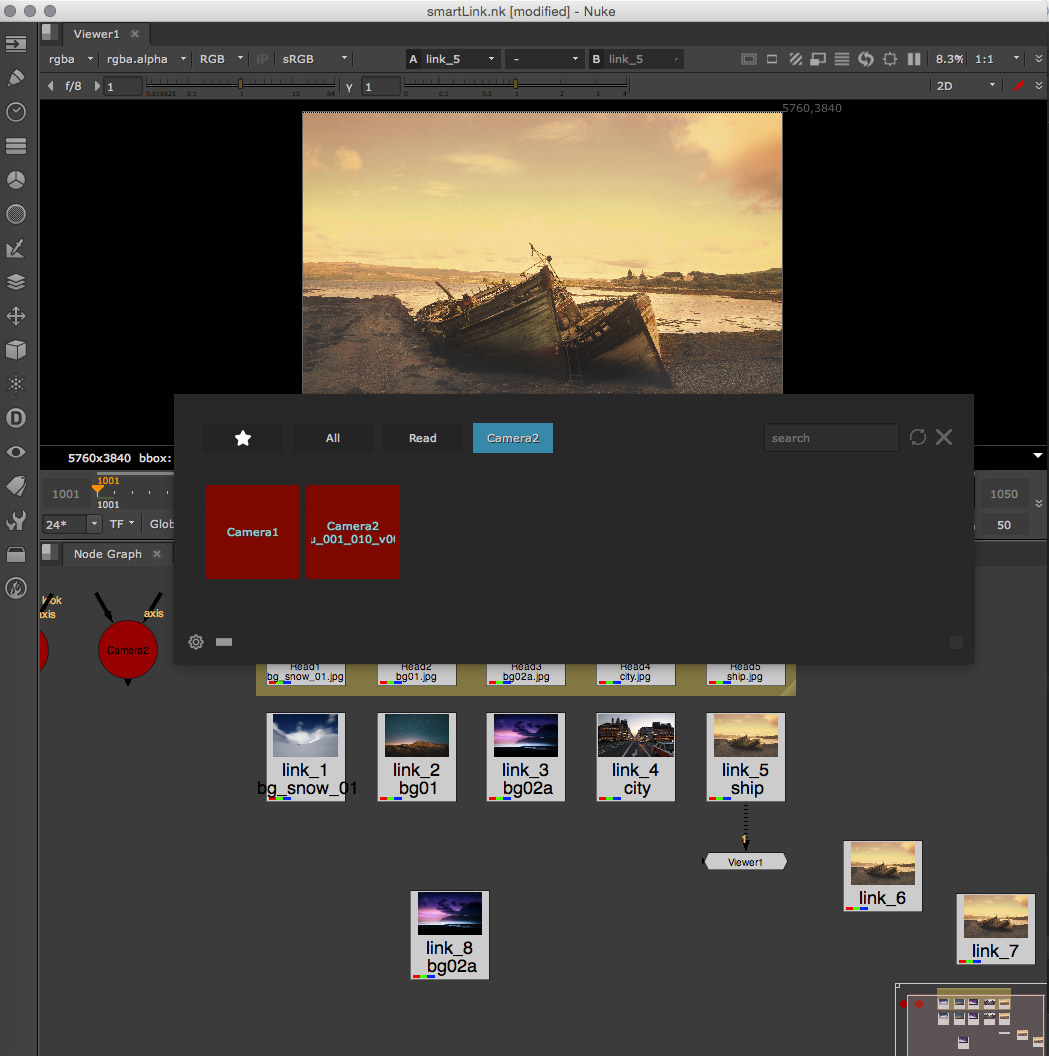
The second camera reads from a file which will be shown in the link element for this node. Hovering over it shows the whole path as a tooltip.
Navigating nodes
Using smartLink, you can easily jump between all your links and source nodes. Select a link and press Ctrl+Left Arrow to jump your node graph to the previous link and using Ctrl+Right Arrow will jump to the next link (use the cmd modifier when using a Mac operating system). Pressing Ctrl+Arrow Up (Linux, Windows) or cmd+Arrow Up will automatically navigate you to the source node that the link is referencing.
You can also use the smartLinker to cycle links and jump to your source nodes. While hovering over a link button, hold Ctrl (Linux, Winodws) or cmd (Mac) and click it to jump to the source node. Holding the Alt Key and clicking it, will show a floating window with all links for the clicked node.
The buttons in here represent the names of the links. So if you rename them, the updated names will show up in here. Clicking one of the buttons will navigate you to that link.
Searching nodes
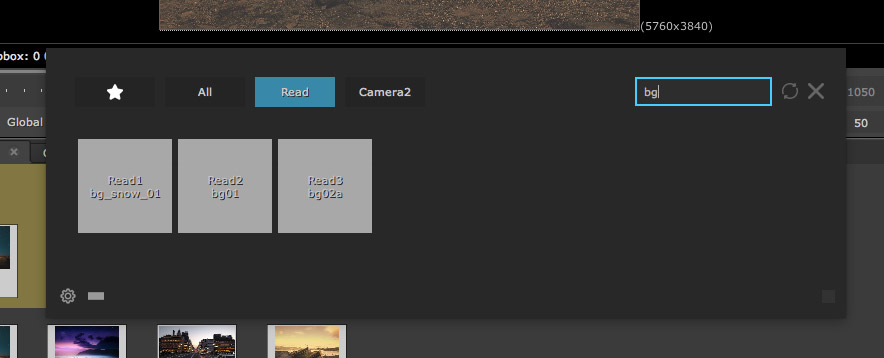
Once your script becomes bigger, the smartLinker’s nodes list can become quite long. In order to quickly find nodes, you can use the smartLinker’s search field at the top right. This will will search for node names, labels and file paths and thus offers a lot more than the built in functionality in Nuke. Let’s for instance search for all background elements. So let’s type in bg and smartLink will filter for all elements that have bg either in their node name, file path or label.
Editing node classes
By default, smartLink shows only Read nodes, ReadGeo nodes and Cameras. But you can always add other node classes and change the order to your needs. For that, click one of the class buttons at the top of the smartLinker and choose edit from the context menu.
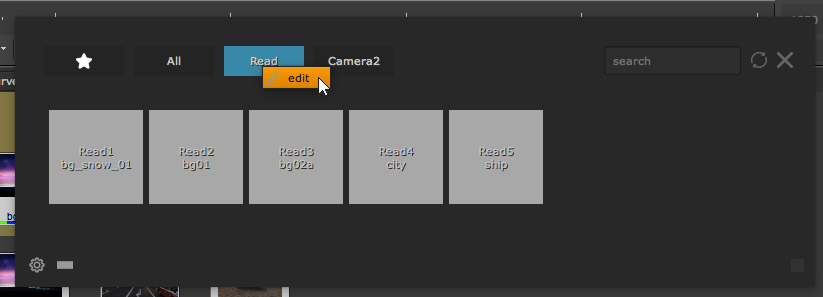
The class buttons will be hidden and an input field shows up, in which you can add new classes and change the order to your needs. Let’s for instance add the Write node class to the smartLinker.
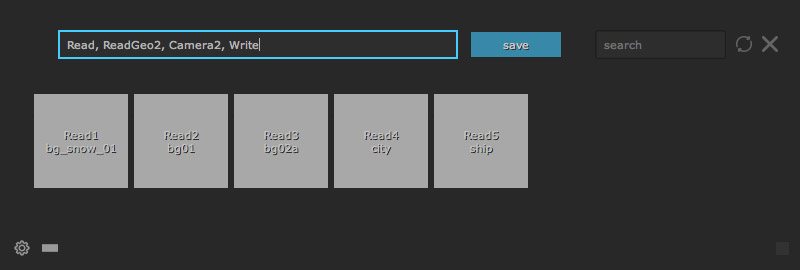
Creating links for Write nodes is maybe not what we want, but still, having the ability to see all Write nodes in one spot and having the ability to jump between these quickly can become useful.
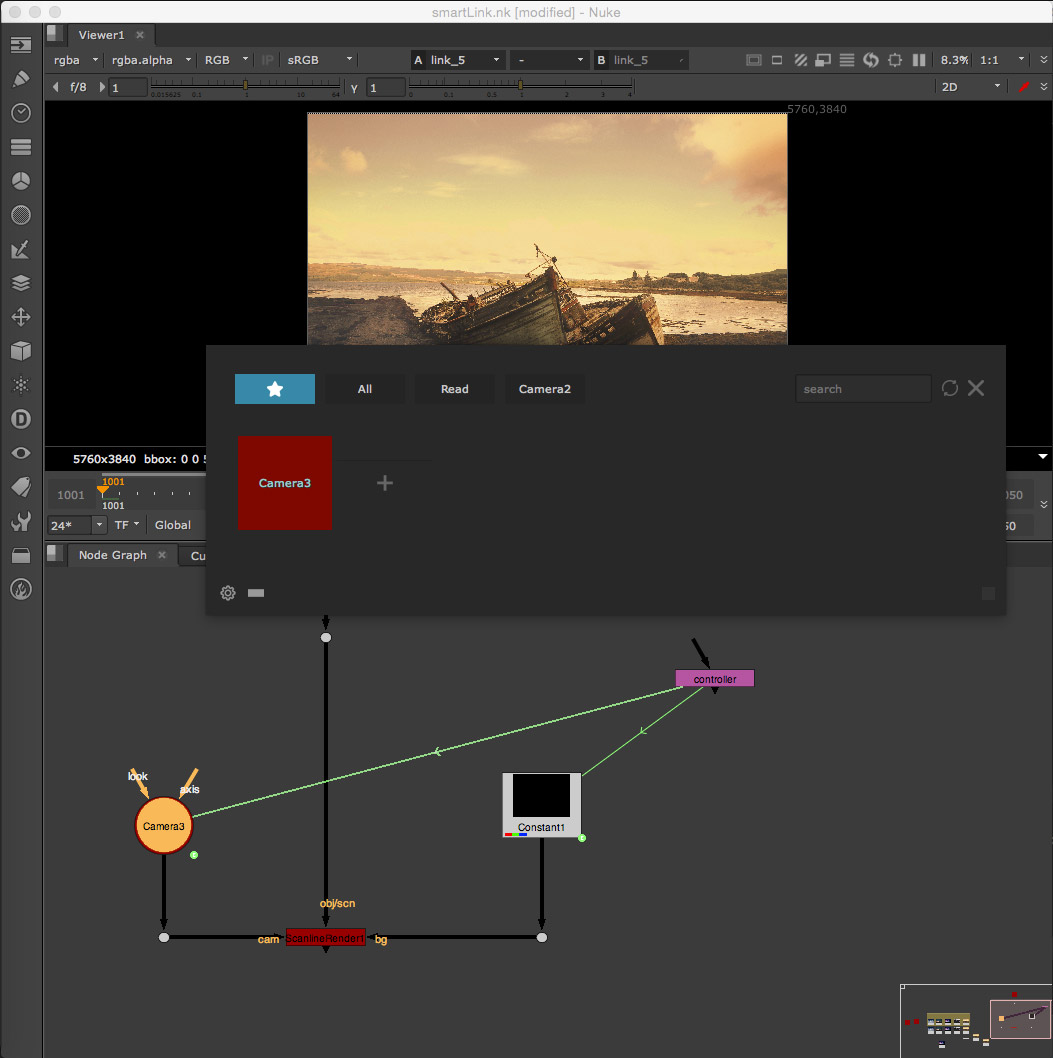
Using favorites
smartLink offers a feature which is called favorite. Using this functionality, you can create a collection of all your important nodes in your Nuke script that you need to return to often and that you need to access quickly.
We have added a few more nodes to our node graph. We are now interested to quickly access our Camera node and our custom controller that drives multiple nodes. For that, let’s open the smartLinker and click the first section, the star icon, which reveals the favorite section.

In here we see a + button. Let’s select our Camera node and click the + button. Our Camera node will be added to the favorites section.
Let’s do the same for our custom controller. So let’s select it and press the + button.
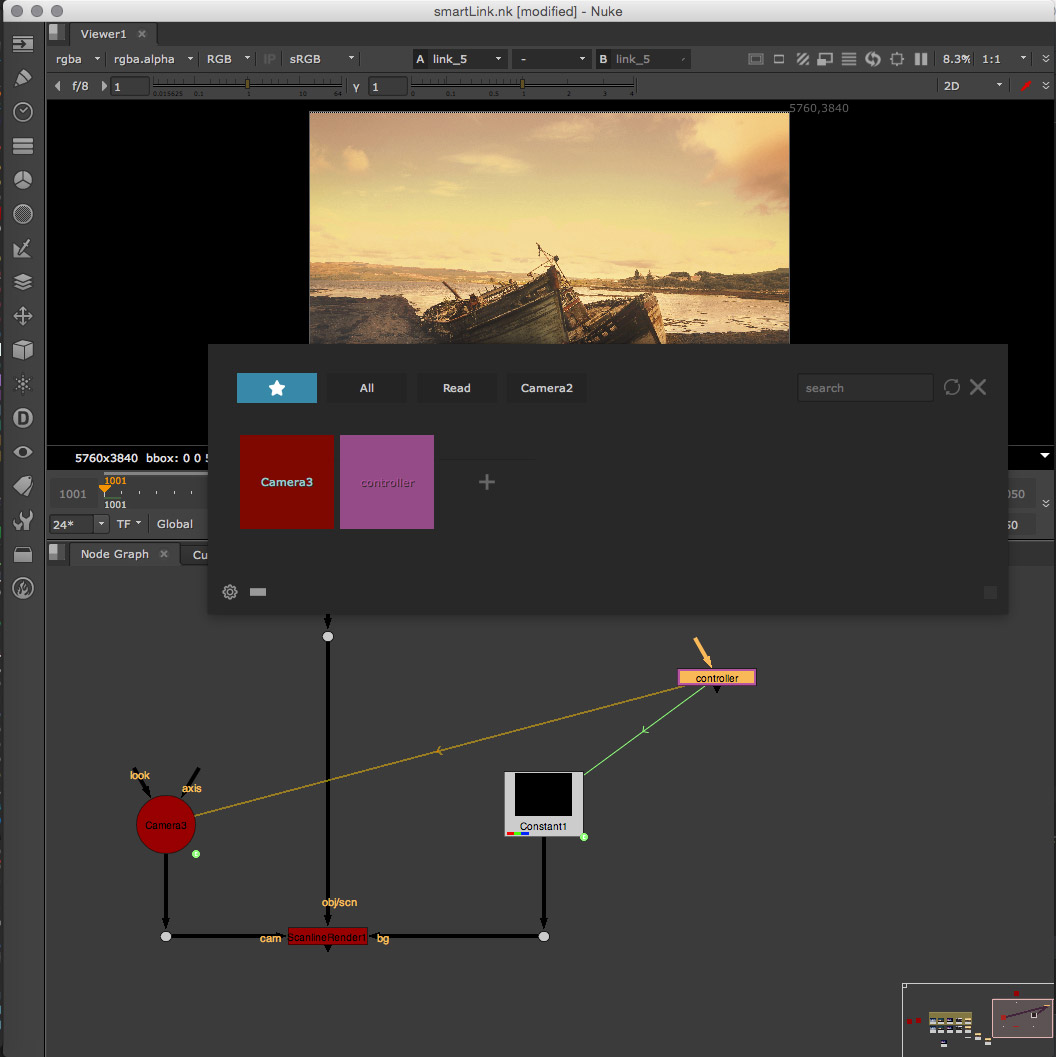
You can also use the shortcut Alt + L to favorite one node or several nodes. The favorites will be saved within your Nuke script and remain also after closing your Nuke script.
Tinting nodes
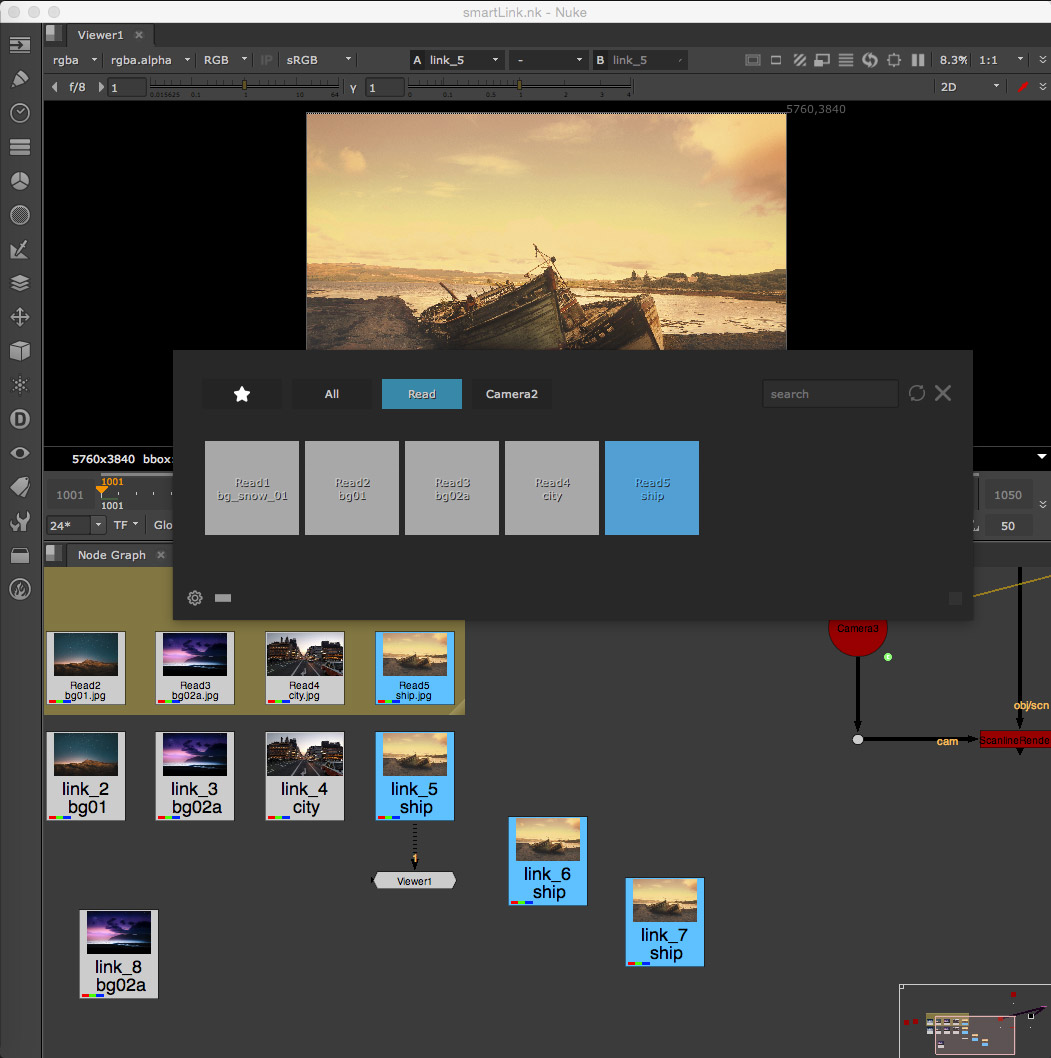
smartLink lets you tint your nodes and links in one go so that you can find them quicker in the smartLinker, but also inside your nodegraph. Let’s for instance tint our ship Read node. In the smartLinker let’s switch to the Read section to show all Read nodes. Let’s hover over the ship Read node in the smartLinker and right click it to show more options. In here let’s choose Tint -> Set.

In the upcoming color picker we are free to choose any color that we would like. Let’s select a light blue and click ok. The source Read node, all links and the node in the smartLinker are tinted in one go for us.
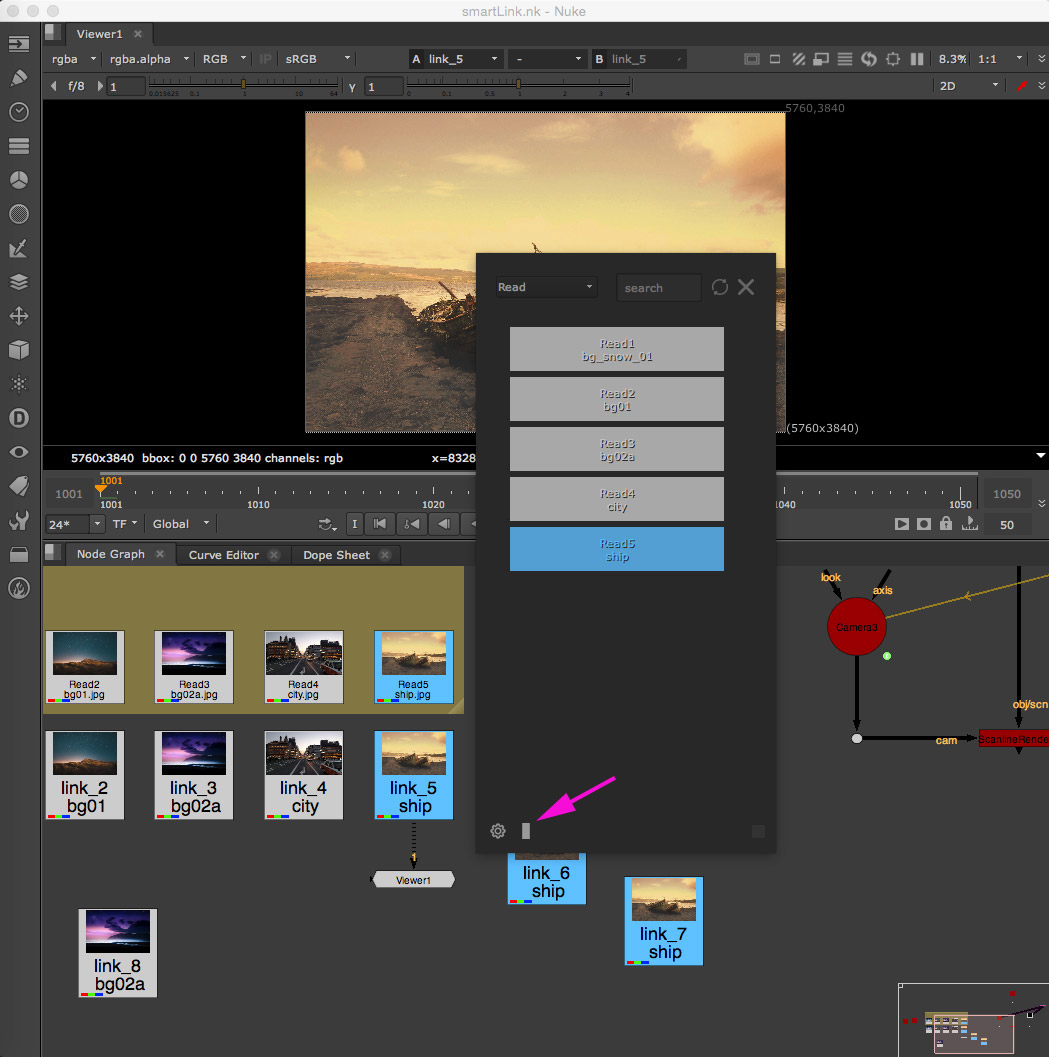
Changing layouts
smartLink offers a horizontal- and a vertical layout. By clicking the small icon next to the settings icon at the bottom left you can switch between these layouts. The chosen layout will be remembered.
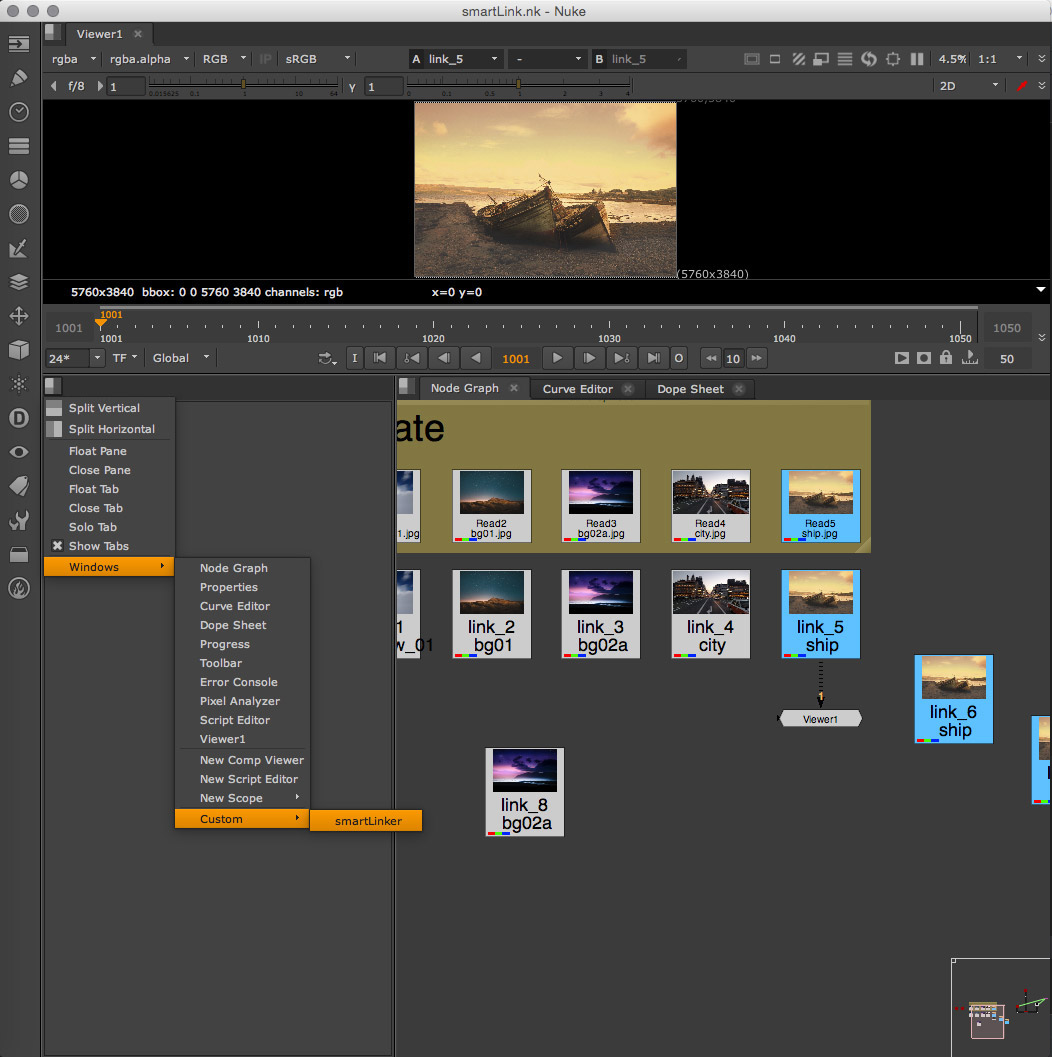
Dockable smartLinker
The smartLinker can also be used as a dockable window. With that you have it permanently at your fingertips and can save it with your layout. To create a dockable smartLinker choose on of your pane menu boxes in any layout section and choose Windows -> Custom -> smartLinker.
You can then save this as a layout (Workspace -> Save workspace…) so that smartLink shows up once you launch Nuke.
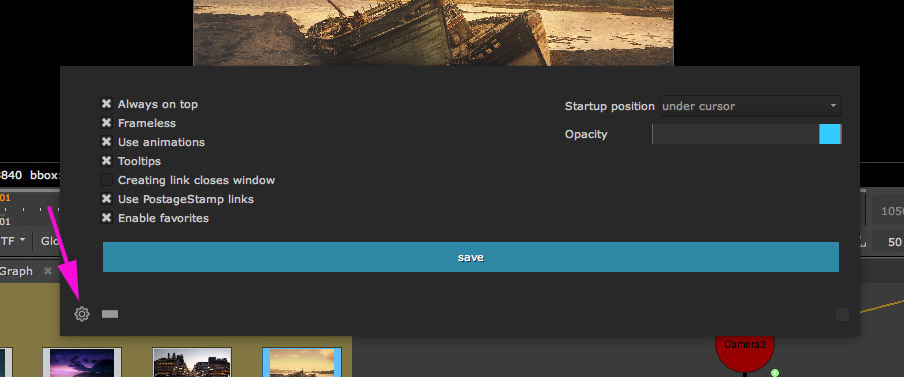
Settings
smartLink contains multiple settings so that you can customize it to your needs. To open the settings, please click the settings button at the bottom left of the smartLinker. The settings section shows up. For more information about all offered settings, please have a look at the settings section.
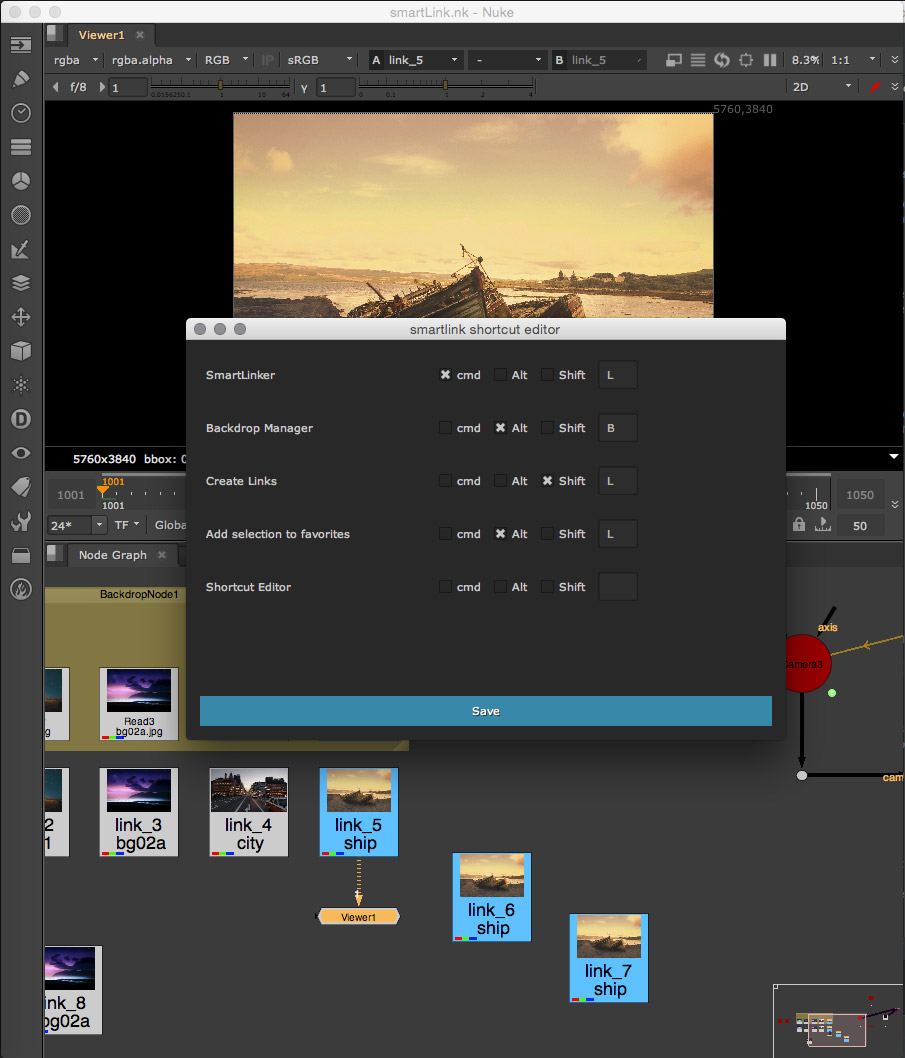
Shortcut Editor
smartLink offers shortcuts for various actions. You can use smartLink’s Shortcut Editor to customize the shortcuts to your needs. To launch the Shortcut Editor, navigate to your menubar and choose cragl -> smartLink -> ShortcutEditor. For more information about this window, please have a look at the Shortcut Editor section.