Quickstart
In the following we will explore smartCommand’s main features.
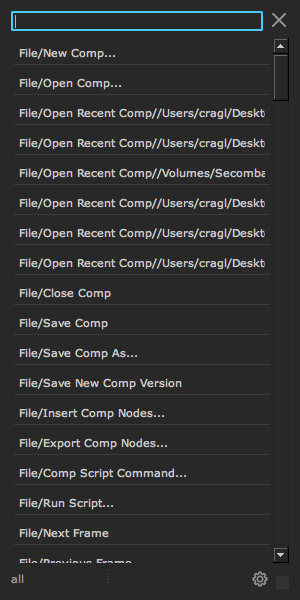
In the menu bar let’s navigate to cragl -> smartCommand -> smartCommander or hit F12 to open the smartCommander. It will be created as a floating window.
Searching and executing commands
The smartCommander offers multiple lists. As we see at the bottom left, the current list is set to all. This mode shows us all commands from all menus and sub menus. In the list, we can either scroll to a particular command or type in the first characters of a command. For instance, let’s search the Flipbook Selected command from the render menu. Type in the first characters ren as seen below:
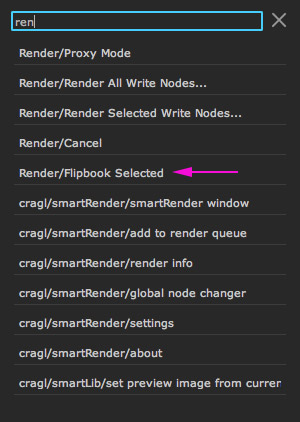
Our list will be filtered showing all commands that start with ren and this includes all commands from Nuke’s Render menu. Click the Flipbook Selected command and your selected node will be flip booked.
Creating collections
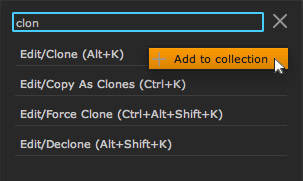
smartCommand lets you create collections to store your favorite commands. Let’s hit F12 again to open the smartCommander. Let’s create a new menu for cloning and decloning nodes. Type in the initial characters clon.
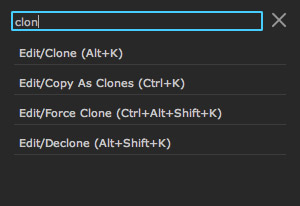
Hover over the Edit/Clone command, right click it and choose Add to collection.
In the upcoming window we can specify, which collection we would like to add it to. As we haven’t created any collection yet, let’s select new collection from the dropdown and give it the name custom. Clicking the color field at the top right lets you set a color for the command as it will appear in our list. Let’s skip this for now and assign a custom color at a later stage.
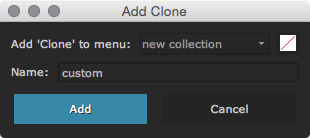
When we are done let’s click the blue Add button. We get a notification about the successful creation of our custom collection. Our clone command was added to this new collection.

Let’s right click the Edit/Declone command and add it to our custom collection as well. As we have created this collection, it is now selectable from the dropdown menu of the upcoming window to add.
Switching collections
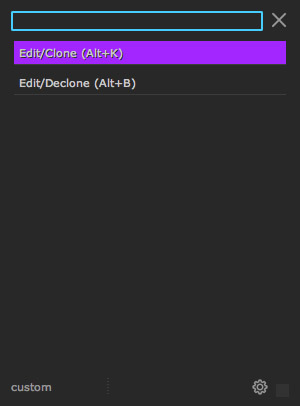
Let’s switch to our custom collection. At the bottom left click the dropdown that reads the word all and set it to custom.
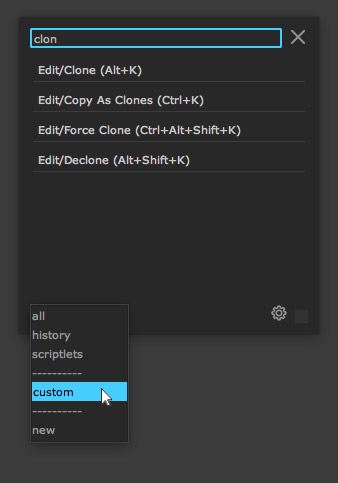
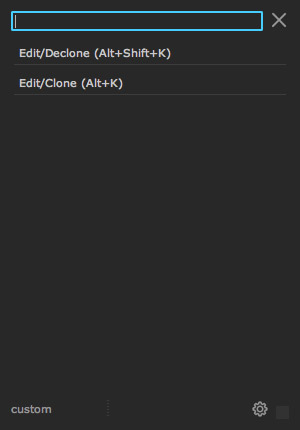
The collection switches from all to custom and shows our two added commands for cloning and decloning. We can add additional commands to our custom collection and create as many collections as we like.
Editing commands
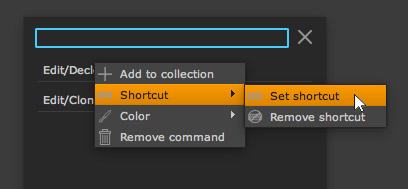
Let’s update the shortcut for our Declone command to a simpler one. So hover over it, right click and choose Shortcut/Set shortcut from the context menu.
In the upcoming hotkey editor let’s check the Alt checkbox and use the B character, so that our new shortcut becomes Alt+B.

The new hotkey becomes immediately available inside Nuke and we don’t need to restart. The update will also be shown right away in the smartCommander as seen below.
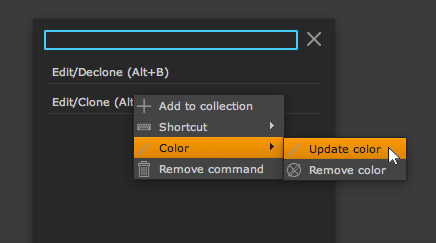
As we use the clone command quite often, let’s tint it so that we can visually recognize it quicker. Let’s right click the clone command and choose Color/Update color from the context menu.
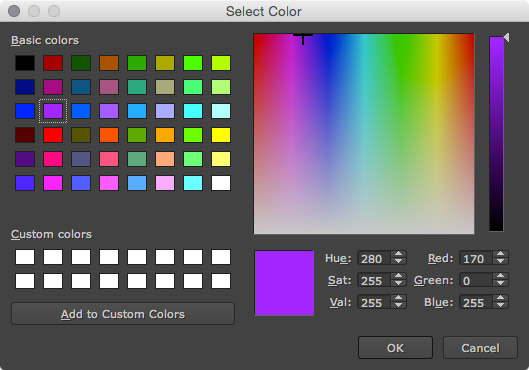
The color picker window shows up and lets us choose a custom color for our command. Let’s choose a purple color and hit the OK button.
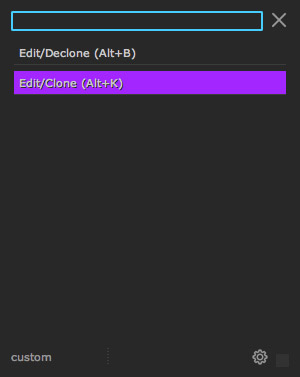
The clone command will now always include our custom purple color. We can always update this color by choosing the Color/Update color command again from the context menu or choose Color/Remove color underneath to clear the color.
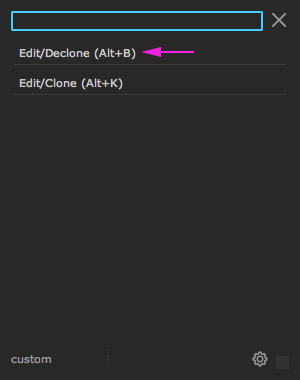
As we have added the declone command after the clone command it will be shown at the top. We can always change the order of commands by holding the ctrl (Linux/Windows) or cmd (Mac) key and then clicking a command and releasing it at the position where we would like to drop it. In this case let’s hold our ctrl or cmd key and click the clone command and move our cursor to the declone command and let go. The commands will be swapped. The new order will be remembered.
Working with scriptlets
smartCommand offers the scriptlets menu that lets you create, edit and execute custom python scripts. By default smartCommand does not contain any scriptlets. In the following we describe how to download and install some offered scriptlets from us.
Downloading and installing scriptlet presets
Here you can download smartCommand’s default scriptlets:
After you have downloaded the scriptlets, please extract them to the following location:
Linux: /home/[username]/cragl/smartCommand/scriptlets
Mac: /Users/[username]/cragl/smartCommand/scriptlets
Windows: C:\users\[username]\cragl/smartCommand/scriptlets
Let’s execute a scriptlet to see how it works. So hit F12 to open the smartCommander, click the list drop down menu at the bottom left and choose scriptlets (shortcut: ctrl/cmd + 3).
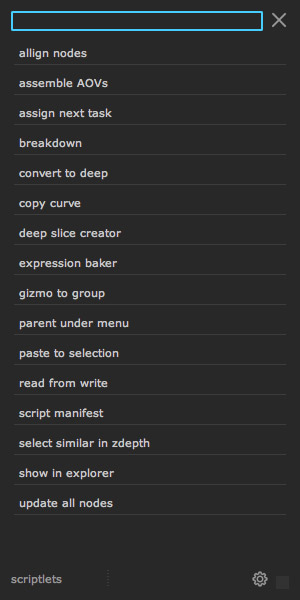
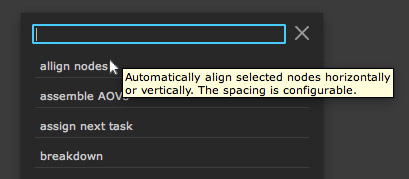
This list shows all scriptlets. These are python files that we can use to execute directly inside Nuke. Let’s for instance clean up our node graph and align some nodes. So let’s select some nodes that we would like to align and navigate to the first command align nodes. If we hover over the command we will see a tooltip that tells us what this scriptlet does.
Let’s click the command and we are presented with a window to specify the align method (horizontal or vertical) and the space between the nodes in pixel. After we have set this window up to our needs and clicked the OK button, we have successfully aligned our nodes.
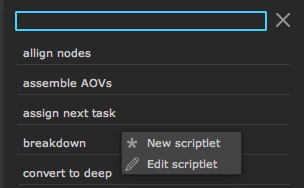
If we right click a scriptlet we can choose to create a new scriptlet or edit the currently selected scriptlet from the context menu.
Please have a look at the scriptlets section for a more in depth look at working with scriptlets.