Cache node
The cache node is responsible for creating upstream caches for a given node. It lets you switch between cached mode and live node connection and offers a few more functions which we will explore in this section.
Creating a smartCache node
There are several ways to create a smartCache node.
Via the hotkey
Shift+C. Note that you can update this hotkey in the smartCache’s menu.pyVia the tab key:

Via the nodes menu:

Via the menu bar:

Note: When having selected a node and executing any of these ways then the cache node will automatically be connected to the selected node and a render dialog shows up so you can directly start with the caching of your selected node.
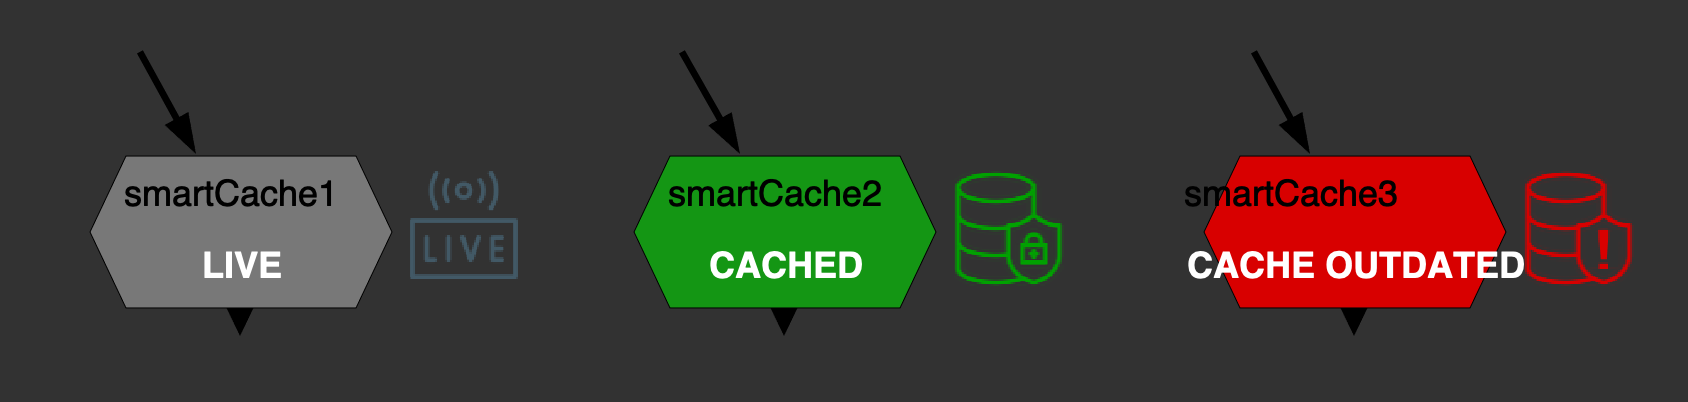
Cache node status
A cache node can have one of the following status:
live: Reading the live node connection and not reading any cached file.
cached: Reading the cached file, all cached frames are up to date.
cache outdated: Reading the cached file, some frames are out of date.
The cache node’s current status gets shown in the DAG using colors and an icon next to the cache node:
In the settings you can adjust the status colors and decide if you want to show the status icons (default behavior) or turn them off for performance reasons.
Cache node properties
The cache node contains two tabs: ‘smartCache’ and ‘cache file’.
The ‘smartCache’ tab
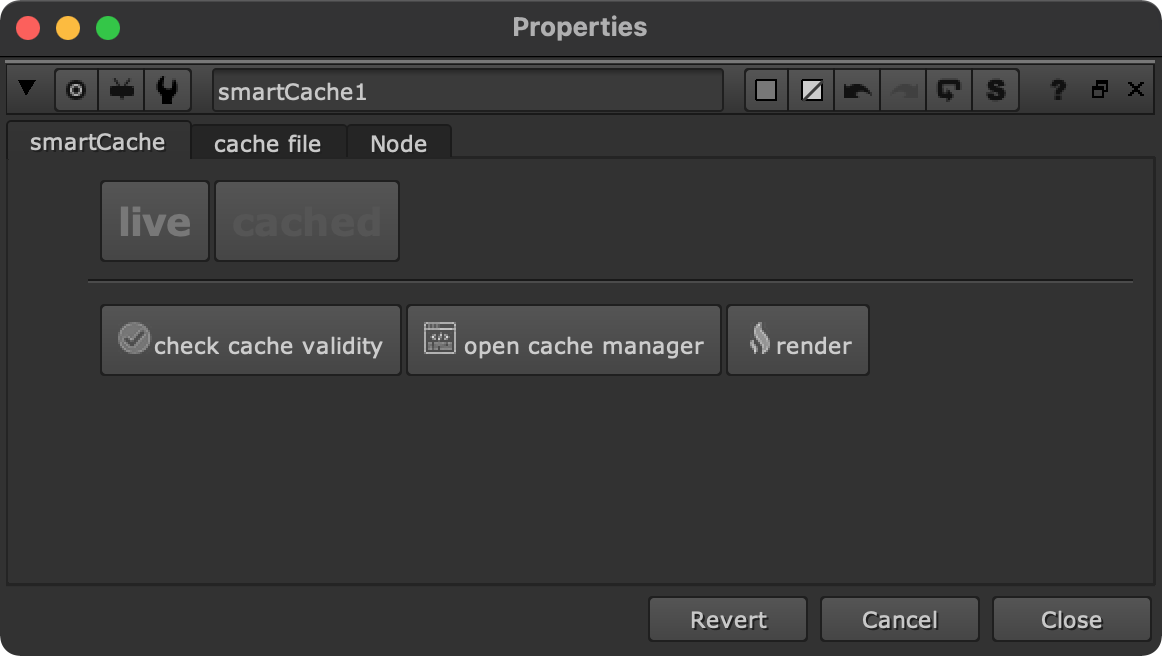
The first tab contains two buttons to switch between live connection mode and cached mode. Use live connection mode to read the upstream node connection. Use cached mode to read the cache file and speed up your node tree.
Click the ‘check cache validity’ button to check if your cache is still valid. Any node or knob change upstream will cause an out of date cache which you can then decide to re-render.
Click the ‘open cache manager’ button to launch the cache manager. For more information on the cache manager please refer to the cache manager section.
Click the render button to open the render dialog. This dialog lets you choose the frame range and render mode (local / background) to submit your render caches.
The ‘cache file’ tab
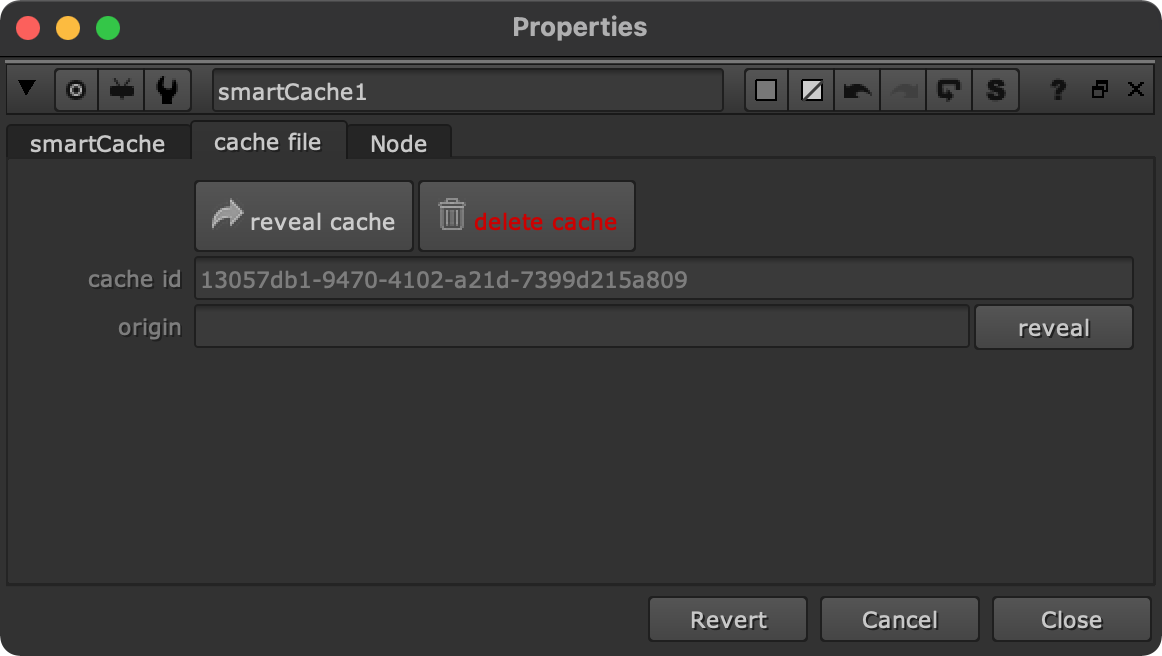
The second tab contains some functionality mainly for the purpose of debugging that you will probably not need to access very often.
Click the ‘reveal cache’ button to reveal the cache. By default, the cache gets written into a ‘caches’ folder next to your current working file. In the settings you can change the cache root directory to a different relative or absolute path if needed.
Click the ‘delete cache’ button to delete the rendered cache files and the cache node itself. Confirm that action as deleting cache files cannot be undone.
Each cache node has a unique cache id which gets displayed in the ‘cache_id’ knob.
Once you render a cache, smartCache will populate the ‘render_origin’ knob with the absolute path of the working file that the cache node was rendered in. This information becomes useful once you version your working file up, because then you always know where a cache originated from. Click the ‘reveal’ button to reveal the origin working file that the cache was created in.
Cache node render settings
smartCache is a Group node. The rendering happens using a regular Write node. By default, smartCache renders 16bit Zip (1 scanline) using default metadata. Note that smartCache renders explicitly not 32bit, as in most cases you might not need this and this would result in unnecessary large files on disk. In case you need this from time to time (e.g. when caching Cryptomatte output) you can simply navigate into the smartCache node and set up the internal Write node to your needs. Does this happen more often on your end? Let us know and we might think about making the actual cache render settings configurable when creating a smartCache node.