Installing a tool using connect
The following shows you how to install a tool using connect. The procedure to install any cragl tool is always the same. Let’s have a look at an example installation for our tool smartRender.
Open connect and find smartRender on the left hand side. Double click it or drag it to the right to reveal more information.
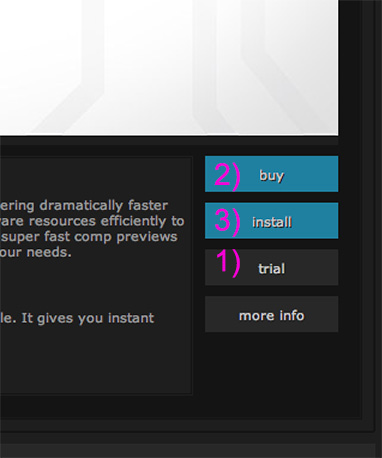
If you like, you can let connect install a fully featured trial for you. As seen in the screenshot (1), simply click the trial button at the bottom right.
At the right hand side you will also find a buy button (as seen in 2) which will direct you to the website where you can purchase smartRender. After purchasing, you will receive an install code.
Now simply click on install as seen in the screenshot (3). This will open a dialog in which you enter your received install code.
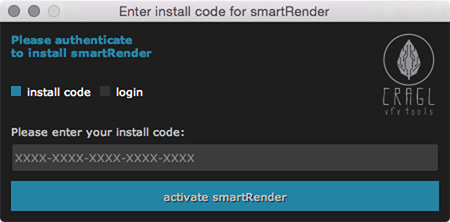
After having entered your install code, click the blue activate smartRender button. This will show a license agreement. After confirming it, smartRender will be installed automatically on your machine and a license will be generated as well so you can use smartRender right away.
If you purchase a license for one of our tools, you can register on our website to get access to your personal cragl backend. In here you can manage all of your purchased licenses and you will have access to our support system. You can now also use these credentials to install a cragl tool using your login. In the dialog, choose the login method and enter your email and password.
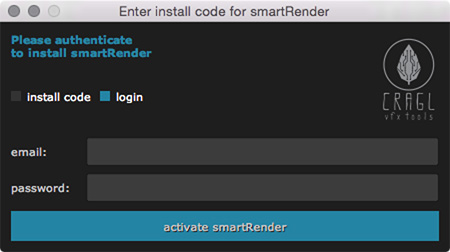
This will also show a license agreement. After confirming it, your cragl tool will also be installed right away so that you can immediately use it.